How To

An upgrade to my mom’s 2007 iMac

If you thought my MacBook Pro was old, then you’re going to be surprised to hear that my mom has a 2007 iMac 24″ (model A1225) that’s still fully functional. Nothing has ever gone wrong with it, in spite of sending it to Romania via a shipping container (on one of those big ships) when she moved here, in spite of wild electricity fluctuations both in the US and in Romania, and in spite of being buried in paperwork all these years on her desk. It’s been working just fine and now that I’ve upgraded it, it’s working even better.

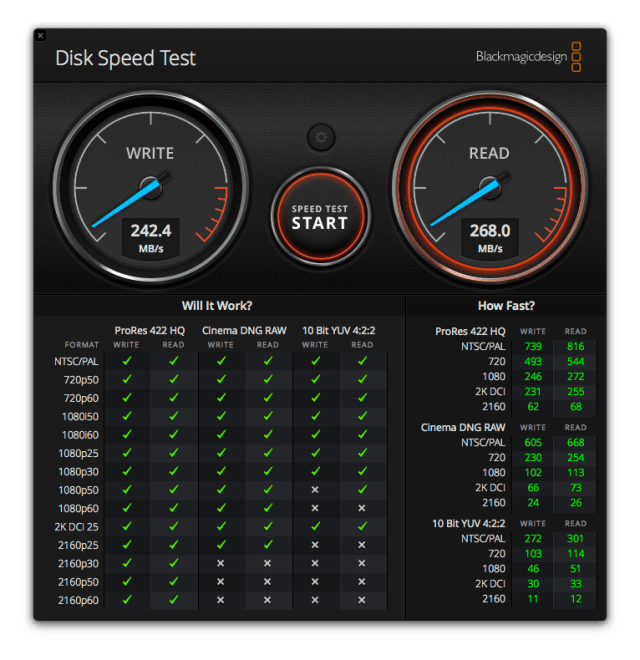
I saw an even greater difference in performance after the upgrade, as compared to my 2008 MBP. Not only was it slower than my MBP before the upgrade, but it’s now faster than it. I couldn’t understand why until I realized that the MBP’s hardware caps off at SATA I (150 MB/s) speeds while the iMac’s hardware is SATA II (300 MB/s). Yup, it was made a year before my laptop and yet it’s faster than it. It was also less expensive. There’s a lesson in there somewhere…

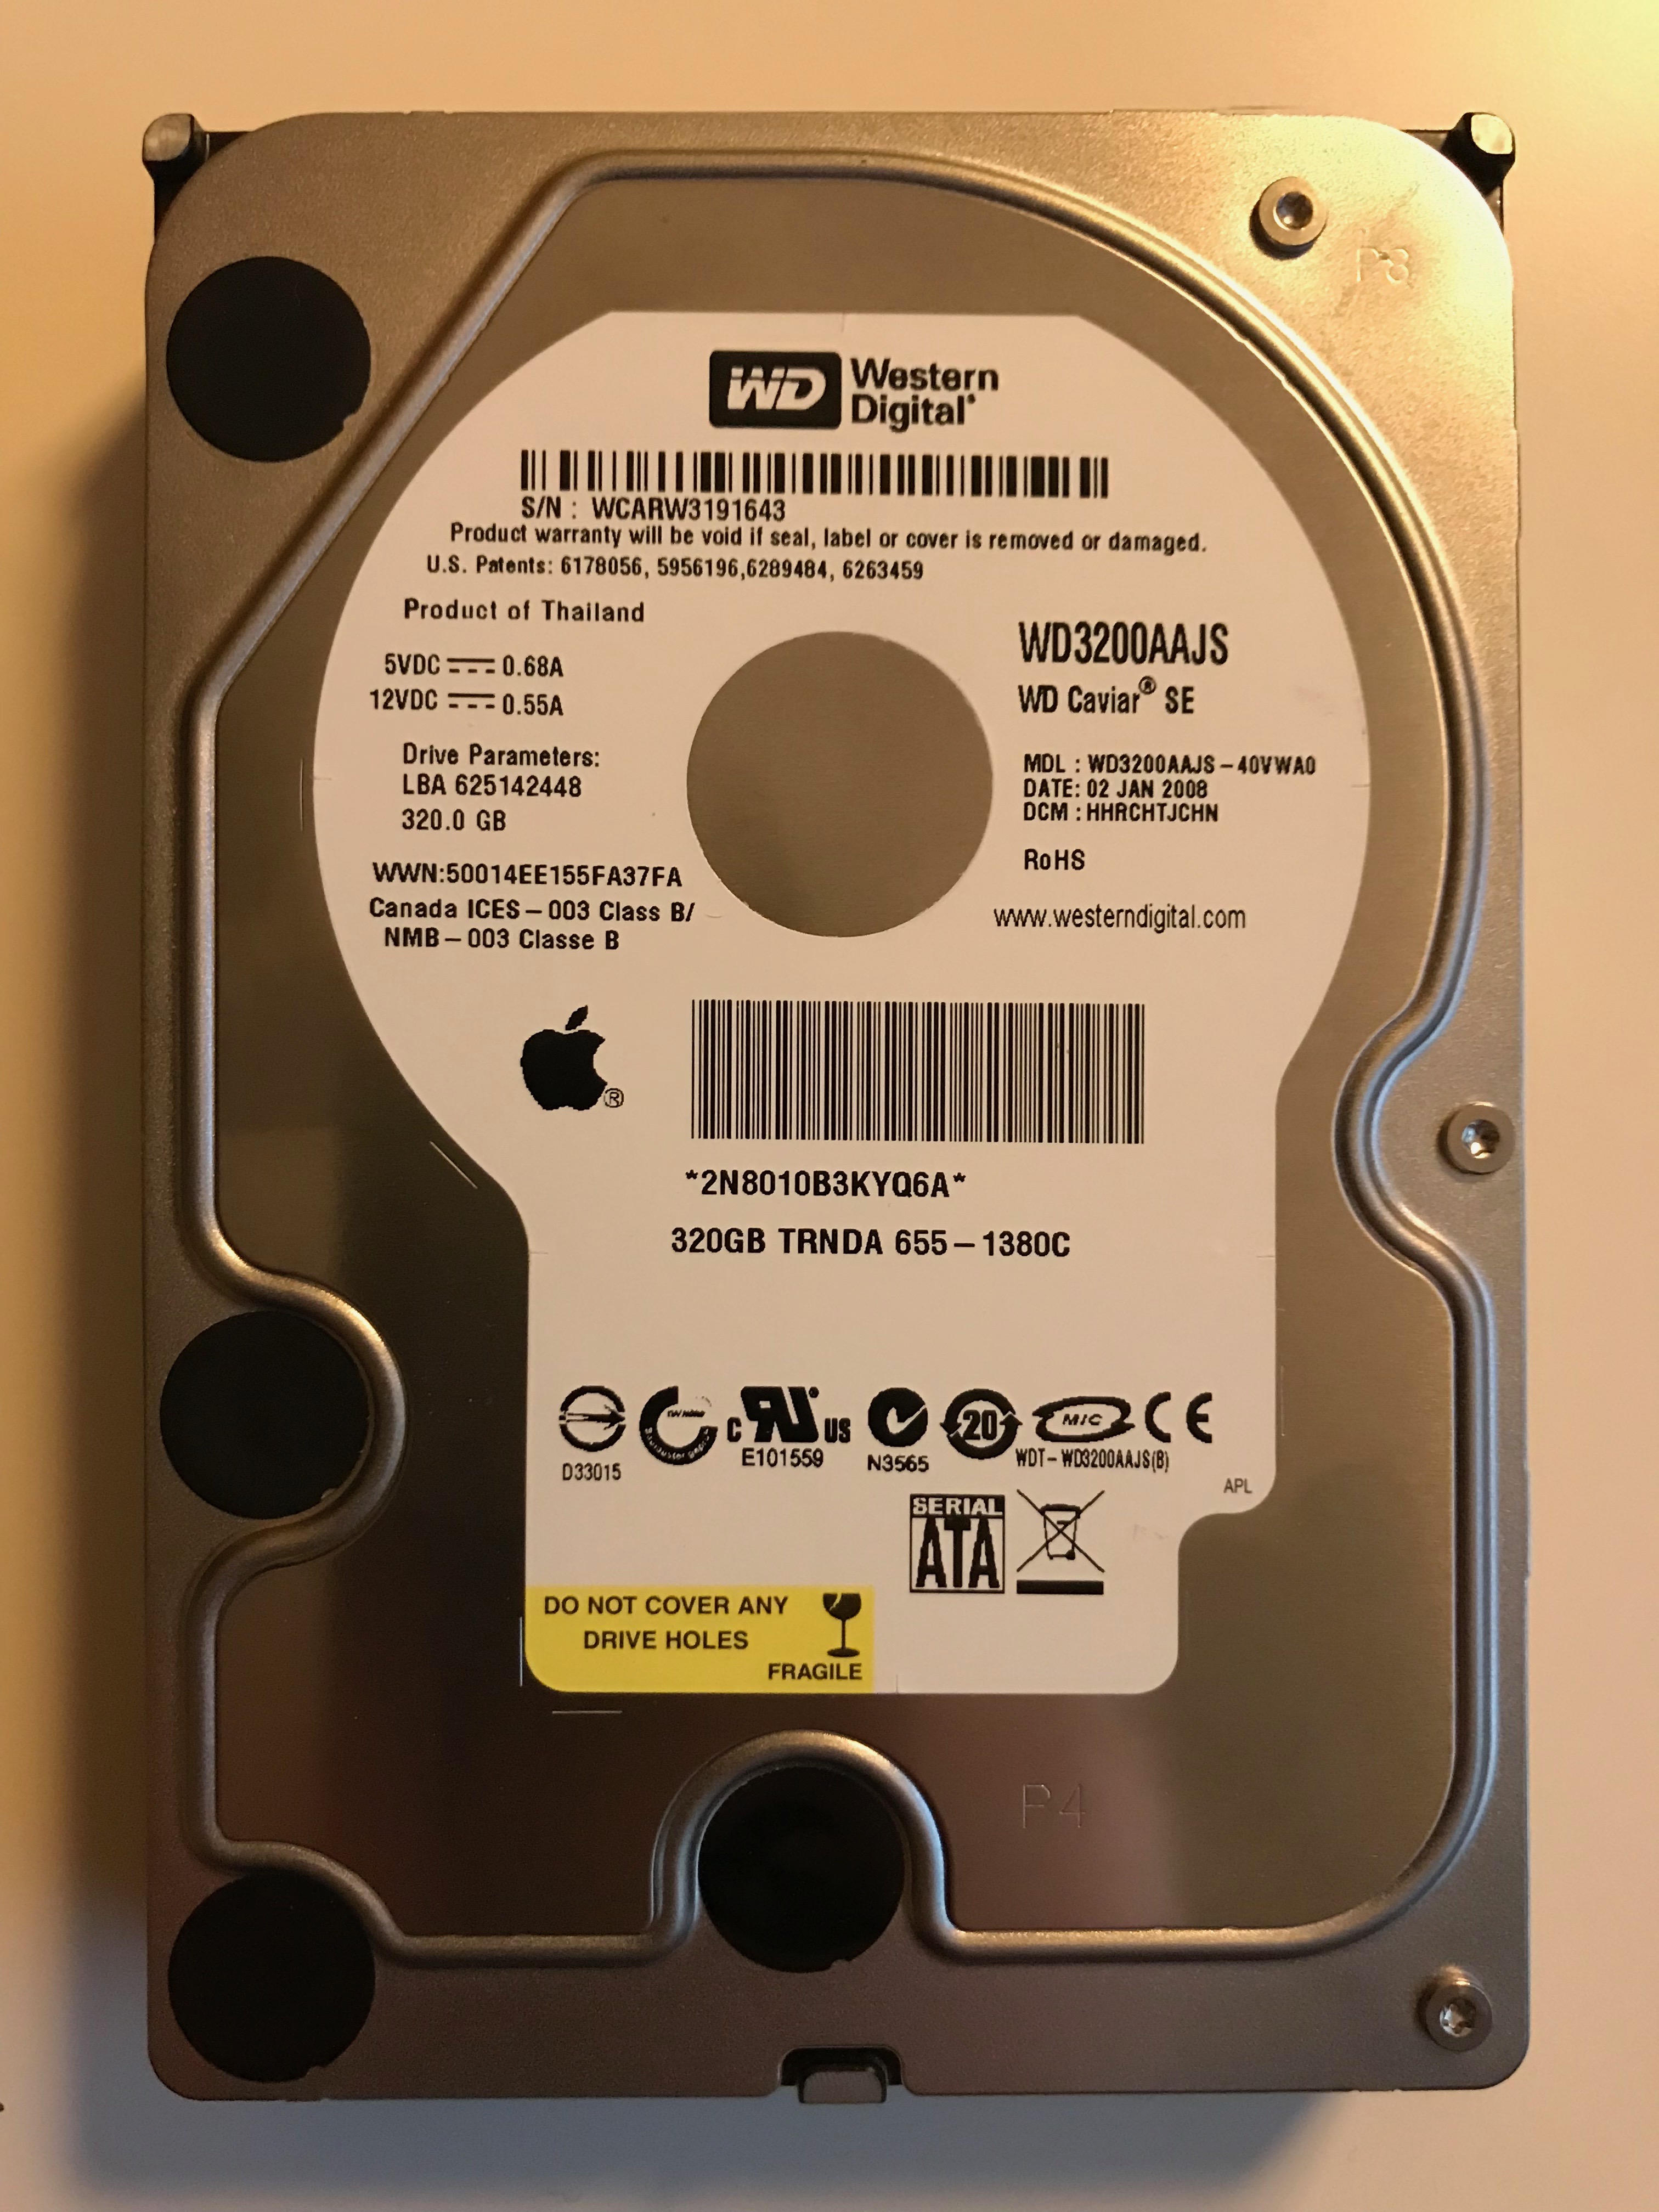
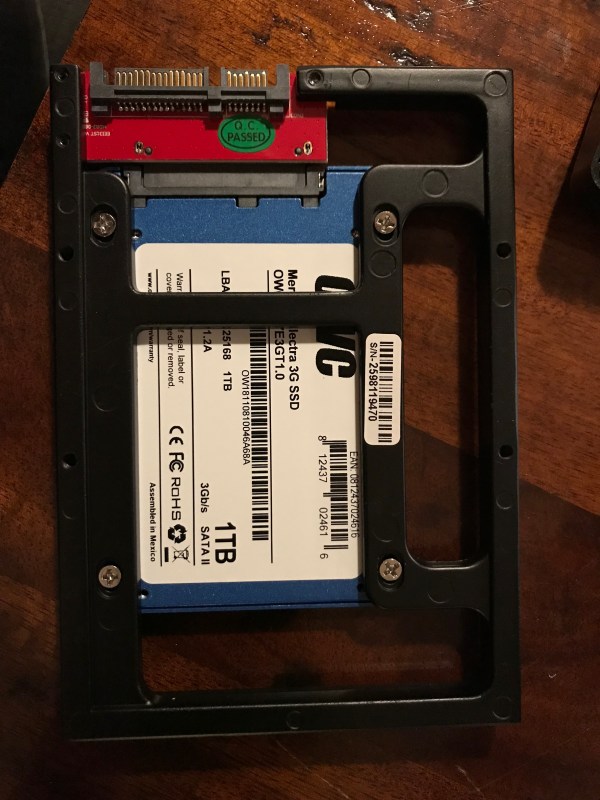
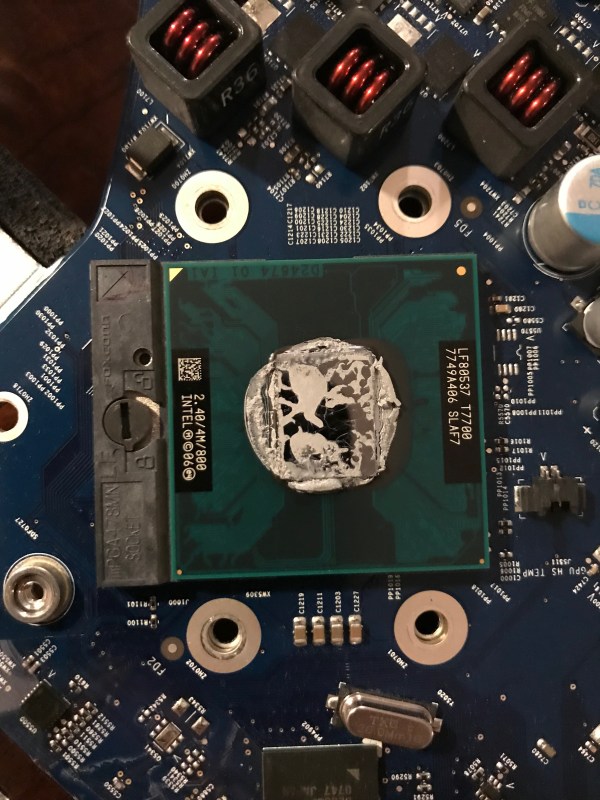
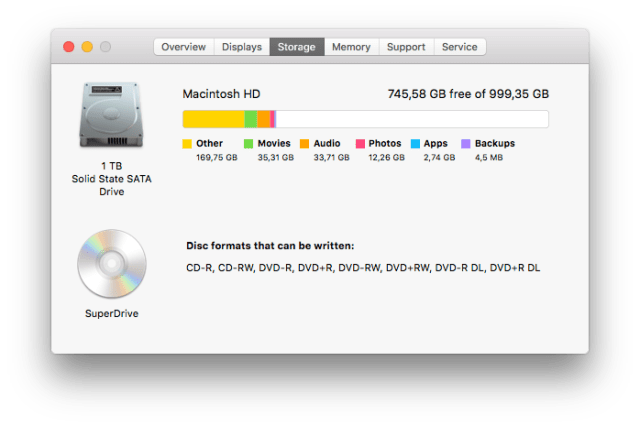
I’d upgraded this iMac’s RAM to the max it could handle (6 GB) a couple of years after she bought it, so the only upgrade I could make now was to swap out the HDD with an SSD. I opted for a 1 TB SSD that would replace her aging 320 GB HDD. Yup, this was the original HDD that shipped with the computer, and it worked just fine for 11 years!

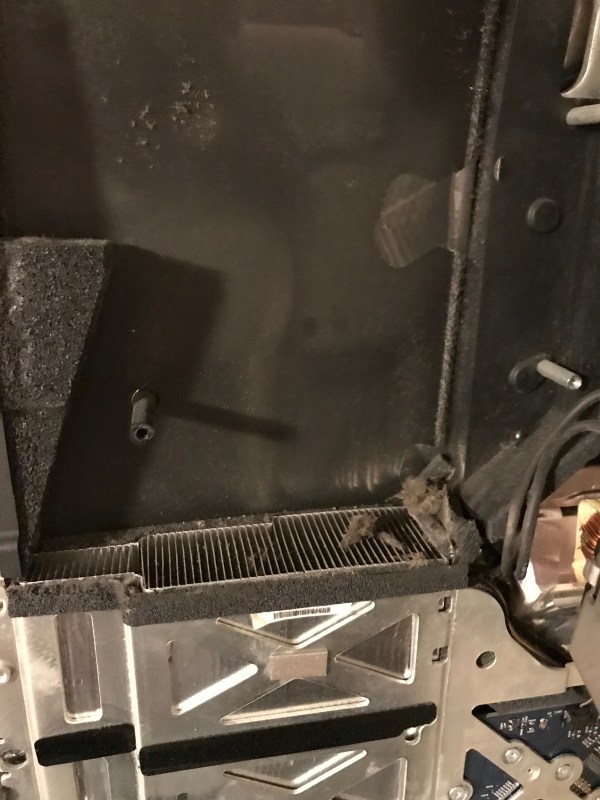
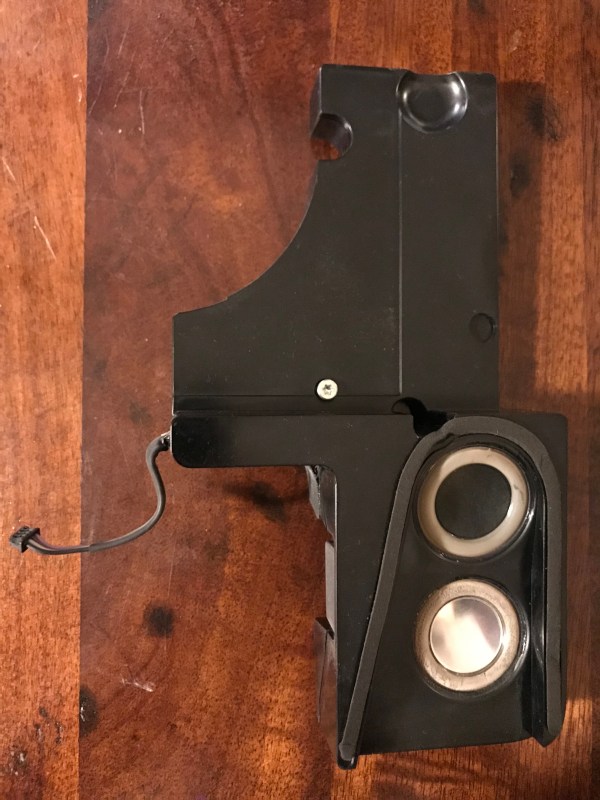
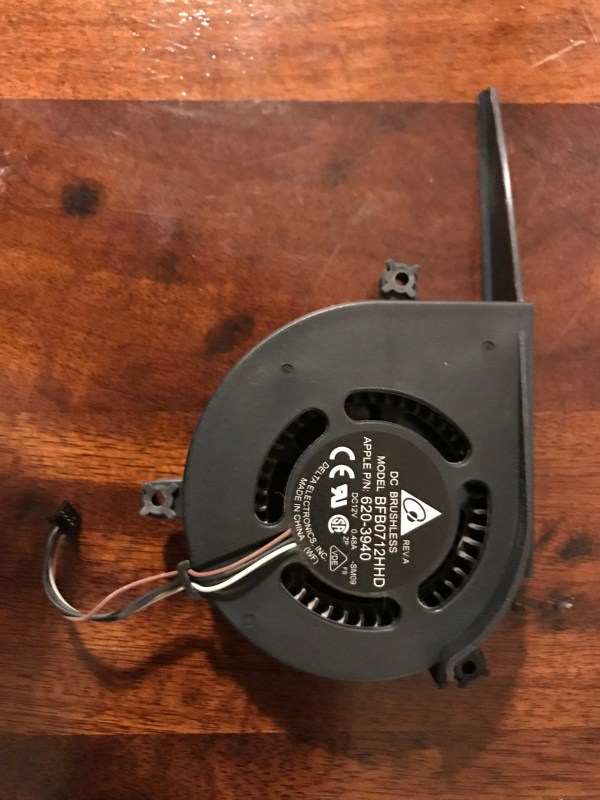
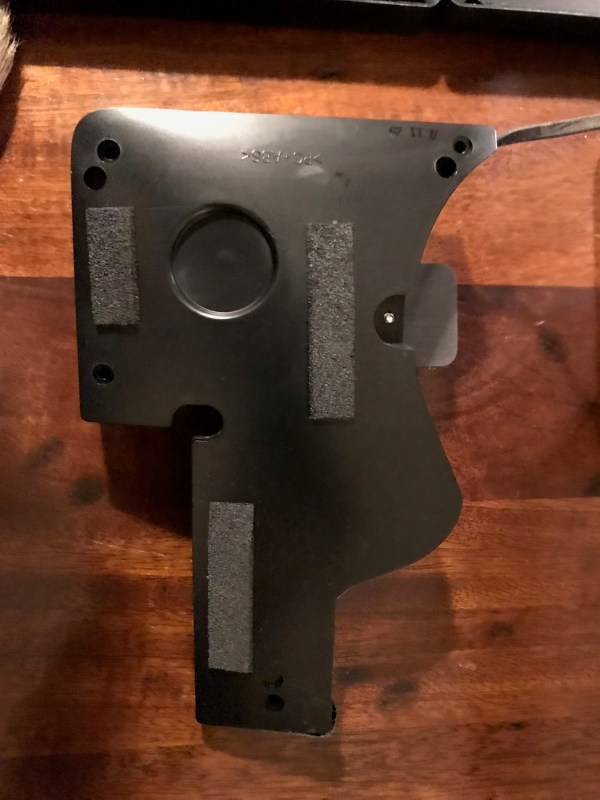
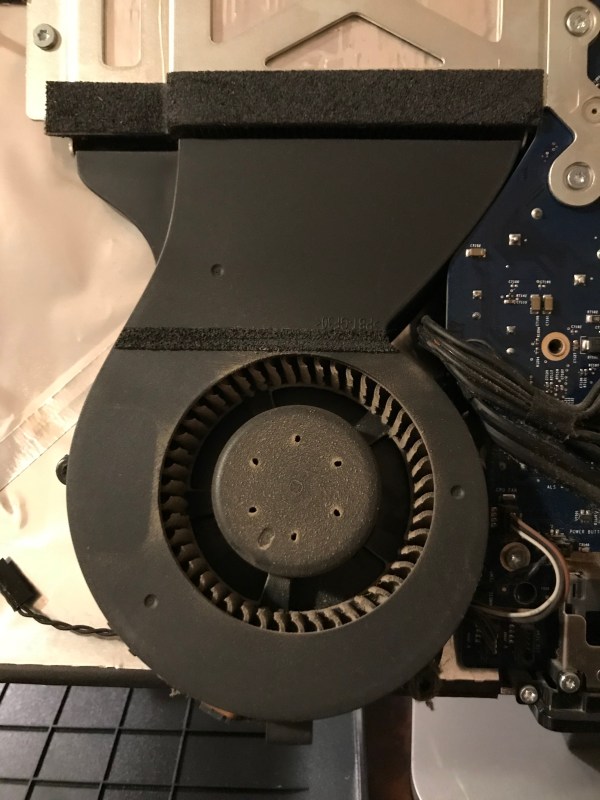
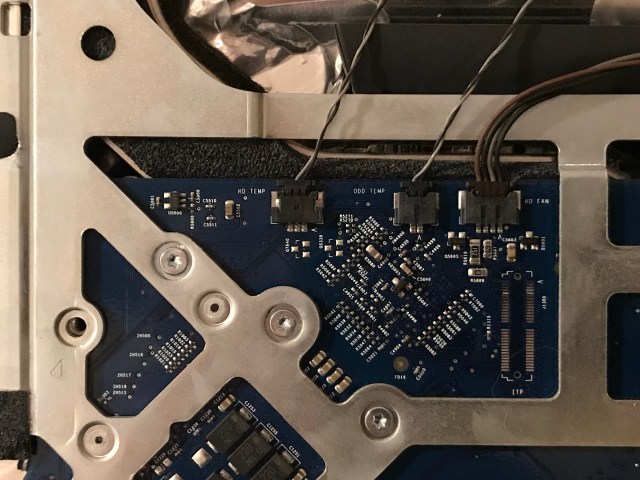
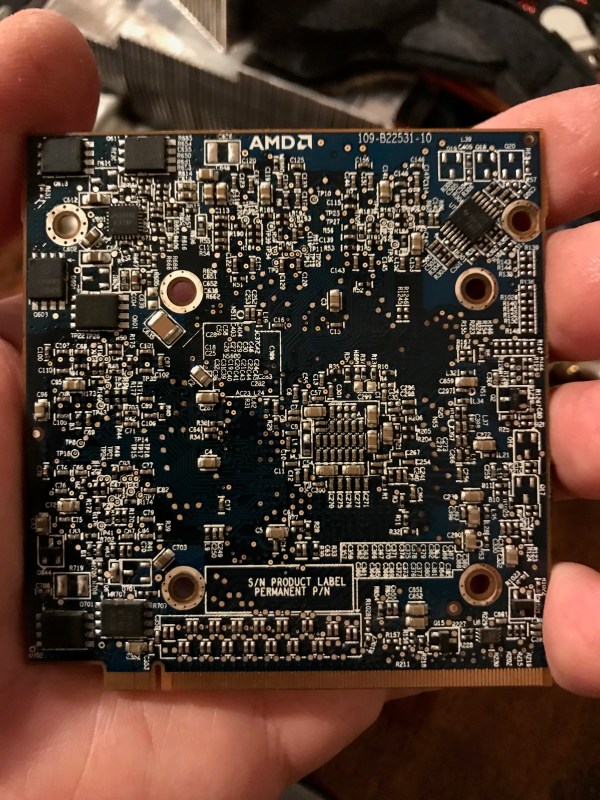
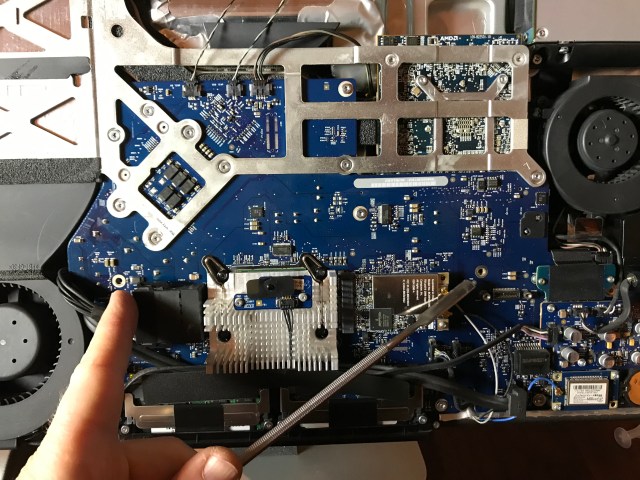
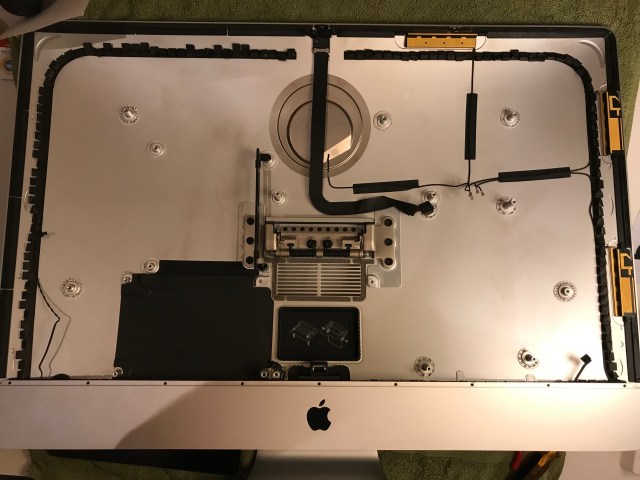
Here is a set of photos taken during the upgrade. Since I’d never opened this iMac, I figured it was due for a thorough cleaning and a replacement of the thermal paste. I used this guide from iFixit to help me out. I’m glad I cleaned all of it; even though it didn’t have as much dust and lint inside as I’d expected, it needed to be cleaned.

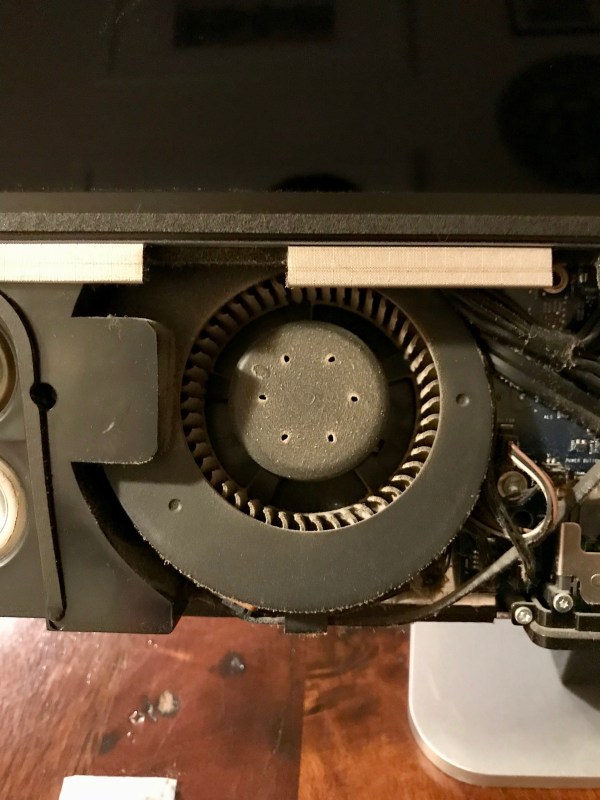
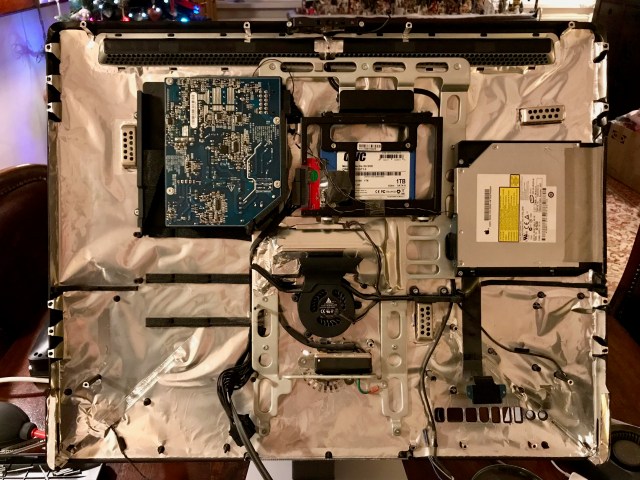
A word of warning: there aren’t a lot of guides for this iMac on the internet, which means I wandered into unknown territory when I took all of it apart. I had to take photos of the screws and their positions, and of the wires and the sensors and oh boy… just be careful and keep track of everything if you decide to take it all apart… The back is plastic and uncharacteristically for Apple, the screw mounts are plastic, and that means you have to be gentle when you’re screwing components into the frame or else you’ll strip the plastic threads. This was the most complicated take-apart job I’ve undertaken so far, even more complicated than my iMac G5. I’ve never seen so many sensors and power cables running everywhere. And once I got it open, it was aluminum foil city… you’ll see what I mean.

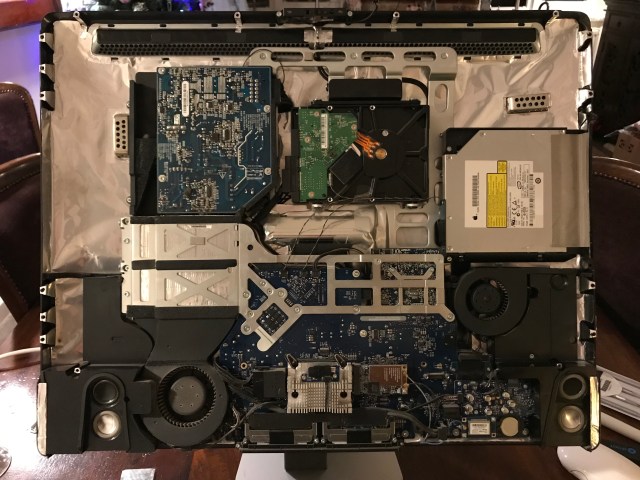
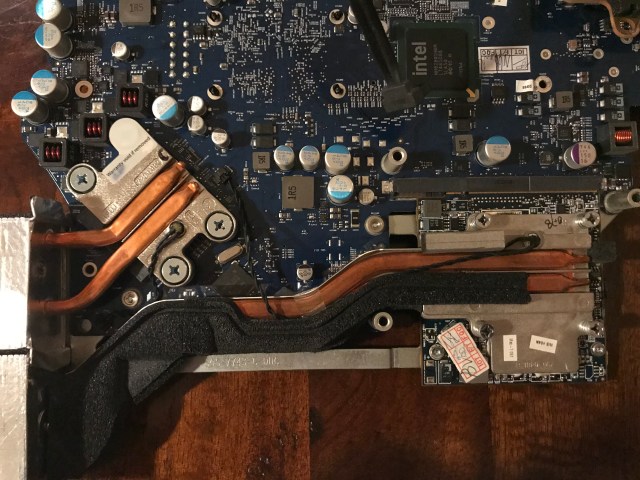
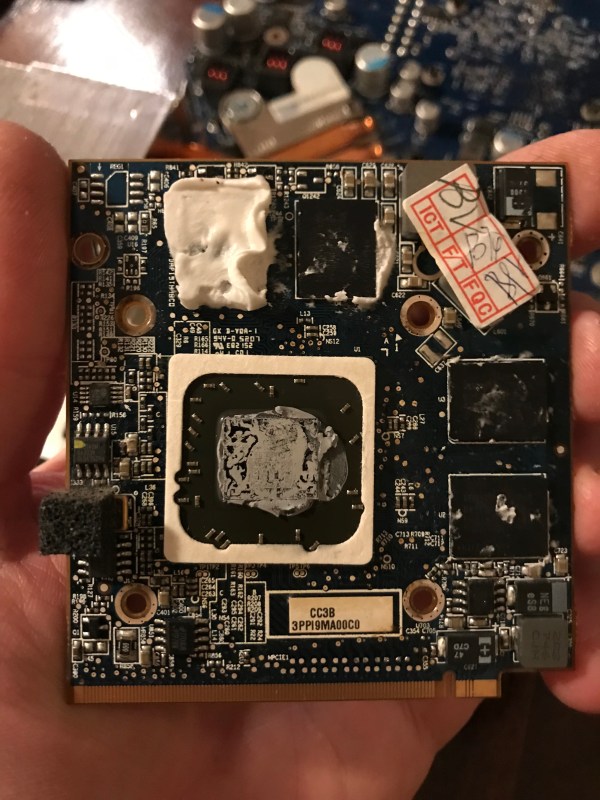
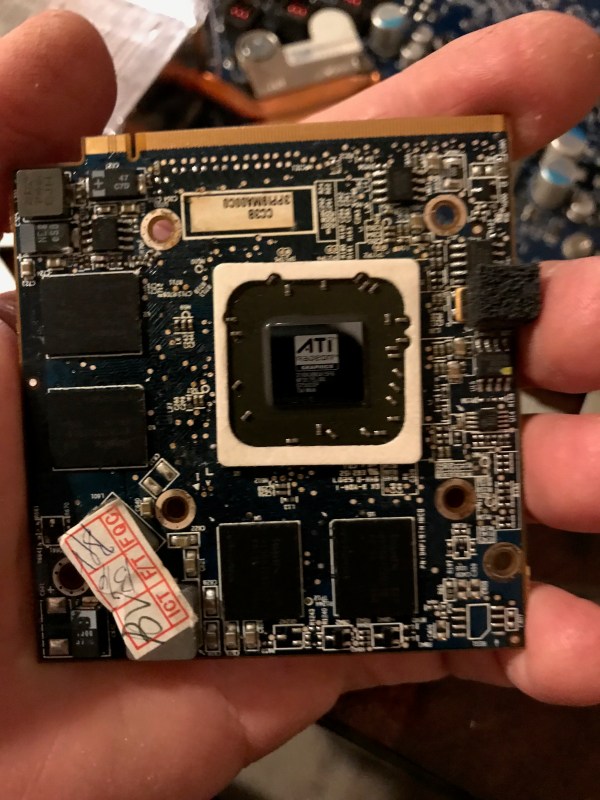
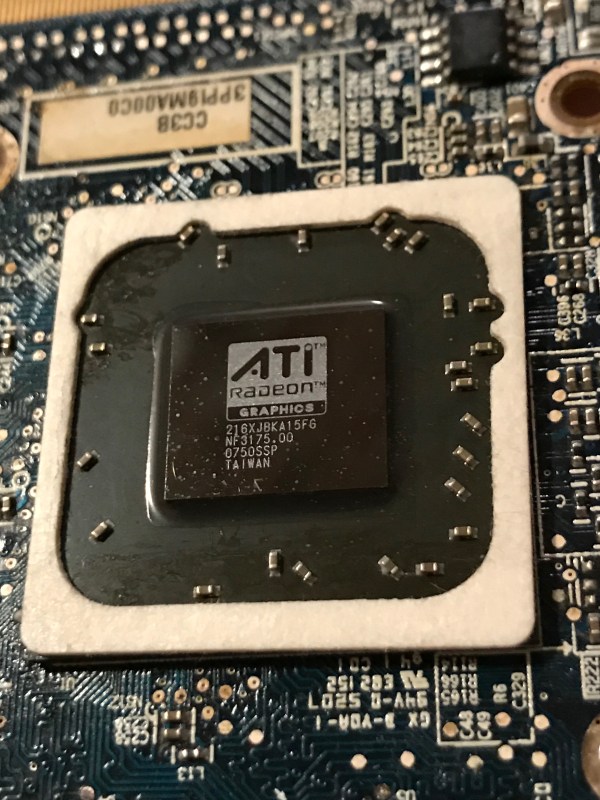
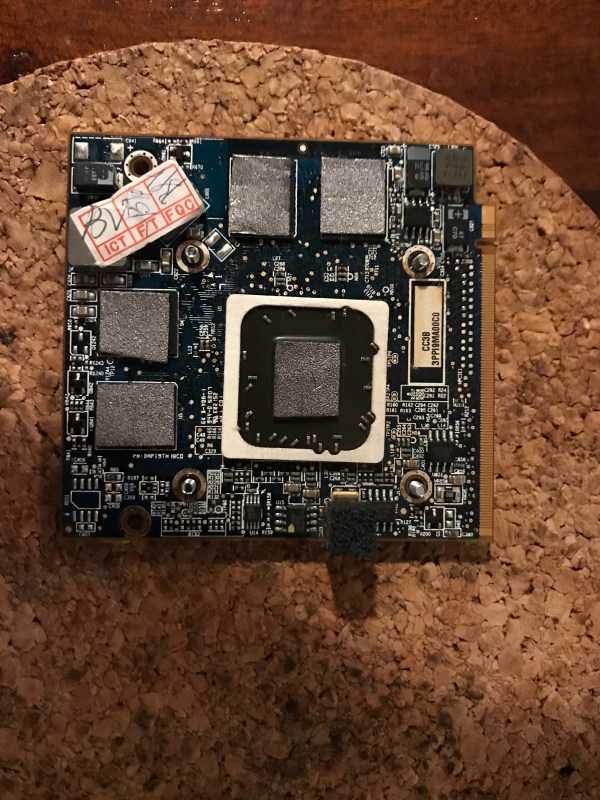
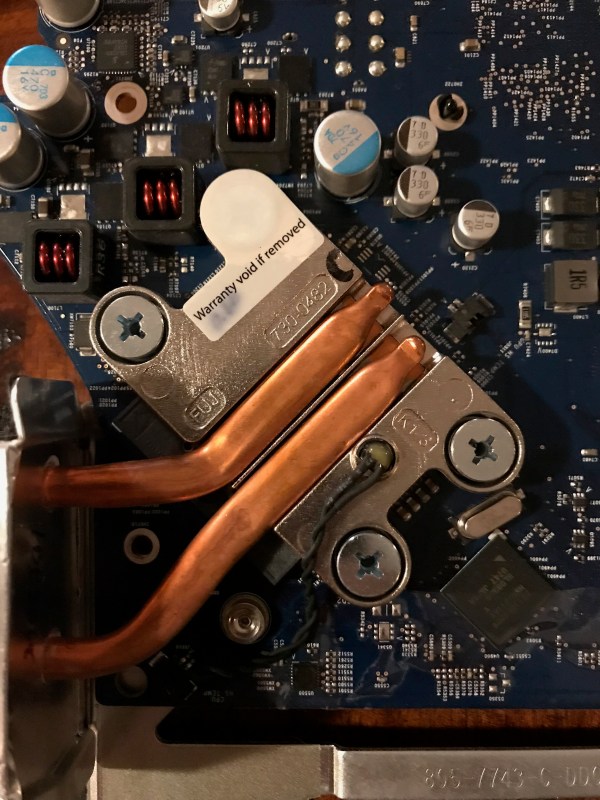
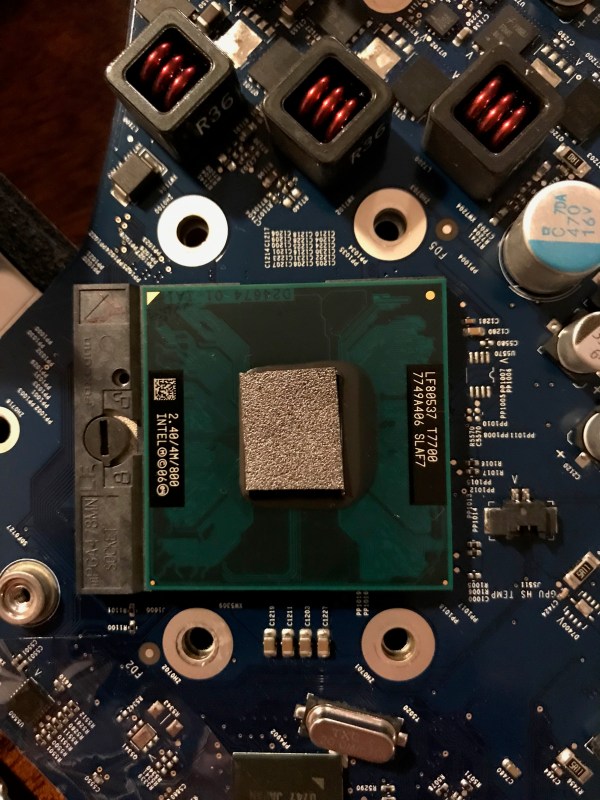
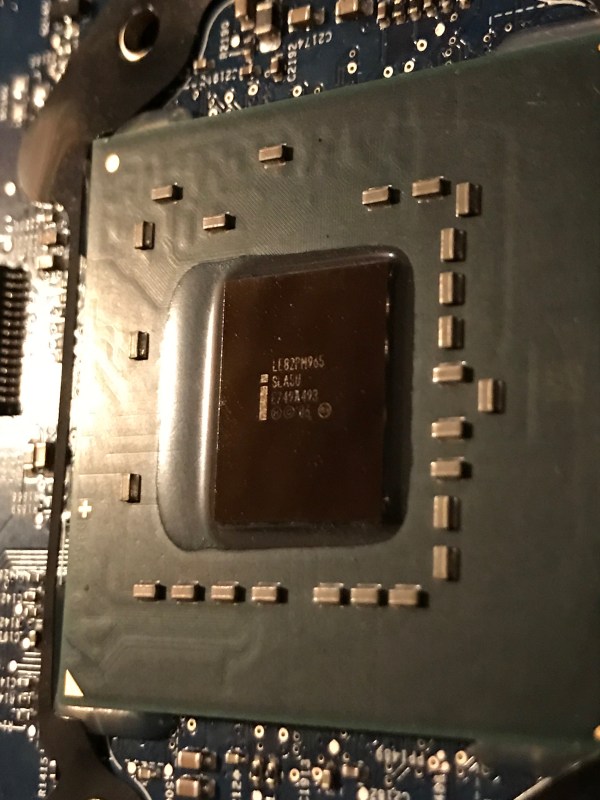
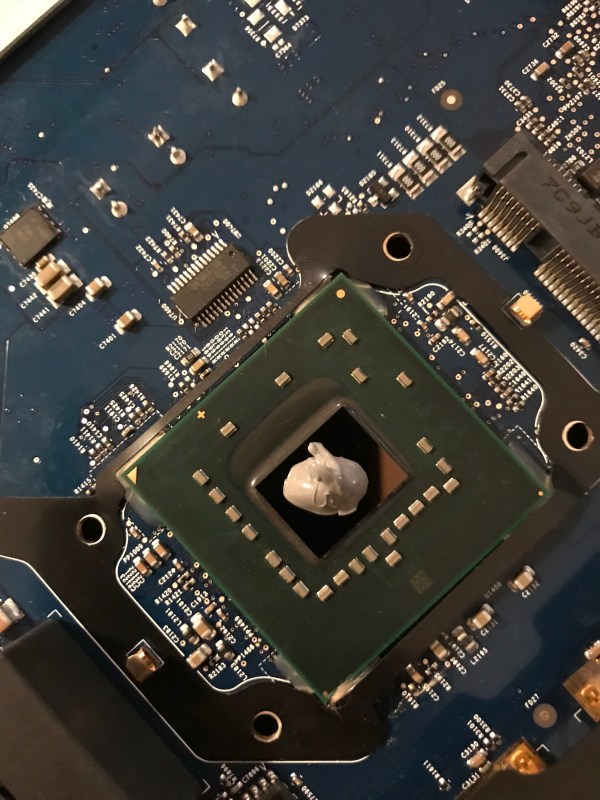
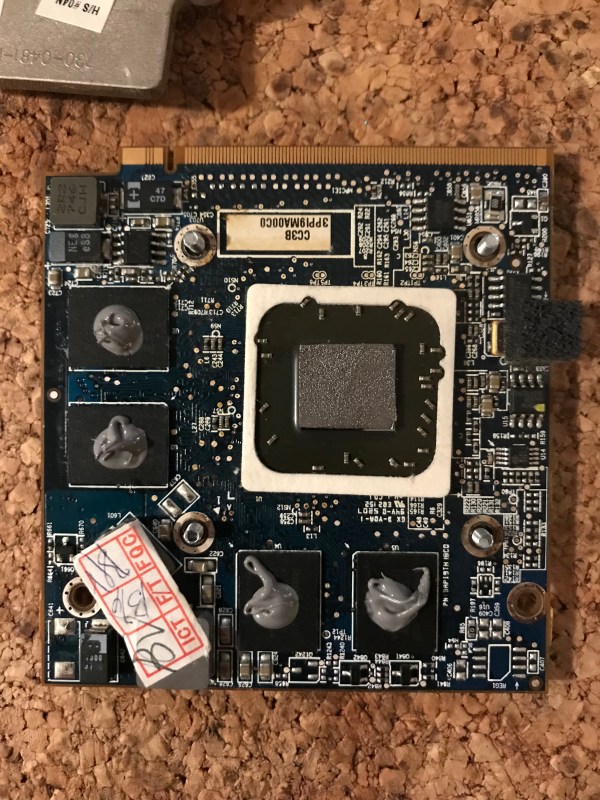
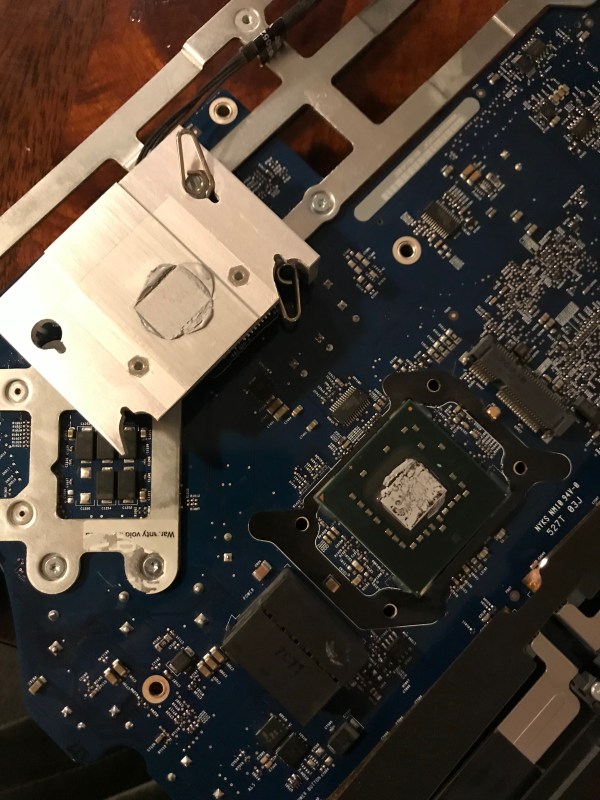
As you’ll see from the photos, I ended up not using graphite pads. I went ahead and cut up pads for its chips, but when screwing back the heat sink assembly I noticed that one of the pads had fallen out, which meant that it just wasn’t making proper contact between the chip and the heat sink. I couldn’t risk having the other pads fall out as well and ruining my mom’s computer in the process, so I ended up using thermal paste for all of the contact points except for the GPU, where the pad seemed to stay in place securely. You’ll see a piece of cork under the graphics card below. It’s actually helpful when you screw the heat sink on top of the card, because the screw heads will dig into the cork and not turn, up to a point.

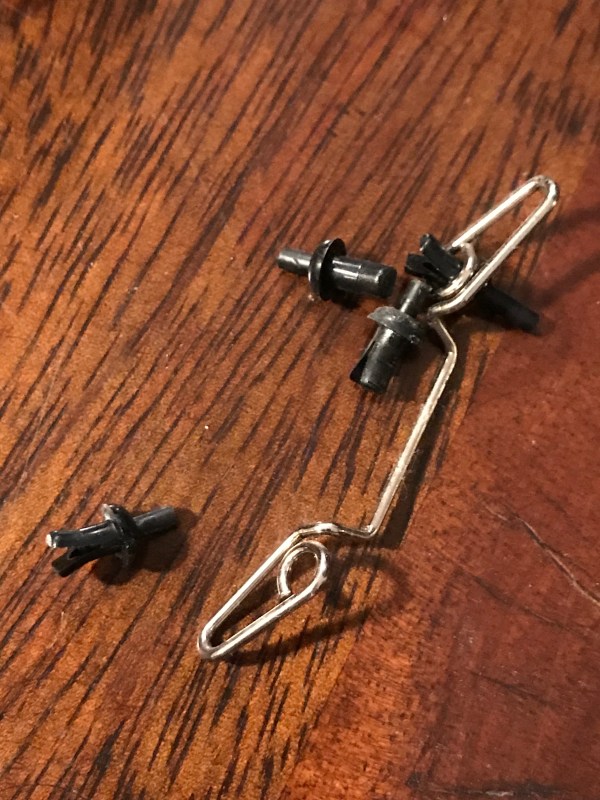
Be careful with this heat sink assembly you see below, the pins that secure it over the chip have to be de-cored (I don’t know if that’s the right word for it) so you can pull them out safely. Then you’ll have to push the cores back in place to secure the pins; if you break one… good luck hunting one down.

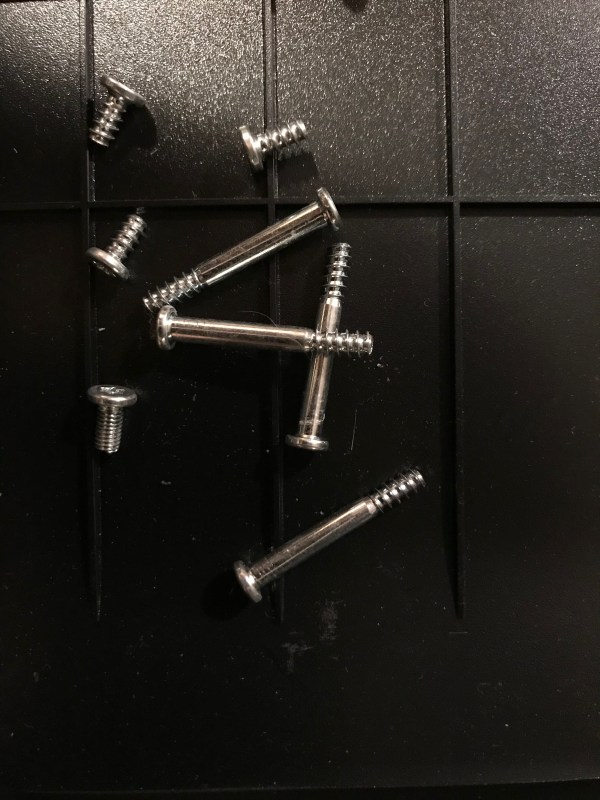
When you put the whole thing back together, leave these two screw mounts unused.

The two screws that you think go there, actually go here.

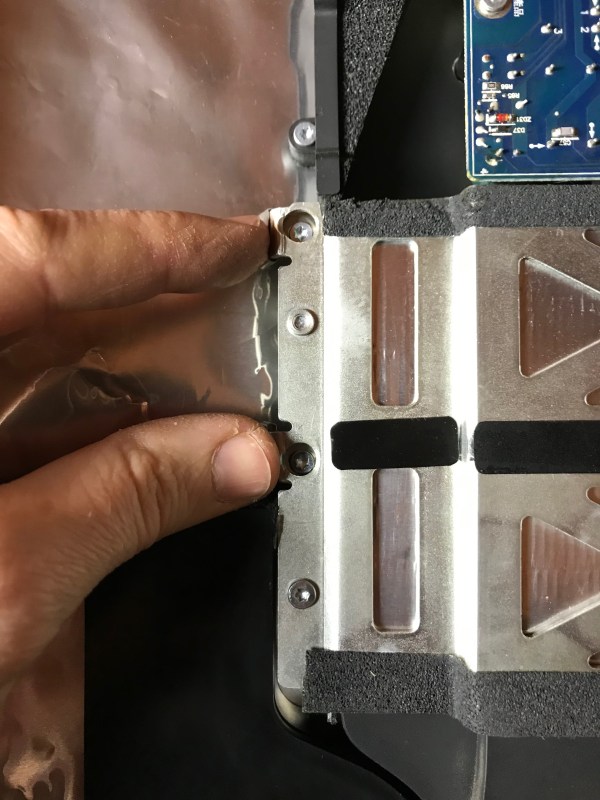
I know now why Apple has decided to make their display assemblies one-piece. While it might be easier to take apart a magnetic glass top that sits over the display instead of prying apart an assembly stuck to the case with adhesive strips, you only get to appreciate that design change when you polish the display for half an hour at the end of the upgrade, trying to remove the smudge marks that you left on it when you took it apart, and when you blow away every single particle of lint with a lens blower before you put the glass back on top, only to discover that you needed to clean some more spots, but you’re too tired to do it over. You might be tempted to cuss at that point… On the other hand, when your one-piece display assembly somehow sucks in fine dust that decides to settle into a spot in the middle of the display and in a corner and is quite visible but you can’t do a thing about it, as is the case with my 2013 iMac, you are also tempted to cuss.

I still say the newer iMacs are easier to service than this older iMac and also than my old MacBook Pro. They’re also more beautiful inside. I can clearly see the attention to detail and design that went into something few people will ever see, simply for the sake of doing good work. That’s something I appreciate more and more and I get older.

The inside of my 2013 iMac

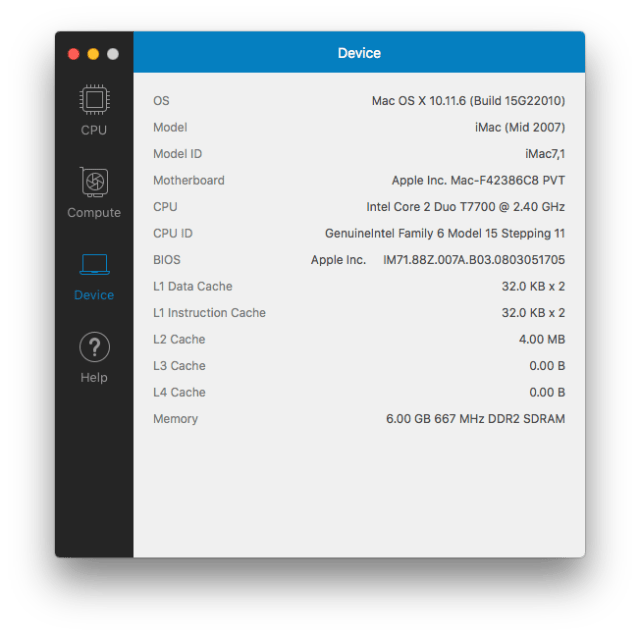
Here are some screenshots that show the specs of the upgraded computer. You’ll see that the disk write speeds went up from about 40 MB/s to 240 MB/s. It’s not exactly 300 MB/s, which is the theoretical max of SATA II, but it’s still a huge jump in speed and the computer shows it in real world use.

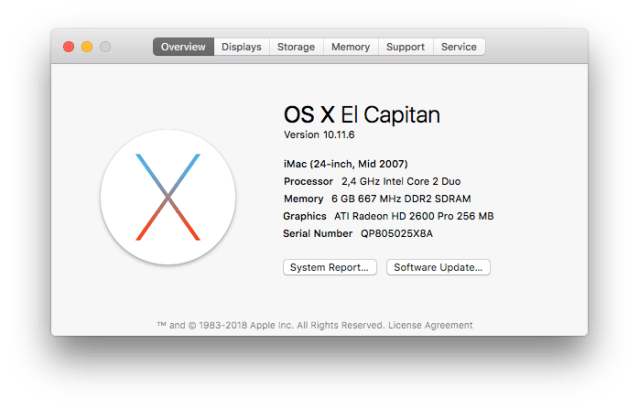
The highest version of macOS I could install was El Capitan. The App Store still bugged me to install Mojave but when I tried, it told me I couldn’t do it. I know Apple wants everyone who can upgrade, to upgrade to Mojave, but they might want to check their notification code to exclude those with older hardware that can’t upgrade. I get the same notifications on my 2008 MBP, which I also can’t upgrade to Mojave.

I’d like to encourage you to explore upgrade options for your older computers. An SSD will probably make the biggest difference in performance and their prices have really come down during the last couple of years. From an environmental standpoint, upgrading an older machine to keep it working well is always going to consume less resources than making a new one. And there’s something to be said for keeping a good machine well maintained: if it’s served you well, it deserves a bit of TLC from you, a bit of regular maintenance to keep it working, as was its purpose from the start.

Standard
A Guide To A Good Life, How To

How to fold your shirts (and organize your closet in the process)

Here’s how you can fold your shirts like a pro and save space in your closet while you’re at it. This way of folding them doesn’t cause creases, allowing you to stack them nicely on shelves in your closet or in your travel bag.

I don’t know about you, but I don’t enjoy lugging around large garment bags when traveling. I’d much rather have a rolling suitcase and be done with it. While I haven’t yet found a way to fold suits so I can do away with the garment bag entirely, at least I don’t have to put my shirts in it, meaning it’s lighter and easier to carry.

This video is part of The Elegant Gentleman series.

Standard
How To

How to properly clean your keyboard

I found myself needing to clean our iMac’s keyboard a few days ago. I remembered watching a video recently that suggested we should simply stick the keyboard in the dishwasher. I wasn’t about to do that. I doubted the circuitry would have worked afterwards, particularly the Bluetooth link between the keyboard and the computer.

The safer route was to simply remove the keys, wash them separately with warm water and soap, then wash the keyboard base with a cloth moistened with water and a mild soap solution. Ligia also got some cotton swabs and rubbing alcohol ready, just to make sure we’d be able to get into all of the keyboard’s crevices.

This solution should work for all keyboards. A word of caution: before you start doing anything to your keyboard, take a couple of photos of the key layout! You don’t want to find yourself with a bunch of keys in your hand, clueless about where to stick them… Take photos of the keys and have them ready to display on your computer, or print them out ahead of time.

Removing the keys is quite simple. You take a quarter or any larger coin, put it under a key, and pry upwards. The key should pop right out. Be careful though, you don’t want to break them — that would render the keyboard quite useless afterwards.

After the keys are removed, the keyboard should look something like this:

Apple keyboard with keys taken off

Please excuse the distortion caused by the camera lens. I used my 24mm prime to make for fast work.

Once the keys are off, Ligia cleaned the keyboard, and I got to work cleaning the keys. I used a basin filled with warm water and I poured in some detergent, then gave each key a light scrubbing with a brush. You can also use the sink directly, but you’ve got to be very careful there. Sinks have drain holes under the top lip, and your keys might just run into them, since they’re plastic and they float. Once they go into the drain, good luck getting them out. You can open up the P-trap and see if they’re there, but chances are that they’re already gone. So be very, very careful as you wash the keys. You want to make sure that you don’t lose any of them.

After the keys were washed, I put them in an absorbent cotton towel and shook them around a bit to get drops of water dislodged from the keys’ undersides, then, while keeping them bunched up in the towel, I ran a hair dryer in there to make sure they got dry a little faster. Here you’ll need to make sure all of the corners of the towel are raised up, otherwise your keys will start flying around… You can also leave them on a towel overnight if you don’t want to bother with the hairdryer.

Keys from Apple keyboard

You also want to be careful that you don’t get excess liquid on the keyboard itself. The last thing you need after you go through the trouble of cleaning it is some problem with the circuits in there. Use a moistened cloth or paper towel, and clean it carefully, making sure you remove any debris or gunk or crumbs or whatever you find in there. Use cotton swabs moistened with rubbing alcohol to get into the tighter spots. When you think you’re done, examine it carefully under a strong light, to make sure you got everything off. Sometimes keys will stick because you or someone else in your house/office spilled sticky liquids on the keyboard, and if you don’t get that sticky gunk cleaned off, the keys will continue to stick even after you think you’ve cleaned them.

After Ligia got the keyboard base cleaned up, we stuck all of the keys back on the keyboard, and it looked quite beautiful when we got done. It was as if we’d gone out and bought a brand new keyboard. Just think of it! We did our part for the environment by re-using a piece of perfectly good hardware, and we also saved about $60. Pretty cool!

Apple keyboard after thorough cleaning

Standard
Reviews

Clean your computer with CCleaner

CCleanerI tried CCleaner, a wonderful little freeware app that will clean temp files and other unused files, registry keys and cookies, on three separate PCs, and I’ve come to rely on it already. Two of those PCs were XP Professional machines, and one was a Windows 2003 Server running on VMWare Enterprise as a virtual machine. It did a great job on all three. It gave no error messages, it just cleaned things up nicely.

When I ran it on my first machine (at work), it found over 300 MB of files it could safely delete. Then I ran it on the server (also at work) and it found about 50 MB of files (granted, this was a new install, only days old.) Then I ran it on my laptop at home, and it found over 500 MB of files. I took a few screenshots for you to see. I like the fact that the CCleaner is very customizable. I can tell it what to delete and what to leave intact. I particularly like that I can specify which cookies to keep, and which to delete. To do the same yourself, go to Options >> Cookies. This means that I can keep a set of “safe” cookies, for sites I like and visit often, and delete all the rest. It’s wonderful, because it means that I won’t have to re-type my login information after running CCleaner.

CCleaner - Main Screen

This is the screen where you specify the registry scanning options:

CCleaner - Issues Screen

This is the screen where you tell it what cookies to keep, and what cookies to delete:

CCleaner - Cookies Screen

I highly recommend CCleaner. It works as advertised, and doesn’t cause any problems. A word of warning though. Before running it on my XP Pro machines, I created System Restore points, and I advise you to do the same before running it. (There is no such option on Windows 2003 Server.) Although CCleaner caused no problems whatsoever on all three machines where I used it, freak accidents are possible on Windows machines, and it’s good to have something to fall back on.

By the way, I think it’s a great idea to create System Restore points before you install any piece of software. It’s just good practice. That way, if something goes wrong, you simply restore your computer and move on, no harm done. Don’t rely on Windows to create the restore points automatically. I found out the hard way that sometimes you simply can’t restore from those points. Manual creation of restore points is the safest bet.

Standard
Thoughts

There's something in the air here in the States

I’ve been meaning to post an entry about this for some time. There has got to be something in the air or in the environment here in the States that’s causing people to have problems with their breathing, and flaring up their allergies. Case in point, Ligia and myself. Let me explain.

Ligia came to the States in 2004. She had no problems whatsoever (no allergies, no breathing problems) in Romania. As soon as she came to the States, she started having problems with pollen, clothes fuzz, and dust. She gets itchy eyes and she sneezes when she goes outside. The skin on her fingers gets cracked and rough when she handles old books or cleans the dust in our home. It’s not fun at all.

Me, I came to the States in 1991. Like Ligia, I had no allergies in Romania, which is a fairly polluted country – or at least used to be when I lived there. While my problems aren’t as serious as Ligia’s, my nose seems to be continually stuffy, and I’ve noticed my problems getting gradually worse over the past few years. Now, I’ve started sneezing from little bits of dust as well. All I need to do is to shake some clothes (even if they’ve just been washed) or pick up an old book, and off I go, sneezing. My skin gets like Ligia’s, cracked and dry, when I clean around our home, and it doesn’t make sense to me.

In 1999, I visited Rome. Out of the 3 weeks I spent there, the first week was taken up with breathing problems. My throat and nose burned, and I could only take short breaths. I understand the pollution is fairly bad there, but it’s nothing special compared to some cities in Romania – cities where I spent plenty of time as I grew up. It’s as if my body had been stripped of any protection against allergens, and I was at their mercy.

Now that I get to compare notes with Ligia on this, both of us have observed that there are a lot more kids here with asthma inhalers than in Romania. As a matter of fact, I never saw any there, and Ligia only saw a single person using an inhaler. Allergies are practically non-existent there, at least not to the level that they’re present here. When our friends in Romania complain that they’re sick, it’s usually with a cold, or the flu, or a headache. Here, allergies flare up, people can’t get out of their house… What’s up with this?

I tell you, there’s got to be something in the air here in the States, something that strips one of any protection against allergens. I’d love to hear what others have to say about this.

Standard