Reviews

Hardware review: WD My Book World Edition II

After looking around for a storage solution to house my growing collection of photographs, I found the Western Digital My Book World Edition II. I’ve been storing my photos on single external hard drives so far, but data loss has always been a concern with that approach. All it takes is a hard drive failure, and I’m going to lose a good portion of my hard work. Naturally, I’ve been looking into various RAID or other failsafe solutions, since they’ve gotten to be fairly affordable.

Great design

I was immediately drawn to the new WD My Book line because of their beautiful design, 1 TB capacity, and the ability to configure the device in RAID 1 format, which would mean my data would be mirrored across the two hard drives inside it. (This would also halve the amount of space available, but that was okay with me — I wanted data redundancy.)


WD My Book World Edition II (front)

For those of you not familiar with WD’s external drives, they have done a beautiful job with their enclosure design, and I raved about their Passport line several months ago. It turns out I now own one of them, a sleek black 160 GB 2.5″ drive just like the one pictured in that post. It’s perfect for data portability, and for a while, I even stored some of my photos on it. But it is just a single drive, and as I said, I’m worried about data loss.

Choosing the product

Back to the My Book line. There were two models I really liked: the My Book Pro and the My Book World. Because I have a mixed OS environment (both PC and Mac), I thought a NAS solution like the My Book World would work best for me, even though its specs said it would only work for Windows. I had a pretty good hunch that I would also be able to access it with my iMac. It runs on Java, it has Samba shares, and those are readily accessible from any Mac. But, this isn’t advertised, and that’s a pity.

By the way, if you’re thinking about getting the My Book Pro drive, make sure to read my review of that model. The takeaway message is to stay away from it, and I explained why in that article.

How it works

The drive itself is beautiful and fairly quiet, except when it boots up. WD has also made firmware upgrades available that make the drives even quieter, so that’s a good thing. I can tell you this right away. If you only plan to use the drive in a Windows environment, it’ll work great. Feel free to buy it, you’ll be happy. But, if you plan to use it in a mixed OS environment, and are looking to access it in more flexible ways, such as with custom drive mappings, and not through the software provided with the drive, you might be very frustrated.

Let me explain. The drive comes with a custom version of something called Mionet. I’ve never heard of it, but it’s software that installs on your machine and makes your files and computer remotely accessible from anywhere. When you run the installer, it’ll prompt you to create an account on the Mionet website, and it’ll register the WD drive, along with your computer, as devices that you can then access remotely. (There’s a monthly fee involved if you want to control your own PC remotely with the software, but you don’t need to pay it to use the WD drive fully.)

Once you install the software, you start up Mionet, and the WD My Book World drive gets mapped automatically to your machine. You also have the option to manage the drive through a browser interface. That’s actually where you configure its volumes (1 TB single volume, or RAID 1, still single volume, but mirrored data and only 500 GB) and other options. Basically, you have to remember that the only proper way to access the drive, whether you’re at home or you’re away, is to start up Mionet and get it mapped to your “My Computer”. If you do that, you’re good to go.
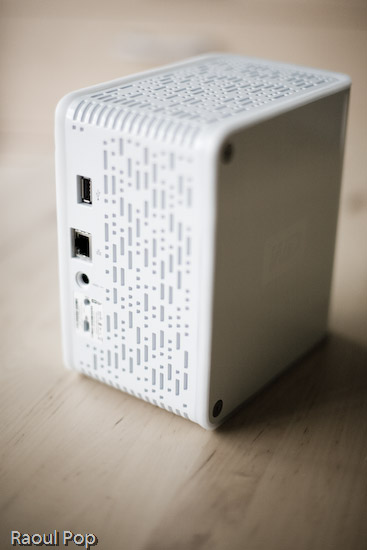
 

WD My Book World Edition II (back)
Potential problems

The problem with this approach (and this tends to be a problem only for geeks like me) is that the drive is readily accessible over the network without Mionet. I can simply browse my workgroup and find it, then log in with separate accounts I can set up by using the WD drive manager, which is accessible through my browser. So here’s where the frustrating part comes in. I can browse to my drive over the network, without Mionet, from any PC or Mac in my home, administer its options, add users and shares, etc. Then I can use Tools >> Map Drive on my PC or Command + K on my Mac to connect to the share name, and log in using those user accounts I’ve just set up. But, I can only read from those shares. I can’t write to them. The drive operating system assigns weird UNIX privileges to those shares, and they don’t correspond to the accounts I’ve just set up. It makes no sense to me and you’ll only fully know what I mean if you do this yourself. Suffice it to say that it’s really frustrating, and it’s not what I expected.

It would have been alright if Mionet made a version of their software for the Mac, but they don’t, and they don’t seem to have any plans to make any. It would have still been alright if the drive hadn’t been accessible through any Mac whatsoever. But the fact that they are accessible, and that I can log onto the drive with usernames and passwords that I can set up through the admin interface, yet I can only gain read-only access to those shares even though I’m supposed to have full access really gets me. Sometimes it’s a real pain to be a geek…

So, my verdict is that I really like the design and the RAID 1 capability, but I do not like the implementation. I ended up returning this and getting the My Book Pro Edition, which I will review very soon. But remember, if you don’t have a mixed OS environment, and have no problems with starting up Mionet when you want the drive to appear in “My Computer”, My Book World will work great for you, and the remote access capability is a really nice feature.

Updates

Updated 7/19/07: I purchased and reviewed the My Book Pro as well. You can read my review right here.

Updated 8/3/07: Multiple commenters have pointed out (see this, this, this, this, this and this) that you can use the drive just fine with both Macs and PCs, over the network, if you skip the install of the Mionet software altogether. It looks like the clincher is the Mionet install itself. Just forgo it, and you’ll be able to map the drive to both PCs and Macs, and read/write as much as you want. I didn’t realize that I had to uninstall Mionet entirely in order for the read/write to work properly.

But keep in mind, if you don’t use the Mionet software, you won’t be able to access the drive remotely. Well, you might be able to arrange some access, but you’ll need to custom-configure your firewall settings to allow traffic on certain ports, and you’ll need a static external IP or dynamic DNS so you can get at your firewall from the outside. And then you’ll need to worry about data encryption as well, unless you don’t care that your data will travel unencrypted over open networks. If you’re a hardcore geek, feel free to try this last bit out, but if you aren’t, beware, it’s a weekend project, and I can’t help you.

Updated 8/9/07: I’ve had several people comment on how they bought the drive based on this post and the comments made on it by others, believing they could get it working over the network with their Mac. The kicker is that they thought they could connect it directly to their machine and get it working that way. 😐 I don’t know how they got that idea, but let me set the record straight. This is a NETWORK drive. It needs a network in order to work. There’s a chance you might get it working by using a crossed ethernet cable or connecting it directly to your machine, but it probably has to be a crossed ethernet cable.

The best way to get it working is to use a hub or a switch, or best of all, your home router, which can assign IP addresses. The drive ships configured for DHCP. That means it has no IP address to start with, and it’s looking for a place to get them. If you don’t have such a place, you’re going to have a lot of headaches. Get such a place (router) or go buy a USB/Firewire drive. Most people who’ve commented already made it plainly clear that’s what they needed, but they still insisted on using this drive. I don’t know why they enjoy the stress of doing that. I didn’t. As I already said in my post, I returned it and got a WD My Book Pro Edition II.

Last but not least, please do me a big favor. Read through the existing comments before you write one. There are so many already, and there’s a very good chance someone’s already asked your question, and I or someone else has already answered it. Thanks!

Updated 12/11/07: I found out today that Western Digital is going to disallow the sharing of all media files through the Mionet software. In other words, if you’re going to use Mionet to share the files on your drive and make them accessible remotely, you will not be able to see or use any of your media files. I think this is a pretty stupid move on WD’s part, and it’s going to come back to bite them. Until they decide to do away with this boneheaded downgrade, keep it in mind if you’re looking to purchase a My Book World Edition. Do NOT use Mionet. Install the drive without it, and if you’ve got to make the files accessible remotely, find other ways to do it, like through a custom config of your firewall.

Updated 12/18/07: Christian, one of the commenters, has left two very useful comments that are worth mentioning here in the post. The first shows you how to access the drive remotely (when you’re away from home) without using the Mionet software. The second tells you why you don’t need to worry about defragging the drive, and how to troubleshoot its performance if you think it’s not as fast as it should be. Thanks Christian!

Updated 4/5/10: Andrew Bindon has posted an easy-to-follow tutorial on how to remove Mionet completely from your computer and the My Book World Edition drive. If you, like me and many others, think Mionet is an annoyance that would best be removed, then follow his advice.

More information

Standard
Reviews

Camera review: Olympus EVOLT E-500 DSLR

For the past month, I’ve been testing out the E-500 DSLR from Olympus. It’s an entry-level DSLR with impressive specs for its class. These past 30 days or so, it has been my primary camera. It’s been everywhere with me, every day. I’ve used it in all sorts of conditions (indoors, outdoors, daylight, nights, cold, warm, wet and dry), and I’ve taken over 3,000 photos with it. So what I’m about to write carries a bit of weight — at least the sort conferred by such use. After you read my review, you’ll get to see sample photographs that I took with the camera. They’re at the end, so you may jump there right now if you’d like.

E-500

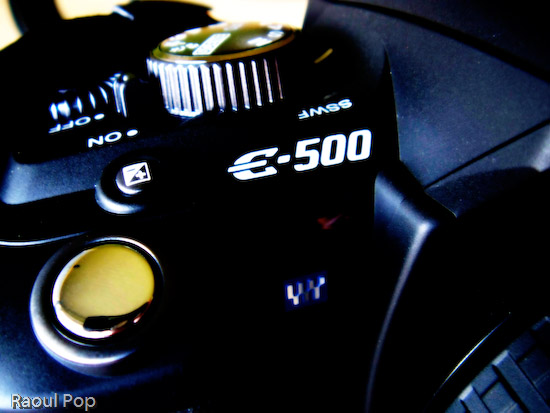
The E-500 feels good in the hand. It’s light (about 435 grams for the body, plus another 75-100 grams or so for the lens). It has a great grip. It just feels right when I hold it in my hand. One of my complaints with the Canon Rebel XT, another DSLR in the same class as the E-500, is that it’s too small. It feels like it was made for a woman’s hand. I can’t quite grip it right. Not so with the E-500.

EVOLT E-500 DSLR (top view)

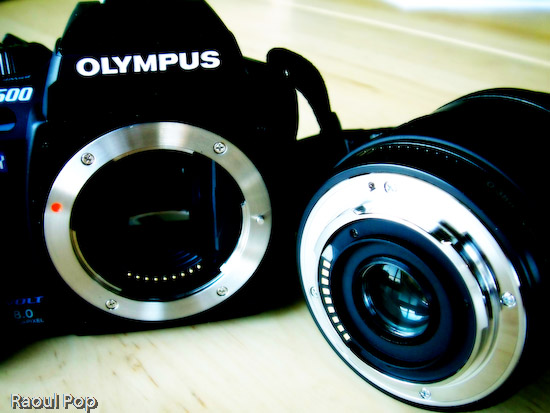
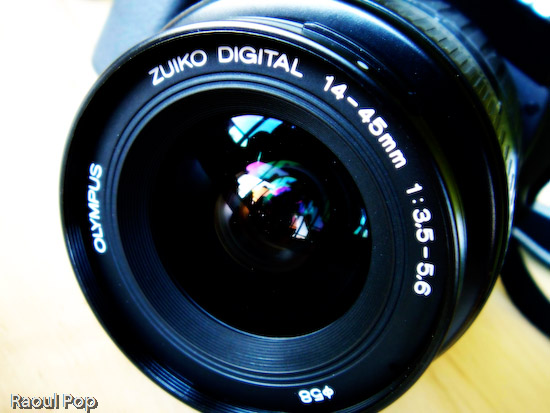
My test model came with a 14-45mm, 1:3.5-5.6 kit lens. Given the sensor size and optics, this is equivalent to a 28-90mm lens on the 35mm system. While the aperture specs of the lens aren’t impressive, its optics and construction are. I’ve held other kit lenses in my hand, and they felt pretty flimsy. This one doesn’t. It has weight to it, and it’s solid. The mount is made of metal, and it feels like a quality product over all. Yes, in order to make the lens affordable, Olympus needed to pare down the specs, but they didn’t skimp on materials and optics, and I’m very glad for that.

Camera body and lens

Zuiko digital lens

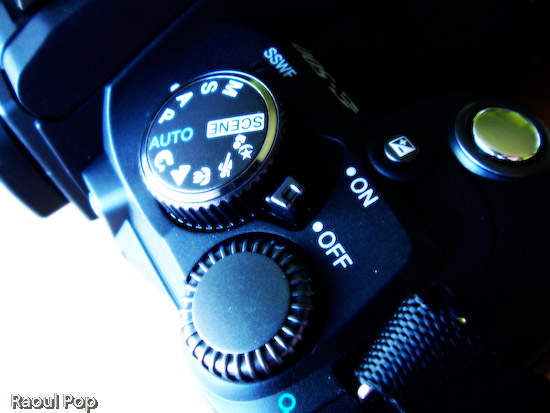
The controls of the camera are easy to use and well-organized. It’s interesting to see how each camera manufacturer designs the interface they think is best for their cameras. Olympus chose to group most of the controls within easy reach of the right hand fingers. There is a main mode dial which can be rotated with the thumb and index finger, and a control dial right next to it that can be rotated with the thumb. Once I got used to the controls, and it took very little time, everything I needed to use frequently could be adjusted easily, and I liked that. My only gripe here is with the White Balance button, which I think is a bit close to the thumb rest and can be accidentally pressed as the camera is held. But as I used the E-500 more, my thumb learned to rest away from this button and things were fine. Incidentally, it would have been nice if the thumb rest were rubberized.

Mode and control dials

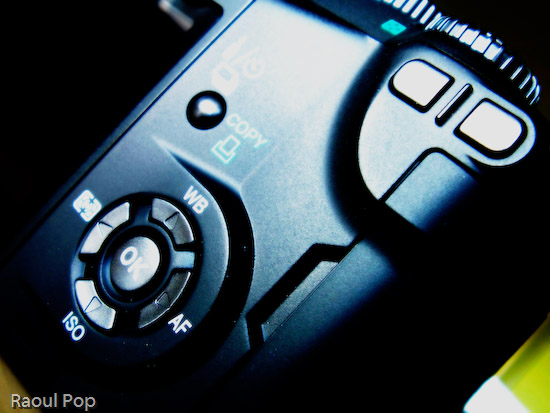
WB, AF, ISO and Metering controls

The user manual is great. I like the way the E-500 manual is laid out. It’s organized by sections and indexed well, so I can refer to specific topics right away. Things are also clearly explained, and I know all too well that’s not always the case with other user manuals.

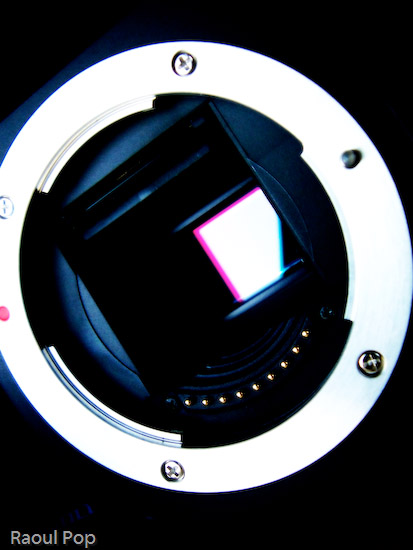
The E-500 has some surprising features for an entry-level DSLR. I was impressed most of all with the supersonic wave filter (SSWF) sensor cleaning. Olympus was the first company to introduce this feature on its DSLRs a couple of years ago, and other companies such as Sony, Pentax and Canon have only more recently followed suit. The SSWF uses ultrasonic vibrations to shake dust off the sensor every time the camera is turned on. This reduces (and may even eliminate) the need to to clean the sensor, though your mileage may vary. It all depends on how much you’ll switch lenses, and how careful you are when you do it. In case you’re worried, the camera has a sensor-cleaning mode that lets you gain access to the sensor for manual cleanings.

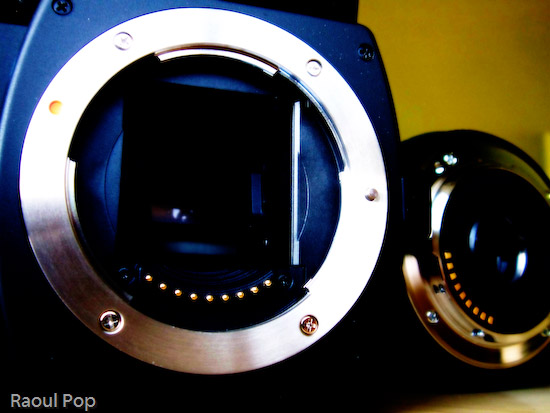
Camera and lens mount

I was pleased to see the camera had four bracketing modes: AE (exposure), WB (white balance), MF (manual focus) and flash. These modes let you vary (or bracket, hence their names) those characteristics when used. For example, AE bracketing will let you take three shots with varying exposures (dark, medium, light). You then choose the best one and delete or keep the others, as you wish. The other modes work the same, and they vary the other characteristics. This is useful for those situations when you’re not quite sure what will give you the best shot possible. Realize though that flash bracketing can get to be pretty annoying for your subjects if they’re people. No one likes being flashed repeatedly. So find the flash intensity that works, do it quickly, then stick with it.

The 2.5-inch LCD screen was a great addition to the E-500. It’s clear, big and displays photos very well, and for its time (2005), fairly unique. Olympus also spent time organizing the menu functions well, and after a short learning period, things are easy to find. The viewfinder is a different story, at least as far as I’m concerned. I found the display of the aperture and shutter information to be hard to read, because it was off to the side instead of at the bottom of the shot. Apparently, I’m not the only one to notice that shortcoming. I also noticed the eyecup (the little rubber piece around the viewfinder) was a little shallow for my eyes, and ambient light distracted me from my shots, particularly in daylight. Thankfully, I see that Olympus offers a bigger eyecup for folks like me.

LCD and other controls

The battery life was surprisingly good. I don’t know if my experience was a fluke, but I managed to get over 1,600 shots on a single charge, and over 400 of those shots were with flash. That’s impressive! I should clarify that on the first charge, I got only 350 shots. But then first charges on all rechargeable batteries don’t last that long. So after I drained the battery that first time and recharged it, the second charge lasted for over 1,600 photographs. And when the camera refused to take more shots because of the depleted battery, I turned it off, then back on, and squeezed more shots. I did this four times, and got an additional 30 shots with a battery that was supposed to be dead. Again, I don’t know if my experience was the norm, but if so, this would be a fantastic selling point. Yet I don’t see battery life mentioned anywhere in the Olympus literature or on their website.

I tried out the Olympus Master software included with the camera, and was less than impressed with its features. I stuck with Adobe Bridge and Photoshop for post-processing my photos thereafter. Incidentally, I wouldn’t advise you to download the photos from the camera to your computer by connecting the two with a USB cable. (This is true for just about any recent DSLR, by the way.) It’ll take forever, particularly if you shoot in RAW format. Because camera manufacturers haven’t updated their USB connectivity hardware, the most you’ll get is the equivalent of USB 1.1 speed. Get a card reader and use that instead. The speeds will be USB 2.0, and you’ll be happy.

I was disappointed to find that the camera’s ISO range only went from 100-400 natively. Yes, the sensitivity can be boosted up to 1600 in whole steps or 1/3 steps, but still, given that other cameras in its class (such as the Nikon D50 and Canon Rebel XT) offer native ISO up to 1600, the E-500 should do so as well. I should note that two noise reduction features are included on the camera. They are useful when using higher ISO settings. One is a noise filter that can be coupled with the ISO boost and works automatically, and another is a noise reduction feature that can be turned on and off as needed, regardless of the ISO setting. Although the noise filter did a good job at 400 and 800 ISO, it couldn’t help much at 1600. The noise reduction feature also wasn’t very helpful unless one used it with long exposures.

Time and time again, as I used the E-500, I found myself wishing for better low-light capability. I tend to take lots of shots in low light conditions, and I prefer not to use the flash, because it’s either disruptive or annoying. When I took photos of people, I found my friends covering their eyes or squinting. And of course, it’s not practical or desired to use the flash when doing street photography at night. Flash would ruin a neon sign, and would shed a harsh light on details best lit by ambient light. Maybe I’m just spoiled in wanting to do handheld night or low-light photography, but those are my expectations.

The autofocus works well and is fast given that it’s only a 3-point AF. That’s important because manual focus is too tedious to use by itself, unless you’re dealing with subjects that won’t move for some time. I also found that the focus ring on the kit Zuiko lens was best used for fine focus adjustments, not for everyday focusing tasks. There were, however, some occasions when the AF didn’t quite work, including daylight conditions. I was never quite sure why, but those times were few and far between. Autofocus was slower in low light, and at times, undesirably slow, by a factor of 3-7x when compared to daylight AF speeds. On the E-500, there is an option to use the flash as an autofocus illuminator (as on other DSLRs), but I didn’t find it useful. It didn’t cut down on the autofocus time at all, and only introduced a strobe-like light that preceded the shots and annoyed my friends even more. So I’d recommend that you plan for long AF times in low ambient light, and realize that you’re going to miss some photo ops because of it.

On the other hand, the built-in flash is surprisingly strong, and that’s good news for those occasions when it does need to be used. I was shocked to see it that it filled a room of 20’x20′ and provided ample light for most shots. Like other reviewers, I was surprised to see that I could not get red eyes in my subjects even if I wanted to, and even when not using the red-eye preflash.

The E-500 has a nice calendar feature built into the photo review mode that lets you view the shots you took on a particular day. I liked that a lot. I also found myself wishing for a bulk delete feature for a particular day. Here’s the scenario: say you take lots of shots, then download them to your computer, and you take more shots the next day, without realizing that you haven’t deleted the other shots first. With a bulk delete feature, you can select all of the shots from the previous day and delete them en masse, without needing to go through and selecting each by hand. But this is just wishful thinking and not a vital feature on an entry-level DSLR.

For those who need it, the E-500 has a mirror lock function that’s called Anti-Shock in the camera menu. It allows you to eliminate the minor vibration caused by the mirror movement as you press the shutter, and it’s useful for macro or night photography.

A surprising feature on this camera was the presence of two custom reset modes. Ever used a car where you could set your seat and steering positions, plus other settings, then store them? This is the same concept. You can choose to adjust certain camera functions, then store them into one of the custom resets. When you want to use those settings, you simply select that reset mode from the menu, and all other settings but yours are wiped out. This can prove useful for day/night photography, when you’d want features like the noise reduction turned off or on, respectively. Or for multiple users of the same camera.

Even though the camera is not dust and splash proof, I can tell you from direct experience that it is a sturdy camera that will work in some pretty harsh conditions. The stated operating temperature of the E-500 is supposed to be 32-100 degrees Fahrenheit. I’ve used it in temperatures as low as 10 degrees Fahrenheit, and it worked great. The user manual says the transitions between temperatures and humidities shouldn’t be sudden. Well, they were sudden, and the lenses didn’t fog up. They worked fine, and what’s more, the camera worked fine. I used it once while it was snowing. Snow accumulated on the camera and lens body, and when I got inside, it melted, leaving drops of water everywhere. I wiped them off, and the camera continued to work just great. I didn’t have a chance to use the camera in dusty or excessively warm conditions, but I certainly put it through its paces here in Washington, DC, and it hardly missed a beat.

I want to talk about the four-thirds standard for a bit (also see the Wikipedia entry for this). The E-500 is built on this standard, so a little background information will help you understand the differences between it and other DSLRs a little better.

As you may know if you own a DSLR, once you’ve bought it and invested in the various accoutrements that go along with that camera body, you’re stuck with the brand, so to speak. You’ve spent thousands of dollars on extra lenses, and if you want to switch to another brand, you’ll need to spend money not only on a new camera body, but on another set of lenses as well. That’s not fun, and most people can’t afford to switch brands, especially if they’ve invested heavily in lenses and other camera accessories like speedlights, batteries, etc. Hence, camera manufacturers are pretty happy (financially speaking) that lens lines aren’t inter-compatible (unless you use special mounts that may or may not work or give you the same image quality), because they have long-term, guaranteed customers.

Olympus came up with the four-thirds standard so they could make lenses that are interchangeable, and can be used by any other camera back built on the four-thirds standard, and they wanted to design them specifically for use in digital photography. But according to Wikipedia, the four-thirds standard isn’t entirely an open standard:

Four Thirds is not an Open Standard, however, as it does not meet the “allowing anyone to use” criteria commonly accepted as the definition of an open standard. It also does not meet the criteria that the standard itself and any associated intellectual property be available on a Reasonable And Non-Discriminatory basis.

So while the standard is good, Olympus needs to be more open about its use in the industry. There also seems to be a drawback. According to Wikipedia, even though the smaller sensor size allows for smaller and lighter lenses, it’s also to blame for the high noise I experienced when taking shots at higher ISO settings. Apparently the sensor just isn’t big enough to function well in low light. Whether that’s accurate, or whether this issue can be solved through creative engineering, I don’t know. What I do know is that I’m not happy with the performance of the E-500 in low light, particularly when shooting without flash, at shutter speeds above 1/25 seconds. But again, my needs are probably more stringent than those of the entry-level DSLR user.

4:3 CCD sensor

This next point is entirely subjective, but I find the 4:3 aspect of the photographs I took with the E-500 more pleasing to the eye than the more prevalent 3:2 aspect found in most photographs. (The 3:2 aspect carries over from film photography.) Have a look at your computer monitor or TV. Chances are (unless you have a wide screen monitor or TV) that you’ve been looking at images made for the 4:3 standard for quite some time, and you didn’t even know it. This aspect ratio has been in use in that medium for decades.

The 3:2 aspect helps the photographer frame a landscape shot a little better, because it’s wider, but when I look at a vertical shot taken with that aspect, it seems as if one side is lopped off. As I said, this is entirely subjective, so I invite you to make up your own minds about it. I ask you to leave brand loyalty aside, and to judge which aspect looks better in each mode. I prefer 4:3 in portrait mode, and I’m on the fence between 4:3 and 3:2 in landscape mode.

So, given all of this camera’s features, capabilities and limitations, does it allow its user to take good photographs? I think so. I was pleased with the color reproduction and image quality. And I’m willing to let you judge this for yourselves as well. As I mentioned, I took over 3,000 photos with the camera, and I posted several of them below, at the end of my review.

EVOLT E-500 DSLR (side view)

Enough talking, let’s wrap things up. Overall, the E-500 is a solid DSLR. It’s sturdy, has a good grip, it’s got good battery life, and the image quality is great. I like the 4:3 aspect of the photos, and I like the fact that the lenses and body are interchangeable with other brands, although currently only Olympus, Panasonic and Leica make DSLRs and lenses based on the standard. That’s about five camera backs altogether, at widely varying prices, so there’s not a whole lot of choice, although that could change in the future. The sensor’s performance in low light is not up to my expectations, and that could or could not be related to the four-thirds standard. Time will tell. I think that it’s a bargain for its class. The current market price hovers around $650 for the body and two lenses, the one I tested and another, the 40-150mm f/3.5-4.5 zoom. I hear that’s a great lens. Bottom line: if I weren’t so bent on being able to use it in low light situations, I’d get one myself.

Here are the sample photographs, as mentioned above.

Valentine for my sweetie

Musing on a fragile life

Those dark shadows that haunt us

Life, reflected

I have this idea

1640 at sunrise

Chat by the country fence

Solitude is peaceful

Waterpainting

The three

Brothers in arms

Green power

Blue mountain

Urge to splurge

Standard
Reviews

Camera preview: Sigma SD14 DSLR

I’m intrigued by the new DSLR from Sigma, the SD14. It’s a 14-megapixel camera that uses a direct image sensor capable of detecting red, green and blue light at every pixel. The product brochure states:

The elements of this 14-megapixel sensor are arranged in three colorsensing layers, comparable to the three layers of emulsion in photographic film.”

Sure enough, the photos they show on their site and in their brochures are stunning. The level of detail and sharpness are fantastic. Were they taken with the SD14? I don’t know, but my interest is certainly piqued. The camera isn’t in stores yet. It’s going to launch early this year. It looks like the retail price will be around $1,600. In this review, I want to have a closer look at the specs of this beautiful camera, and see how they compare to other mid-level DSLRs. See my analysis below.

➡ Updated 10/29/07: Although the advertised resolution for this camera is 14 megapixels, and additively speaking, it’s correct, the actual resolution is about 5 megapixels. That’s because each sensor layer (there are three) has 4.7 megapixels. Added together, that makes 14 megapixels, but we have to remember that the layers are stacked on top of each other. Even though the pixel data corresponds to 14 megapixels, the printable resolution is still only around 5 megapixels, which is markedly lower than that offered by other DSLRs in that same price range. As some people have pointed out, you can safely increase the resolution of the photos in post-processing, but the camera will still only give you 5 megapixels per photo when you press the shutter button.


Sigma SD14 DSLR

First and foremost, there’s the sensor. It’s a newly developed Foveon X3. Here’s what Foveon says about their new sensor:

Similar to the layers of chemical emulsion used in color film, Foveon X3 image sensors have three layers of pixels. The layers of pixels are embedded in silicon to take advantage of the fact that red, green, and blue light penetrate silicon to different depths – forming the first and only image sensor that captures full color at every point in the captured image.”

So it looks like this sensor is groundbreaking, much more so than any other currently on the market. But is it unique to Sigma? Isn’t it found in Canon and Nikon cameras? We need look no further than the Foveon site, which lists the cameras currently using this sensor as the Sigma SD9, Sigma SD10, Polaroid x530, Hanvision HVDUO-5M and Hanvision HVDUO-10M.

It turns out the Sigma SD14 not only uses a pretty unique sensor, but it uses the latest and greatest version as well, the Fx17-78-F13D, which isn’t yet used in any other camera on the market. As you can see, none of the other cameras that use Foveon can boast 14-megapixels. It’s also reassuring to know this is a third generation sensor, so most of the kinks should have been worked out by now.

Furthemore, it looks like just about any camera on the market that uses regular sensors is inferior to the Sigma, simply because of the Foveon sensor’s capability to reproduce color more faithfully. Instead of having to manipulate the image through computations in order to render proper color, the Sigma can just rely on natural color capture through the Foveon sensor, which I’m pretty sure is a great advantage if it works as advertised.

From what I’ve seen in the brochures, I like the controls. As Sigma says, they’ve simplified them and eliminated extraneous functions. All I see on the mode dial is P (point and shoot), A (aperture priority), S (shutter priority) and M (full manual). The on/off dial turns easily for burst, timer and long exposure settings. I like the shape and size of the camera. The hold is rubberized, and the camera’s exterior is clean and simple.

The simplicity of design is exemplified in the accessories as well. There aren’t a ridiculous number of them. You’ve got the nice battery pack that holds two batteries and screws onto the tripod mount, a remote and cable release, two flash guns, one more advanced yet both featuring a bounce head, and an AC adapter. The standard accessories are what one would expect with a camera: battery, charger, USB cable, strap, caps, software and the product manual.

The built-in flash is a good idea. While an external flash is better, a built-in flash is good for fill-in light during daytime shots, and will also do acceptably for indoor shots when nothing else is available.

As I talk about the rest of the SD14’s specs, I’m going to compare it with Canon EOS 5D and the Nikon D200, which are my favorite DSLRs and are also cameras that have set new standards in the field of digital photography. (I own a Canon 5D)

The SD14 is supplied by default with a dust protector that is “put in place with a single action“. I’m not quite sure what that means, but I assume a button on the camera or in the central menu controls it. This is good. Anything that camera manufacturers can do to minimize dust gathering on the sensor is a good thing. It’s interesting that the camera only has a 5-point distance measurement for autofocus. Certainly Sigma has plenty of experience with AF, having designed lenses for a long time. But the Canon EOS 5D has a 9-point AF with 6 supplemental points, while the Nikon D200 has an 11-area AF. Are 5 points enough? I guess we’ll find out when the SD14 comes to the market.

SD14’s pentaprism is rated at 98%x98%, while the Canon has theirs at 96%x96%. The Nikon D200 doesn’t list this info in their specs, though I’d venture to guess they’re in the ballpark. The LCD monitor is at 2.5 inches and 150,000 pixels, which is the same size as on the Canon 5D and Nikon D200, but lower in resolution than theirs, which are both rated at 230,000 pixels. Coverage for the SD14 and 5D is listed at 100%, while it’s only at 95% for the Nikon. Most of the other specs match the EOS 5D and Nikon D200, so I’ll only note the differences.

The SD14’s ISO sensitivity only goes up to 800, although 1600 is listed in Extended Mode. Both the Canon 5D and Nikon D200 go up to ISO 1600, and the 5D even goes up to 3200 in Expansion Mode, which I assume is similar to the SD14’s Extended Mode. I wonder why the SD14 doesn’t go up to 1600 ISO naturally, and my guess is that it’s a limitation of this generation of Foveon sensors. The sensitivity will likely be extended with the next-generation sensors. I also have to wonder how an ISO800 photo on the SD14 compares to an ISO800 photo on the Canon or Nikon. How does it fare in low light? Will there be noise, or will the photos come out clear and beautiful, like they should? Even better, will its light sensitivity trump that of the Canon and Nikon, even if they do go up to 1600? I’d love to find out for myself.

I also need to point out that the top shutter speed, at 1/4000th of a second, is also only half that of the 5D or D200, which both go up to 1/8000th of a second. I’d venture to guess the sensor is the limiting factor here as well, though I can’t elaborate on that. This also promises to be the compensating factor. If the image quality is as good as promised, I won’t care that it can’t go up to 1/8000th of a second.

Since geotagging photos has become so mainstream nowadays, it would have been nice to see some sort of GPS functionality on the SD14, perhaps like the one on the Nikon D200, which allows the photographer to connect a GPS device to the camera and record coordinates to the EXIF data for every photo.

The dimensions and weight of the SD14 are similar to those of the EOS 5D and Nikon D200. The SD14 is 144mm wide, slightly less than the D200 at 147mm or the EOS 5D at 152mm. It’s also slightly shorter, at 107.3mm, than the D200 and EOS 5D, both of which are 113mm tall. It is, however, thicker, which I like, because there’s more to hold and that tends to stabilize the shots. It’s 80.5 mm deep, whereas the D200 is 74mm and the EOS 5D is 75mm. It’s also lighter than the other two. At 700g for the body, it’s 130 grams lighter than the D200, and 110 grams lighter than the EOS 5D. I welcome that, because when you add an external flash or battery pack to a serious DSLR, it gets so heavy you might as well use it for weightlifting. Any weight that gets trimmed off is okay by me.

Battery life is somewhat lower than that of either the EOS 5D and the Nikon D200. The SD14 can take approximately 500 shots on a single battery charge at normal temperatures, and 400 shots at near zero-degree temperatures. The EOS 5D can take approximately 800 and 400 shots at normal and low temperatures, respectively. The Nikon D200 can take up to 1,800 shots per charge at normal operating temperatures; no stats are quoted for low temperatures on their site. Again, to be fair, I think this has to do with the Foveon sensor. Instead of a single layer that must be kept charged, it has three separate layers. I haven’t dug deeply into the Foveon X3 specs, but I gather the sensor probably uses more power than a regular single-layer sensor. (Someone correct me if I’m wrong on this.)

It looks like the SD14 is a natural, unstrained progression for Sigma. After making lenses, then film SLRs, then 1st and 2nd generation DSLRs using the Foveon sensor, they’ve graduated to the SD14, which looks to be a beauty of a camera. If you’d like more information about the SD14, you can access the brochures easily. Click on each link to download a PDF in English: Concept, Product and Major Specifications, or just visit the Sigma SD14 website.

To sum up, the Sigma SD14’s main strength is its Foveon X3 sensor. I’m impressed with this camera, and plan on having a closer look at it as soon as I can get my hands on one.

Standard
Thoughts

Getting closer to a credit-card sized mobile phone

Two recent developments make me happy, because my idea about a truly portable cellphone is about to come to fruition. The first is the development of the Motorola F3 cellphone, which was built to be cheap and thin, have a long-lasting battery, and use E-ink for its display. Now, Samsung has just come up with the thinnest LCD display in the world: it’s 0.82mm thick! That’s amazing! So between E-ink, OLED and thin LCD displays, we’ll find the best option to use for a thin cellphone display. The steps taken by Motorola with the F3/Motofone also prove that manufacturers can design thinner phones. Strip batteries or other sorts of innovative batteries are also coming to market soon, and are improving by the day. Who knows, perhaps someone will even find a way to recharge a cellphone battery from the static electricity and heat that our body generates.

All of this means that pretty soon, a cellphone the size of a credit card and only slightly thicker will be a reality. I look forward to that day! I’ll be able to slip it in my wallet, in my pant pocket or even my shirt pocket, and there will be no annoying bulge to bother me. Beautiful!

Standard
Thoughts

A white MacBook unwrapping

My mother was fed up with multiple crashes on her Windows laptop, and wasn’t sure what to do. Should she get a new Windows laptop? Should she try to fix the existing laptop? It was all very traumatic for her, because she lost precious data with each crash.

When I first suggested she switch to Apple, she said no thanks, she wasn’t going to learn a new operating system. She had little spare time as it was. But with time, she relented. I convinced her to visit the Apple Store at her local mall and play around with the computers. I remember a few months ago, she called me from the store, excited. She was willing to give it a try and consider a purchase. She wanted a laptop, and didn’t want to spring for the expensive MacBook Pro, so I suggested the MacBook. She liked the white one. I advised her to wait till they came out with the Core 2 Duo and fixed the random shutdown and discoloration issues.

Fast forward a couple of months, and I placed the order for her. I expected to wait about a week till Apple shipped it out, like I did with my iMac G5. Was I ever surprised when I got a shipment notification the very next day! I thought boy, they really improved… but in typical Apple fashion, they managed to mess up the order somehow. When I ordered my iMac, they sent me a Spanish keyboard and instruction manual. This time, they didn’t ship the Apple Care plan for the MacBook. [sigh] Some things are just the way they are…

I had the laptop sent to me, since I promised I’d take her through the switch. Now I’ve got my work cut out for me. I’ve got to import all of my parents’ documents , photos, music and other things from the PC backup files to the MacBook. As if that’s not enough, I need to transfer her Outlook-based mail archive to Apple Mail, and that’s not a walk in the park. Fortunately, I’ve done it before. When everything’s set up, I’m going to fly it down to her and hand it over. There may be an official hand-off ceremony, I don’t know, we’ll have to see.

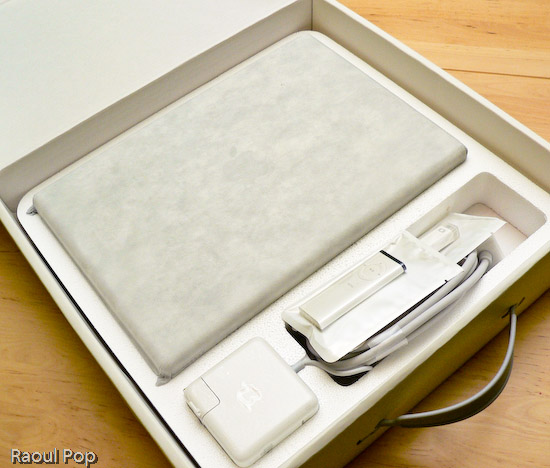
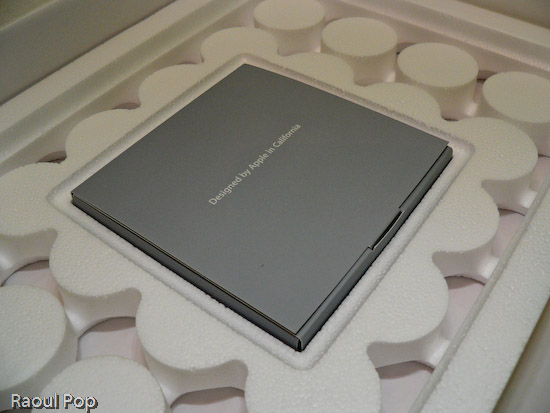
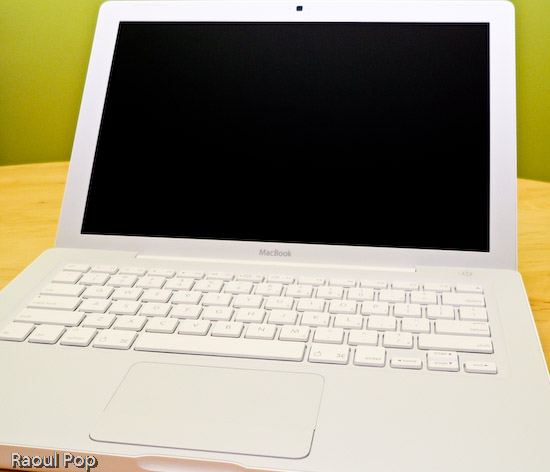
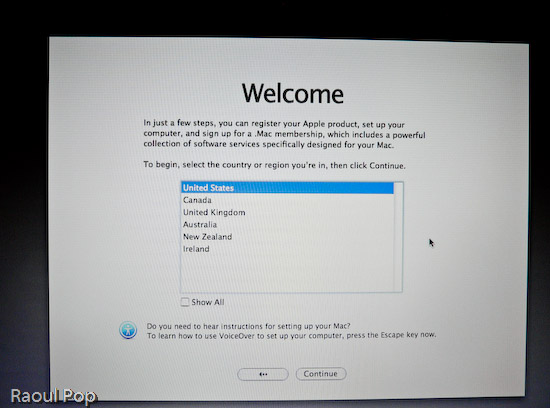
Anyway, the laptop arrived yesterday and I took it out of the box, duly documenting the process with photos. You’re welcome to have a look.

MacBook in its box

MacBook box opened

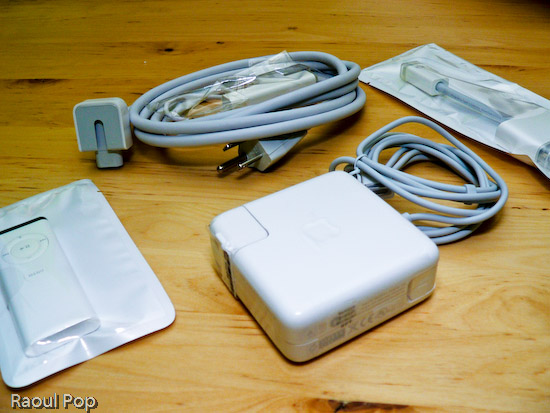
MacBook wires, adaptors and remote control

MacBook DVDs, manuals

13? White MacBook

13? White MacBook with lid open

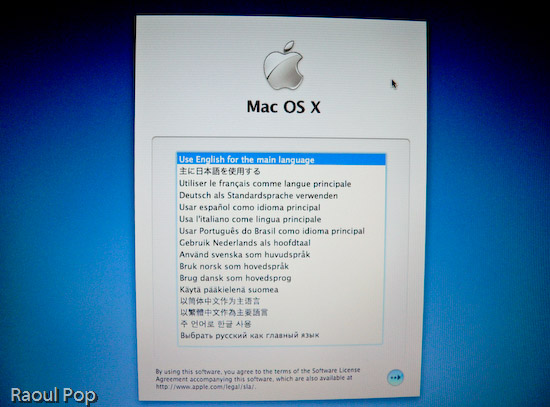
MacBook language selection screen

MacBook welcome screen

Standard