How To

Discerning among LCD monitors

I’ve been looking at various LCD monitors lately, because I’d like to get one for my laptop. Truth be told, I’m more confused than when I started. There’s a dizzying array of prices among various brands, in the same size display, and not a whole lot of explanation as to why that is. Sure, every company touts their higher contrast ratio, higher brightness, more resolution, more inputs, etc., but that still doesn’t explain why the prices differ so much.

I’m looking at 20-22″ LCD monitors, and in that range, I’ve managed to find monitors in three price groups:

  • Around $250, I can buy this Sceptre or or X2gen (brands I haven’t heard of). I can also find similar prices from brands like ViewSonic, Samsung, Dell and HP.
  • From $600-900, I can get the 20″ or 23″ Apple Cinema Displays. The thing is, other than the distinctive design, the specs are actually less impressive than those of the much less expensive monitors in the first group.
  • Then, of course, there are brands like LaCie, with their professional LCD displays that start [*cough*] around $1,800 for the sizes I’m interested in.

So I did a lot of searching, and found out that manufacturers can fake the contrast and brightness measurements, so even though everyone touts their higher specs, you can’t trust them. Many of the monitors also don’t list a measurement that’s harder to fake, the gray-to-gray response time. I wanted to compare apples to Apples, if you will.

After a little more spec comparison, I found that the top of the line LaCie monitors list a spec that no one else seems to list, and that is the “gamma correction”. For example, their 321 LCD has 12-bit gamma correction. Less expensive models have 10-bit gamma correction. And that got me thinking: if, at least for LaCie, the price is proportional to the gamma correction bit depth, a higher spec there might be a good thing. But the less expensive monitors didn’t list it, and Apple didn’t list it either. What was I to do?

I gave Apple a call. After about 15 minutes of alternate talking and holding on the line for a sales rep while he consulted with the engineers, I got nothing but smoke and mirrors. Not that I think it was intended. I just think the rep didn’t have the info. He didn’t know what gamma correction was, and the bit depth of the gamma correction on Apple’s displays isn’t listed anywhere in the specs. The person he spoke with in engineering either didn’t know this or didn’t feel like sharing that bit of data. So the rep kept coming back to me with 16.7 million colors, which works out to 24-bit color.

I kept thinking, that can’t be right! Here LaCie is charging over $1,800 dollars for 12-bit gamma correction and Apple claims 24-bit on that spec at less than half that price? They would be an absolute bargain if that were true! But it’s not, at least not for that spec. I don’t doubt the Apple displays can show 24-bit color overall. But I still don’t know whether their gamma correction engine outputs 8-bit (the normal spec), 10-bit (the higher end), or 12-bit (the really high end), and this determines how well that 24-bit color gets displayed. This is important because the higher the bit depth, the smoother the color is. I’m a photographer, and I shoot in RAW. The files I get are either 12-bit or 16-bit color, and I can see some dithering in color tones when I look at the photos on my laptop’s screen. That means that even though my video card can display 32-bit color, my laptop’s effective display is less than 16-bit.

I have a feeling that given their price range, the Apple Cinema Displays are either 8-bit or 10-bit when it comes to gamma correction. If they’re 8-bit, then they’re overpriced given their specs, and they’re charging hundreds more based purely on design. If they’re 10-bit, that’s interesting, and it warrants a closer look.

So, as you can see, I’ve gotten nowhere. I’d love to have a reason to buy an Apple Cinema Display, but it’s got to be a good reason, based on facts, not sales fluff. I like Apple but I’m not a fanboy. At this point in time, I can’t see why I should spend more than $1,000 on an external monitor, so that rules out the LaCie LCDs and the other high end displays. That means if Apple can’t offer me a compelling reason for their higher price, I’ll go with one of the less expensive monitors and see how things work out. If and when I do, I’ll blog about it, so stay tuned. And by all means, if you’ve got some ideas about this, do let me know.

Standard
Reviews

Camera review: Olympus EVOLT E-500 DSLR

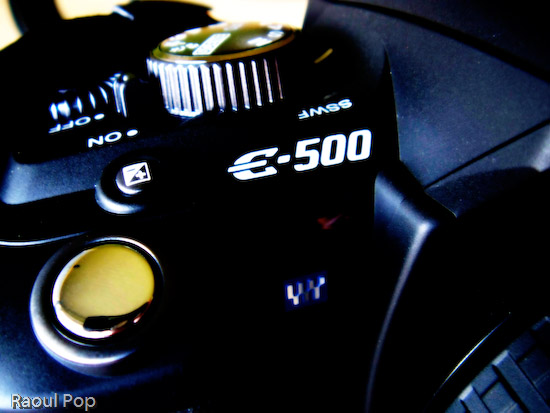
For the past month, I’ve been testing out the E-500 DSLR from Olympus. It’s an entry-level DSLR with impressive specs for its class. These past 30 days or so, it has been my primary camera. It’s been everywhere with me, every day. I’ve used it in all sorts of conditions (indoors, outdoors, daylight, nights, cold, warm, wet and dry), and I’ve taken over 3,000 photos with it. So what I’m about to write carries a bit of weight — at least the sort conferred by such use. After you read my review, you’ll get to see sample photographs that I took with the camera. They’re at the end, so you may jump there right now if you’d like.

E-500

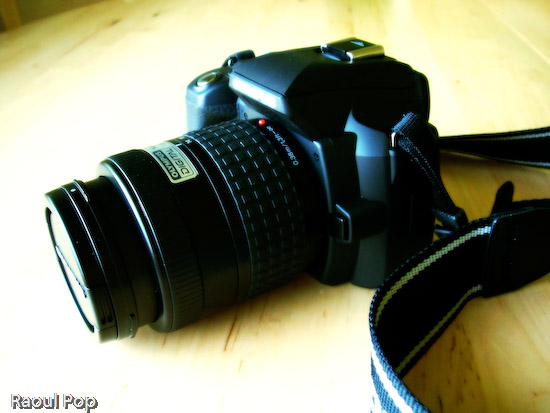
The E-500 feels good in the hand. It’s light (about 435 grams for the body, plus another 75-100 grams or so for the lens). It has a great grip. It just feels right when I hold it in my hand. One of my complaints with the Canon Rebel XT, another DSLR in the same class as the E-500, is that it’s too small. It feels like it was made for a woman’s hand. I can’t quite grip it right. Not so with the E-500.

EVOLT E-500 DSLR (top view)

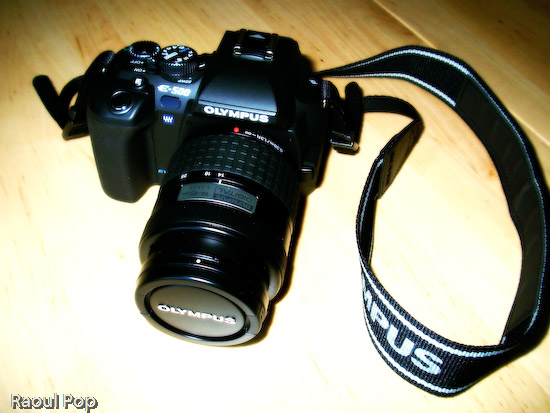
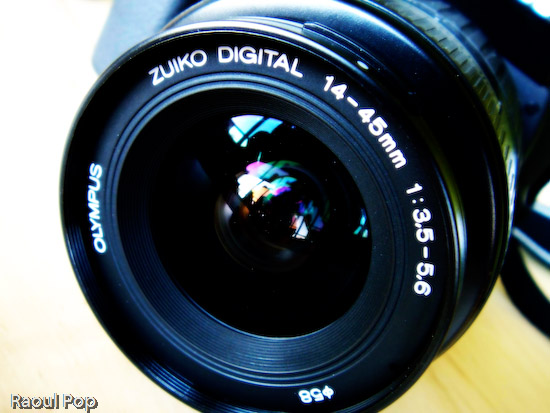
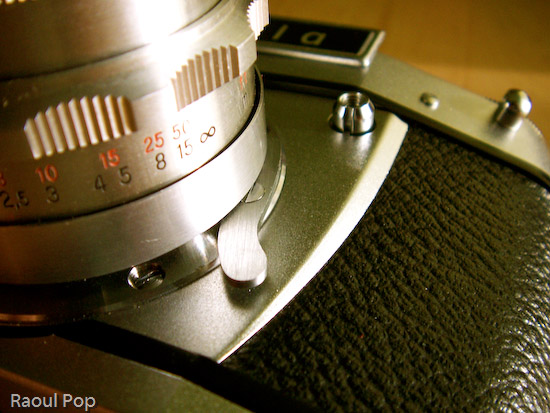
My test model came with a 14-45mm, 1:3.5-5.6 kit lens. Given the sensor size and optics, this is equivalent to a 28-90mm lens on the 35mm system. While the aperture specs of the lens aren’t impressive, its optics and construction are. I’ve held other kit lenses in my hand, and they felt pretty flimsy. This one doesn’t. It has weight to it, and it’s solid. The mount is made of metal, and it feels like a quality product over all. Yes, in order to make the lens affordable, Olympus needed to pare down the specs, but they didn’t skimp on materials and optics, and I’m very glad for that.

Camera body and lens

Zuiko digital lens

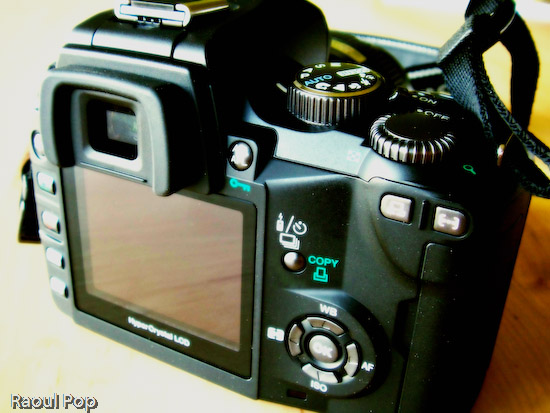
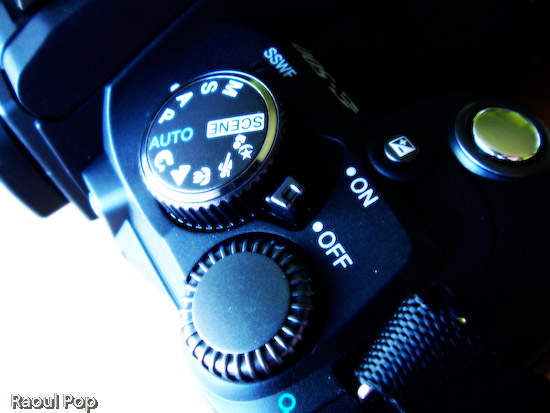
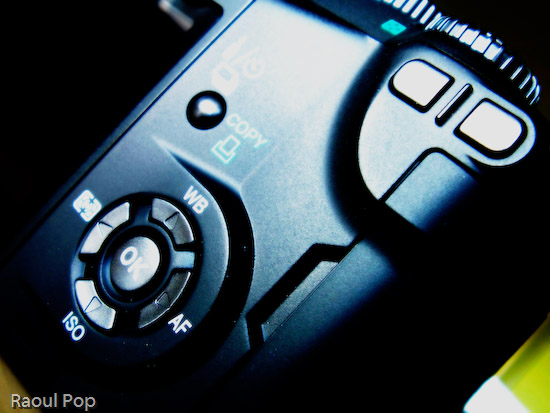
The controls of the camera are easy to use and well-organized. It’s interesting to see how each camera manufacturer designs the interface they think is best for their cameras. Olympus chose to group most of the controls within easy reach of the right hand fingers. There is a main mode dial which can be rotated with the thumb and index finger, and a control dial right next to it that can be rotated with the thumb. Once I got used to the controls, and it took very little time, everything I needed to use frequently could be adjusted easily, and I liked that. My only gripe here is with the White Balance button, which I think is a bit close to the thumb rest and can be accidentally pressed as the camera is held. But as I used the E-500 more, my thumb learned to rest away from this button and things were fine. Incidentally, it would have been nice if the thumb rest were rubberized.

Mode and control dials

WB, AF, ISO and Metering controls

The user manual is great. I like the way the E-500 manual is laid out. It’s organized by sections and indexed well, so I can refer to specific topics right away. Things are also clearly explained, and I know all too well that’s not always the case with other user manuals.

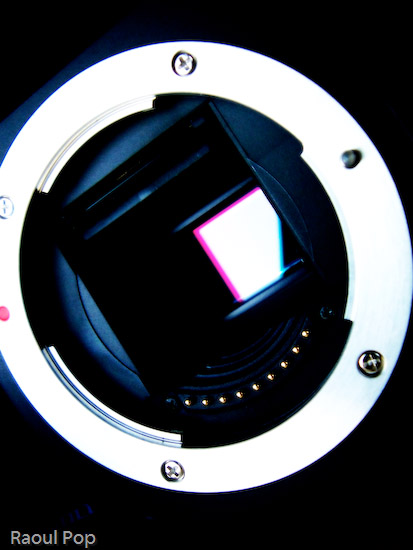
The E-500 has some surprising features for an entry-level DSLR. I was impressed most of all with the supersonic wave filter (SSWF) sensor cleaning. Olympus was the first company to introduce this feature on its DSLRs a couple of years ago, and other companies such as Sony, Pentax and Canon have only more recently followed suit. The SSWF uses ultrasonic vibrations to shake dust off the sensor every time the camera is turned on. This reduces (and may even eliminate) the need to to clean the sensor, though your mileage may vary. It all depends on how much you’ll switch lenses, and how careful you are when you do it. In case you’re worried, the camera has a sensor-cleaning mode that lets you gain access to the sensor for manual cleanings.

Camera and lens mount

I was pleased to see the camera had four bracketing modes: AE (exposure), WB (white balance), MF (manual focus) and flash. These modes let you vary (or bracket, hence their names) those characteristics when used. For example, AE bracketing will let you take three shots with varying exposures (dark, medium, light). You then choose the best one and delete or keep the others, as you wish. The other modes work the same, and they vary the other characteristics. This is useful for those situations when you’re not quite sure what will give you the best shot possible. Realize though that flash bracketing can get to be pretty annoying for your subjects if they’re people. No one likes being flashed repeatedly. So find the flash intensity that works, do it quickly, then stick with it.

The 2.5-inch LCD screen was a great addition to the E-500. It’s clear, big and displays photos very well, and for its time (2005), fairly unique. Olympus also spent time organizing the menu functions well, and after a short learning period, things are easy to find. The viewfinder is a different story, at least as far as I’m concerned. I found the display of the aperture and shutter information to be hard to read, because it was off to the side instead of at the bottom of the shot. Apparently, I’m not the only one to notice that shortcoming. I also noticed the eyecup (the little rubber piece around the viewfinder) was a little shallow for my eyes, and ambient light distracted me from my shots, particularly in daylight. Thankfully, I see that Olympus offers a bigger eyecup for folks like me.

LCD and other controls

The battery life was surprisingly good. I don’t know if my experience was a fluke, but I managed to get over 1,600 shots on a single charge, and over 400 of those shots were with flash. That’s impressive! I should clarify that on the first charge, I got only 350 shots. But then first charges on all rechargeable batteries don’t last that long. So after I drained the battery that first time and recharged it, the second charge lasted for over 1,600 photographs. And when the camera refused to take more shots because of the depleted battery, I turned it off, then back on, and squeezed more shots. I did this four times, and got an additional 30 shots with a battery that was supposed to be dead. Again, I don’t know if my experience was the norm, but if so, this would be a fantastic selling point. Yet I don’t see battery life mentioned anywhere in the Olympus literature or on their website.

I tried out the Olympus Master software included with the camera, and was less than impressed with its features. I stuck with Adobe Bridge and Photoshop for post-processing my photos thereafter. Incidentally, I wouldn’t advise you to download the photos from the camera to your computer by connecting the two with a USB cable. (This is true for just about any recent DSLR, by the way.) It’ll take forever, particularly if you shoot in RAW format. Because camera manufacturers haven’t updated their USB connectivity hardware, the most you’ll get is the equivalent of USB 1.1 speed. Get a card reader and use that instead. The speeds will be USB 2.0, and you’ll be happy.

I was disappointed to find that the camera’s ISO range only went from 100-400 natively. Yes, the sensitivity can be boosted up to 1600 in whole steps or 1/3 steps, but still, given that other cameras in its class (such as the Nikon D50 and Canon Rebel XT) offer native ISO up to 1600, the E-500 should do so as well. I should note that two noise reduction features are included on the camera. They are useful when using higher ISO settings. One is a noise filter that can be coupled with the ISO boost and works automatically, and another is a noise reduction feature that can be turned on and off as needed, regardless of the ISO setting. Although the noise filter did a good job at 400 and 800 ISO, it couldn’t help much at 1600. The noise reduction feature also wasn’t very helpful unless one used it with long exposures.

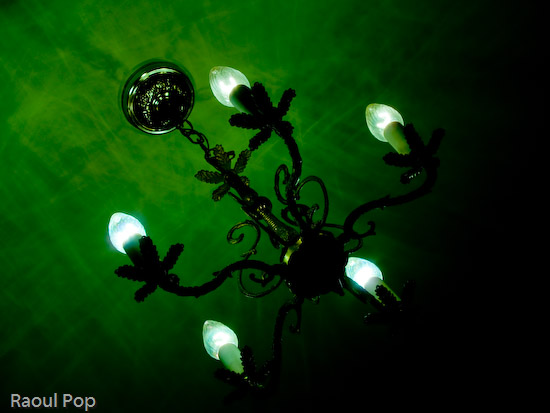
Time and time again, as I used the E-500, I found myself wishing for better low-light capability. I tend to take lots of shots in low light conditions, and I prefer not to use the flash, because it’s either disruptive or annoying. When I took photos of people, I found my friends covering their eyes or squinting. And of course, it’s not practical or desired to use the flash when doing street photography at night. Flash would ruin a neon sign, and would shed a harsh light on details best lit by ambient light. Maybe I’m just spoiled in wanting to do handheld night or low-light photography, but those are my expectations.

The autofocus works well and is fast given that it’s only a 3-point AF. That’s important because manual focus is too tedious to use by itself, unless you’re dealing with subjects that won’t move for some time. I also found that the focus ring on the kit Zuiko lens was best used for fine focus adjustments, not for everyday focusing tasks. There were, however, some occasions when the AF didn’t quite work, including daylight conditions. I was never quite sure why, but those times were few and far between. Autofocus was slower in low light, and at times, undesirably slow, by a factor of 3-7x when compared to daylight AF speeds. On the E-500, there is an option to use the flash as an autofocus illuminator (as on other DSLRs), but I didn’t find it useful. It didn’t cut down on the autofocus time at all, and only introduced a strobe-like light that preceded the shots and annoyed my friends even more. So I’d recommend that you plan for long AF times in low ambient light, and realize that you’re going to miss some photo ops because of it.

On the other hand, the built-in flash is surprisingly strong, and that’s good news for those occasions when it does need to be used. I was shocked to see it that it filled a room of 20’x20′ and provided ample light for most shots. Like other reviewers, I was surprised to see that I could not get red eyes in my subjects even if I wanted to, and even when not using the red-eye preflash.

The E-500 has a nice calendar feature built into the photo review mode that lets you view the shots you took on a particular day. I liked that a lot. I also found myself wishing for a bulk delete feature for a particular day. Here’s the scenario: say you take lots of shots, then download them to your computer, and you take more shots the next day, without realizing that you haven’t deleted the other shots first. With a bulk delete feature, you can select all of the shots from the previous day and delete them en masse, without needing to go through and selecting each by hand. But this is just wishful thinking and not a vital feature on an entry-level DSLR.

For those who need it, the E-500 has a mirror lock function that’s called Anti-Shock in the camera menu. It allows you to eliminate the minor vibration caused by the mirror movement as you press the shutter, and it’s useful for macro or night photography.

A surprising feature on this camera was the presence of two custom reset modes. Ever used a car where you could set your seat and steering positions, plus other settings, then store them? This is the same concept. You can choose to adjust certain camera functions, then store them into one of the custom resets. When you want to use those settings, you simply select that reset mode from the menu, and all other settings but yours are wiped out. This can prove useful for day/night photography, when you’d want features like the noise reduction turned off or on, respectively. Or for multiple users of the same camera.

Even though the camera is not dust and splash proof, I can tell you from direct experience that it is a sturdy camera that will work in some pretty harsh conditions. The stated operating temperature of the E-500 is supposed to be 32-100 degrees Fahrenheit. I’ve used it in temperatures as low as 10 degrees Fahrenheit, and it worked great. The user manual says the transitions between temperatures and humidities shouldn’t be sudden. Well, they were sudden, and the lenses didn’t fog up. They worked fine, and what’s more, the camera worked fine. I used it once while it was snowing. Snow accumulated on the camera and lens body, and when I got inside, it melted, leaving drops of water everywhere. I wiped them off, and the camera continued to work just great. I didn’t have a chance to use the camera in dusty or excessively warm conditions, but I certainly put it through its paces here in Washington, DC, and it hardly missed a beat.

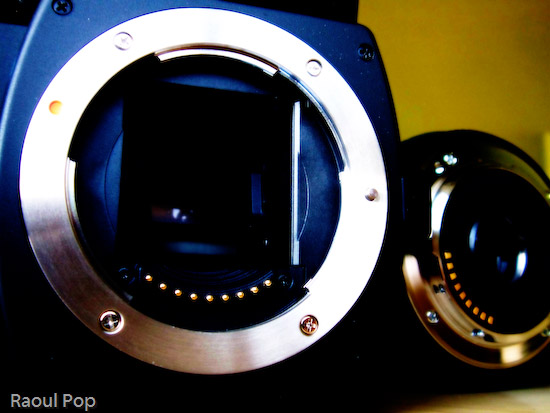
I want to talk about the four-thirds standard for a bit (also see the Wikipedia entry for this). The E-500 is built on this standard, so a little background information will help you understand the differences between it and other DSLRs a little better.

As you may know if you own a DSLR, once you’ve bought it and invested in the various accoutrements that go along with that camera body, you’re stuck with the brand, so to speak. You’ve spent thousands of dollars on extra lenses, and if you want to switch to another brand, you’ll need to spend money not only on a new camera body, but on another set of lenses as well. That’s not fun, and most people can’t afford to switch brands, especially if they’ve invested heavily in lenses and other camera accessories like speedlights, batteries, etc. Hence, camera manufacturers are pretty happy (financially speaking) that lens lines aren’t inter-compatible (unless you use special mounts that may or may not work or give you the same image quality), because they have long-term, guaranteed customers.

Olympus came up with the four-thirds standard so they could make lenses that are interchangeable, and can be used by any other camera back built on the four-thirds standard, and they wanted to design them specifically for use in digital photography. But according to Wikipedia, the four-thirds standard isn’t entirely an open standard:

Four Thirds is not an Open Standard, however, as it does not meet the “allowing anyone to use” criteria commonly accepted as the definition of an open standard. It also does not meet the criteria that the standard itself and any associated intellectual property be available on a Reasonable And Non-Discriminatory basis.

So while the standard is good, Olympus needs to be more open about its use in the industry. There also seems to be a drawback. According to Wikipedia, even though the smaller sensor size allows for smaller and lighter lenses, it’s also to blame for the high noise I experienced when taking shots at higher ISO settings. Apparently the sensor just isn’t big enough to function well in low light. Whether that’s accurate, or whether this issue can be solved through creative engineering, I don’t know. What I do know is that I’m not happy with the performance of the E-500 in low light, particularly when shooting without flash, at shutter speeds above 1/25 seconds. But again, my needs are probably more stringent than those of the entry-level DSLR user.

4:3 CCD sensor

This next point is entirely subjective, but I find the 4:3 aspect of the photographs I took with the E-500 more pleasing to the eye than the more prevalent 3:2 aspect found in most photographs. (The 3:2 aspect carries over from film photography.) Have a look at your computer monitor or TV. Chances are (unless you have a wide screen monitor or TV) that you’ve been looking at images made for the 4:3 standard for quite some time, and you didn’t even know it. This aspect ratio has been in use in that medium for decades.

The 3:2 aspect helps the photographer frame a landscape shot a little better, because it’s wider, but when I look at a vertical shot taken with that aspect, it seems as if one side is lopped off. As I said, this is entirely subjective, so I invite you to make up your own minds about it. I ask you to leave brand loyalty aside, and to judge which aspect looks better in each mode. I prefer 4:3 in portrait mode, and I’m on the fence between 4:3 and 3:2 in landscape mode.

So, given all of this camera’s features, capabilities and limitations, does it allow its user to take good photographs? I think so. I was pleased with the color reproduction and image quality. And I’m willing to let you judge this for yourselves as well. As I mentioned, I took over 3,000 photos with the camera, and I posted several of them below, at the end of my review.

EVOLT E-500 DSLR (side view)

Enough talking, let’s wrap things up. Overall, the E-500 is a solid DSLR. It’s sturdy, has a good grip, it’s got good battery life, and the image quality is great. I like the 4:3 aspect of the photos, and I like the fact that the lenses and body are interchangeable with other brands, although currently only Olympus, Panasonic and Leica make DSLRs and lenses based on the standard. That’s about five camera backs altogether, at widely varying prices, so there’s not a whole lot of choice, although that could change in the future. The sensor’s performance in low light is not up to my expectations, and that could or could not be related to the four-thirds standard. Time will tell. I think that it’s a bargain for its class. The current market price hovers around $650 for the body and two lenses, the one I tested and another, the 40-150mm f/3.5-4.5 zoom. I hear that’s a great lens. Bottom line: if I weren’t so bent on being able to use it in low light situations, I’d get one myself.

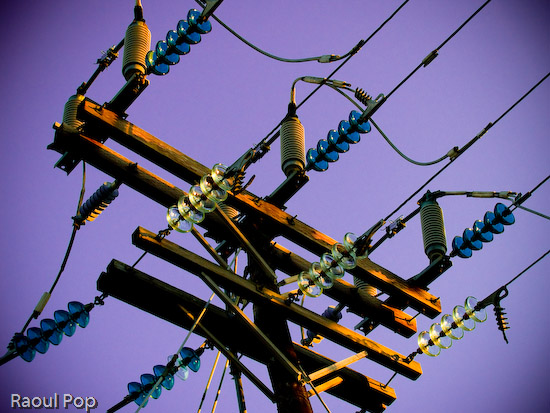
Here are the sample photographs, as mentioned above.

Valentine for my sweetie

Musing on a fragile life

Those dark shadows that haunt us

Life, reflected

I have this idea

1640 at sunrise

Chat by the country fence

Solitude is peaceful

Waterpainting

The three

Brothers in arms

Green power

Blue mountain

Urge to splurge

Standard
Reviews

The Exakta EXA Ia analog camera

I got a fantastic present for Christmas from close friends of ours: an Ihagee Exakta EXA Ia analog camera.

Exakta in original box

It apparently sat unused in a shop in Mexico since its factory production days back in the late 60s, still in the original box, waiting for someone to purchase it. It came with a whole kit which included a plastic/leather camera case, camera, lens, lens extension kit (for macro shots), two prisms/viewfinders (one normal, one 90-degree), a mechanical timer, a light meter and a ton of lens filters.

Camera case

You can watch a video review below or here, or scroll past it to see the photos and read my review.

The camera kit also included the original instruction manual (in Spanish). Since I don’t speak Spanish, I had to figure out the camera on my own. Here are the specs as best I can figure them out:

  • Exakta EXA Ia body, fully manual, 1964-1968 production (approximated the year based on the serial number)
  • Analog flash sync for bulbs or electronic speedlights
  • Shutter speeds from 1/175 to 1/30 s and Bulb mode
  • DIN sensitivity from 12-30 and ASA from 50-800, including b&w negatives; the list goes as follows: 12, 15, 18, 21, 24, 27, 30 (DIN) and 50, 100, 200, 400, 800 (ASA/ISO), plus C and NC.
  • Exposure counter can accommodate films of up to 36 exposures
  • Shutter release features threads for attachment of mechanical timer (included)
  • Shutter lock
  • Rewind release button and pop-up rewind knob
  • Carl Zeiss Jena lens, f2.8/22 50mm, focusing distance 0.6m to infinity
  • Lens extension barrel for macro shots; barrel disassembles into multiple sections to allow for varying focusing distances and macro apertures

Camera body and lens

If there’s one expression I could use to describe this camera, it’s ease of use. Once I figured out the controls, it turned out to be a joy to play with them. The focus control is so well made, that at close distances, it turns slower, allowing for some real precise focusing. The aperture adjustment clicks, letting me know when I’ve reached a proper setting. The film advancement lever’s travel is short and also clicks reassuringly. The exposure countdown dial clicks as well. I guess I like controls that click, but it’s the sort of feedback that encourages good use. It also gives the impression of something that’s very well-made.

Camera in case

EXA Ia (front view)

It’s quite easy to take the lens off, and I love the fact that the extension barrel breaks down into multiple sections. It lets me vary the focusing length and also changes the perceived aperture of the lens, allowing me to get closer or further away from the object.

EXA Ia (top view)

The interchangeable viewfinders are so much fun! I can just slide them out and use a different one, allowing me to customize the way I look at my photographic subjects. Both viewfinders allow me to see right through the lens (TTL), so I get a direct preview of the lighting conditions. When I adjust the aperture, the aperture ring closes or opens, and I can see right through the viewfinder how much light comes through the lens. Of course, as I found out with my first roll of film, you’d better know exactly what shutter speed you’re using, or else the photos aren’t going to come out as you saw them through the lens!

Viewfinder

Rangefinder

Judging from the instruction manual, this camera could be had with some pretty cool accessories when it came out: a lens hood to reduce glare, a tele lens, and a Stereflex Jena viewfinder and lens, that took 3D shots. It could also use a vertical grip and electronic flash, powered by a strap-held, external Braun battery. Pretty nifty! Just goes to show that a great gift doesn’t have to be new!

Macro rings

I need to point out (for those of you that have only used digital cameras) that working with a manual analog camera (especially one as old as this) is a _______ experience. It’s up to you to fill in that blank. Depending on your skill level and willingness to learn new things, it may be an amazing experience, or a completely frustrating one. If you’re only used to point and shoot, there is no such thing on a manual camera. Instead, you have what you see below.

Shutter speed selection

Exposure and ISO indicator

You have to manually adjust the camera settings like aperture and shutter speed based on ambient light. You can guesstimate and live with the results, or use a light meter like this one. If you enjoy using burst mode (where you can shoot 3 or more photos in rapid sequence), you can forget it about it. You have to manually advance the film by cranking on a lever after each photo. Autofocus? Forget about it! Auto-flash? No such thing. You’ll need to manually adjust the power of the flash/strobe based on GN (Guide Number) calculations.

Lens release lever

This may sound discouraging to novices, but believe me, it’s a fantastic learning experience. If you master the use of a manual analog camera, you’ll approach photography with a brand new perspective. The quality of your photos will improve tremendously, and you’ll get real joy out of using your camera, be it analog or digital. Plus, there are other fringe benefits, such as not needing to use batteries (manual cameras don’t need them) and of course, my favorite, the opportunity to pool with a really, really cool gadget. Once you hold one of these cameras in your hand and get to appreciate the fine engineering and craftmanship that went into making it, you’ll know you’ve got something pretty unique, something you don’t see these days, when cameras are made by robots. There’s something captivating about using metal levers and gears and getting real tactile feedback from your camera. I get a really nice feeling when I press the shutter and a mechanical part actually moves inside. It’s not a circuit, it’s not a sensor — it’s a real piece of metal. Now that’s nice!

EXA Ia

Camera itself

Updated 12/25/12: I no longer have the camera, please stop asking for the user manual. Thanks! 

Standard
Reviews

Camera preview: Sigma SD14 DSLR

I’m intrigued by the new DSLR from Sigma, the SD14. It’s a 14-megapixel camera that uses a direct image sensor capable of detecting red, green and blue light at every pixel. The product brochure states:

The elements of this 14-megapixel sensor are arranged in three colorsensing layers, comparable to the three layers of emulsion in photographic film.”

Sure enough, the photos they show on their site and in their brochures are stunning. The level of detail and sharpness are fantastic. Were they taken with the SD14? I don’t know, but my interest is certainly piqued. The camera isn’t in stores yet. It’s going to launch early this year. It looks like the retail price will be around $1,600. In this review, I want to have a closer look at the specs of this beautiful camera, and see how they compare to other mid-level DSLRs. See my analysis below.

➡ Updated 10/29/07: Although the advertised resolution for this camera is 14 megapixels, and additively speaking, it’s correct, the actual resolution is about 5 megapixels. That’s because each sensor layer (there are three) has 4.7 megapixels. Added together, that makes 14 megapixels, but we have to remember that the layers are stacked on top of each other. Even though the pixel data corresponds to 14 megapixels, the printable resolution is still only around 5 megapixels, which is markedly lower than that offered by other DSLRs in that same price range. As some people have pointed out, you can safely increase the resolution of the photos in post-processing, but the camera will still only give you 5 megapixels per photo when you press the shutter button.


Sigma SD14 DSLR

First and foremost, there’s the sensor. It’s a newly developed Foveon X3. Here’s what Foveon says about their new sensor:

Similar to the layers of chemical emulsion used in color film, Foveon X3 image sensors have three layers of pixels. The layers of pixels are embedded in silicon to take advantage of the fact that red, green, and blue light penetrate silicon to different depths – forming the first and only image sensor that captures full color at every point in the captured image.”

So it looks like this sensor is groundbreaking, much more so than any other currently on the market. But is it unique to Sigma? Isn’t it found in Canon and Nikon cameras? We need look no further than the Foveon site, which lists the cameras currently using this sensor as the Sigma SD9, Sigma SD10, Polaroid x530, Hanvision HVDUO-5M and Hanvision HVDUO-10M.

It turns out the Sigma SD14 not only uses a pretty unique sensor, but it uses the latest and greatest version as well, the Fx17-78-F13D, which isn’t yet used in any other camera on the market. As you can see, none of the other cameras that use Foveon can boast 14-megapixels. It’s also reassuring to know this is a third generation sensor, so most of the kinks should have been worked out by now.

Furthemore, it looks like just about any camera on the market that uses regular sensors is inferior to the Sigma, simply because of the Foveon sensor’s capability to reproduce color more faithfully. Instead of having to manipulate the image through computations in order to render proper color, the Sigma can just rely on natural color capture through the Foveon sensor, which I’m pretty sure is a great advantage if it works as advertised.

From what I’ve seen in the brochures, I like the controls. As Sigma says, they’ve simplified them and eliminated extraneous functions. All I see on the mode dial is P (point and shoot), A (aperture priority), S (shutter priority) and M (full manual). The on/off dial turns easily for burst, timer and long exposure settings. I like the shape and size of the camera. The hold is rubberized, and the camera’s exterior is clean and simple.

The simplicity of design is exemplified in the accessories as well. There aren’t a ridiculous number of them. You’ve got the nice battery pack that holds two batteries and screws onto the tripod mount, a remote and cable release, two flash guns, one more advanced yet both featuring a bounce head, and an AC adapter. The standard accessories are what one would expect with a camera: battery, charger, USB cable, strap, caps, software and the product manual.

The built-in flash is a good idea. While an external flash is better, a built-in flash is good for fill-in light during daytime shots, and will also do acceptably for indoor shots when nothing else is available.

As I talk about the rest of the SD14’s specs, I’m going to compare it with Canon EOS 5D and the Nikon D200, which are my favorite DSLRs and are also cameras that have set new standards in the field of digital photography. (I own a Canon 5D)

The SD14 is supplied by default with a dust protector that is “put in place with a single action“. I’m not quite sure what that means, but I assume a button on the camera or in the central menu controls it. This is good. Anything that camera manufacturers can do to minimize dust gathering on the sensor is a good thing. It’s interesting that the camera only has a 5-point distance measurement for autofocus. Certainly Sigma has plenty of experience with AF, having designed lenses for a long time. But the Canon EOS 5D has a 9-point AF with 6 supplemental points, while the Nikon D200 has an 11-area AF. Are 5 points enough? I guess we’ll find out when the SD14 comes to the market.

SD14’s pentaprism is rated at 98%x98%, while the Canon has theirs at 96%x96%. The Nikon D200 doesn’t list this info in their specs, though I’d venture to guess they’re in the ballpark. The LCD monitor is at 2.5 inches and 150,000 pixels, which is the same size as on the Canon 5D and Nikon D200, but lower in resolution than theirs, which are both rated at 230,000 pixels. Coverage for the SD14 and 5D is listed at 100%, while it’s only at 95% for the Nikon. Most of the other specs match the EOS 5D and Nikon D200, so I’ll only note the differences.

The SD14’s ISO sensitivity only goes up to 800, although 1600 is listed in Extended Mode. Both the Canon 5D and Nikon D200 go up to ISO 1600, and the 5D even goes up to 3200 in Expansion Mode, which I assume is similar to the SD14’s Extended Mode. I wonder why the SD14 doesn’t go up to 1600 ISO naturally, and my guess is that it’s a limitation of this generation of Foveon sensors. The sensitivity will likely be extended with the next-generation sensors. I also have to wonder how an ISO800 photo on the SD14 compares to an ISO800 photo on the Canon or Nikon. How does it fare in low light? Will there be noise, or will the photos come out clear and beautiful, like they should? Even better, will its light sensitivity trump that of the Canon and Nikon, even if they do go up to 1600? I’d love to find out for myself.

I also need to point out that the top shutter speed, at 1/4000th of a second, is also only half that of the 5D or D200, which both go up to 1/8000th of a second. I’d venture to guess the sensor is the limiting factor here as well, though I can’t elaborate on that. This also promises to be the compensating factor. If the image quality is as good as promised, I won’t care that it can’t go up to 1/8000th of a second.

Since geotagging photos has become so mainstream nowadays, it would have been nice to see some sort of GPS functionality on the SD14, perhaps like the one on the Nikon D200, which allows the photographer to connect a GPS device to the camera and record coordinates to the EXIF data for every photo.

The dimensions and weight of the SD14 are similar to those of the EOS 5D and Nikon D200. The SD14 is 144mm wide, slightly less than the D200 at 147mm or the EOS 5D at 152mm. It’s also slightly shorter, at 107.3mm, than the D200 and EOS 5D, both of which are 113mm tall. It is, however, thicker, which I like, because there’s more to hold and that tends to stabilize the shots. It’s 80.5 mm deep, whereas the D200 is 74mm and the EOS 5D is 75mm. It’s also lighter than the other two. At 700g for the body, it’s 130 grams lighter than the D200, and 110 grams lighter than the EOS 5D. I welcome that, because when you add an external flash or battery pack to a serious DSLR, it gets so heavy you might as well use it for weightlifting. Any weight that gets trimmed off is okay by me.

Battery life is somewhat lower than that of either the EOS 5D and the Nikon D200. The SD14 can take approximately 500 shots on a single battery charge at normal temperatures, and 400 shots at near zero-degree temperatures. The EOS 5D can take approximately 800 and 400 shots at normal and low temperatures, respectively. The Nikon D200 can take up to 1,800 shots per charge at normal operating temperatures; no stats are quoted for low temperatures on their site. Again, to be fair, I think this has to do with the Foveon sensor. Instead of a single layer that must be kept charged, it has three separate layers. I haven’t dug deeply into the Foveon X3 specs, but I gather the sensor probably uses more power than a regular single-layer sensor. (Someone correct me if I’m wrong on this.)

It looks like the SD14 is a natural, unstrained progression for Sigma. After making lenses, then film SLRs, then 1st and 2nd generation DSLRs using the Foveon sensor, they’ve graduated to the SD14, which looks to be a beauty of a camera. If you’d like more information about the SD14, you can access the brochures easily. Click on each link to download a PDF in English: Concept, Product and Major Specifications, or just visit the Sigma SD14 website.

To sum up, the Sigma SD14’s main strength is its Foveon X3 sensor. I’m impressed with this camera, and plan on having a closer look at it as soon as I can get my hands on one.

Standard
Reviews

Giving thanks for innovative technology

This year, there were a handful of technology/software products that truly changed my life, and I wanted to take a little time to thank their makers publicly.

WordPress
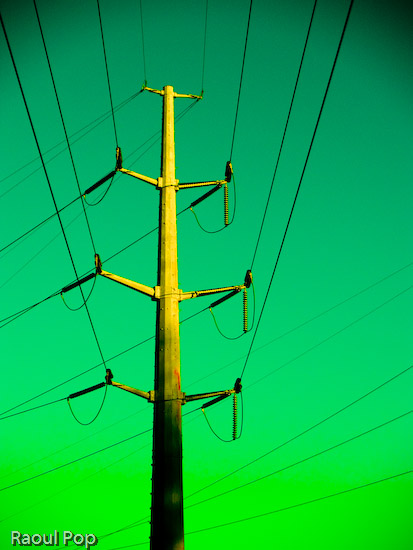
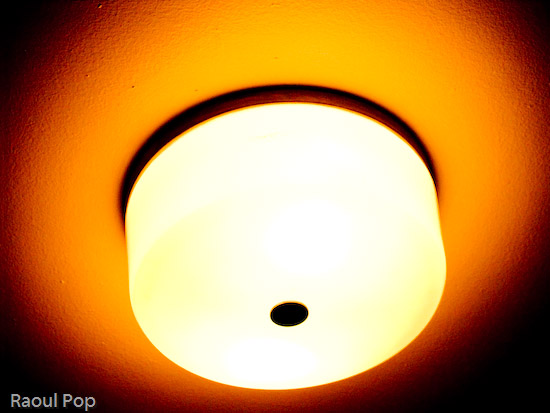
The first, and most important, is WordPress. Without it, this site wouldn’t exist, because I wouldn’t have had the opportunity to combine the content from my various other sites into a single, easy to use collection. The WordPress motto — “a state of the art semantic personal publishing platform” — couldn’t be truer, and I’m here to attest to that. It was easy to combine content from my previous Blogger blog and two of my personal sites into what I now call ComeAcross, and it is easy, every day, to publish more content that may benefit others. That’s really the purpose of ComeAcross — sharing what I think is useful information with others — and WordPress made it possible.

Updated 1/1/08: I’ve since merged ComeAcross into Raoul Pop, which is the site you’re on right now.

GmailGmail has been another wonderful product. Although I started using it in 2005, it was this year that I really started to appreciate its features, ease of use, open standards and fantastic spam filter. The account size is more than generous, the ads are not intrusive, I love being able to label my messages, and the search feature is right on. On top of that, I can retrieve copies of my messages through the POP protocol (that’s Pop, as in my last name :-)), and make them searchable on my iMac through Spotlight.

Loudblog
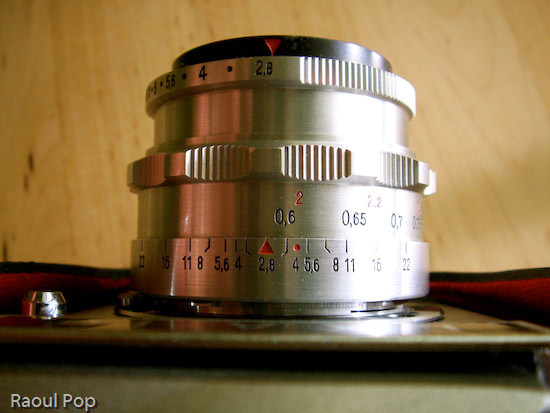
Finally, I’m grateful for Loudblog. It’s an open-source podcasting platform that’s fast, easy to install, and easy to use. I use it to publish my three podcasts: ComeAcross and Dignoscentia (in English and Romanian). I have to apologize because I haven’t had time to publish any podcasts recently, but that doesn’t mean I don’t appreciate how easy Loudblog made the publishing of podcasts for me.

So there you have it, three products that have made it incredibly easier for me to publish content and communicate this year. I’m truly thankful for them, and who knows, maybe they’ll help you as well!

Standard