Reviews

Lens review: Canon EF 100-400mm f/4.5-5.6L IS USM Zoom

Canon EF 100-400mm f/4.5-5.6L IS Zoom Lens

I had a chance to play with Canon’s affordable 100-400mm L series zoom last week. I rented it for a day from Penn Camera at Tyson’s Corner, mounted it on my 5D, and ran out to chase wildlife as soon as I got home from work. As the sun began to set, I took it up to the roof, set it on my tripod, and took photos of the horizon. In the morning, I snuck out onto the terrace at sunrise and got photos of that as well. All in all, I put the lens through its paces, shooting in daylight, dusk and dawn conditions, handheld and on a tripod. Even though I only used the lens for a day, albeit a pretty full one, I’m fairly comfortable with what I’m about to say.

Leap year for Mr. Chipmunk

Tree cover at sunset

The robin examines me

I liked it. The 100-400mm range is a versatile range, and the fact that you can get this L series lens at around $1,400 makes it a bargain. The lens isn’t as heavy as the 70-200mm L series zoom (which I played with today), and it’s fairly comfortable to hold for moderate amounts of time. It has a push-pull mechanism for extending the focal range, and that has its benefits and drawbacks. The benefit is that it does make it a bit easier to get through the large focal range a little faster. It’s also necessary in order to make the lens affordable. Push-pull lenses are cheaper to make than regular zooms, and require less glass as well, making them lighter.

Bethesda, as seen from the top of Grosvenor

Tuckerman Lane at sunset

➡ Updated 7/4/07: Erik Persson asked me two relevant questions this morning via private email. One is about how the autofocus handled, and the other was about whether autofocus is possible at all with an extender, or whether manual focus needs to be used. Autofocus was a bit slow, but that’s to be expected. This is a big zoom that can focus over a large distance. There is a focus limiter switch that decreases the focusing distance. You tell it to focus either from 1.8m to infinity or 6.5m to infinity. If you know you’re only going to shoot things farther away than 6.5m from you, then set the switch to that, and the autofocus will be a little faster. I’m not sure how to answer Eric’s second question. He suggests autofocus on EOS models up to the 5D is possible only up to f/5.6, and Mark 1D models can autofocus up to f/8.0. Not sure about that. I can only point you to this lens chart at Canon, which talks about the compatibility of the extenders with various lenses, and tells you what the expected aperture will be, and whether or not autofocus will be possible at all. I checked the specs for the 5D and 1Ds, and can’t find the upper f-stop limits for either models. Perhaps a call to Canon will clear this up, but it is the 4th of July today, and I doubt they’re open. Maybe one of you who has more information is willing to comment on this.

Beautiful swallow

Ugly one awaits

➡ Updated 7/6/07: Erik got back to me once more with a link to a review by The Digital Picture, where the AF to aperture specs are discussed. Furthermore, he provided a link to specs from Canon for the EOS 1v SLR (film camera) where the bit of information about being able to use AF with lenses that only open to f/8 is provided. So it looks like you’ll have to use manual focus if you stick extenders on the 100-400mm zoom. Thanks Erik! You know, you could just as well use the comments instead of sending me emails, but whatever works for you. 🙂

Moon rises over Grosvenor

Grosvenor rooflines

If you’ve been looking at the 400mm f/2.8L tele, which retails around $6,500, and you’re wondering why this lens is so inexpensive, you should know there is a reason for the price difference — but I doubt you needed me to tell you that. I stated the reasons in the paragraphs above, and they are: less glass, push-pull mechanism for the EF 100-400mm zoom lens. I haven’t tried out the 400mm tele myself yet, but I have a feeling it’s a great deal sharper and has more contrast than this lens.

Early morning contrails

Clarity

I think you can already guess what my two complaints are: the details are a bit soft when the photos are viewed at 100%, and the push-pull mechanism creates a sort of vacuum between the camera and the innermost lens. Every time I extended or contracted the lens, air rushed in or out through the crevices. I’m sure things are isolated pretty well and dust doesn’t get sucked in, but it feels odd, and it makes it difficult to stop at say, 300mm. It’s certainly a lot easier to either pull the lens all the way out to 400mm or push it all the way back in to 100mm. You know how they say that zoom lenses are soft at either ends of the focal range? Well, it would have been nice to have some sort of limiter switch that could let me stay between 110-390mm, or something like that. With the push-pull mechanism, it was hard to get the focal length just below or above its limit in order to avoid softness.

Wood duck advances

EF 100-400mm lens, wide

Having said all this, let me reassure you that this lens is a bargain at its price. If you’ve had your eye on it, get it. Realize you won’t get the results you might get with a more expensive tele, but you won’t pay through the nose for it either. This lens will definitely shine on cropped sensors like those found in the 30D and Rebel, where the effective focal range will be 160-640mm. How else can you get in the 600mm focal range without spending a ton of money? What’s more, with extenders like the 1.4x or the 2x, you can get up to 800mm on a full sensor or up to 1260mm on a cropped sensor. That’s pretty amazing!

Heron at Grosvenor Lake

Afternoon traipse

There are a few other things to keep in mind though. The maximum aperture at 400 mm is f/5.6, and that means you’ll need pretty good light in order to shoot handheld with it. If you stick an extender on it, the effective aperture will get even smaller, so you’ll either need serious daylight or a tripod. But, as I’ve already said, you get amazing range with this lens, and it’s inexpensive for an L series zoom. If you’re willing to live with the few issues I’ve outlined, then get it.

Many lives

Waterside

Buy the lens

Sun sets over Grosvenor

Standard
Reviews

Camera review: Canon EOS 30D DSLR

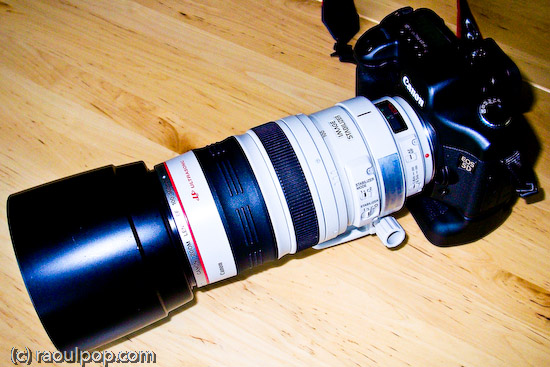
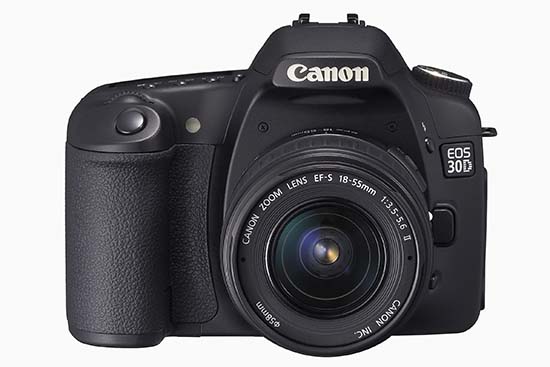
For the past month, I’ve been using the Canon EOS 30D as my primary camera, and I love it. I’ve taken over 5,000 photos with it. I actually got a bit sad when I had to send it back to the good folks at Canon PR. In the span of 30 days, I’ve come to regard this camera as an old friend, and that’s high praise coming from me. Why? Because it works. It works as advertised, and doesn’t let me down, no matter what the shooting conditions are. I know that when I take it out of the bag, it’s ready to go, and I know what kinds of photos I’m going to get with it — great ones — provided I do my part as a photographer.

Canon EOS 30D (front)

Before you go on, just in case you’re not familiar with my reviews, I need to explain something. I focus on real world use when I look at a camera. That’s what matters to me. Lab tests are nice if you shoot in a lab. Yes, for the most part, they can give you a good idea of a camera’s capabilities. But I’m interested in the performance of a camera in the unpredictable conditions of everyday use. How well does it do when I use it as a primary camera, for a whole month, in widely varying conditions (cold, warm, dry, humid, wet, sunny, evenings, nights, mornings, noons, afternoons, etc.)? With that in mind, here’s what I look for in a great DSLR:

  • A decent amount of resolution (8 megapixels or above)
  • Low or non-existent noise at higher ISO (I tend to shoot a lot in low light and do not like to use a flash)
  • High-quality sensor (ability to produce great photos across varying conditions when coupled with good lenses)
  • Great body with a great grip
  • Ease of use (well-placed buttons and controls, easy to navigate menus)
  • Big, clear viewfinder
  • Good battery life
  • Good screen size (at least 2.5″)
  • Fast auto-focus in various lighting conditions, along with ability to choose various focus points
  • Good automatic exposure (expose photos correctly when in automatic or semi-automatic modes)
  • Fast drive (at least 3 fps)
  • Video out, PC terminal, remote

Did the 30D deliver on all these conditions? Absolutely. It even exceeded some of them. Read on for the details.

I won’t list all of the specs. Nobody bothers to read them anyway. If you need to look something up, they’re readily available on the Canon USA website. I will, however, list the important specifications below, and I’ll refer to them throughout my review:

  • 22.5 x 15.0 mm APS-C CMOS sensor, 1.6x crop factor, 3:2 aspect ratio
  • 8.2 megapixels (3504 x 2336 pixels)
  • Compatible with all EF lenses, including (of course) EF-S lenses
  • ISO range: 100-1600 in 1/3-stop increments, expandable to 3200
  • Shutter speeds from bulb, 30 – 1/8000 seconds, tested to 100,000 exposures, 65ms lag
  • Drive speeds: self-timer, one shot, 3 fps, 5 fps
  • Viewfinder: fixed pentaprism, 95% coverage vert./horiz., 0.9x magnification, 20mm, -3.0 to +1.0 dioptric adjustment
  • LCD: 2.5″ diag., 170-degree viewing angle, 230,000 pixels, 100% coverage
  • Formats: RAW, JPEG, RAW + JPEG
  • DOF preview, mirror lock mode, data verification
  • Battery life: 900-1,100 shots
  • Dimensions: 144 x 105.5 x 73.5mm
  • Weight: 700g (body only)
  • Operating temperatures: 32-104°F/0-40°C

In addition to reviewing the specs listed above, I encourage you to take the 3D camera tour, also available on the Canon website. It’ll give you a better idea of how it looks in real life. And as always, before you purchase any camera, it makes good sense to go to a camera store and try it out in person, just to see how it fits in your hand and whether you’ll like the controls.

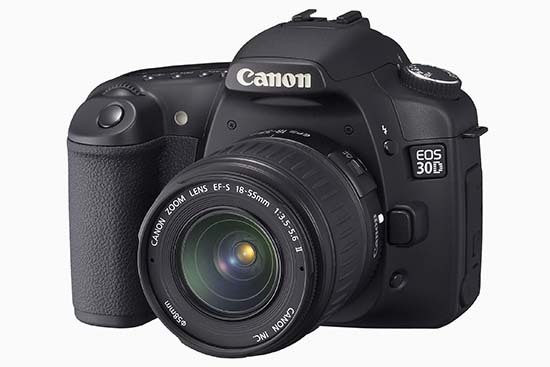
I always like to ask myself what makes a camera special or different. Where does it fit in? What’s the point? The answer here is that the Canon EOS 30D is a mid-level DSLR that fits in between the Canon Rebel line and the Canon 1D line. No, I haven’t forgotten the 5D — it fulfills a different purpose, and is meant as a less expensive version of the 1Ds Mark II. The 30D has the same sensor size (APS-C) and can use the same lenses (EF/EF-S) as the Canon Rebel cameras, while providing capabilities more akin to a 1D Mark II N camera: faster drive, better battery life, a very nice magnesium alloy body and grip, better low light sensitivity, and similar controls (Quick Control dial, for example). That means that if you own a Canon Rebel and you want to move up, the 30D is your best bet. You’ll be able to keep using your old EF-S lenses while gaining pro-level capabilities similar to the 1D Mark II N.

Alright, let’s get back to my criteria, and take it step by step.

Resolution

The 30D puts out 8.2 megapixels of beautiful resolution. That’s fine by me. It’s at my megapixel threshold, but I don’t mind it. Keep in mind that higher resolution doesn’t always mean better photos. If you don’t believe me, have a look at my review of the Fuji Finepix S9100. Since I always shoot at maximum resolution and in RAW format, all of my photos came in at 3504 x 2336 pixels. I find that resolution sufficient for creative post-processing. I can crop or rotate photos and still retain enough resolution to make prints of 8×10 or larger dimensions. That’s a good thing. While I talk of cropping, I want to mention a pet peeve of mine. [rant] For goodness’ sake, people, crop proportionally! I see so many photos that have been cropped with no regard for a photo’s aspect ratio whatsoever, and they don’t look good at all. If you shoot at 3:2 aspect ratio, let your crop also be 3:2. If you shoot in 4:3, let your crop be 4:3 as well. (There are some exceptions to this rule, but I can’t address them here. I might write a separate blog post about it.) [/rant]
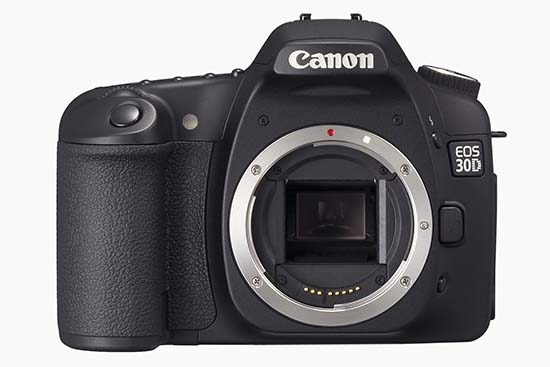
Canon EOS 30D (body only)

Image Sensor

As you can see from the specs, this is an APS-C sensor, with a 1.6x crop factor. It’s also called a magnification factor, but I don’t like to call it that because there is no magnification involved. A smaller sensor uses less surface from a lens’ field of view (FOV), thus yielding a photo that looks like it was photographed from a smaller distance, but really wasn’t. So while a photo taken with a 5D and a 100mm lens looks like it was shot with a 100mm lens, because the 5D has a full frame sensor, the 30D will yield a photo that looks like it was shot with a 160mm lens. It’s like taking a photo with the 5D and cropping out 4 megapixels of resolution. You get the remaining 8 megapixels, and this makes it appear as if the photo is magnified, but it’s not. Some people tout this as an advantage. They say they can get a higher focal length out of their lenses. But they’re mistaken. It’s the same photo they’d have gotten with a full frame sensor, but cropped. I hope this helps some people understand this. It took me a while to get it. There’s nothing wrong with a smaller sensor that uses a crop factor (for one, they’re much more affordable), as long as you understand what you’re really getting. An unstated advantage of smaller sensors is that you can get away with using cheaper lenses. Whereas a full frame sensor would bring out any imperfections in those lenses because it would use their entire surface area, a smaller sensor would only use their center area, which is usually the sharpest portion of the lens.

In order to avoid the confusion around focal lengths and crop factors, Canon has a line of EF-S lenses which are built specifically for the APS-C sensor size used in the Canon Rebel and 30D models. That means the 18-55mm kit lens that shipped with my 30D review unit really yielded photos that matched that focal range. With EF-S lenses, there’s no crop factor involved, since they are built specifically for the smaller sensor. To really see the difference, pick up an EF-S and an EF lens, turn them upside down, and look at the diameter of the rear lenses on both. The EF-S lens will have a much smaller diameter. Short of looking at the label, that’s how you can tell which sensor they’re built for.

A lot of people are making a big deal out of automatic sensor cleaning features on DSLRs, including me. This involves a mechanism that shakes or vibrates the sensor at ultrasonic speeds, hopefully causing dust present on it to fall down onto an adhesive strip laid down in a groove below it. I say hopefully because some dust will sometimes continue to stick to the sensor, necessitating a manual cleaning. And what people also don’t realize is that they’ve got to service their DSLRs every 6 months to 1 year in order to remove the dirty adhesive strip and lay down a fresh one. Otherwise, dust that can’t stick to it anymore will be drawn back to the sensor instead.

The Canon EOS 30D has no such sensor cleaning, and I can’t say that I missed it during my use of the camera. I did notice right away after receiving my review unit that there was some dust on the sensor. It was likely there from previous uses of the camera by other reviewers. There were about 4 big, persistent dust specks. I tried a manual blower (you can get one for about $10), and that removed two of the particles. To remove all of them, I used sensor cleaning swabs and a good solution (total price, about $40), and they worked as advertised. If you use them too, make sure to follow the directions carefully, otherwise you run the risk of scratching the plastic layer above the sensor. And you know what? After using the swabs, I had no more dust problems with the sensor for the rest of my review period (about 3 weeks). I changed lenses regularly in windy weather, outside, and indoors in rooms charged with static from the dry weather, and dust was not a problem in my photos. So while auto sensor cleaning is a nice feature, it’s not needed, and also doesn’t completely eliminate the headaches caused by dust on the sensor.

There’s one more thing I’d like to mention about the sensor and the DIGIC II processing engine. I always shoot in RAW mode, and I was pleasantly surprised to see that the 30D’s RAW file sizes were smaller than on other cameras producing 8-9 megapixels. Canon really makes good use of their pixels. For example, the Olympus EVOLT E-500, another 8-megapixel DSLR I tested, produced 13-14MB RAW files at 8 megapixels, while the Canon EOS 30D yielded 7-9MB RAW files at the same 8-megapixel resolution. While this may not seem like a big difference to you, it’s huge when you think in terms of CF card sizes. Using the same 4GB CF card on both DSLRs, I was able to get 293 images from the E-500 and 436 images from the 30D. That’s a big difference no matter how you look at it, because it means I can shoot more images on the same card.

Image quality

As for the quality of the sensor, I’ll let my photos do the talking. I can safely say that I’m impressed. As I mentioned at the start of this review, I took over 5,000 photos, and there were only a couple of situations where I was slightly disappointed. Overall, this sensor is superb. It’s no wonder Canon chose to leave it in the 30D when they retired the 20D. Its low light sensitivity is unmatched when I compare it with everything I’ve tried so far. From what I understand, I’m not alone. Other reviewers concur. The only cameras that can top the 30D are all much more expensive (5D, 1D). People who buy the 30D for its excellent low light sensitivity alone will not be disappointed, and at its selling price, it’s a bargain.

The images look great throughout the ISO range. What I really like is how little chroma noise can be seen at higher ISO settings. Indeed, there’s so little in most situations that I need to view the photo at 100% magnification in order to see it. On average, there is more luminescence noise than chroma noise, although I don’t mind it as much. Both kinds of noise can be easily eliminated using Adobe Lightroom’s built-in noise reduction tools. Let me make it clear though that this sensor has very little noise when I compare it with other cameras. And at high ISO (1000 to 1600), while the smaller details and shades would be lost with other cameras, they’re preserved with the 30D.

I started to post-process and publish the photos taken with the 30D a few days ago, and I’ll continue to do so. There are currently 20 published photos, but they’ll grow to several hundred by the time I’m done. Watch for them over here at Flickr or in this set at Zooomr. Before the purists jump on me, let me say that I post-process my photos with artistic goals in mind. In other words, I adjust WB, colors, tone, etc. to get each photo to look the way I want it. In that sense, they’re not “right out of the camera”. If you’re looking for those sorts of photos, no great loss, plenty of other review sites have them. What you will see here are photos that are meant to showcase the capabilities of the camera, all post-processed individually and to my liking.

As long as I mentioned White Balance, let me say that the auto WB feature in the 30D works very well. In low light, it yields warmer colors, which I like, and in daylight hours, it usually yields colors that are very similar to what I see. In that sense, it’s accurate and satisfies my needs.

The Auto Exposure on the 30D also works pretty well in automatic mode, though I saw that it overexposed photos just a tad in Aperture Priority mode (Av), which is where I stay most of the time. This sometimes yielded harsher lights than I desired. To prevent that, I turned down the exposure compensation value (EV) by -0.5 or -1.0. In Shutter Priority mode (Tv), it exposed things the way I wanted it. And of course it didn’t matter in fully Manual mode, since we are each personally responsible for the exposure we get there. 🙂

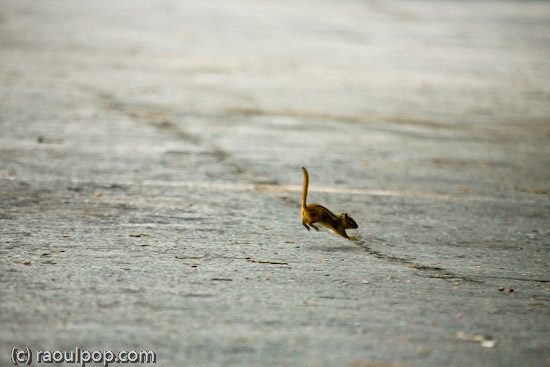
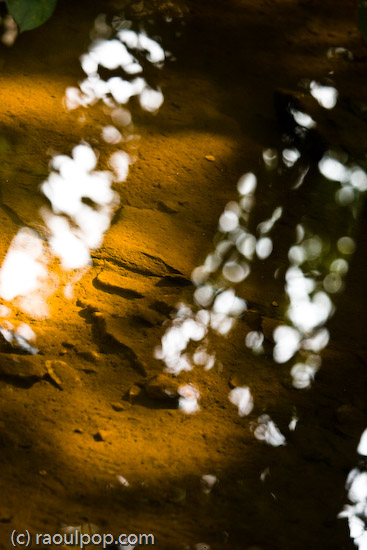
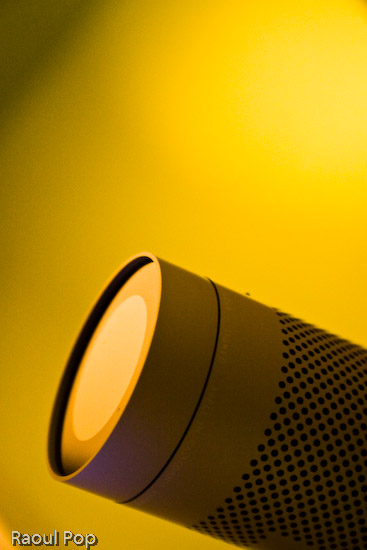
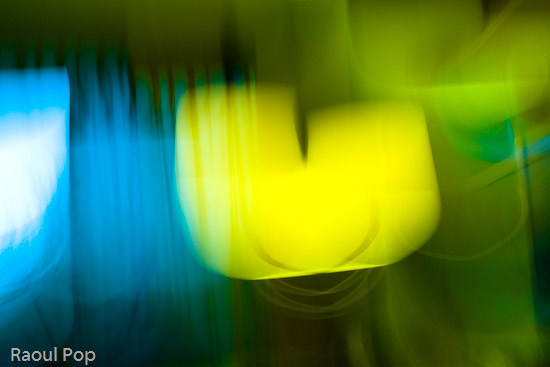
To give you an idea of the photos you can get at 1600 ISO in low lighting, here’s one I took of our iMac’s iSight camera:

iSee

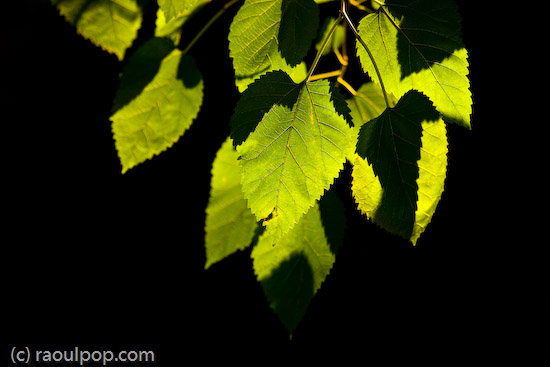
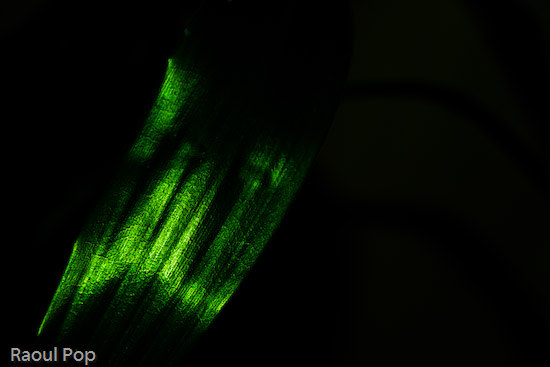
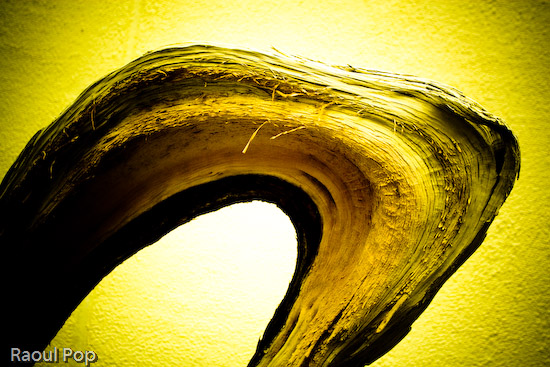
What I also liked is that I was able to get great photos even with the kit lens, including closeups. Here’s one of a bamboo leaf:

The dream

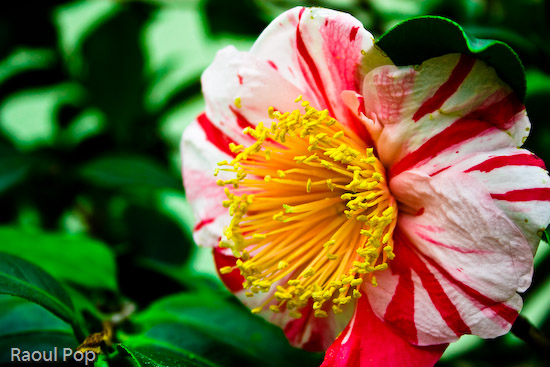
Or how about this other macro shot?

Better stay inside

Camera body

One of the things I really like about the 30D is its beautiful body. Even if all the specs were the same between it and the Canon Rebel line, and the only difference was the body design, I’d pay the extra money and get a 30D instead of a Rebel. I just don’t like the body of the Rebel line. Both the XT and XTi feel too small and I can’t grip them. The XT body is at least a little larger, but the XTi body is so small I feel like I’m holding some cheap digicam in my hand.

Canon EOS 30D (three quarters)

What you’re basically getting with the 30D is a body design that’s very similar to the 5D in dimensions and weight. It feels like a serious camera when you hold it. The buttons are where they need to be, and the Quick Dial control is awesome. I hope Canon keeps it as part of their design for a long time to come. Using the Quick Dial, I was able to change ISO settings, among other things, without taking my eye off the viewfinder. It’s a huge advantage over the predominant four-button design. It’s also very easy to scroll through photos using the dial instead of pressing arrow keys repeatedly.

The weight of the camera is great. It’s just heavy enough to feel like a solid, pro-level camera, without being too heavy on the wrist. A 50mm lens barely adds weight, so it’s great to carry it around like that. The kit lens is also very light, so it isn’t felt at all.

The interface was also wonderfully simple. After a quick perusal of the user manual to clear up some settings, I was ready to go. The menus were much simpler than on other cameras I used. Given the technical complexity of the 30D, I found this very refreshing. The Quick Dial control made it a breeze to navigate through the options and select the features I wanted. The only thing I would suggest is the ability to mark and delete batches of photos in review mode. I could only delete single photos or all photos on a card, but I often wanted to delete only groups of photos.

I really liked the viewfinder. It’s big and clear. I was able to make dioptric adjustments to fit my vision perfectly, and that was great. It was also easy to see the shutter, aperture and ISO indicators at the bottom of the viewfinder window. The only thing you need to keep in mind is that the viewfinder has 95% coverage, so there are little slivers of space at the edges of your photos that you won’t see in the viewfinder. Frame your shots accordingly or crop afterwards as needed.

The LCD screen size is just right. We’re getting used to larger and larger LCD screens these days, and I don’t mind it one bit. The 2.5″ screen of the 30D is great for reviewing shots on the fly, either as you shoot, or afterwards, in “chimping” mode.

Speed

The EOS 30D emphasizes speed in its mechanisms. This is demonstrated by the fast 5fps drive, the small shutter lag, and the fast, 9-point autofocus. I tell you, there’s a big difference between a 3fps drive and a 5 fps drive. In those critical moments when you absolutely need to capture something, it’s really nice to be able to press the shutter and get a quick burst of photos. The shutter lag of the 30D is really good. At 65 ms, it’s a lot faster than the new Rebel XTi (100 ms). I could not find data right away on the shutter lag of the 1D Mark II N, but I have a feeling 30D’s shutter lag is close to it.

Autofocus is, of course, directly dependent on the lens used. As such, autofocus times will vary widely. On fast lenses, the time is obviously going to be really fast, and on slow lenses (zoom, macro) autofocus times are going to be slow. Light is also an important factor to consider. In low light, pretty much any camera will “hunt” or delay autofocus while it tries to find appropriate focal points. I used two lenses while I tested the 30D: the kit lens, which is an 18-55mm EF-S lens, and an EF 100mm f/2.8 Macro USM. The autofocus times on the kit lens were almost instantaneous, even in low light, while autofocus times on the macro lens were slow, as expected. It was surprising to me to get such fast autofocus times out of the kit lens, especially when considering its maximum aperture is f/3.5. I can only attribute it to the 30D.

Battery life

The 30D’s battery life is great. After the first charge, I was able to get 1,400 exposures before I emptied the battery. I couldn’t wait long enough to drain the second charge. I’d exceeded 1,400 exposures and was getting ready to take a trip where I wanted to use the camera extensively, so I plugged it in. Afterwards, I lost count of the number of photos taken per charge. What I also liked about the 30D is that it gave me ample forewarning of low battery. I was able to take over 300 photos on a low battery, and could have probably gotten more if I hadn’t recharged it.

The long battery life surprised me because the specs state 900-1,100 shots per battery charge, depending on the temperature. I used the camera in decidedly cold weather, in temperatures below 32 degrees Fahrenheit, and yet I was still able to get over 1,400 shots per charge. Although I barely used the flash, I did enable the preview feature that displayed each photo taken for approximately 2 seconds, so it’s not as if I was a battery miser.

Let’s review

I really liked using the Canon EOS 30D. It’s a solid camera with a great sensor that produces quality images, with unmatched low light sensitivity in its class. Its magnesium alloy body feels great and grips very well. Its controls are well-placed and easy to use. Its speed is also unmatched in its class, and its battery life exceeded my expectations. Overall, the camera was a pleasure to use, and inspired a sense of being well made and reliable. Would I purchase one if I were in the market? Absolutely. Given its features and price, you can’t go wrong with this camera.

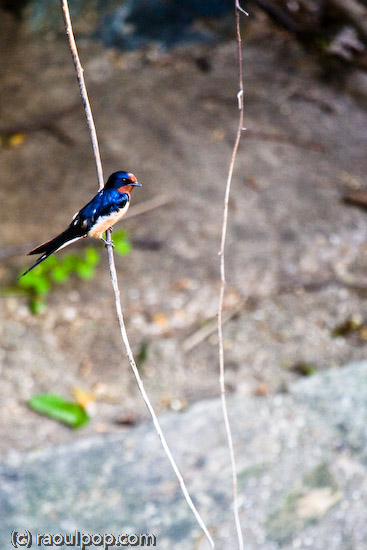
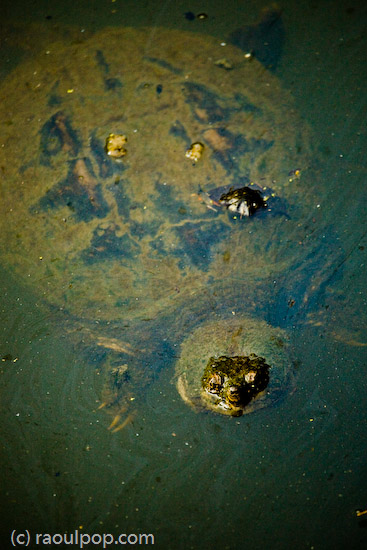
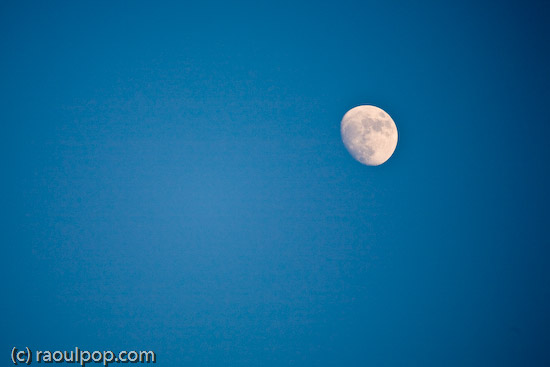
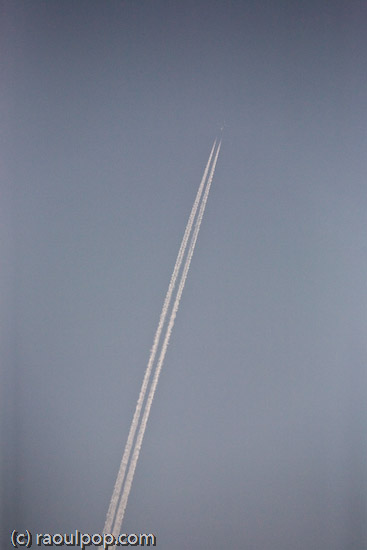
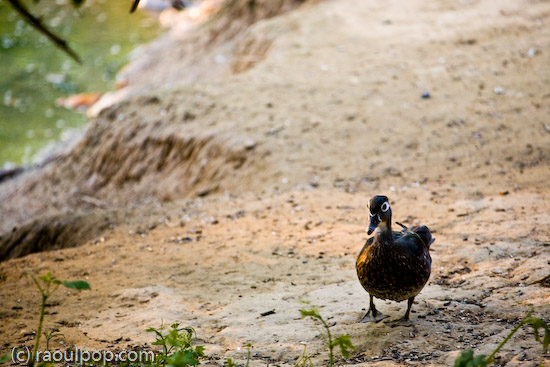
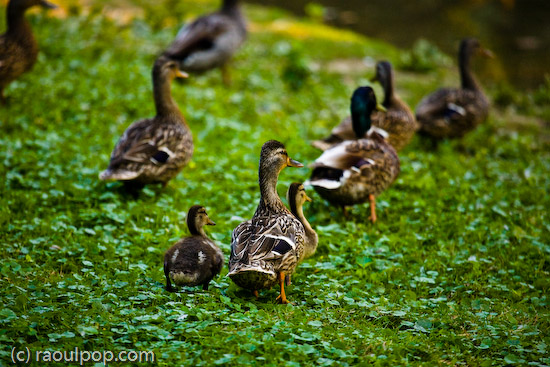
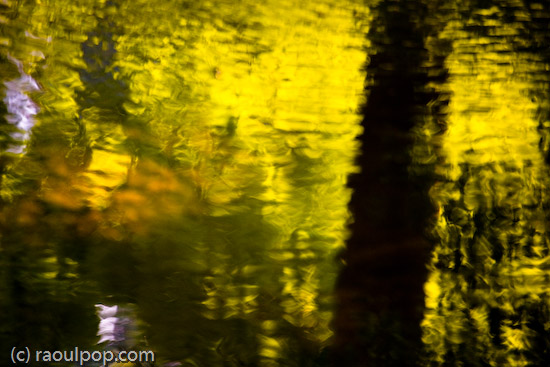
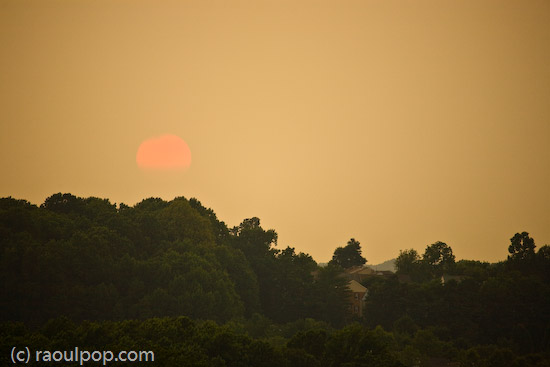
Here are a few more sample photos.

Speed of light

Shaken

Candy striper

Was there ever any doubt?

How to buy it

Standard
How To

10 tips for taking better photos

Church

In a recent post about winnowing my own photos, I mentioned briefly that I’m tired of wading through mediocre photos on online sharing sites in order to arrive at the good ones. While that’s true, it’s not nice to criticize without offering a solution. This quick tutorial is my proposed solution. I really hope it helps people take better photos.

This advice is meant for the 80% of people out there who own a camera and pick it up once in a while to take photos at an event or during a trip, without much thought about composition, aperture, shutter speed, lighting and other such things, but merely with the desire to capture the moment. I know from personal experience that many of these same people are disappointed when they get home and download the photos to their computers. Why? Because their photos are out of focus, or too bright, too dark, colors are too light or off, etc. These people end up thinking that’s just the way things are, and they shouldn’t expect better photos. But they’re wrong! By doing a few simple things, the appearance of their photos (and your photos) can improve dramatically.

So what makes me qualified to offer photography advice? I’ve been photographing places, nature and people for more than 15 years. I too was a casual photographer for a large portion of that time, and when I couldn’t stand my own terrible photos any more, I decided it was time to improve. What I know, I learned on my own and from various books and many articles that I’ve read over the years. I practice the advice I give below, and know it works. My photos improved dramatically when I started to shoot digital, because I could shoot a ton of photos and learn much faster what worked and didn’t work.

Here’s what you can do (and this applies in particular to the smaller digital cameras):

  1. Hold the camera steady. I know it’s difficult to do with a tiny little camera, but use both hands. Grab the corners of the camera, or put your palm or side of the hand underneath the camera to support it as you take the shot. If you hold the camera casually, you risk moving it up and down as you press the shutter button. I know you are tempted to take shots with one hand when you use your camera, but if you don’t hold your hand rock-steady, you’ll likely get a blurry shot. (Yes, some of the cameras nowadays have image stabilization, but it’s a good idea not to rely on it entirely. You’ll find its effect is limited.)
  2. Don’t stick your fingers in front of the camera. Your camera has a lens. It uses that lens to look at the world, and capture the images it sees when you tell it. If you stick your finger in front of that lens, or worse, keep it right over the lens, don’t be surprised with the results. And if you’ve been wondering just why your photos always come out blurry, you might want to check how you hold the camera. There might be an autofocus sensor under that finger of yours. That sensor needs to have an unobstructed view of the subject, so it can measure the distance properly and tell the camera how to focus. Some cameras also have a separate light sensor that measures ambient light. When your finger’s on it, it’s in the dark, and so is your camera. Daylight shots will come out completely washed out, because the camera thinks it’s dark and exposes the sensor/film too much.
  3. Clean that lens. I know you like to hold your compact camera in your hand or in your pocket. And if you have kids, they like to play with the camera as well. Have you ever looked at your lens? It’s probably full of muck and fingerprints. Clean it. Use a damp soft cloth, or even better, a lens cleaning kit, which comes with cloth and special solution. It’s inexpensive, and does wonders!
  4. Set your camera’s mode dial to P. That is, if your camera has a mode dial. Don’t set it to A, which you might think stands for Automatic, but actually stands for Aperture Priority, and don’t set it to S or M, which stand for Shutter Priority and Manual, respectively. Set it to P, which stands for Point and Shoot. That way, the camera does its thing and you only need to worry about pressing the shutter button.
  5. Get familiar with your camera’s scene modes. I know most of you are used to just turning the camera on and pressing the shutter button, and you might or might not have wondered what certain icons on your mode dial or in the camera menu meant. Well, if they look like people, or flowers, or mountains, they’re scene modes. They adjust the camera’s settings so you can take better photos in those situations. It’s kinda like shifting into a lower gear when you descend a mountain. You know, you’re used to putting your car in D, and you never think about those other numbers, like 2 and 1, that you also find on your automatic drive. But you find out really fast that if you shift your car into 2 or 1 as you go down a hill, you have to use the brake a lot less. It’s the same with your camera. It’ll work without the scene modes, but it’s a lot easier when you use them. So take out the manual if you can find it, or download it from the camera’s website, and look up the instructions for scene modes. Learn how to switch to Landscape mode when you’re shooting mountains, or into Portrait mode when you take photos of people, and into Macro mode when you photograph flowers or other objects at close ranges. Other cameras have scene modes for cloudy days, for the beach, for snow, etc. Use them, they’ll make your photos much better!
  6. Walk, don’t zoom. When you can, try walking closer to the person or object that you want to photograph. When you use the zoom, any little shake of the camera affects the sharpness of the photo. Oftentimes, the photo will come out blurry if you take a tele shot with a handheld camera. Getting closer to your subject really, really helps! And for goodness’ sake, don’t use the digital zoom feature, it’ll suck the quality right out of your photographs.
  7. Frame the shot. Don’t just take that camera out of your pocket and snap away at everything you see, hoping you’ll get some decent shots. Plan those shots if you want them to be good. It only takes a few seconds to frame the subject on your camera’s screen or viewfinder. Look at the screen. Do you like what you see? If you don’t like it, don’t take the photo, try a different angle/position. If you’re taking a photo of a person, it’s really boring to have them in the center of the shot. Move the camera slightly so they’re off-center. You’ll be surprised at how much better the photo will look. While I’m on the subject, I can’t tell you how tired I am of seeing photos of grinning people in front of buildings or monuments. Have your subjects do something interesting, like look at the building. Take the photo from the side. Or take a candid shot, while they’re looking at something else, with the object of your desire (building, monument, statue) in the background. It’s much more interesting that way. If you’re taking a photo of a well defined subject like a flower, a car or a person, don’t cut them off in ways that make them look strange. It’s usually better to get all of that object in the photo and crop later. As you get more experienced, you can start to experiment, but as they say, you must know your ABC’s before you can read…
  8. Know your camera’s limitations. I don’t mean you should be able to quote the specs back to me, but know the basics. Does it take good shots in the dark? If it does, great. If it doesn’t, don’t expect to get good shots in the dark, particularly as you get farther from your subject(s). Realize that the built-in flash can only do so much, and in the dark, even at twilight, your shots aren’t going to be all that great. They’re either going to be too dark (if you’re far) or too washed out (if you’re too close,) or they’ll be blurry because someone in that shot moved, or your hand moved, etc. How long does it take from the time you press the shutter button to the moment your camera takes the shot? Realize you need to account for the focus time as well, and different cameras have different focus times. With some cameras, there’s a delay of over a second until they take the shot. They have to focus, then they take additional time to activate the shutter and store the shot. You can’t just press the button and expect a great shot unless you have a good DSLR. Know what your camera can do, and realize that you won’t be able to get some shots when you only have a few moments. Also be aware of how many photos you can get on a battery charge, and plan your photo taking around that number. You don’t want to be left with an empty battery when there are plenty of opportunities for great shots all around you.
  9. Do some basic post-processing. No, you don’t need Photoshop for this. You can do it for free with Picasa on Windows and iPhoto on the Mac. They’re both great at letting you do basic tasks such as adjusting exposure, lighting, boosting color, adding sharpness, removing red eyes and cropping. You won’t believe your eyes when you see the difference in your photos! Trust me on this one, take a half hour to learn how to manipulate the controls in Picasa or iPhoto, and you’ll be thanking yourself again and again. So many mediocre photos can be helped by a little post-processing that it’s staggering! Really, I can’t emphasize this enough.
  10. Use my favorite fix for bad photos: the Delete button. This works wonders! You can declutter your photo library in minutes, and end up with decent photos you’ll actually want to show people! You’ll no longer want to avoid looking at your photographs! Have no mercy, just delete that horrid shot. If you followed steps 1-9 and you still couldn’t help a particular photo, put it out of its misery. Delete it for good!

If you want to get a few more tips, read the post I wrote about photographing Walt Disney World.

Hope this helps you, really!

Standard
How To

How to choose a camcorder

If you’re interested in purchasing a camcorder, this guide will help you decide what to get when you look at the dizzying array of products out there.

At the moment, the industry is “in the 80’s”, caught between 4:3 and 16:9 aspect ratios, and standard and high-definition video. The HDV, 16:9 camcorders are still expensive, while the standard 4:3 camcorders are months to years behind the technology curve. There are some mongrel/hybrid models out there, that offer a mix of standard to high-def recording, on both 4:3 and 16:9 aspects.

To make things more complicated, there are multiple high-def formats: 480p, 780p, 1080p. There are also multiple media: Hi8, DV, miniDV, DVD, miniDVD, and hard drive. Each kind of media has its pros and cons. Finally, there are multiple connections: Firewire, mini-DVI, S-video, RCA, etc. There are caveats with each connection, and the quality of the video output varies with each, even on the same model camcorder.

So, how do you make sense of all this nonsense? Well, my recommendations are:

  • 16:9 aspect ratio (the extra width to the picture truly makes a difference, and allows you to compose your shots a lot better)
  • HDV (780 or 1080p, preferably the latter)
  • Firewire or mini-DVI connector
  • MiniDV or hard drive media

I should mention that some people like the convenience of storing directly on DVD – just realize that if you do that, it’s harder to edit the video. You have to import it to the computer from the DVD or the camcorder, then edit it, which is a slower process overall, plus most DVD media isn’t reusable, etc. Also, if your camcorder will record to mini-DVDs, realize that some DVD players won’t be able to play them, in particular the slot-loading ones that you find on Apple computers or some in-car entertainment systems.

You should also look for a good optical zoom, low-light capabilities, and optical image stabilization. Good, intuitive controls should also be present, and it’d be nice to have good battery life as well.

If you’re more than an amateur/home videographer, then you should look at the capability to use different lenses, and the presence of relevant physical controls directly on the camcorder’s exterior. You probably also want to look at the ability to switch between different frame rates.
Before you go out there and try to find a camera with all these features, realize the market’s in disarray, and you’ll be disappointed if you look for a camera that has it all. A camera that has my list of desired features will cost over $1,000 at the moment, and that’s out of reach for many people.

CNET’s put together a camcorder guide which will help you narrow down your choices, and my advice is to look through that as well. On their site, they also have reviews of many camcorders. Just realize that the editors are people, and the reviews are subjective, in particular the video reviews. I remember viewing one where the editor referred to the LCD panel as very small, literally “the same size as the viewfinder”, when it was clearly 4-5 times larger in terms of surface area.

The best thing to do is to come up with your own wishlist of features for your dream camcorder, using this guide and other guides like the CNET guide, then go to the stores, and see which model most closely fits your wishlist. You’ll have to compromise or give up on some features, but you’ll come out with a great buy in the end, because you’ll have done your homework.

Standard
How To

How to find cartoons for children

Stephen Metcalf from Slate wrote a good piece entitled “Beyond Bugs Bunny: The Quest to Find the Perfect Children’s Cartoon“. It reminded me to write about my own thoughts on the issue.

Unfortunately, Stephen’s piece falls short of the truth. While I agree with him on one aspect, that “one is faced with an uninviting… choice: insipidity or carnage” when trying to pick from among the choices, I disagree with his characterization of what constitutes inspidity or carnage in cartoons.

Most Walt Disney cartoons aren’t insipid, in particular the classic ones. I have great respect for the art, and the way in which Disney chose to portray certain things. Look, he was trying to make commercial movies. There was a path to be followed if commercial success was to be the result, and he knew what needed to be done. I don’t think the overwhelming majority of people would consider his movies a compromise, or an example of insipidity.

You want to talk about insipid? What about Ed, Edd and Eddy? What about Codename: Kids Next Door? What about Pokemon? What about Beavis and Butthead? What about Ren & Stimpy? The list is endless. Cartoons like these are a veritable waste of time. They’re not funny, their plots are mediocre, their art is ugly, and one gets up from watching them feeling like they just lost a few hundred brain cells.

I’ve also heard talk of Looney Tunes and Tom & Jerry being violent, and I disagree with that line of thought. There’s a huge difference between the violence portrayed in those cartoons and the violence one finds in the cartoons of today, in particular some of the action cartoons, or the anime, which can be extremely violent, to the point of brutal cruelty.

The violence to be found in LT or T&J cartoons was rubbery. Nothing really ever happened to the characters. They emerged unscathed. It was all done for fun and with great comedic timing, and even as a kid, you would know it – I did, at any rate. You also can’t call them children’s cartoons. They were created at a time when cartoons would get shown before movies in theatres. Adults were expected to watch and enjoy them. Some of them won Oscars. The brand of humor to be found in them is a mix of pratfalls and other physical jokes, which appealed to everyone, and jokes that only grown-ups would get. Unfortunately, all of that has been lost on the cartoonists of today, who seem to produce only violence and insipidity.

You want to talk about risquĂ©? What about the Max Fleischer cartoons, which Stephen touts, in particular the Betty Boop ones? Would you call those children’s cartoons? Not by far! They treat themes such as adultery (albeit with subtlety) and theft. Betty has many gentlemen callers, most of them old and rich, and some are married. In some of the cartoons, she’s only in her negligĂ©. There’s a scene in “Poor Cinderella” that would make the fellows whistle even nowadays. What about Felix the Cat? In “Felix in Hollywood”, he peeps into the dressing room of a star, then whistles and exclaims, “Oh, Boy!”. In “Neptune’s Nonsense”, Neptune has a mermaid do a belly dance for him. In “Sultan Pepper”, the same character that fools around with Betty Boop in one of her cartoons now tries to sleep with the entire harem of a visiting sultan. This is clearly not kid stuff. Sure, some of Fleischer’s cartoons are safer, but you’d have to pick and choose.

One has to do the same nowadays. Stephen seems to have stumbled upon a good find with Charlie and Lola. I would also recommend Little Bear, which is an absolutely charming show that doesn’t get aired often these days, unfortunately.

The truth is, cartoons made specifically for children, and in particular cartoons made for infants and young children, to the age of 4-5, are a relatively new thing. Even Disney didn’t make his cartoons just for children. He said that himself. So there’s no point in criticizing the man or the other existing art because it doesn’t work for something it wasn’t originally intended for.

There’s a good reason college kids can’t stand Barney, but little kids love him. His TV show is specifically intended for very young audiences. It’s the same with The Wiggles. I go bonkers watching them, but my friends’ little daughter (who’s also 3 years old) loves them. So you see, one should look at what’s on the market today, and make an intelligent decision based on facts and personal preference.

Standard