For the past month, I’ve been using the Canon EOS 30D as my primary camera, and I love it. I’ve taken over 5,000 photos with it. I actually got a bit sad when I had to send it back to the good folks at Canon PR. In the span of 30 days, I’ve come to regard this camera as an old friend, and that’s high praise coming from me. Why? Because it works. It works as advertised, and doesn’t let me down, no matter what the shooting conditions are. I know that when I take it out of the bag, it’s ready to go, and I know what kinds of photos I’m going to get with it — great ones — provided I do my part as a photographer.
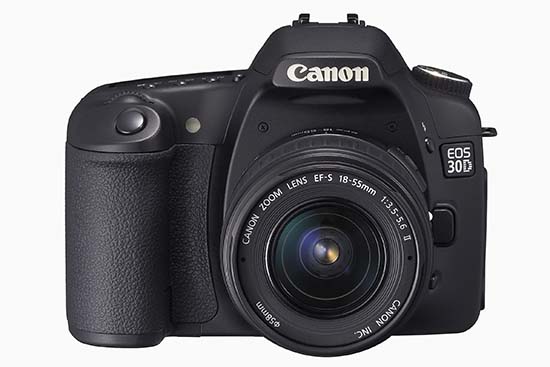
Before you go on, just in case you’re not familiar with my reviews, I need to explain something. I focus on real world use when I look at a camera. That’s what matters to me. Lab tests are nice if you shoot in a lab. Yes, for the most part, they can give you a good idea of a camera’s capabilities. But I’m interested in the performance of a camera in the unpredictable conditions of everyday use. How well does it do when I use it as a primary camera, for a whole month, in widely varying conditions (cold, warm, dry, humid, wet, sunny, evenings, nights, mornings, noons, afternoons, etc.)? With that in mind, here’s what I look for in a great DSLR:
- A decent amount of resolution (8 megapixels or above)
- Low or non-existent noise at higher ISO (I tend to shoot a lot in low light and do not like to use a flash)
- High-quality sensor (ability to produce great photos across varying conditions when coupled with good lenses)
- Great body with a great grip
- Ease of use (well-placed buttons and controls, easy to navigate menus)
- Big, clear viewfinder
- Good battery life
- Good screen size (at least 2.5″)
- Fast auto-focus in various lighting conditions, along with ability to choose various focus points
- Good automatic exposure (expose photos correctly when in automatic or semi-automatic modes)
- Fast drive (at least 3 fps)
- Video out, PC terminal, remote
Did the 30D deliver on all these conditions? Absolutely. It even exceeded some of them. Read on for the details.
I won’t list all of the specs. Nobody bothers to read them anyway. If you need to look something up, they’re readily available on the Canon USA website. I will, however, list the important specifications below, and I’ll refer to them throughout my review:
- 22.5 x 15.0 mm APS-C CMOS sensor, 1.6x crop factor, 3:2 aspect ratio
- 8.2 megapixels (3504 x 2336 pixels)
- Compatible with all EF lenses, including (of course) EF-S lenses
- ISO range: 100-1600 in 1/3-stop increments, expandable to 3200
- Shutter speeds from bulb, 30 – 1/8000 seconds, tested to 100,000 exposures, 65ms lag
- Drive speeds: self-timer, one shot, 3 fps, 5 fps
- Viewfinder: fixed pentaprism, 95% coverage vert./horiz., 0.9x magnification, 20mm, -3.0 to +1.0 dioptric adjustment
- LCD: 2.5″ diag., 170-degree viewing angle, 230,000 pixels, 100% coverage
- Formats: RAW, JPEG, RAW + JPEG
- DOF preview, mirror lock mode, data verification
- Battery life: 900-1,100 shots
- Dimensions: 144 x 105.5 x 73.5mm
- Weight: 700g (body only)
- Operating temperatures: 32-104°F/0-40°C
In addition to reviewing the specs listed above, I encourage you to take the 3D camera tour, also available on the Canon website. It’ll give you a better idea of how it looks in real life. And as always, before you purchase any camera, it makes good sense to go to a camera store and try it out in person, just to see how it fits in your hand and whether you’ll like the controls.
I always like to ask myself what makes a camera special or different. Where does it fit in? What’s the point? The answer here is that the Canon EOS 30D is a mid-level DSLR that fits in between the Canon Rebel line and the Canon 1D line. No, I haven’t forgotten the 5D — it fulfills a different purpose, and is meant as a less expensive version of the 1Ds Mark II. The 30D has the same sensor size (APS-C) and can use the same lenses (EF/EF-S) as the Canon Rebel cameras, while providing capabilities more akin to a 1D Mark II N camera: faster drive, better battery life, a very nice magnesium alloy body and grip, better low light sensitivity, and similar controls (Quick Control dial, for example). That means that if you own a Canon Rebel and you want to move up, the 30D is your best bet. You’ll be able to keep using your old EF-S lenses while gaining pro-level capabilities similar to the 1D Mark II N.
Alright, let’s get back to my criteria, and take it step by step.
Resolution
The 30D puts out 8.2 megapixels of beautiful resolution. That’s fine by me. It’s at my megapixel threshold, but I don’t mind it. Keep in mind that higher resolution doesn’t always mean better photos. If you don’t believe me, have a look at my review of the Fuji Finepix S9100. Since I always shoot at maximum resolution and in RAW format, all of my photos came in at 3504 x 2336 pixels. I find that resolution sufficient for creative post-processing. I can crop or rotate photos and still retain enough resolution to make prints of 8×10 or larger dimensions. That’s a good thing. While I talk of cropping, I want to mention a pet peeve of mine. [rant] For goodness’ sake, people, crop proportionally! I see so many photos that have been cropped with no regard for a photo’s aspect ratio whatsoever, and they don’t look good at all. If you shoot at 3:2 aspect ratio, let your crop also be 3:2. If you shoot in 4:3, let your crop be 4:3 as well. (There are some exceptions to this rule, but I can’t address them here. I might write a separate blog post about it.) [/rant]
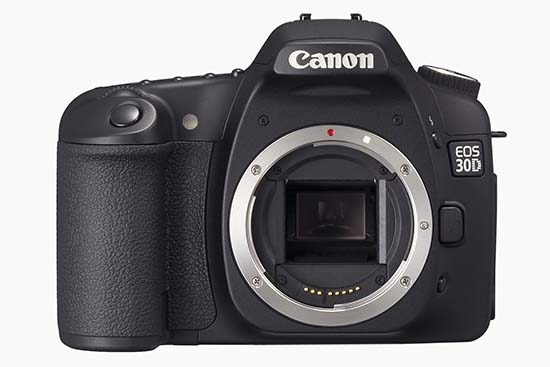
Image Sensor
As you can see from the specs, this is an APS-C sensor, with a 1.6x crop factor. It’s also called a magnification factor, but I don’t like to call it that because there is no magnification involved. A smaller sensor uses less surface from a lens’ field of view (FOV), thus yielding a photo that looks like it was photographed from a smaller distance, but really wasn’t. So while a photo taken with a 5D and a 100mm lens looks like it was shot with a 100mm lens, because the 5D has a full frame sensor, the 30D will yield a photo that looks like it was shot with a 160mm lens. It’s like taking a photo with the 5D and cropping out 4 megapixels of resolution. You get the remaining 8 megapixels, and this makes it appear as if the photo is magnified, but it’s not. Some people tout this as an advantage. They say they can get a higher focal length out of their lenses. But they’re mistaken. It’s the same photo they’d have gotten with a full frame sensor, but cropped. I hope this helps some people understand this. It took me a while to get it. There’s nothing wrong with a smaller sensor that uses a crop factor (for one, they’re much more affordable), as long as you understand what you’re really getting. An unstated advantage of smaller sensors is that you can get away with using cheaper lenses. Whereas a full frame sensor would bring out any imperfections in those lenses because it would use their entire surface area, a smaller sensor would only use their center area, which is usually the sharpest portion of the lens.
In order to avoid the confusion around focal lengths and crop factors, Canon has a line of EF-S lenses which are built specifically for the APS-C sensor size used in the Canon Rebel and 30D models. That means the 18-55mm kit lens that shipped with my 30D review unit really yielded photos that matched that focal range. With EF-S lenses, there’s no crop factor involved, since they are built specifically for the smaller sensor. To really see the difference, pick up an EF-S and an EF lens, turn them upside down, and look at the diameter of the rear lenses on both. The EF-S lens will have a much smaller diameter. Short of looking at the label, that’s how you can tell which sensor they’re built for.
A lot of people are making a big deal out of automatic sensor cleaning features on DSLRs, including me. This involves a mechanism that shakes or vibrates the sensor at ultrasonic speeds, hopefully causing dust present on it to fall down onto an adhesive strip laid down in a groove below it. I say hopefully because some dust will sometimes continue to stick to the sensor, necessitating a manual cleaning. And what people also don’t realize is that they’ve got to service their DSLRs every 6 months to 1 year in order to remove the dirty adhesive strip and lay down a fresh one. Otherwise, dust that can’t stick to it anymore will be drawn back to the sensor instead.
The Canon EOS 30D has no such sensor cleaning, and I can’t say that I missed it during my use of the camera. I did notice right away after receiving my review unit that there was some dust on the sensor. It was likely there from previous uses of the camera by other reviewers. There were about 4 big, persistent dust specks. I tried a manual blower (you can get one for about $10), and that removed two of the particles. To remove all of them, I used sensor cleaning swabs and a good solution (total price, about $40), and they worked as advertised. If you use them too, make sure to follow the directions carefully, otherwise you run the risk of scratching the plastic layer above the sensor. And you know what? After using the swabs, I had no more dust problems with the sensor for the rest of my review period (about 3 weeks). I changed lenses regularly in windy weather, outside, and indoors in rooms charged with static from the dry weather, and dust was not a problem in my photos. So while auto sensor cleaning is a nice feature, it’s not needed, and also doesn’t completely eliminate the headaches caused by dust on the sensor.
There’s one more thing I’d like to mention about the sensor and the DIGIC II processing engine. I always shoot in RAW mode, and I was pleasantly surprised to see that the 30D’s RAW file sizes were smaller than on other cameras producing 8-9 megapixels. Canon really makes good use of their pixels. For example, the Olympus EVOLT E-500, another 8-megapixel DSLR I tested, produced 13-14MB RAW files at 8 megapixels, while the Canon EOS 30D yielded 7-9MB RAW files at the same 8-megapixel resolution. While this may not seem like a big difference to you, it’s huge when you think in terms of CF card sizes. Using the same 4GB CF card on both DSLRs, I was able to get 293 images from the E-500 and 436 images from the 30D. That’s a big difference no matter how you look at it, because it means I can shoot more images on the same card.
Image quality
As for the quality of the sensor, I’ll let my photos do the talking. I can safely say that I’m impressed. As I mentioned at the start of this review, I took over 5,000 photos, and there were only a couple of situations where I was slightly disappointed. Overall, this sensor is superb. It’s no wonder Canon chose to leave it in the 30D when they retired the 20D. Its low light sensitivity is unmatched when I compare it with everything I’ve tried so far. From what I understand, I’m not alone. Other reviewers concur. The only cameras that can top the 30D are all much more expensive (5D, 1D). People who buy the 30D for its excellent low light sensitivity alone will not be disappointed, and at its selling price, it’s a bargain.
The images look great throughout the ISO range. What I really like is how little chroma noise can be seen at higher ISO settings. Indeed, there’s so little in most situations that I need to view the photo at 100% magnification in order to see it. On average, there is more luminescence noise than chroma noise, although I don’t mind it as much. Both kinds of noise can be easily eliminated using Adobe Lightroom’s built-in noise reduction tools. Let me make it clear though that this sensor has very little noise when I compare it with other cameras. And at high ISO (1000 to 1600), while the smaller details and shades would be lost with other cameras, they’re preserved with the 30D.
I started to post-process and publish the photos taken with the 30D a few days ago, and I’ll continue to do so. There are currently 20 published photos, but they’ll grow to several hundred by the time I’m done. Watch for them over here at Flickr or in this set at Zooomr. Before the purists jump on me, let me say that I post-process my photos with artistic goals in mind. In other words, I adjust WB, colors, tone, etc. to get each photo to look the way I want it. In that sense, they’re not “right out of the camera”. If you’re looking for those sorts of photos, no great loss, plenty of other review sites have them. What you will see here are photos that are meant to showcase the capabilities of the camera, all post-processed individually and to my liking.
As long as I mentioned White Balance, let me say that the auto WB feature in the 30D works very well. In low light, it yields warmer colors, which I like, and in daylight hours, it usually yields colors that are very similar to what I see. In that sense, it’s accurate and satisfies my needs.
The Auto Exposure on the 30D also works pretty well in automatic mode, though I saw that it overexposed photos just a tad in Aperture Priority mode (Av), which is where I stay most of the time. This sometimes yielded harsher lights than I desired. To prevent that, I turned down the exposure compensation value (EV) by -0.5 or -1.0. In Shutter Priority mode (Tv), it exposed things the way I wanted it. And of course it didn’t matter in fully Manual mode, since we are each personally responsible for the exposure we get there. 🙂
To give you an idea of the photos you can get at 1600 ISO in low lighting, here’s one I took of our iMac’s iSight camera:

What I also liked is that I was able to get great photos even with the kit lens, including closeups. Here’s one of a bamboo leaf:

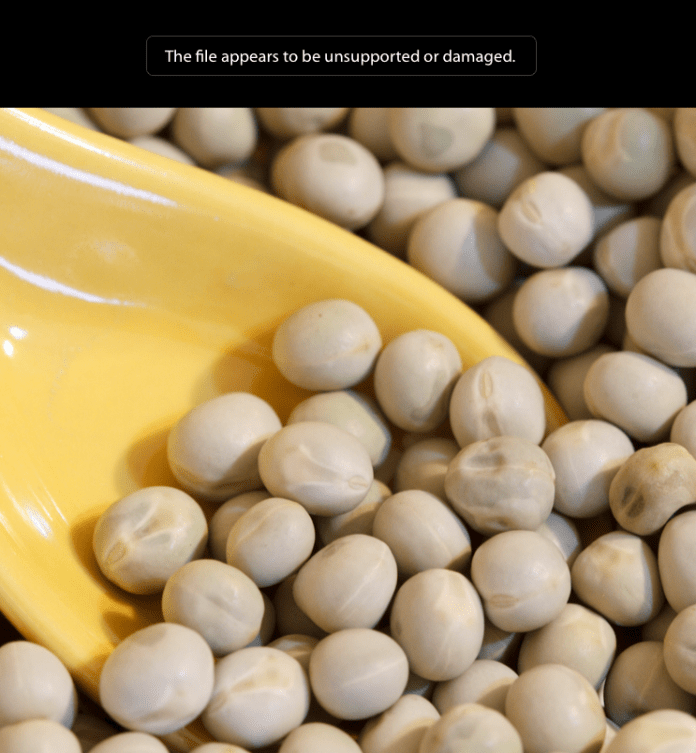
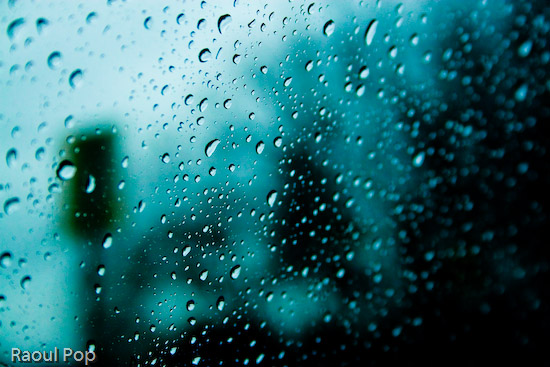
Or how about this other macro shot?
Camera body
One of the things I really like about the 30D is its beautiful body. Even if all the specs were the same between it and the Canon Rebel line, and the only difference was the body design, I’d pay the extra money and get a 30D instead of a Rebel. I just don’t like the body of the Rebel line. Both the XT and XTi feel too small and I can’t grip them. The XT body is at least a little larger, but the XTi body is so small I feel like I’m holding some cheap digicam in my hand.
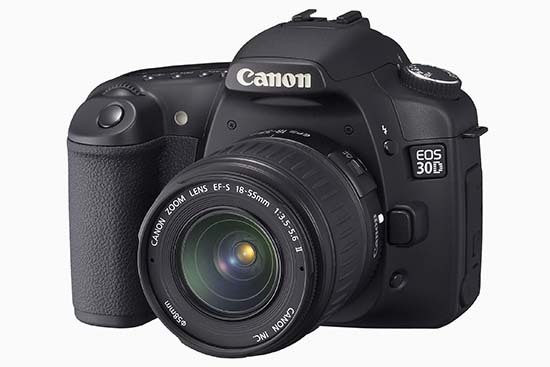
What you’re basically getting with the 30D is a body design that’s very similar to the 5D in dimensions and weight. It feels like a serious camera when you hold it. The buttons are where they need to be, and the Quick Dial control is awesome. I hope Canon keeps it as part of their design for a long time to come. Using the Quick Dial, I was able to change ISO settings, among other things, without taking my eye off the viewfinder. It’s a huge advantage over the predominant four-button design. It’s also very easy to scroll through photos using the dial instead of pressing arrow keys repeatedly.
The weight of the camera is great. It’s just heavy enough to feel like a solid, pro-level camera, without being too heavy on the wrist. A 50mm lens barely adds weight, so it’s great to carry it around like that. The kit lens is also very light, so it isn’t felt at all.
The interface was also wonderfully simple. After a quick perusal of the user manual to clear up some settings, I was ready to go. The menus were much simpler than on other cameras I used. Given the technical complexity of the 30D, I found this very refreshing. The Quick Dial control made it a breeze to navigate through the options and select the features I wanted. The only thing I would suggest is the ability to mark and delete batches of photos in review mode. I could only delete single photos or all photos on a card, but I often wanted to delete only groups of photos.
I really liked the viewfinder. It’s big and clear. I was able to make dioptric adjustments to fit my vision perfectly, and that was great. It was also easy to see the shutter, aperture and ISO indicators at the bottom of the viewfinder window. The only thing you need to keep in mind is that the viewfinder has 95% coverage, so there are little slivers of space at the edges of your photos that you won’t see in the viewfinder. Frame your shots accordingly or crop afterwards as needed.
The LCD screen size is just right. We’re getting used to larger and larger LCD screens these days, and I don’t mind it one bit. The 2.5″ screen of the 30D is great for reviewing shots on the fly, either as you shoot, or afterwards, in “chimping” mode.
Speed
The EOS 30D emphasizes speed in its mechanisms. This is demonstrated by the fast 5fps drive, the small shutter lag, and the fast, 9-point autofocus. I tell you, there’s a big difference between a 3fps drive and a 5 fps drive. In those critical moments when you absolutely need to capture something, it’s really nice to be able to press the shutter and get a quick burst of photos. The shutter lag of the 30D is really good. At 65 ms, it’s a lot faster than the new Rebel XTi (100 ms). I could not find data right away on the shutter lag of the 1D Mark II N, but I have a feeling 30D’s shutter lag is close to it.
Autofocus is, of course, directly dependent on the lens used. As such, autofocus times will vary widely. On fast lenses, the time is obviously going to be really fast, and on slow lenses (zoom, macro) autofocus times are going to be slow. Light is also an important factor to consider. In low light, pretty much any camera will “hunt” or delay autofocus while it tries to find appropriate focal points. I used two lenses while I tested the 30D: the kit lens, which is an 18-55mm EF-S lens, and an EF 100mm f/2.8 Macro USM. The autofocus times on the kit lens were almost instantaneous, even in low light, while autofocus times on the macro lens were slow, as expected. It was surprising to me to get such fast autofocus times out of the kit lens, especially when considering its maximum aperture is f/3.5. I can only attribute it to the 30D.
Battery life
The 30D’s battery life is great. After the first charge, I was able to get 1,400 exposures before I emptied the battery. I couldn’t wait long enough to drain the second charge. I’d exceeded 1,400 exposures and was getting ready to take a trip where I wanted to use the camera extensively, so I plugged it in. Afterwards, I lost count of the number of photos taken per charge. What I also liked about the 30D is that it gave me ample forewarning of low battery. I was able to take over 300 photos on a low battery, and could have probably gotten more if I hadn’t recharged it.
The long battery life surprised me because the specs state 900-1,100 shots per battery charge, depending on the temperature. I used the camera in decidedly cold weather, in temperatures below 32 degrees Fahrenheit, and yet I was still able to get over 1,400 shots per charge. Although I barely used the flash, I did enable the preview feature that displayed each photo taken for approximately 2 seconds, so it’s not as if I was a battery miser.
Let’s review
I really liked using the Canon EOS 30D. It’s a solid camera with a great sensor that produces quality images, with unmatched low light sensitivity in its class. Its magnesium alloy body feels great and grips very well. Its controls are well-placed and easy to use. Its speed is also unmatched in its class, and its battery life exceeded my expectations. Overall, the camera was a pleasure to use, and inspired a sense of being well made and reliable. Would I purchase one if I were in the market? Absolutely. Given its features and price, you can’t go wrong with this camera.
Here are a few more sample photos.


How to buy it
