How To

A bit about Wide Color Range and Lightroom

Those of you who follow my blog know I love color. I always look for ways to increase the intensity and range of the colors in my photos. I like to call it WCR (Wide Color Range). Who knows what it’s really called… Since I’m self-taught, that’s what I call it. I wrote recently about one of the ways I post-process my photos, and have gotten a lot of great feedback on that method. But it’s not suited to every situation. While it works very well for architecture, some nature, and even some portrait photography, the colors get to be too harsh in other situations.

So I started to experiment, and found that Lightroom is quite capable when it comes to achieving most of my post-processing goals. I really like the ability to make tonal and individual color adjustments without opening Photoshop. For example, I find Lightroom’s heal tool much easier to use than the heal tool in Photoshop. There’s a very practical reason for preferring to work in Lightroom as well, and it’s this: every time I transfer a RAW image to Photoshop, it turns into a 45MB file. Add an extra layer, and it doubles in size. That means every finished PSD or TIF file gets to be anywhere from 90-135MB or more. Compare that with 7-8MB for the original DNG file, and you can see how quickly hard drive space becomes an issue, particularly when a typical photo session of mine yields about 300-400 photos or more.

The key to using Lightroom (at least for me) is to be bold, to not be afraid of potentially ruining a photo. There’s always the reset button in case my results are off the mark. That means I can experiment all I want, non-destructively, which is hugely beneficial.

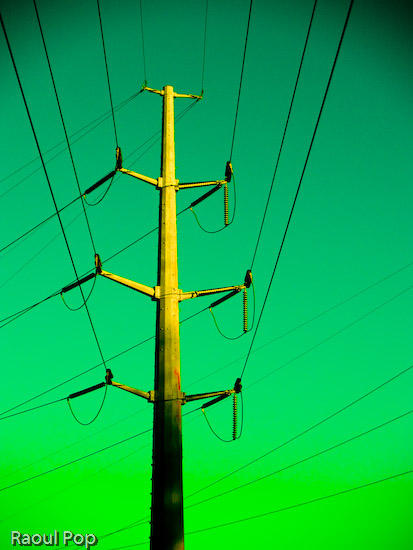
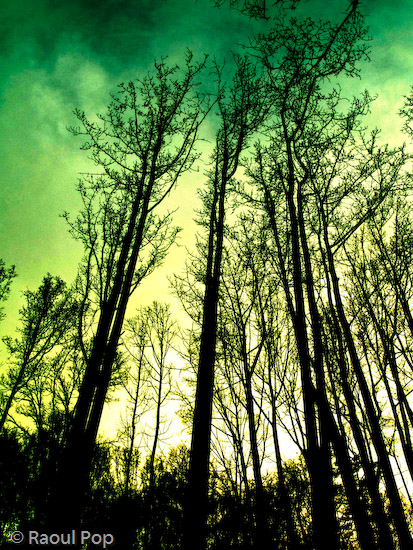
Here are a few of my recent results with Lightroom. In this photo, the sky was a fairly colorless light blue, though there were some tonal differences that allowed me to change hues and their intensity and really bring out the greens.

Green power

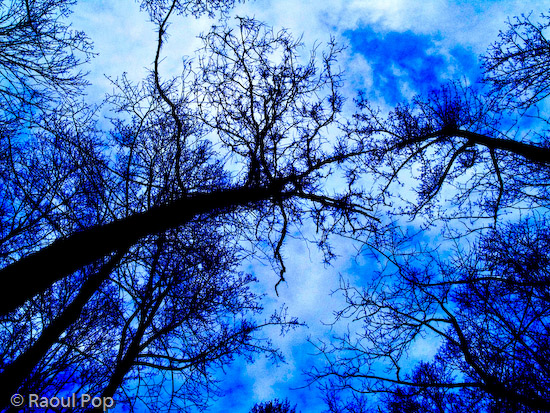
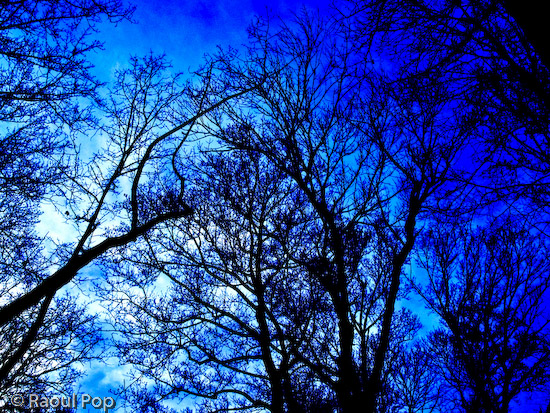
Here the sky was a light blue, but I wanted a different look, since I have tons of tree photos in my library.

Sensory perception

This was fairly simple, just slight vignetting with blue and green color enhancements, but I really like the result.

Windswept but steady

This one was a bit more complicated, with lots of tonal, hue, saturation and lightness adjustments. I really like how all of the trees are straight, spaced closed together, and yet still allow a nice view of the horizon. That’s why I photographed them.

Get up, stand up

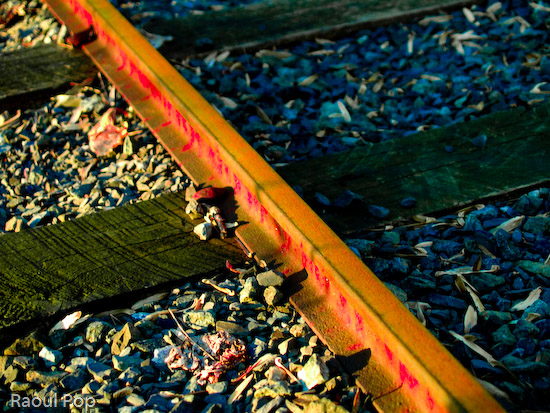
There was no blood on the tracks in this photo, nor was there any red paint. There were some dark orange rust spots though. I changed their hue from orange to dark red in Lightroom, then increased that particular color’s saturation. Finally, I decreased that color’s lightness in order to darken it. In real life, those railroad tracks look perfectly normal, though rusty from a winter’s disuse.

Blood on the tracks

Standard
How To

My own sort of HDR

I’ve been intrigued by HDR (High Dynamic Range) post-processing for some time. At its best, it renders incredible images. At its worst, average, and even good, it renders completely unrealistic, overprocessed, unwatchable crud. Even some of the best images made with HDR methods seem weird. They’re not right — somehow too strange for my eyes. But, I did want to try some of it out myself and see what I’d get. The challenge for me was to keep the photo realistic and watchable. I wanted to enhance the dynamic range and color of my photos in an HDR sort of way. I also didn’t want to sit there with a tripod taking 3-5 exposures of the same scene. As much fun as that sounds, I don’t always carry a tripod with me.

By way of a disclaimer, I have not researched the production of HDR-processed images thoroughly. I have, however, seen a boatload of HDR images on both Flickr and Zooomr. I did read the tutorial that Trey Ratcliff posted on his Stuck in Customs blog. Of course, we all know Trey from Flickr, where he posts some fantastic HDR images on a daily basis. So, given my disclaimer, realize I don’t say I’m the first to have done this. I’m just saying this is how I worked things out for myself. If indeed I’m the first to do this, cool! If not, kudos to whoever did it before. I’d also like to encourage you to experiment on your own and see how things work out for you. Change my method, build on it, and make something even better. While I’m on the subject, I’m not even sure I should call this processing method HDR. It’s more like WCR (wide color range). What I’m really doing is enriching the color range already present in the photo while introducing new color tones.

When I started, I experimented with Photoshop’s built-in Merge to HDR feature. Using Photoshop, after a few non-starts that I deleted out of shame, I got something halfway usable. Have a look below.

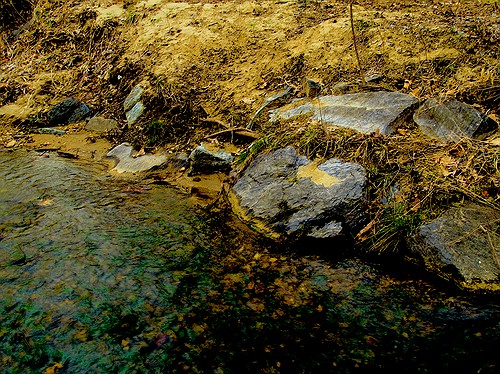
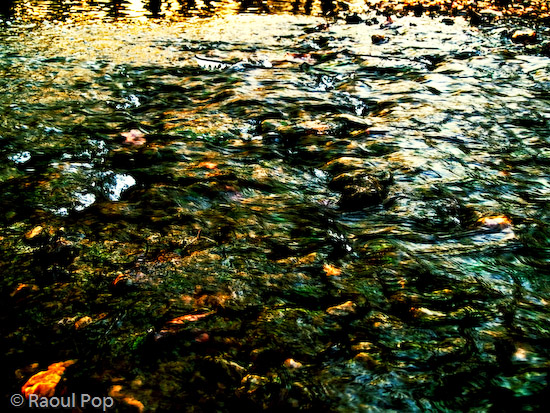
Brook and rocks

Here’s how I processed the photo above. I shot three exposures of that scene in burst & bracket mode, handheld (no tripod), in RAW format. Then, I darkened the low exposure, lightened the light exposure, and exported all three to full-res JPGs. Used Merge to HDR in Photoshop, got a 32-bit image, adjusted the exposure and gamma, converted to 16-bit, adjusted exposure, gamma, colors, levels, highlights, then smart sharpened and saved as 8-bit JPG. It came out okay — not weird, at least not too much, anyway, but still not to my satisfaction. I should mention I also used a sub-feature of the Merge to HDR option that automatically aligned the images. As I mentioned, I shot handheld, and there were slight differences in position between the three exposures. Photoshop did a pretty good job with the alignment, as you can see above. It wasn’t perfect, but definitely acceptable.

I know there are people out there saying Photoshop doesn’t do as good a job with HDR as Photomatix. It’s possible, although I got decent results. Maybe at some point in the future I’ll give Photomatix a try, but for now, I’m pretty happy with my own method — see below for the details.

But first, what’s the point of HDR anyway? When I answered that question for myself, I started thinking about creating my own (WCR) method. The point as I see it is this: to enhance the dynamic range of my images. That means bringing out the colors, highlights and shadows, making all of the details stand out. Whereas a regular, unprocessed photo looks pretty ho-hum, an HDR-processed photo should look amazing. It should pop out, it should stand out in a row of regular images. It should not look like some teenager got his hands on a camera and Photoshop and came up with something worthy of the computer’s trash bin. As I’ve heard it from others, the standard way to postprocess a scene in HDR is to take 3-5 varying exposures, from low to high. Those exposures can then be combined to create a single image that more faithfully represents the atmosphere and look of that scene.

But, what if you don’t have a tripod with you? Can’t you use a single image? Yes, you can shoot in RAW, which is the equivalent of a digital negative, and good HDR software can use that single exposure to create multiple varying exposures, combine them and create an image that’s almost as good as the one made from multiple original exposures.

What if you want to make your own HDR/WCR images, in Photoshop, all by yourself? I wanted to do that, and I think I arrived at a result that works for me. Here’s what I did. I took a single exposure of a brook in the forest, which you can see below, unprocessed.

Brook, unprocessed

There’s nothing special about this photo. It’s as the camera gave it to me, in RAW format. The colors are dull and boring. There’s some dynamic range, and the color range is limited. It’s all pretty much made up of tones of brown. I took this single exposure, converted it to full-res JPG (but you don’t have to, you can use the RAW directly,) put it in Photoshop, created three copies of the original layer, called them Low, Medium and High, then adjusted the exposure for Low to low, left the exposure for Medium as it was, and adjusted the exposure for High to high. Then I set all of them to Overlay mode. (The original JPG, preserved in the Background layer, was left to Normal mode and was visible underneath all these layers.) The key word when talking about exposure here is subtle. Make subtle changes, or you’ll ruin the shot.

As soon as I adjusted the layers and changed them to Overlay, things looked a lot better. The dynamic range was there, it just needed to be tweaked. So I went in and adjusted the individual exposures for each layer some more to make sure parts of the photo weren’t getting washed out or ended up too dark. Then I threw a couple of adjustment layers on top for levels and colors. Finally, I duplicated the three layers and merged the duplicates, then used the smart sharpen tool. The adjustment layers were now on top of it all, followed by the merged and sharpened layer, and the three exposure-adjusted layers, which were no longer needed, but I kept them in there because I like to do non-destructive editing. Here’s the end result, exported to a JPG.

Brook, processed

This is the sort of post-processing that pleases my eye. The details were preserved, the colors came out looking natural yet rich, and things look good overall. Even though some spots are a little overexposed, I like it and I’m happy with it. Let’s do a quick review. Using my own WCR/HDR-like method, I accomplished the following:

  • Used a single RAW/JPG exposure
  • Didn’t need to use a tripod, could shoot handheld
  • Didn’t need special software, other than Photoshop
  • Achieved the dynamic range I wanted
  • The photo looks natural, at least to my eyes
  • The post-processing was fairly simple and took about 30 minutes

There is one big difference between my WCR method and the usual HDR post-processing. Done right, the latter will help bring detail out of the shadows. Because of that single or multiple exposure done at +2 EV or more, spots that would normally be in the dark in a regular photo can be seen in HDR. Not so with my method. Here the darks become darker. The atmosphere thickens. The highlights become darker as well. The whole shot gains character, as I like to call it. So this is something to keep in mind.

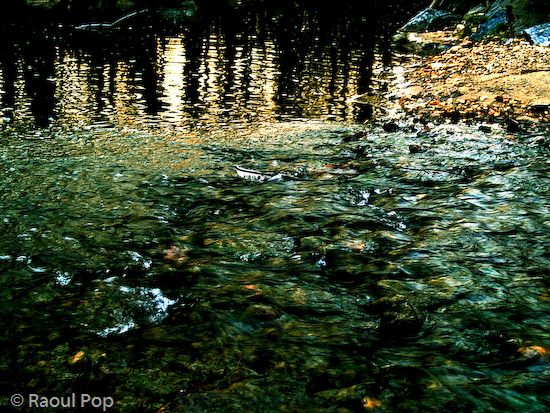
Just to clarify things, the image above was the first result I obtained using my method. There was no redo. I then processed some more images, and got a little better at it. It’s worth experimenting with the Shadow/Highlight options for each individual layer. It helps minimize blown-out spots. It’s also very worthwhile to play with the Filter tool for each layer. This really helps bring out some nice colors. It’s sort of like taking three exposures of the same scene with different color filters. The results can be stunning if done well. You also don’t need to use three overlays. It all depends on the photo. Some photos only need one overlay, while others need four or five. Subtle changes in exposure can help bring out areas that are too dark. You can see some photos below where I used my own advice.

Brook, take two, processed

Meeting of the minds

Parallel lines

There you are

I hope this proves useful to those of you out there interested in this sort of post-processing. It’s my dream to see more natural and colorful photos, regardless of whatever post-processing method is used.

Standard
How To

Hacking the GN calculations when using manual flash

Here’s how to hack it when you’re stumped as to what guide number to use with a manual flash. This is useful when you’re using an analog SLR that won’t sync the flash power automatically, or you’ve got a DSLR and want to fine-tune the amount of light the flash puts out. I can’t stand having to calculate this with formulas. We all may have seen this :

Aperture (f-stop) = GN X ISO/distance (in meters)

But do any of us know it by heart, or better yet, want to know it? And are we really going to take out a tape and measure the distance to the subject? I know I don’t feel like it. So how can we hack this? Well, we use what knowledge we have to ascertain the flash power we want, and then we adjust the GN (Guide Number) up or down. It works like this:

  • Higher GN means more power for the flash and consequently, more light
  • Higher f-stop means smaller aperture, and that translates to less light coming into the camera
  • Higher ISO means better sensitivity to the light that the aperture lets in
  • Higher distance means less light (remember, we’re using a flash, and the effective distance is limited)

So, what does this mean for us? Simple: we can adjust any of the four factors listed above to get the photo we want. Need more light? Boost the GN and/or the aperture. Can’t get more light, but want a better photo? Boost the ISO, but recognize the photo may be grainy. Can’t boost ISO? Decrease the distance between you and the subject.

Of course, keep in mind that when you boost aperture (choose a lower f-stop), you’ll decrease the depth of field. Think of the focus field as a loaf of bread. When you use a small aperture (large f-stop, 16 for example), you get the whole loaf in the shot. When you use a large aperture (small f-stop, 1.4 for example), you get only a slice in focus. You can effectively think of f-stops as slices of that loaf of bread. Larger f-stops means more slices. So if you’ve got objects in this photo of yours that reside at various points of focus (more slices), to keep them all in focus, you’ll need to keep the aperture fairly small (large f-stop). If you’re only interested in a particular object, by all means, increase the aperture (small f-stop), get more light that way, and use a lower GN. You’ll get more natural colors. Flash light can be harsh and wash out the nuances if overused, so the less you can use, the better off you are.

Don’t think I’ve forgotten to talk about shutter speed. Just realize that you won’t have too much flexibility there, in particular if you’re shooting handheld. Even with a tripod and manual flash, you can’t adjust the speed that much. Too slow, and any people in the photo will be blurry. Plus, the flash will be ineffective. It can’t stay lit for several seconds or more unless you use a bulb. Too fast, and you won’t get any light. Plus, if you’re syncing the flash with the camera, you’re limited by the top sync speed, which varies by camera and usually runs from 1/180 to 1/250 seconds. You’re better off playing with the other variables in the equation.

Remember, you don’t need to go to the trouble of using manual flash unless you have to. If you need to adjust flash intensity and your camera allows it, you can easily boost or decrease it through simple menu functions. Just look this up in your camera’s manual. You can usually use the +/- button, if your camera has one.

Hope this helps!

Standard
How To

10 tips for taking better photos

Church

In a recent post about winnowing my own photos, I mentioned briefly that I’m tired of wading through mediocre photos on online sharing sites in order to arrive at the good ones. While that’s true, it’s not nice to criticize without offering a solution. This quick tutorial is my proposed solution. I really hope it helps people take better photos.

This advice is meant for the 80% of people out there who own a camera and pick it up once in a while to take photos at an event or during a trip, without much thought about composition, aperture, shutter speed, lighting and other such things, but merely with the desire to capture the moment. I know from personal experience that many of these same people are disappointed when they get home and download the photos to their computers. Why? Because their photos are out of focus, or too bright, too dark, colors are too light or off, etc. These people end up thinking that’s just the way things are, and they shouldn’t expect better photos. But they’re wrong! By doing a few simple things, the appearance of their photos (and your photos) can improve dramatically.

So what makes me qualified to offer photography advice? I’ve been photographing places, nature and people for more than 15 years. I too was a casual photographer for a large portion of that time, and when I couldn’t stand my own terrible photos any more, I decided it was time to improve. What I know, I learned on my own and from various books and many articles that I’ve read over the years. I practice the advice I give below, and know it works. My photos improved dramatically when I started to shoot digital, because I could shoot a ton of photos and learn much faster what worked and didn’t work.

Here’s what you can do (and this applies in particular to the smaller digital cameras):

  1. Hold the camera steady. I know it’s difficult to do with a tiny little camera, but use both hands. Grab the corners of the camera, or put your palm or side of the hand underneath the camera to support it as you take the shot. If you hold the camera casually, you risk moving it up and down as you press the shutter button. I know you are tempted to take shots with one hand when you use your camera, but if you don’t hold your hand rock-steady, you’ll likely get a blurry shot. (Yes, some of the cameras nowadays have image stabilization, but it’s a good idea not to rely on it entirely. You’ll find its effect is limited.)
  2. Don’t stick your fingers in front of the camera. Your camera has a lens. It uses that lens to look at the world, and capture the images it sees when you tell it. If you stick your finger in front of that lens, or worse, keep it right over the lens, don’t be surprised with the results. And if you’ve been wondering just why your photos always come out blurry, you might want to check how you hold the camera. There might be an autofocus sensor under that finger of yours. That sensor needs to have an unobstructed view of the subject, so it can measure the distance properly and tell the camera how to focus. Some cameras also have a separate light sensor that measures ambient light. When your finger’s on it, it’s in the dark, and so is your camera. Daylight shots will come out completely washed out, because the camera thinks it’s dark and exposes the sensor/film too much.
  3. Clean that lens. I know you like to hold your compact camera in your hand or in your pocket. And if you have kids, they like to play with the camera as well. Have you ever looked at your lens? It’s probably full of muck and fingerprints. Clean it. Use a damp soft cloth, or even better, a lens cleaning kit, which comes with cloth and special solution. It’s inexpensive, and does wonders!
  4. Set your camera’s mode dial to P. That is, if your camera has a mode dial. Don’t set it to A, which you might think stands for Automatic, but actually stands for Aperture Priority, and don’t set it to S or M, which stand for Shutter Priority and Manual, respectively. Set it to P, which stands for Point and Shoot. That way, the camera does its thing and you only need to worry about pressing the shutter button.
  5. Get familiar with your camera’s scene modes. I know most of you are used to just turning the camera on and pressing the shutter button, and you might or might not have wondered what certain icons on your mode dial or in the camera menu meant. Well, if they look like people, or flowers, or mountains, they’re scene modes. They adjust the camera’s settings so you can take better photos in those situations. It’s kinda like shifting into a lower gear when you descend a mountain. You know, you’re used to putting your car in D, and you never think about those other numbers, like 2 and 1, that you also find on your automatic drive. But you find out really fast that if you shift your car into 2 or 1 as you go down a hill, you have to use the brake a lot less. It’s the same with your camera. It’ll work without the scene modes, but it’s a lot easier when you use them. So take out the manual if you can find it, or download it from the camera’s website, and look up the instructions for scene modes. Learn how to switch to Landscape mode when you’re shooting mountains, or into Portrait mode when you take photos of people, and into Macro mode when you photograph flowers or other objects at close ranges. Other cameras have scene modes for cloudy days, for the beach, for snow, etc. Use them, they’ll make your photos much better!
  6. Walk, don’t zoom. When you can, try walking closer to the person or object that you want to photograph. When you use the zoom, any little shake of the camera affects the sharpness of the photo. Oftentimes, the photo will come out blurry if you take a tele shot with a handheld camera. Getting closer to your subject really, really helps! And for goodness’ sake, don’t use the digital zoom feature, it’ll suck the quality right out of your photographs.
  7. Frame the shot. Don’t just take that camera out of your pocket and snap away at everything you see, hoping you’ll get some decent shots. Plan those shots if you want them to be good. It only takes a few seconds to frame the subject on your camera’s screen or viewfinder. Look at the screen. Do you like what you see? If you don’t like it, don’t take the photo, try a different angle/position. If you’re taking a photo of a person, it’s really boring to have them in the center of the shot. Move the camera slightly so they’re off-center. You’ll be surprised at how much better the photo will look. While I’m on the subject, I can’t tell you how tired I am of seeing photos of grinning people in front of buildings or monuments. Have your subjects do something interesting, like look at the building. Take the photo from the side. Or take a candid shot, while they’re looking at something else, with the object of your desire (building, monument, statue) in the background. It’s much more interesting that way. If you’re taking a photo of a well defined subject like a flower, a car or a person, don’t cut them off in ways that make them look strange. It’s usually better to get all of that object in the photo and crop later. As you get more experienced, you can start to experiment, but as they say, you must know your ABC’s before you can read…
  8. Know your camera’s limitations. I don’t mean you should be able to quote the specs back to me, but know the basics. Does it take good shots in the dark? If it does, great. If it doesn’t, don’t expect to get good shots in the dark, particularly as you get farther from your subject(s). Realize that the built-in flash can only do so much, and in the dark, even at twilight, your shots aren’t going to be all that great. They’re either going to be too dark (if you’re far) or too washed out (if you’re too close,) or they’ll be blurry because someone in that shot moved, or your hand moved, etc. How long does it take from the time you press the shutter button to the moment your camera takes the shot? Realize you need to account for the focus time as well, and different cameras have different focus times. With some cameras, there’s a delay of over a second until they take the shot. They have to focus, then they take additional time to activate the shutter and store the shot. You can’t just press the button and expect a great shot unless you have a good DSLR. Know what your camera can do, and realize that you won’t be able to get some shots when you only have a few moments. Also be aware of how many photos you can get on a battery charge, and plan your photo taking around that number. You don’t want to be left with an empty battery when there are plenty of opportunities for great shots all around you.
  9. Do some basic post-processing. No, you don’t need Photoshop for this. You can do it for free with Picasa on Windows and iPhoto on the Mac. They’re both great at letting you do basic tasks such as adjusting exposure, lighting, boosting color, adding sharpness, removing red eyes and cropping. You won’t believe your eyes when you see the difference in your photos! Trust me on this one, take a half hour to learn how to manipulate the controls in Picasa or iPhoto, and you’ll be thanking yourself again and again. So many mediocre photos can be helped by a little post-processing that it’s staggering! Really, I can’t emphasize this enough.
  10. Use my favorite fix for bad photos: the Delete button. This works wonders! You can declutter your photo library in minutes, and end up with decent photos you’ll actually want to show people! You’ll no longer want to avoid looking at your photographs! Have no mercy, just delete that horrid shot. If you followed steps 1-9 and you still couldn’t help a particular photo, put it out of its misery. Delete it for good!

If you want to get a few more tips, read the post I wrote about photographing Walt Disney World.

Hope this helps you, really!

Standard
How To

Quick tip: Increase or decrease font size on web pages

On a PC

Hold down the Ctrl key and move the scroll wheel on your mouse up or down to decrease or increase font size, respectively. Works in IE and Firefox on PCs.

On a Mac

Use Command and + or Command and – to increase or decrease the font size.

Standard