
The National Association of Emergency Medical Technicians is getting the word out about ICE, an acronym which stands for In Case of Emergency. ICE entries in your phone’s addressbook can help paramedics decide who to call if you’re hurt. The advice given is to “type ICE into your phone’s directory and include a name and number under the heading.” Always include an area code. Should you need to include multiple entries, call them ICE1, ICE2, and so on. You can also designate your next of kin with ICEWife, ICEMom, ICEDad, etc.. Make sure your contact has your basic medical information: blood type, allergies, and medications you’re taking. Source: Summer 2006 edition of the USAA Magazine.
Tag Archives: advice
A practical approach to shaving
Updated 9/21/12: Since I wrote this article, I also made a video where I go through a typical wet shave with a DE safety razor.
You may also enjoy this post, where I talk about how my shaving habits have evolved over time, or this post, where I talk about the current range of shaving products.
Now back to the original article…
For First-Time Shavers or Those With Sensitive Skin
I’ve wanted to write an article about shaving for some time, but didn’t get around to it until now. In a society where shaving products can be found virtually everywhere, there is a surprising paucity of resources about just how one should shave. I recognize shaving is a very personal and thus, a subjective experience, but someone ought to iterate some useful advice gathered from their experience. For me, I know the advice I give in this article would have been a real gold mine, and would have saved me from needless and countless pain and irritation. I think shaving ought to be an enjoyable experience. After all, most men have to do it about every day, and when you do something that often, it shouldn’t be a source of pain. With these thoughts in mind, let’s proceed.
Shaving Utensils
I prefer to use the old-time shaving soap and a shaving mug, but you don’t have to. I enjoy whipping up the lather every morning. It’s my little shaving ritual, and it helps me get ready to shave. If you’re interested, get a good brush, preferably one made of badger hair.
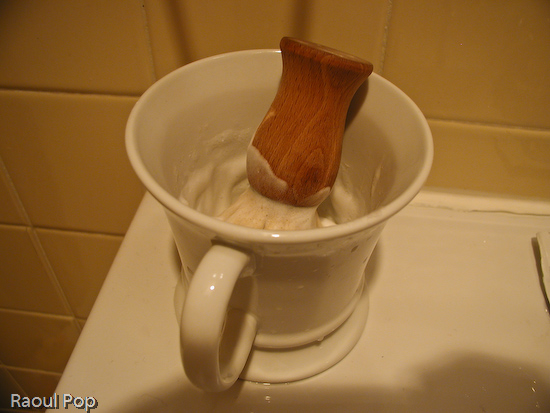
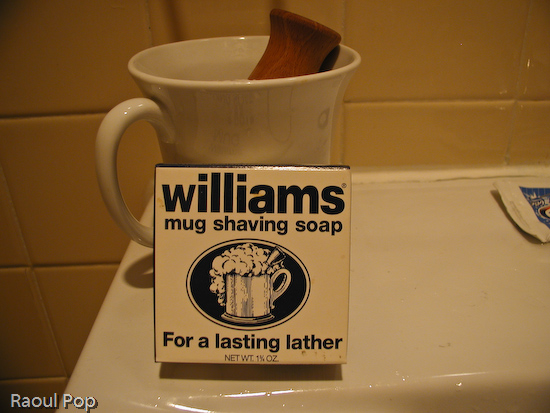
I use Williams Mug Shaving Soap. I tried the Colgate brand a while ago and it’s alright, too. Warm up the mug by running it under hot water, then moisten the soap and the brush with hot water as well. Rub the brush over the soap in a circular motion until you build up a good amount of foam. It should be solid foam that can stand on its own, not the soft bubbly type you get from regular soap when you wash your hands.
If you’re going to use shaving lotions or gels, then I recommend picking one that’s gentle to the skin and has moisturizers. Avoid the lotions that make your skin tingle, they’ll irritate your face if it’s sensitive, and the shave may hurt more. I don’t have any specific recommendations, since I seldom use them.
To shave, I use a Gillette Mach 3 razor. I realize Gillette will come out with newer models as time goes on, so don’t think you have to stick with this model. Find what works for you. Personally, I find the Mach 3 razor strikes a good balance between a close shave and a concern for those with sensitive skin. The only problem I’ve found is that if I don’t gently angle up the blades as I shave my moustache, it’ll leave some hairs at the base of my nose, so you may want to watch that if you use this product.

I also find the single-blade razor useful for troubleshooting purposes. What I mean is that I use that once in a while to see where my shaving technique needs improvement. The areas where I cut myself or irritate my skin needlessly is where I’m probably not using correct technique. I’ll discuss shaving technique in just a bit.

If you are experiencing a high level of irritation during your shaves, you might want to start working on your technique by using one of the BumpGuard razors. They’re marketed toward African-Americans, who are more prone to develop bumps from ingrown hairs, but they work great for those with general irritation as well. I actually keep a couple in my bathroom cabinet all the time, and use them once in a while to give my face a break from the Gillette razor.
I don’t recommend the use of electric razors, although I’ve used them for years. They irritated my face, in particular the Norelco razors, which pull on the hair as they shave it. I suppose that works for some men, but for me, it was sheer pain. I used a waterproof single-foil Panasonic razor for some time, with okay results, and then I purchased a dual-foil Braun razor (fairly expensive). It gave me poorer shaving results than the Panasonic, which was half the price of the Braun. At any rate, I experienced varying levels of irritation no matter which electric razor I used, and my neck would tingle and feel painful to the touch all day long.
Now, what about aftershave? I use something very simple: Witch Hazel. It works great for me, and I can get a large bottle for the same price as an after-shave lotion. It works great year-round, but I also use a moisturizer during the winter months, because my face gets dry. You may be in the same boat.

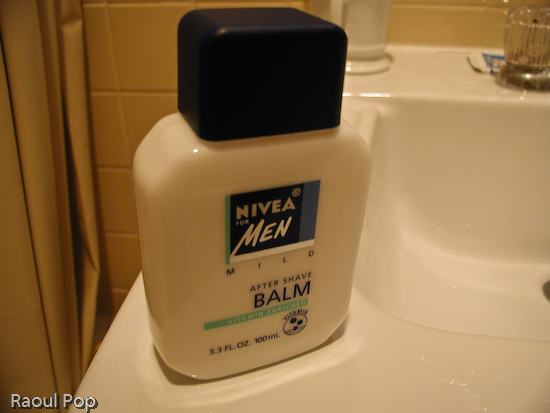
I also use the new (or fairly new, anyway) Nivea Men After Shave Balm. It’s pretty good. If you really want to moisturize your face though, I recommend the plain Nivea Creme (not pictured). It’s thick and harder to apply, but boy, does it moisturize! It virtually winter-proofs your face.
Shaving Technique
Here’s where things get dicey, if not done right. They talk about proof in the pudding… well, the proof is going to be on your face. It will show you if you’ve done things right or not. I really believe that! Let me give you a little background so you can see why.
I thought I was incurably sensitive to shaving, and that I would always have to deal with serious irritation and even bleeding every single time I shaved. This wasn’t bleeding from cuts, although I had those once in a while, too. This was generalized bleeding at the site of irritation. Little drops of blood would start appearing on large areas of my neck or on the sides of my jaws, areas which were particularly sensitive. I struggled with this for years. I saw family doctors and dermatologists, and about the only advice I could get out of them was to shave less often (not much of an option when you’re trying to maintain a neat appearance) or to try the BumpGuard razors.
The last bit was definitely good advice, and it started me down the right path. I went out and purchased some, and couldn’t believe the difference it made the first time I used them. I had no generalized bleeding, although I did have some little cuts, and significantly less irritation! The shave wasn’t as smooth, but the lack of bleeding more than made up for that. I realized I was onto something, and maybe there was hope for me. If you’re in the same boat, read on to see what I did.
I started looking all over the Internet, and found numerous sources that talked about some of the following useful things, but to my knowledge, none had a complete set. I’ve compiled a list of what I found here:
Moisten your facial hair with warm to hot water before shaving. Don’t just wet your face with warm water, take handfuls of water and splatter them on your face. Your stubble should be soft to the touch when it’s properly moistened. If it helps you do it right, use a facial towel that you’ve held under hot water. Keep that on your face and neck for about 30 seconds. Even better, take a shower and shave afterwards.
Use a new blade, not an old, dull blade. If you’re using disposable razors, a cartridge will last you about a week for optimum cutting, give or take a few days, depending on your facial hair and technique. That’s not a lot of time, so have plenty of cartridges on hand.
Shave with the hair, not against it. This is key, especially on the neck or underneath the jaw, where hair doesn’t run straight down, but to the sides or even upwards (at least it does so on my face.)
Rinse with cold water. Don’t use ice-cold water, but use room-temperature water, and rinse off the soap thoroughly. If you leave some traces of soap on the face, it’ll itch and irritate your face. Ice-cold water will dry your face, and it’s also an un-needed shock.
Use a good after-shave. The key here is to use something. I used rubbing alcohol in the past, with good results. My grandfather uses that all the time, and his face looks great after shaving. I now use witch hazel, it’s a little gentler than the rubbing alcohol. In cold seasons, use a moisturizing lotion as well. See section entitled “Shaving Utensils” above for more details on this.
This is all good advice, and I encourage you to follow it. The thing is, I did most of these things, or at least I thought I did, and I still had serious problems shaving. So, what solved it for me? To the list above, I would add the following pieces, and this is what I’ve found to make the difference:
Apply the shaving lotion properly. Build a good amount of foam on your face. If you’re using soap, rub that brush in circular motions across your face until the foam is solid to the touch, like whipped cream. See the photo to the left for an example. Leave joking aside for a second and look at the way I’ve applied the soap. You want to make sure you’re properly covering your face. If you’re using a shaving lotion or gel, don’t assume that just because you’ve quickly applied it to your face you’re good to go. Really rub it on until the gel turns into solid foam. Even nowadays, I find that when I don’t build up the foam to a proper consistency, I’ll get irritated.

Let the blade do the cutting. Don’t apply extra pressure with your hand. Apply only enough pressure to move the blade across your face, not more. If the blade is new and sharp enough, it’ll do the job just fine. If you get into the habit of applying more pressure, you will – I repeat, you will – irritate your face, and induce bleeding. I was guilty of this myself.
Use small, fairly quick strokes, not large, long and slow ones. This is really important. It’s when you use the long strokes that you inadvertently cut your hair against the grain, or induce cuts in the skin, or shave off some skin beside the hair, causing irritation. If you use small, measured strokes, it works out just right. You don’t get irritated, and you can control the blade better. I know they always show these models on TV shaving the entire length of their neck with one stroke, but that’s only for show. It’s misleading. Don’t go by it! Trust me and use small, measured strokes. You’ll see the difference.
Rinse the blade often so it’s clear of foam and hair. This may seem like a minor detail, but it will pay off. If the blade is clean, you don’t have to guess to know how close it is to the skin. You know how much pressure you need to apply. If there are hairs trapped between the blades, you will drag those hairs across your skin as you move the blade, increasing your chances for irritation.
Replenish the foam by re-applying it in those areas where it’s dry or thinner. There’s no shame in re-applying foam to your face. You won’t fail Shaving 101 if you can’t finish shaving before the foam dries off, and it will dry off in just a few minutes. Don’t feel bad, it’s normal. Just wet the brush again, work up some foam, and re-apply. If you don’t, and you shave over thin or dry foam, you will certainly get irritation. It’s a given!
Alright! If you’re following these steps correctly, you should get a nice, clean shave, like the one pictured below. If you still have problems, you need to go back over the pieces of advice I’ve given you. If at any time you start experiencing irritation or bleeding while shaving, it’s very likely that your technique has deteriorated. You might want to give your face a break by using a BumpGuard razor for a few days, and it wouldn’t hurt to use a single-blade razor so you can pinpoint the zones where you’re not shaving properly. Wherever you get cuts and irritation, that’s where you’ve got to improve.

Hope this helps!
How not to treat your Betta fish
I have written this article with the hope of discouraging Betta owners from engaging in potentially hurtful practices when it comes to their fish. Bettas are treated quite casually and often abused. I believe they are much smarter than generally known (see article entitled The Underrated Betta Fish) and deserve better treatment.
The most important abuse that takes place is this: they are made to fight with each other in many countries, their owners knowing full well that they fight to the death. In the US and the more “civilized” countries, this practice is not as wide-spread, though what we have here is not a whole lot better. Here we sell Betta aquariums with clear dividers that are meant to house two or more Bettas in clear view of each other. This is supposed to enhance their appearance, because the poor things puff up their fins, thinking their territory is threatened. What few people realize is that this practice is very stressful for the Bettas. Although the fish are not damaged externally, and what I mean by this is that they don’t tear each other up, internally they experience the same stress. We all know what stress does to our bodies. Well, it has the same effect on Bettas. How would you like to live every moment of the day continually angry? That is what happens to them when they are placed in those sorts of aquariums. They feel continually threatened, and live in constant stress. Overtime, they get sick and die, whereas they would have had much longer and better lives if they were left to lead a peaceful existence.
Bettas are bred and transported in tiny little jars, and most of them never see a bigger aquarium, since they are also kept in small jars by their owners. This is an error, and it can be attributed to those people who say that Bettas are not pretentious, and that they’ve even heard of them living in the puddles left by horses’ hoofs somewhere in Southeast Asia. Just because Bettas can live in that sort of an environment doesn’t mean they like it. Fish love to live in large spreads of water, no matter what species they are.
Another issue is the cleanliness of the Betta aquariums. Just because Bettas can live in murky water doesn’t mean the average Betta owner can let the tank water get ridiculously dirty before they change it. What’s worse, some people actually believe that they can buy these sorts of Betta jars, where the poor thing is sandwiched in between the bottom of the tank and some silly plant growing above. I’m not sure who spread that silly rumor, but apparently they’ve said the Bettas need no food or fresh water when they’re placed in that sort of jar — and the rumor has spread! Apparently, the jar can be a fully self-contained, perpetual eco-system! What kind of a cockamamie story is that? I’d like to know what these people were on when they came up with this crud. Would you like to live in a tiny jar, surrounded by your own pee and doo-doo, and be forced to nibble on bitter plant roots when you’re naturally carnivorous? If you do, there’s something wrong with you. Bettas enjoy a nicely sized aquarium as much as the next fish. Don’t forget that while their origin is indeed from Southeast Asia, and they are commonly found in flooded rice paddies, their”aquariums” over there are quite large. They encompass entire fields! Yes, the water may be murky at times, and when the sun dries up the fields, they may shrink in size to little puddles, but that doesn’t mean the Bettas like to live that way all the time.
A mistake that people make is not spending enough time with their Bettas. Most of the time, they are thought of as ornaments to the room. That’s not how a smart fish can be treated. If they are continually ignored by their owners, the Bettas will withdraw into themselves, and will become loners. They will shy away from the owner when they are fed. The owner’s face next to the bowl will cause the fish to be frightened instead of happy.
Another problem I’ve found — and although it may seem minor, it does matter — is the size of the Betta Bits, the round pellets one finds in the pet stores. I’d like to know if the people who make those things have ever tried to feed them to the fish? They are much too big for their small mouths. My poor Bettas struggled to swallow them until I discovered that if I split them in half, it would make the job much easier for them. Why aren’t these things sized right? Bettas are not goldfish. They don’t have huge mouths. They are not the pigs of the aquarium; they are delicate little creatures, and their food ought to be tailor-made for them.
Do you know of other ways in which Bettas are shortchanged or worse, abused? Write about it in the comments.
A guide to saving energy
Given our dwindling energy resources, it makes good sense to conserve what we have left. If the phrase “dwindling energy resources” is news to you, welcome back to reality. Where have you been, and was it nice there?
With these concerns in my mind, I’ve put together a list of energy-saving tips that will help both the environment and your pocketbook. I’m fairly sure that you may have seen some of these tips before, but what I’ll try to do is to come up with a comprehensive list grouped by categories in alphabetical order, that I will update as I stumble upon more material.
Bathroom
- Don’t take very hot showers. Some of us like that sort of thing (including me,) but not doing it saves a whole lot of energy, and according to my wife, is also better for the skin. Apparently very hot water dries the skin and makes it less resilient. Hot water is also bad for your hair. It dries it out too, and it has a tendency to break afterwards.
- Don’t leave the water running while you brush your teeth.
- Squeeze the toothpaste tube only from the bottom – just kidding! I squeeze it from the middle just to spite the people that write those directions on the tube.
- You’ve all heard this saying, right? “If it’s yellow, let it mellow, if it’s brown, flush it down…” Well, I think it’s downright disgusting not to flush after urinating, so flush those toilets, for goodness’ sake! But you could invest in a toilet that uses less water per flush.
Cars
- Be sensible and realize that oil reserves are not unlimited. Just because we don’t have to stand in line to buy gasoline here in the States doesn’t mean you have the right to drive a Hummer or some other gas guzzling SUV or large sedan. Think about this: now, in 2004, the price of gasoline in Europe is 2-3 times what we’ve got here. How long do you think this difference will last? I tell you, not long. Invest in a gas-sipping automobile, preferably a hybrid, before your monster’s resale value drops to nothing.
- Plan your trips carefully. Going to the drugstore to floss shouldn’t qualify as a car trip. If you’re going to use your car, go to multiple stores during the same trip.
- Quit trying to impress the person next to you in traffic lights. So your car is probably faster than theirs. So what! It doesn’t mean you should speed off every time just so your ego can get a nice pat on the back. Be reasonable and conserve your acceleration for those times when you really need it.
Computers
- We have all heard that it pays to leave your computer on all the time, because it’s built with energy-saving devices, and it can be programmed to power individual devices such as hard drives off, etc. Let’s do a bit of math here. Most computers nowadays come with a 320W power source and some with ~400W power sources. If you leave it on all the time, chances are it will only be used actively for about 4-5 hours out of a day, more for some people, less for others. For the rest of that time, it will consume electricity at the rate of 3 (that’s three) 100-watt light bulbs and some change. Would you leave three 100-watt light bulbs on all the time? I didn’t think so. If you’re not sure about the impact your computer has on your electricity bill, just turn off everything else in the house and go look at your electricity meter (note: at 2004 rates, if left on all the time, a computer will cost about $12-15 per month in electricity). That meter’s rotating kind of fast, doesn’t it? Now do you begin to get the point? Therefore set your computer to go into Standby mode after a half hour of idle time. If your network card is equipped with Wake On LAN capability, then get your computer to go into Hibernate mode – most Windows computers using the latest OS can do this without a problem. On an Apple this is Sleep mode – Apple doesn’t have a Standby mode. If neither Standby nor Hibernate will work for you, just TURN IT OFF. Don’t worry about those who say that over time, it will damage the computer. It’ll probably still last upwards of 5 years, which is well beyond the projected lifetime of most PCs.
- Set your computer to turn the monitor off after 5-10 idle minutes. CRT screens use quite a bit of electricity by themselves. Just look at the labels on their backs to see how much yours consumes. You can also just turn off the monitor. The power switch can take it, don’t worry. It’ll work for years, and years, and years… Well, you get the idea.
- Set the computer to turn off the hard drives after 30 minutes – 1 hour of idle time. They can start back up without a problem in about 5-10 seconds.
- Purchase a flat screen monitor if you can afford it. They consume a lot less electricity than CRT screens (about 2-3 times less), and they’re better on your eyes. They also emit less radiation, not to mention they take up a whole lot less space.
- Instead of adding extra hard drives to the inside of the computer, add them to the outside by purchasing a USB or Firewire hard drive enclosure. That way, when you’re not using them, you can simply unplug them and not have to worry about the extra electricity each uses as it spins around whenever the computer is on. Use them to store files you don’t need to access often.
- Purchase extra RAM. More RAM means less access time seeking the hard drives, thus, over time, less energy usage.
House
- Replace all your incandescent bulbs with the new fluorescent spiral bulbs. They consume 3-4 times less energy and give off better light.
- If you’re building a new house, or just replacing your drywall in your old house, then invest in good insulation. There are plenty of websites on the Internet that can teach you how to properly layer a wall from the outside to the inside in order to get the maximum energy savings – the process is easy and fairly cheap to implement. Just do a search on Google for this stuff. You’ll be happy you did when your heating/cooling bills arrive.
- If you’ve got a house, put a solar panel (or more if you’d like) on the roof. Store the electricity generated in a battery or generator. You can then use it to power the devices in your house, including air conditioning devices. I’ve heard of people that get paid by their energy company every month because they generate more energy from the solar panels that they are using. A little extra cash can’t hurt, right? Again, there are detailed descriptions for this stuff on the Internet.
- Install double glass pane windows. There are those windows that have two layers of glass and are filled with an inert gas in the middle. They are very energy efficient.
- Install draft guards on the main door(s) to your house/apartment. This will not only keep in the nice cool air in the summer (or warm air in the winter) but it will also keep out bugs, and we all want that, right?
- At night, only turn on the lights in those rooms that you’re using. If you’re afraid you’ll stumble over things, invest in night-lights. You can find fluorescent green night-lights that consume very little energy and last for years and years. Or you could purchase those combination night-light/deodorizers.
Kitchen
- Don’t use the dishwasher if you can help it.
- If you do end up having to use it, only wash full loads and put it on the cycle that takes the least time to clean the dishes. What I’ve found is that you can wash a full load in the Light cycle and get results that are just the same or better than washing it in the Normal cycle. I don’t know why, but that’s been my personal experience.
- Don’t leave the water running in the sink while you’re doing the dishes.
- Don’t open the faucets all the way if you don’t need a full jet of water.
Starting a vegan diet
First, if you are indeed motivated to go vegan, I want to congratulate you, and to let you know that the advantages are incredible. But… going on a vegan diet could be a very drastic step for anybody, especially if they’re eating the usual American fare: red meat, fries, cola and coffee. You will experience significant withdrawal symptoms, even if you are now a vegetarian. You will definitely crave all of your old favorites, and there will be plenty of times when you’ll ask yourself why. It’ll be up to you to let your mind overcome your senses, and to choose health over appetites.
No matter what we think of food, it is a drug. Although it may not come in test tubes, it is made up chemicals which trigger certain reactions in our body. Some of these chemicals are addictive. Sugar for example, is an addictive chemical. We humans will crave sugar if we get our body used to a certain quantity of it on a daily basis. Similarly, certain chemicals in red meat are also addictive. When the animals are killed, they release certain “fight or flight” hormones in their bloodstream, which quickly travel to the muscle cells that make up the meat. These chemicals remain there through the cooking process until those of us who still eat meat consume it. Once in our body, these hormones, which are still active, trigger certain sensations of well-being and raised awareness, which are then associated with meat-eating. And we probably all know about the addictive qualities of coffee…
In a similar manner, although not as obtrusively, all of the food we eat either gets associated with positive or negative feelings. That is why we like certain foods. And we don’t even have to like them to experience withdrawal symptoms, we just have to be used to eating them. Their absence in our diet will make us miss them.
It is for these reasons that a great many people fail in their resolution to stay vegan, and revert to much less healthful lifestyles. Of course, there are other, secondary reasons, such as convenience (you can get a burger and a cola pretty much anywhere, but it’s much harder to find good vegan food) or health problems caused by a lack of planning in their diets.
Being a vegan by definition means eating a variety of vegan foods: vegetables, fruits and legumes. There are certain vitamins or minerals that only certain foods can provide, and if one sticks to the obvious lettuce and tomatoes and the hardy beans and potatoes and perhaps a few apples and bananas here and there, they’re going to run into serious health problems. While proper planning in a vegan diet will be treated in another article (and I’m not sure when I’ll get the chance to write it,) here I simply want to introduce the concept of dietary planning and make you aware of the dangers inherent in a lack of planning.
How does one become a vegan? Well, as you’ve already seen, one has to be fairly motivated, and the strongest motivator that one can have is the desire to stay healthy and live a long life. And given all of the health problems caused by meat and dairy-based diets, going and staying vegan is the only way to ensure that your body can function at its best.
What’s next after motivation? Putting your beliefs into practice. My advice is to take it slowly. It’s not going to be good for you to go vegan cold turkey, because you’ll quickly get discouraged and might revert back to your old lifestyle. Vegan food tastes very bland to a person who’s been eating meat. You’ll need to get your taste buds and mind accustomed to the taste of vegan food, and after a few months of eating it, you’ll finally discover the finer flavors and textures of it. You may even begin to like it. Please don’t think this sounds dreary. I don’t look forward to my meals as a bland experience, but you may. Just realize that your attitude will change, but it may take months.
So how do you do it? If you’re now eating meat, calculate how many times a week you eat it, and reduce the number of meat-containing meals, replacing those meals with either chicken or fish, or vegetarian meals. You may be inclined to drop meat completely out of your diet. Good for you! Do it, but stick in there. If you’ve switched to chicken or fish, continue on this diet for about 1-2 months, all the while reducing the number of times you eat chicken or fish per week and replacing those meals with vegetarian meals. After 2-3 months at the most, you should be a vegetarian. Sounds easy? It is, if you stick to my plan.
Now that you’re a full fledged vegetarian, start planning your diet. Make sure you include all of the veggies and fruits that you need in your diet. And if you’re still consuming milk and cheese and eggs, drop the American-made cheese as fast as you can. I’m referring to the non-organic American cheeses. They are one of the least healthy foods on this planet. They are made from the milk of cows treated with all sorts of hormones that will wreak havoc in your body. Also, as a rule, dry cheese is not very healthy. Wet cheese (feta cheese, cottage cheese, etc.) is okay. But be sure to get only organic cheeses.
Next, drop the eggs. If you like them, you may want to read about their high fat and cholesterol content, and about the hormones they use to grow the chickens. You may also want to think about the fact that eggs are really the placenta and embryo of the chicken. If you must have eggs, get the organic kind. Next, drop the milk. The non-organic milk is loaded with unhealthy hormones, and it actually causes cancer cells in your body to grow and develop into tumors, because the cows here in the States are treated with growth factors (certain chemicals which cause cellular growth). These chemicals accumulate in the milk, and they’re not destroyed by pasteurization. If you must have milk, get the organic kind.
You shouldn’t stay in the vegetarian phase too long, or you’ll get stuck there, midway. Make the move fast, within 1-2 months of becoming vegetarian. Start reading about the vegan diet, and start planning your move. Make sure you know where to buy all of the vegetables and fruits that you need at reasonable prices. Have everything ready, learn a few good dishes to get you through the first vegan week, and then take the plunge. Throw away any vestige of your old lifestyle: any stale meat in the freezer, any cheese or eggs that you might have around the house, any candy bars, any cookies or potato chips. Clean out your house, so nothing tempts you, then start being a vegan.
Now you’ll be in for a few rough weeks, or even months, as your mouth will water at the sight of old foods. Stay in there, and read about the dangers of eating the old foods. It’ll keep you motivated. Believe me, you will begin to love vegan food, and you will also feel disgust at the sight or smell of old food, because now you’ll know exactly what’s in it and why it smells and looks the way it does.
