Ever since we’ve begun the restoration work on the historical monuments in the Transylvanian countryside (see Asociatia P.A.T.R.U. for the details), I’ve had to tend to the landscaping, among other things. And if there’s one thing you learn when you garden, is that you have to prune the weeds constantly. Some weeds you simply cannot just pull out and throw in a compost pile, they’re so invasive that you must burn them in order to stop them from spreading.
Yet in our modern, civilized society, we are led to believe that we must tolerate the weeds, including the really nasty ones. That somehow, we are to be as tolerant as possible, that there is a place for everyone in our all-inclusive civilization. It’s as if everyone’s a precious flower that we must tend to and nourish. Inasmuch as I want that to be the case, and lots of other idealistic people want that to be the case, a lot of people are weeds. Nasty weeds that we shouldn’t tolerate, that do not deserve our respect, attention, or our help. These are people that constantly shit the bed of civilization, so to speak. They take every chance, every opportunity given to them by society, by well-meaning people, and they abuse it. They turn it into something to be regretted. Like weeds, if they’re not pruned, they spread everywhere, and then there’s no garden anymore. They must be thrown out of society. For some, a little time in the compost pile might be enough. For others, there is no coming back. It’s like trying to stick a square peg in a round hole. They’re anachronisms, throwbacks to more barbaric times. Unfortunately, unlike anachronisms, they’re not self-eliminating, they’re self-perpetuating. And so more drastic action must be taken.
This isn’t something that’s done once. It requires regularity. Punishing regularity. Real effort, real sweat. A constant battle against the weeds. Just like gardening.
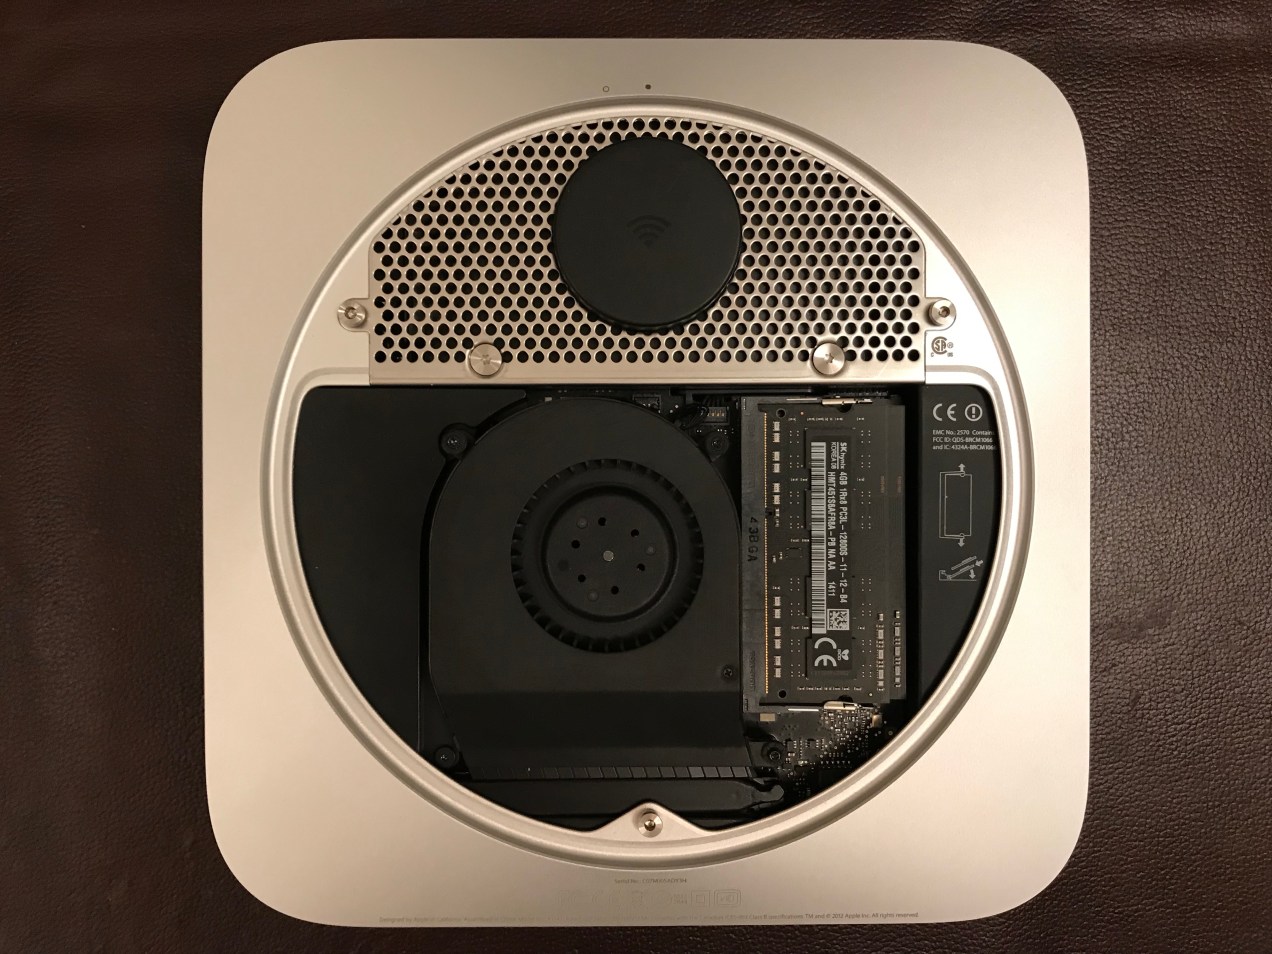
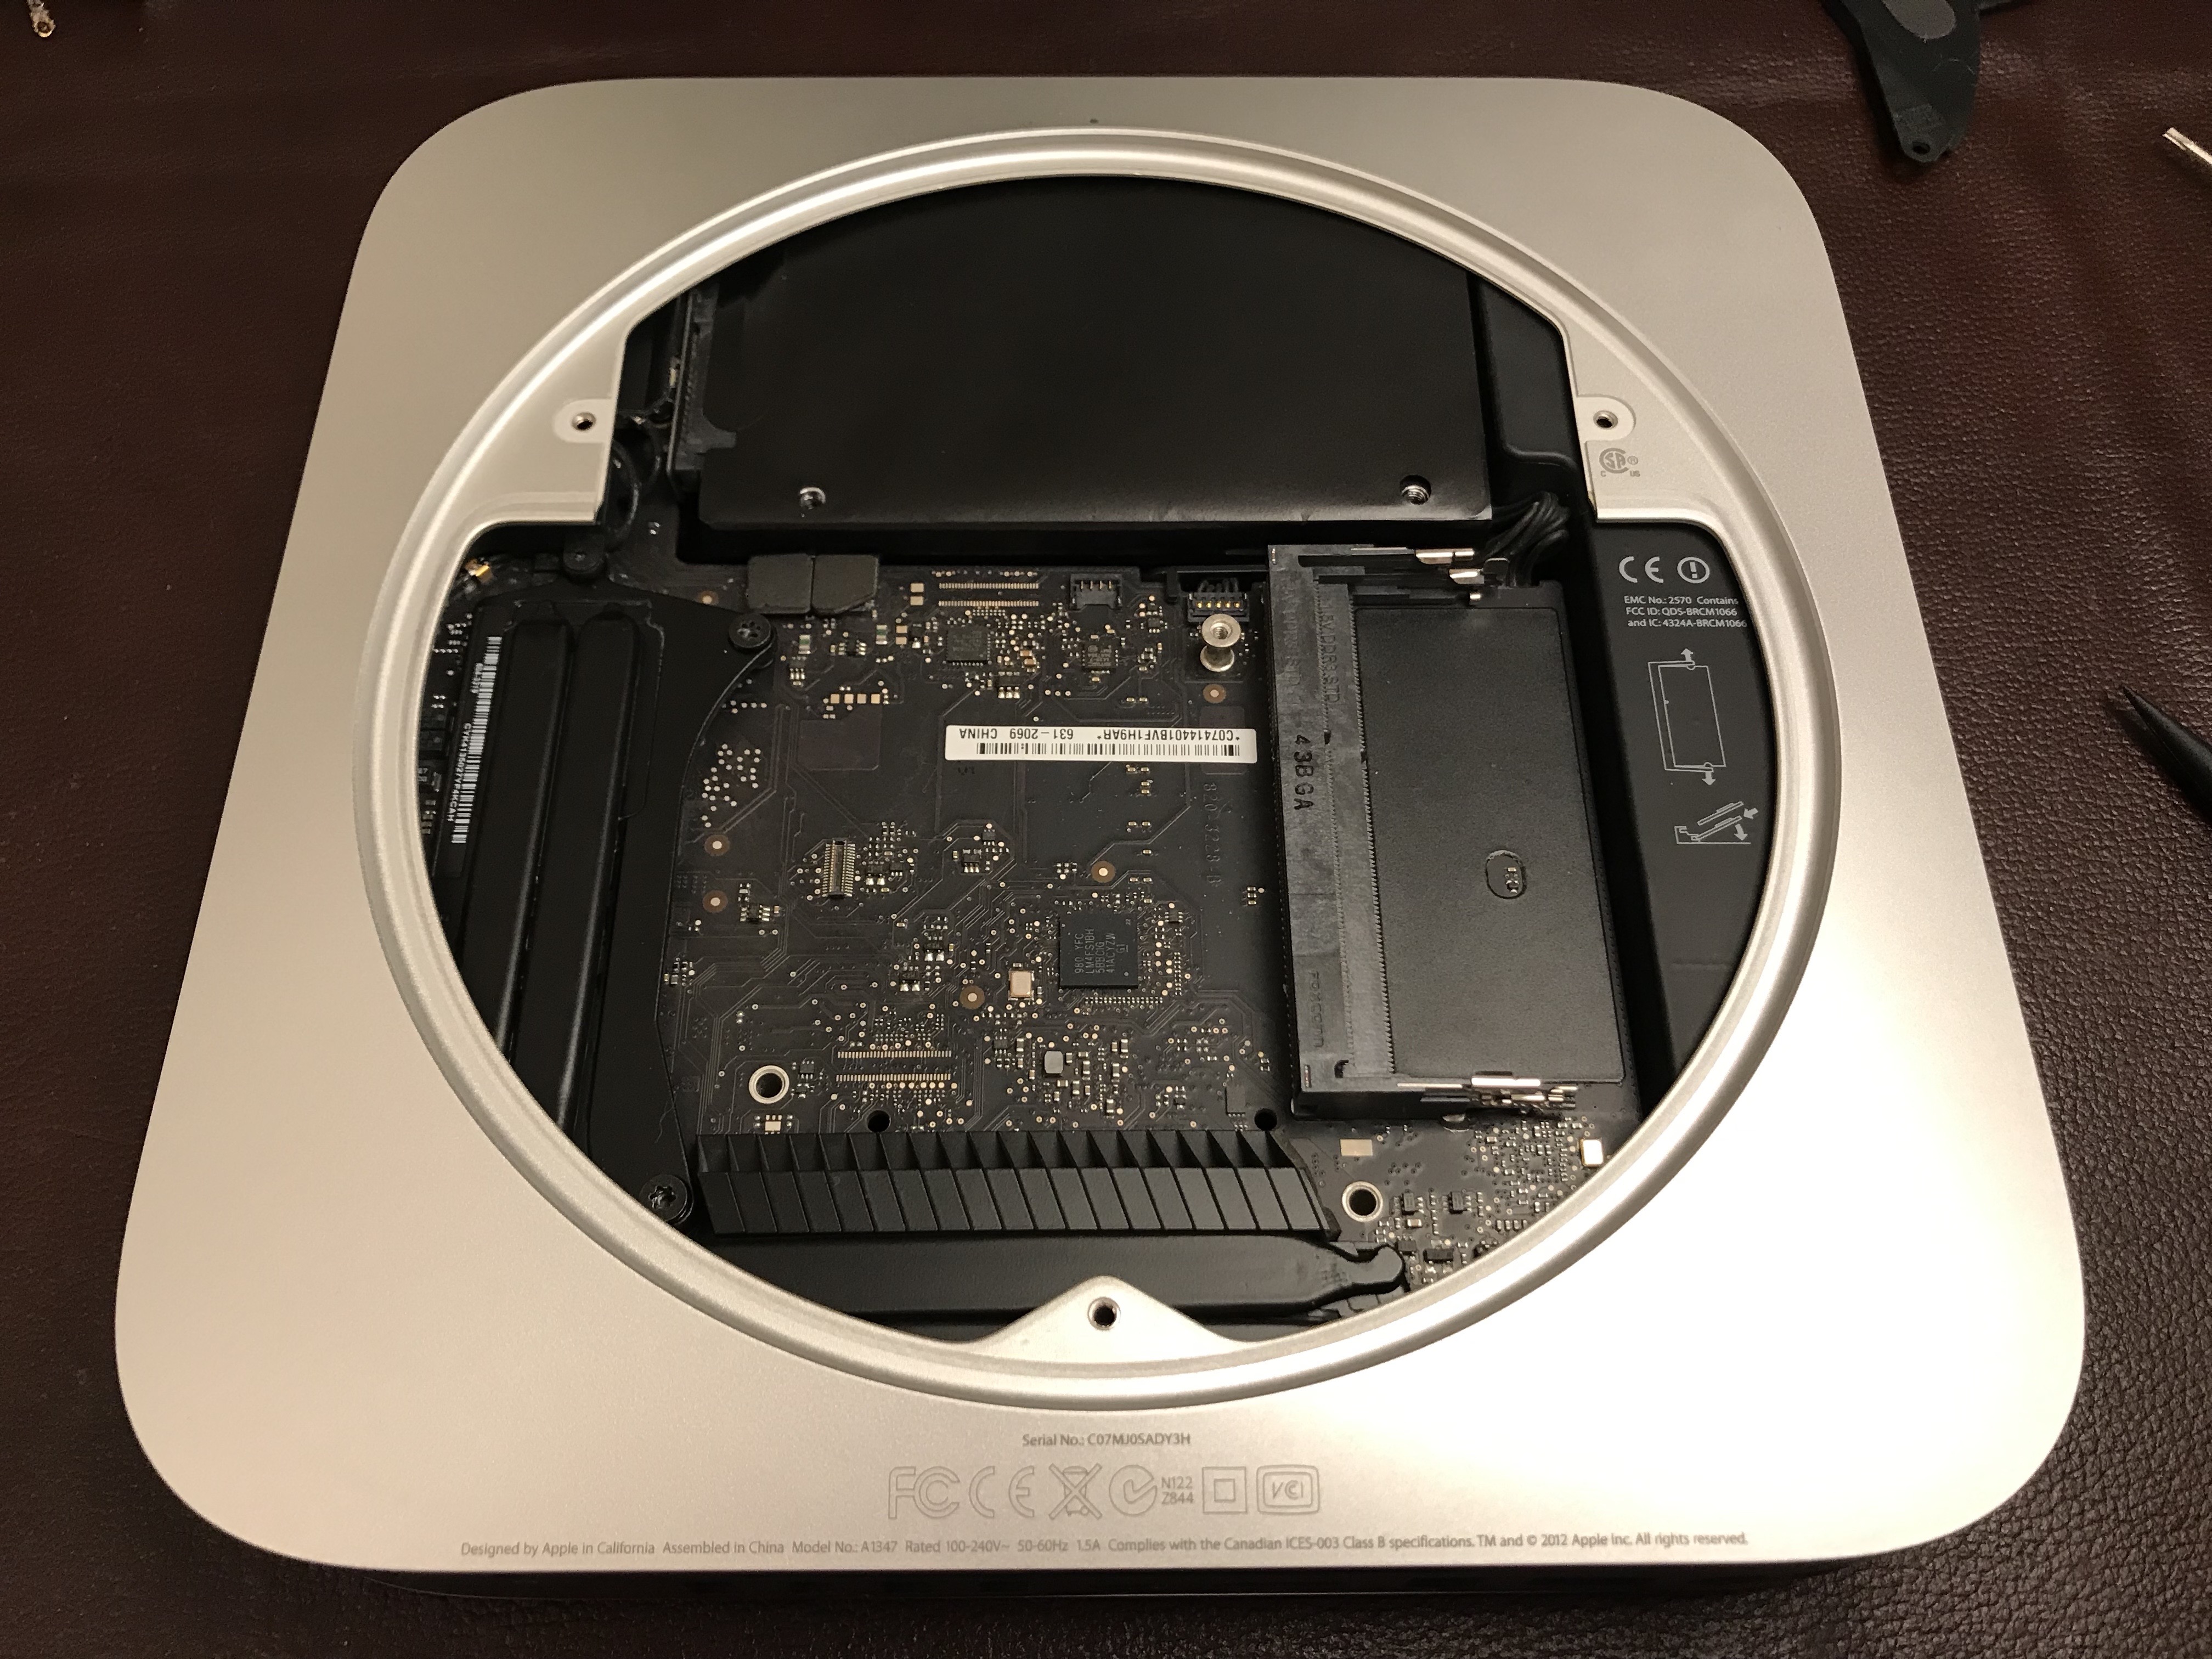
My wife’s computer is a unibody, late-2012 Mac Mini, model A1347 with Fusion Drive, which we’ve had since then, having ordered it to our specs directly from Apple. We’re happy with it. It’s a lovely little computer with more than enough oomph for my wife’s needs (she is an author).
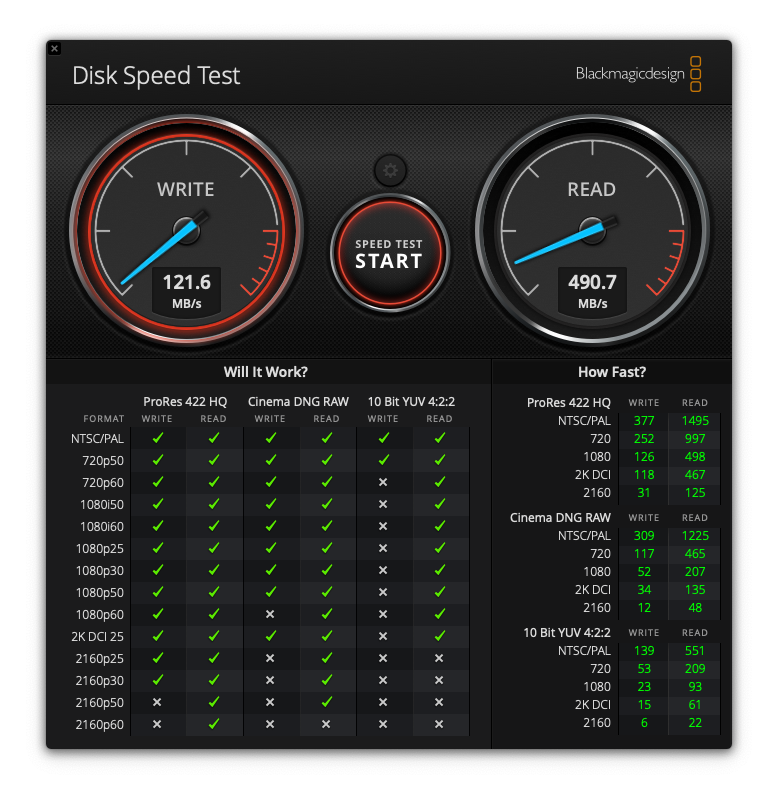
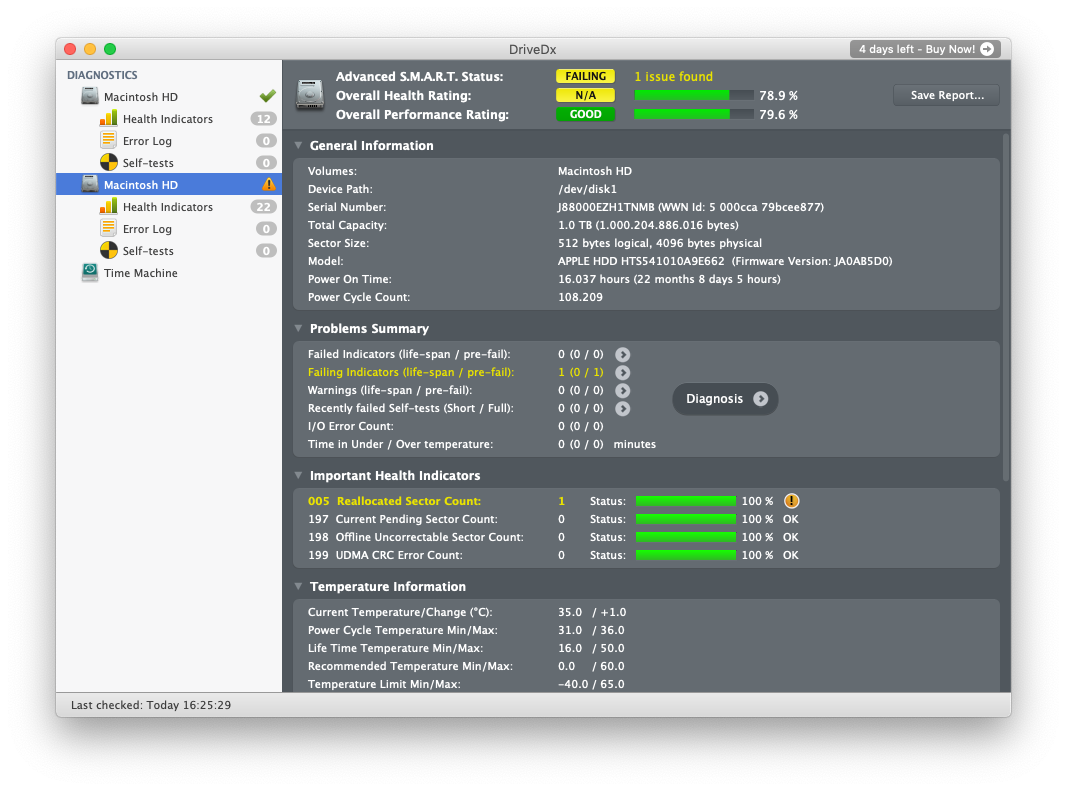
The HDD on her Mac was silently failing and her computer was getting slower. A quick disk speed test revealed that its write speeds had decreased by about 75%.
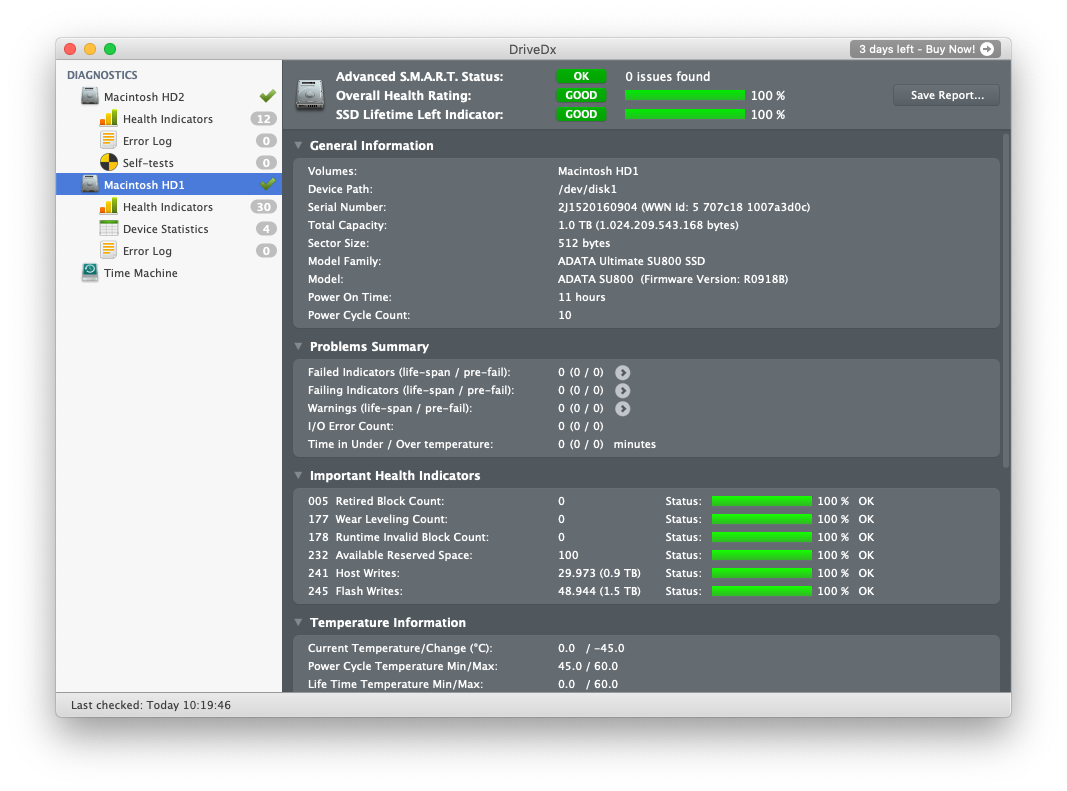
Running First Aid on the system volume did not yield any insights into the HDD’s true state. Thankfully, there’s a little app called DriveDx, which I talked about in a previous post. Running that app revealed the HDD’s problems.
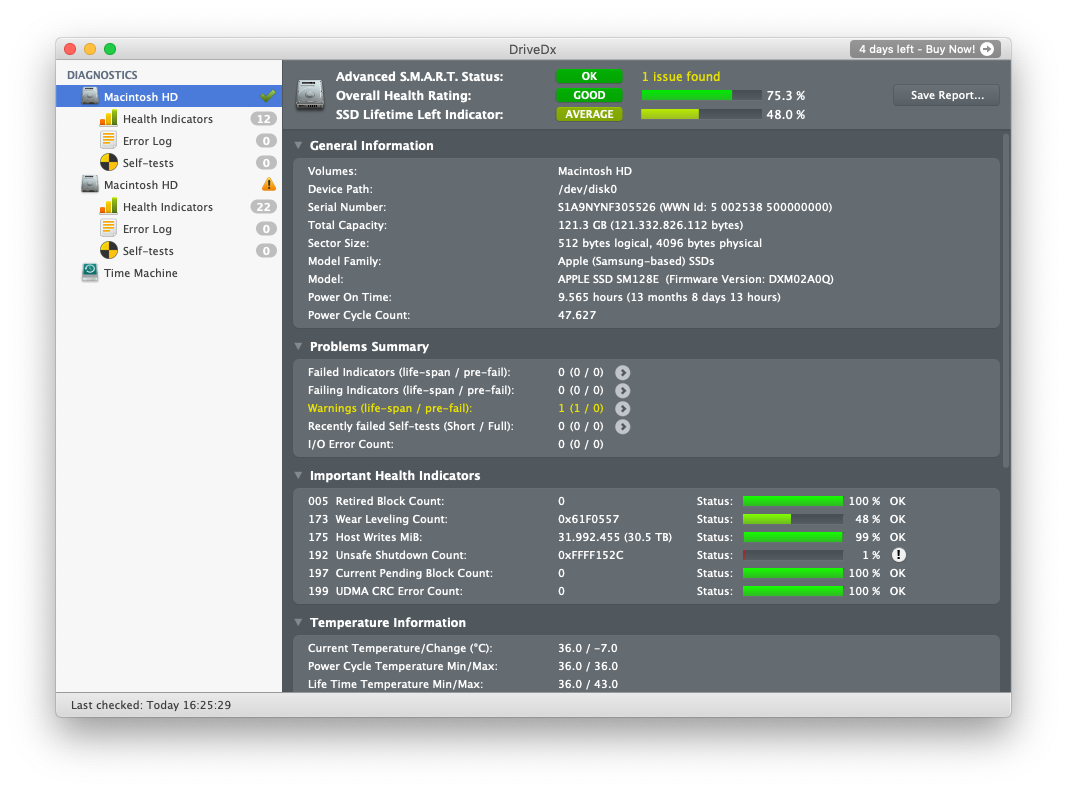
The SSD wasn’t doing too well either, but at least its lifespan was at about 50%.
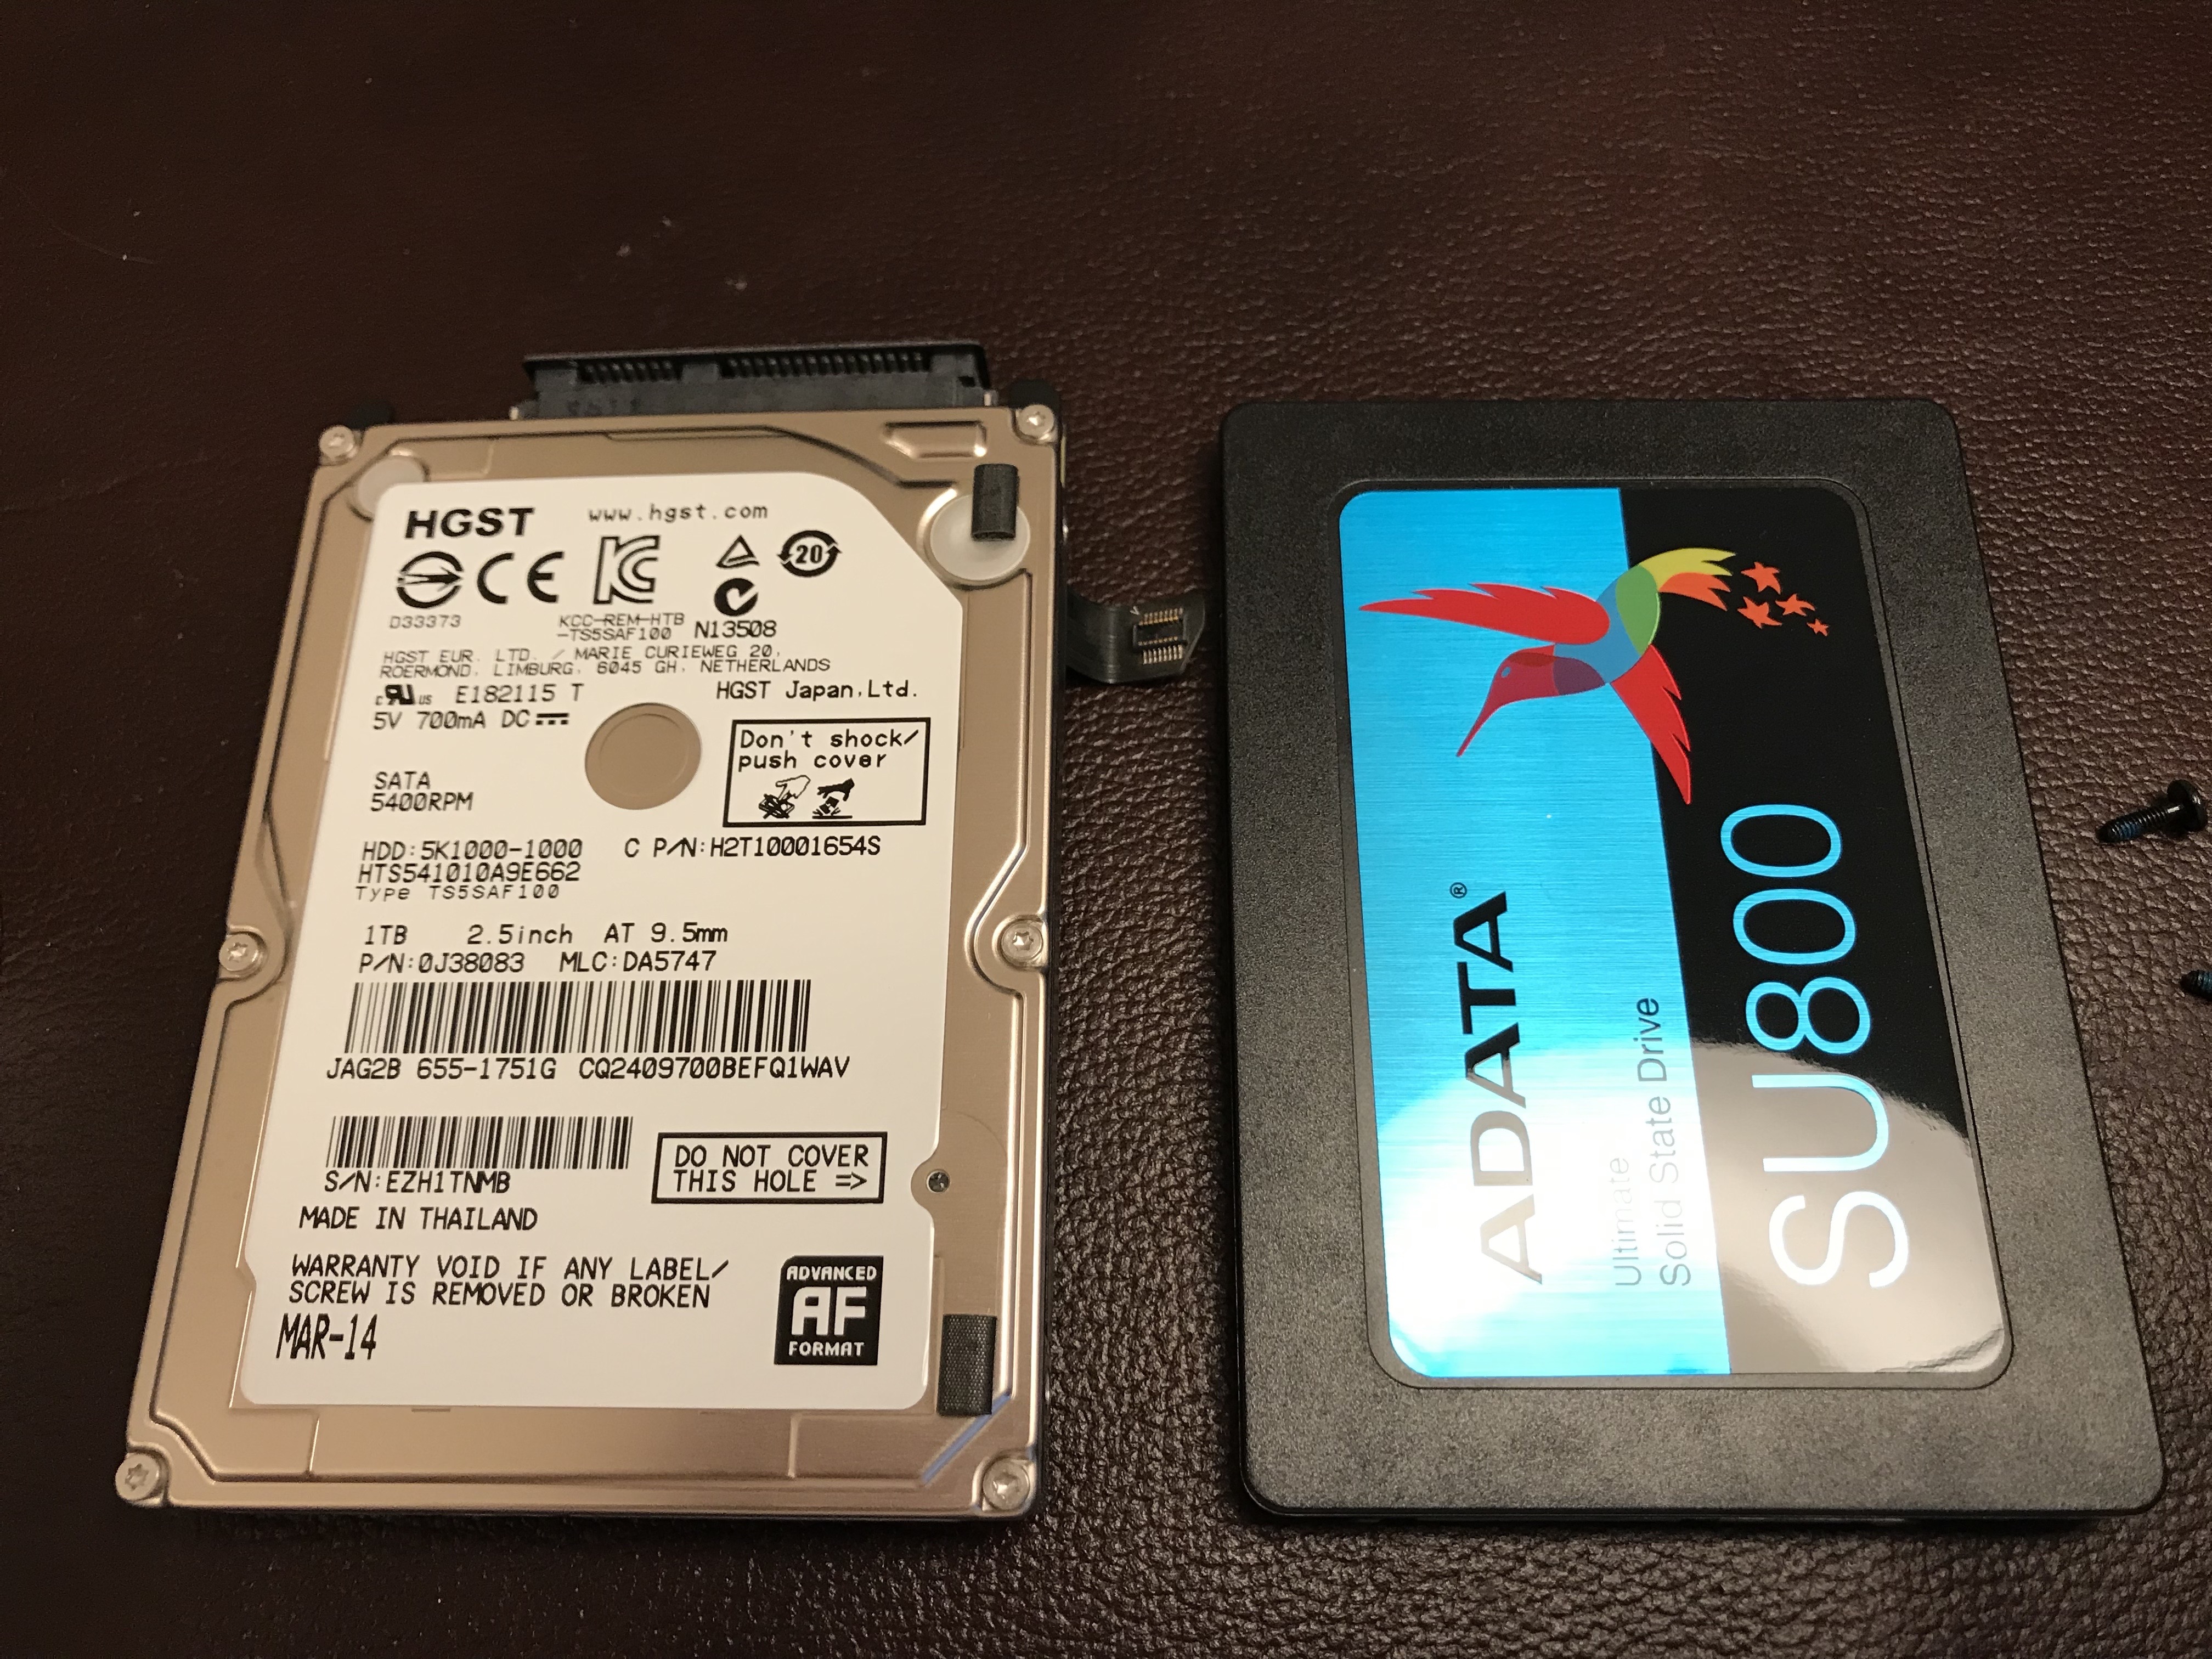
The solution was simple: I needed to replace the HDD. A 1TB SSD would suffice, so I ordered one (an ADATA SU800 1TB SSD). My wife continued to use her computer as usual, since it was still working, although I made doubly sure that it was backing up to Time Machine. I would restore her data from those backups after I replaced the HDD.
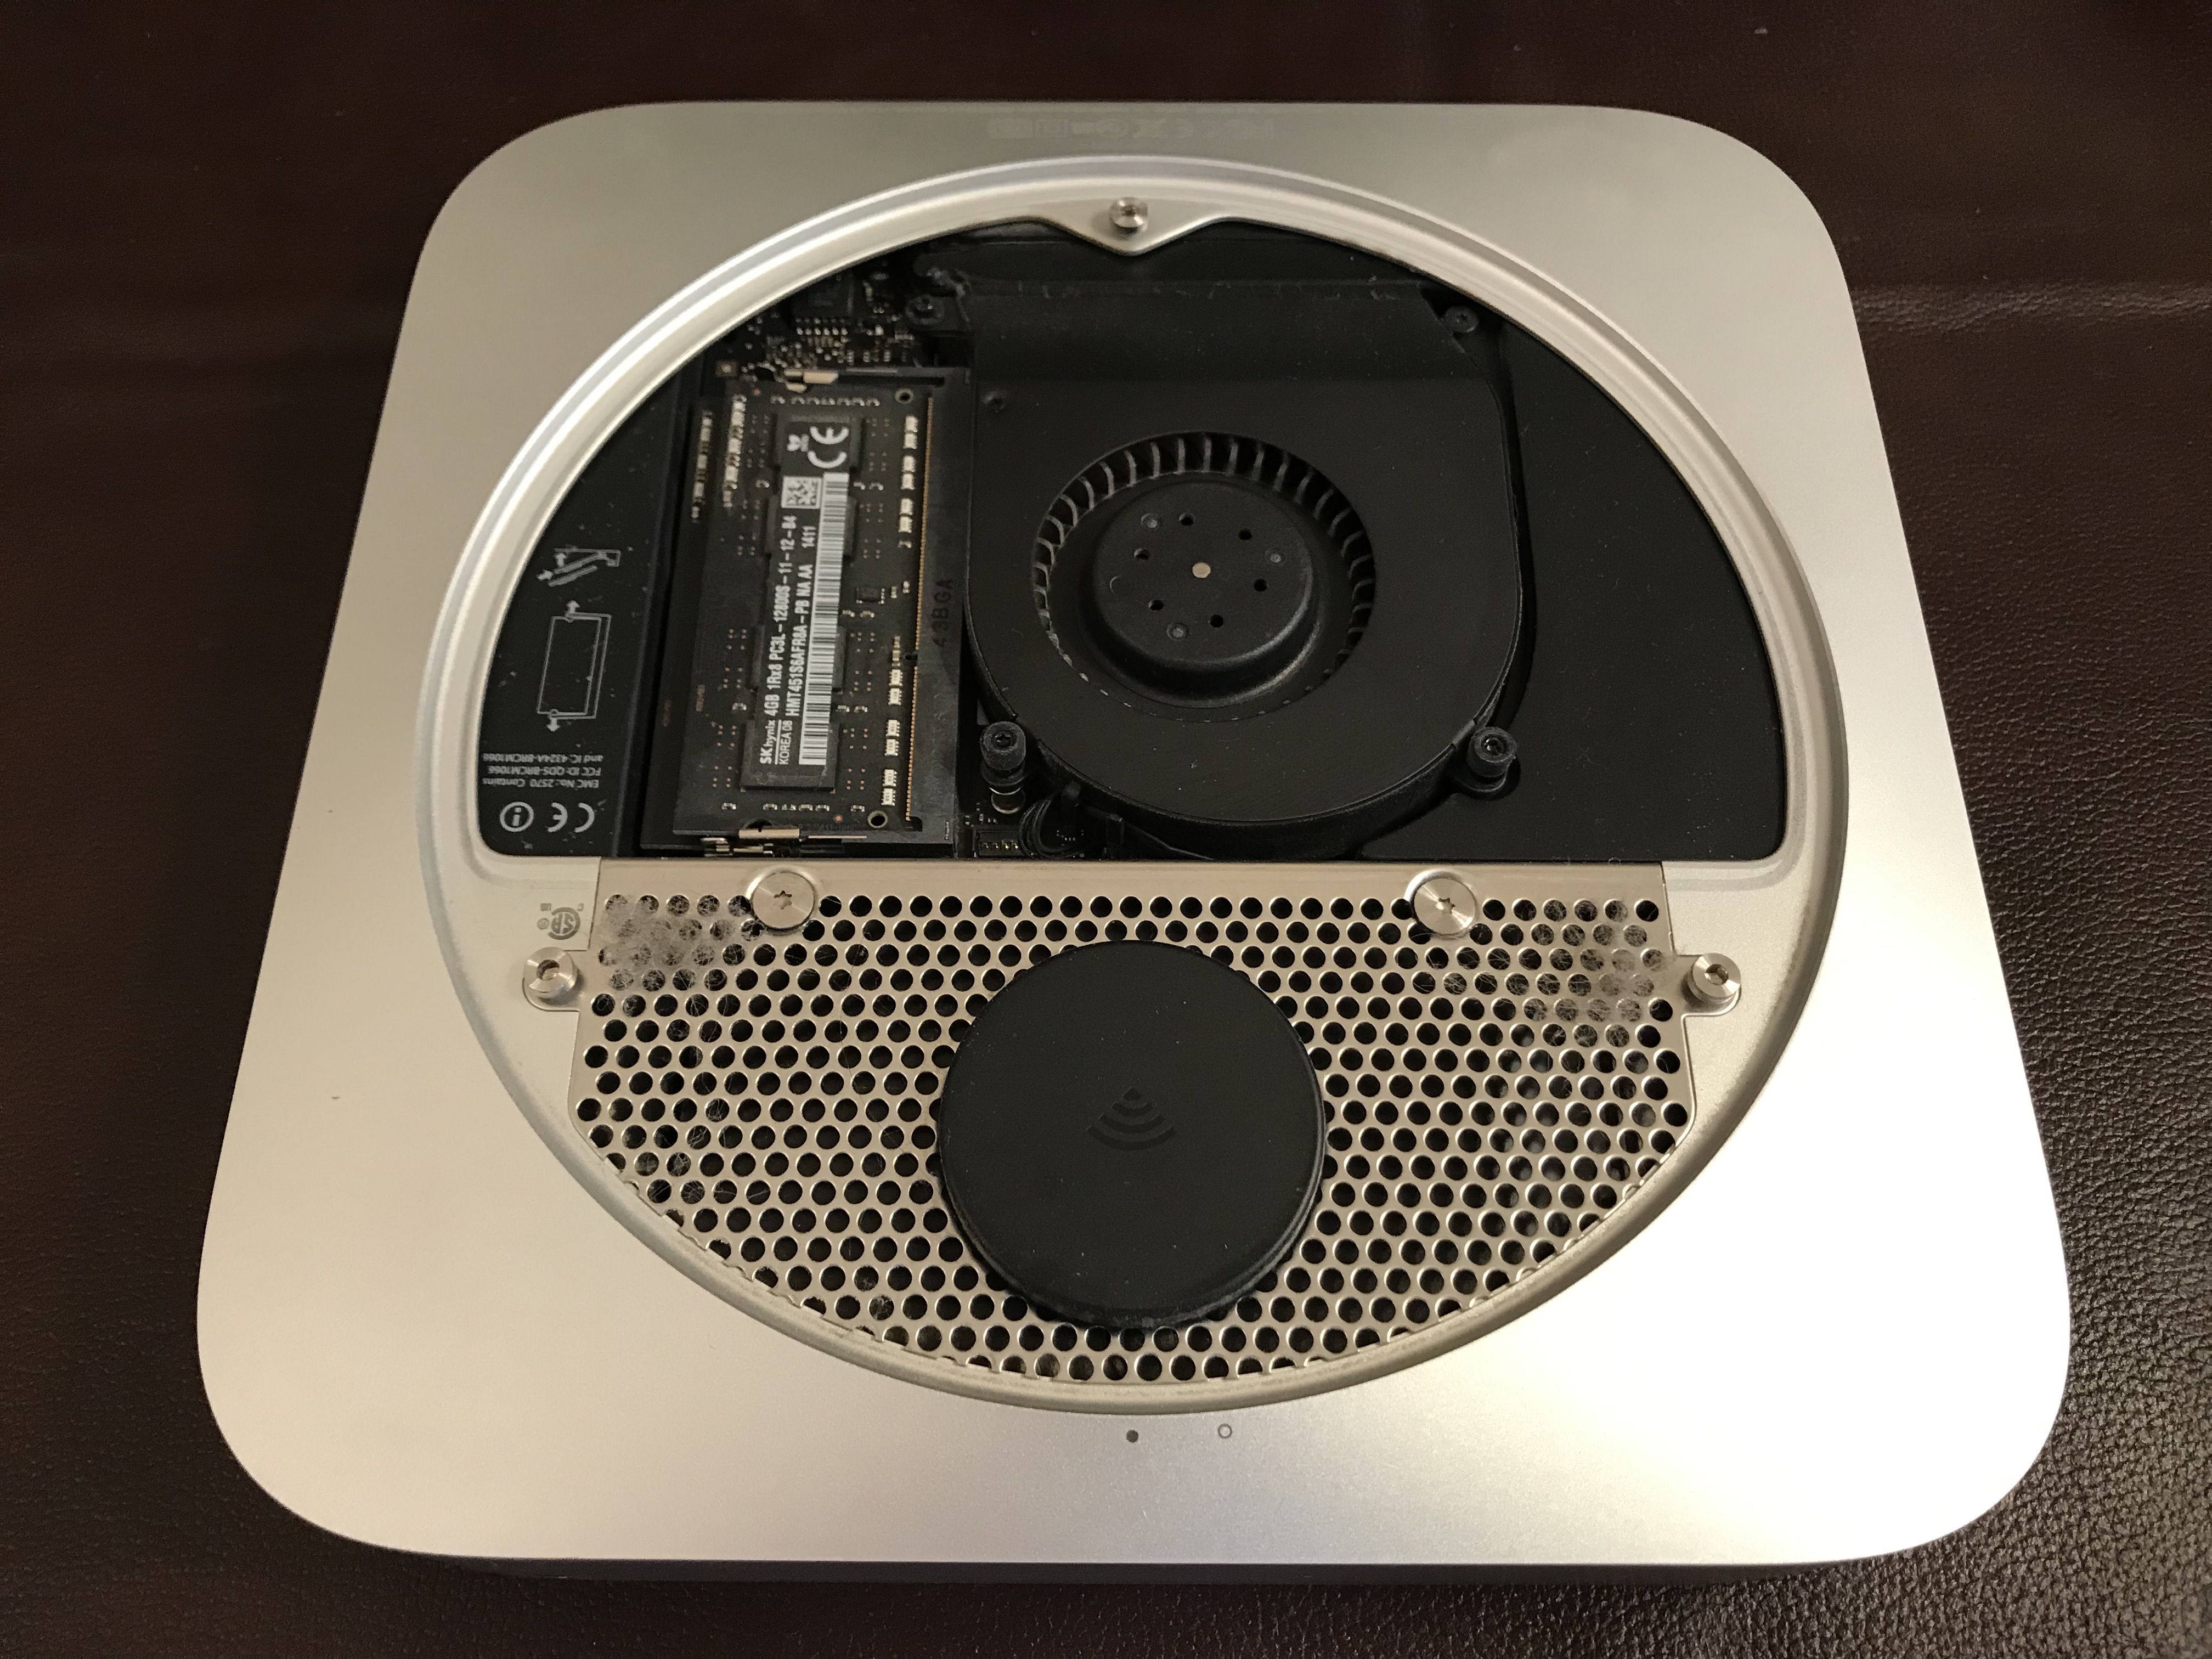
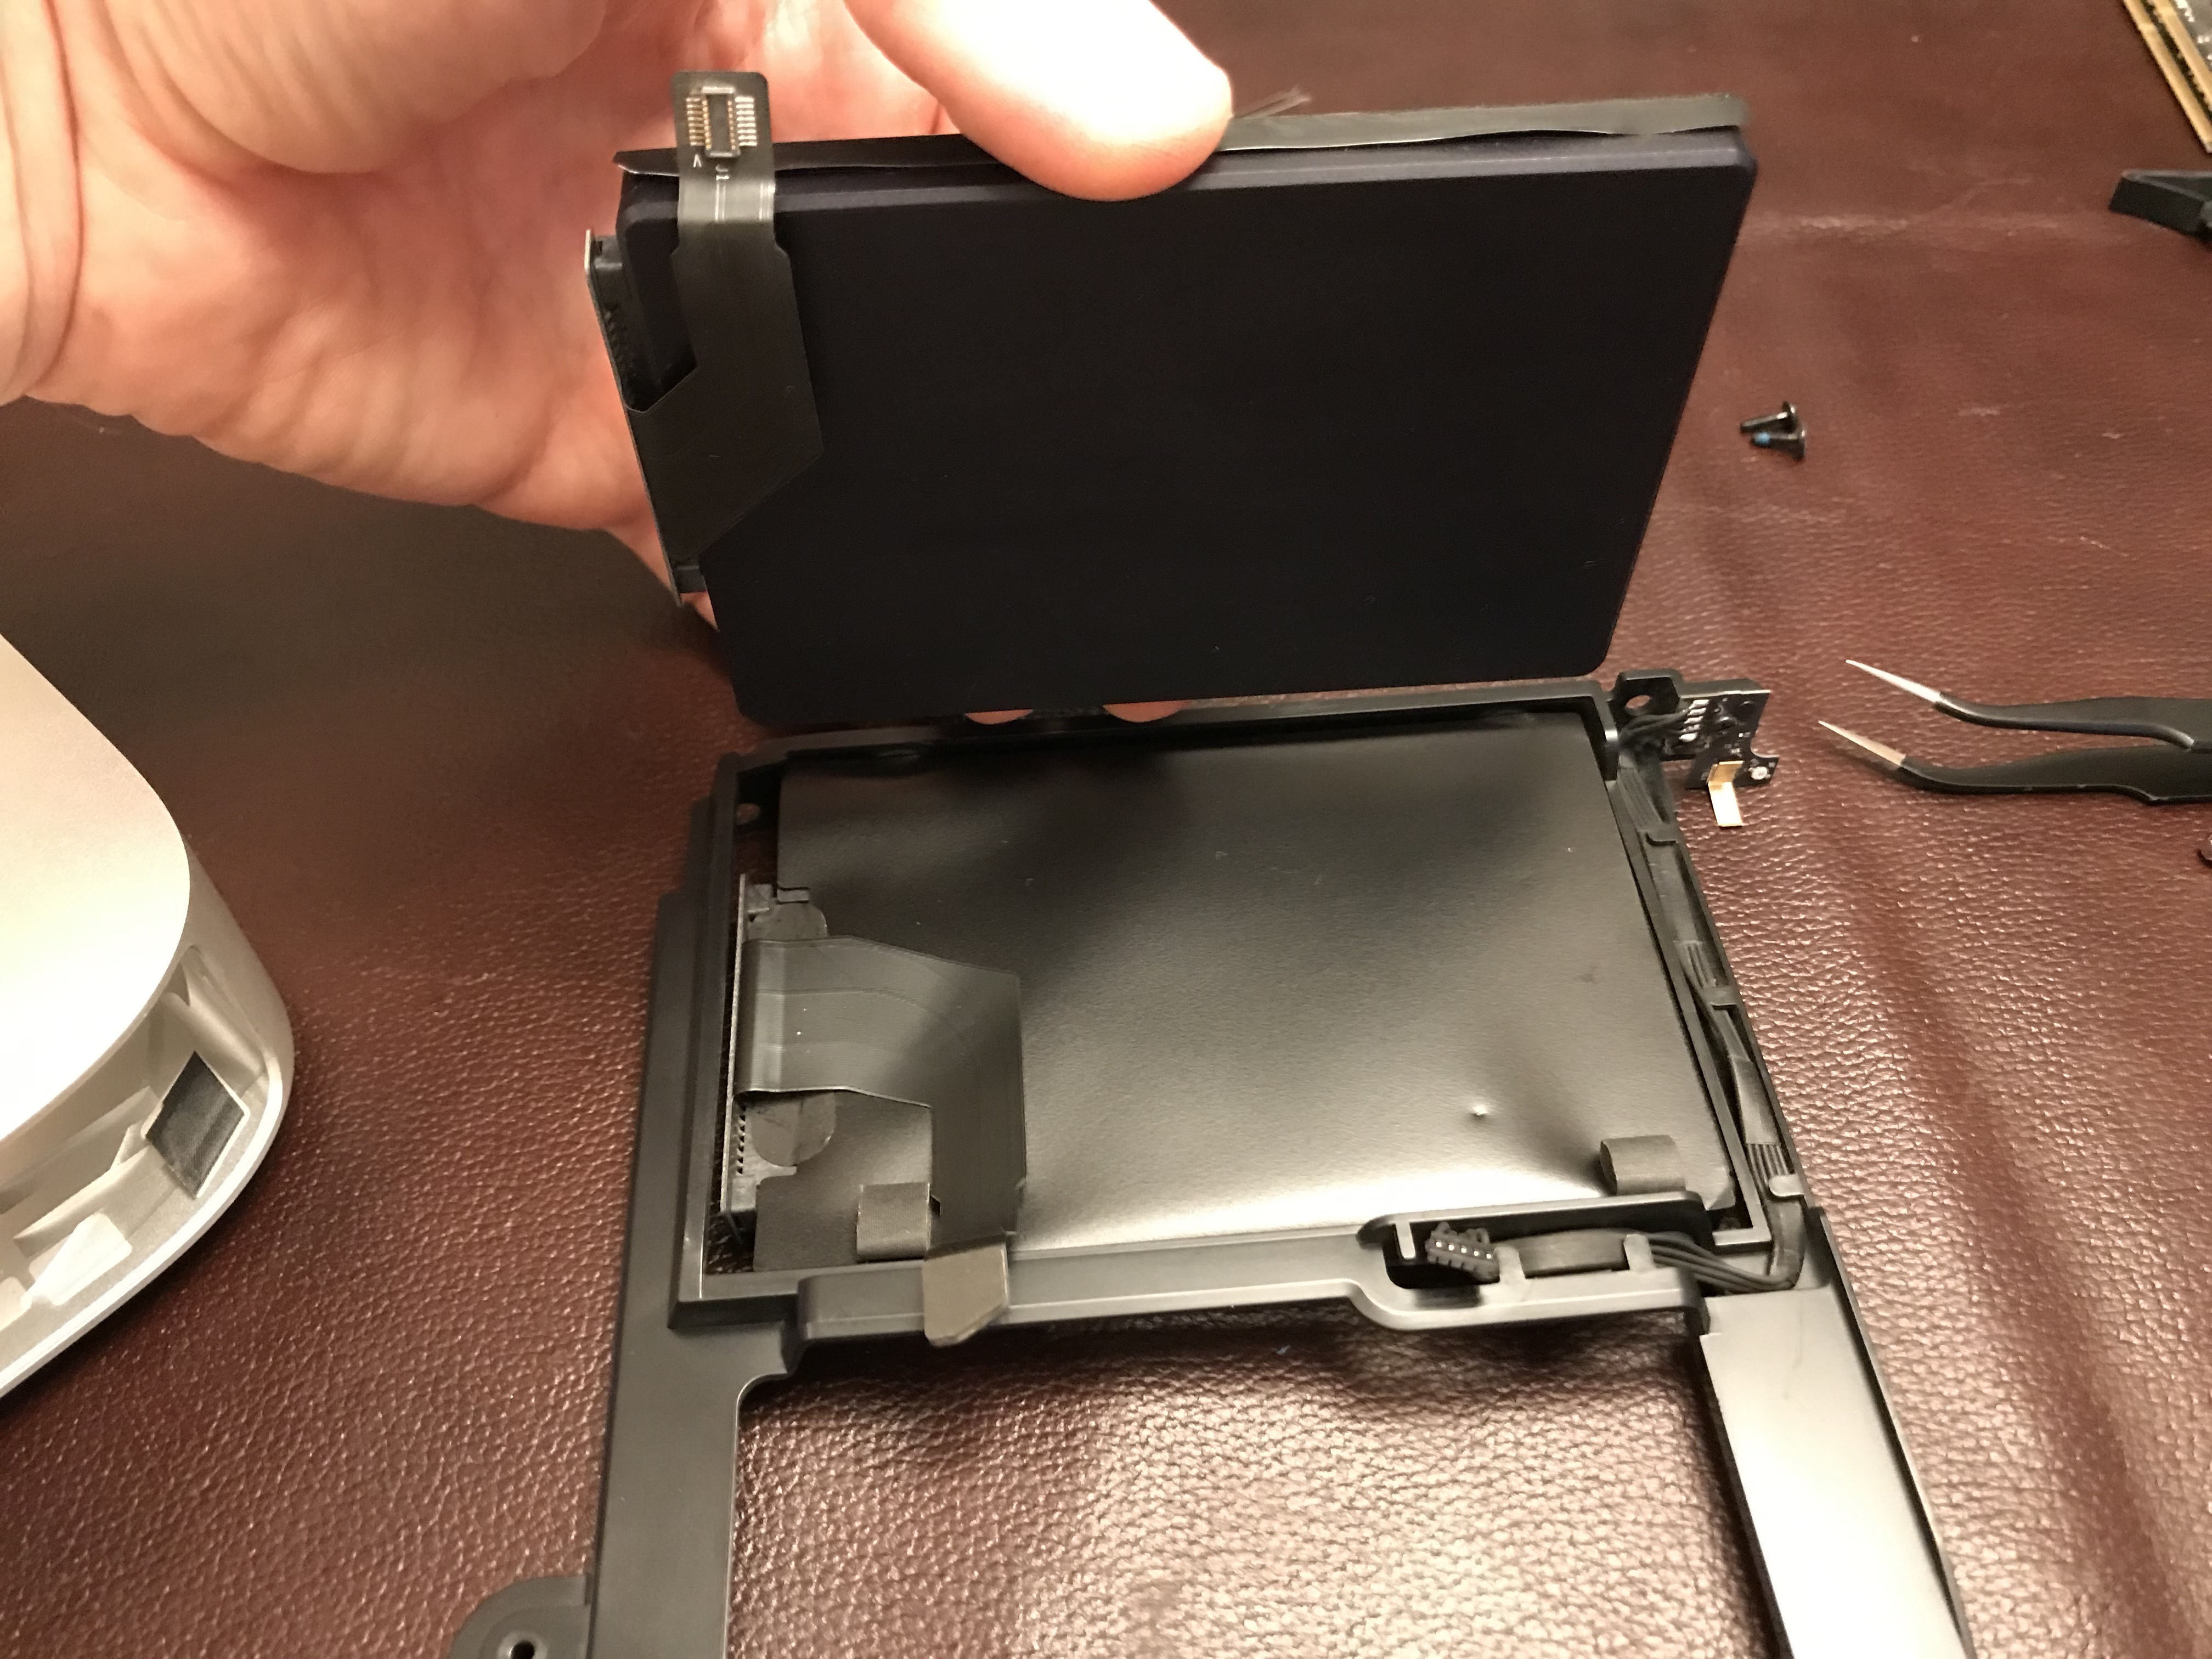
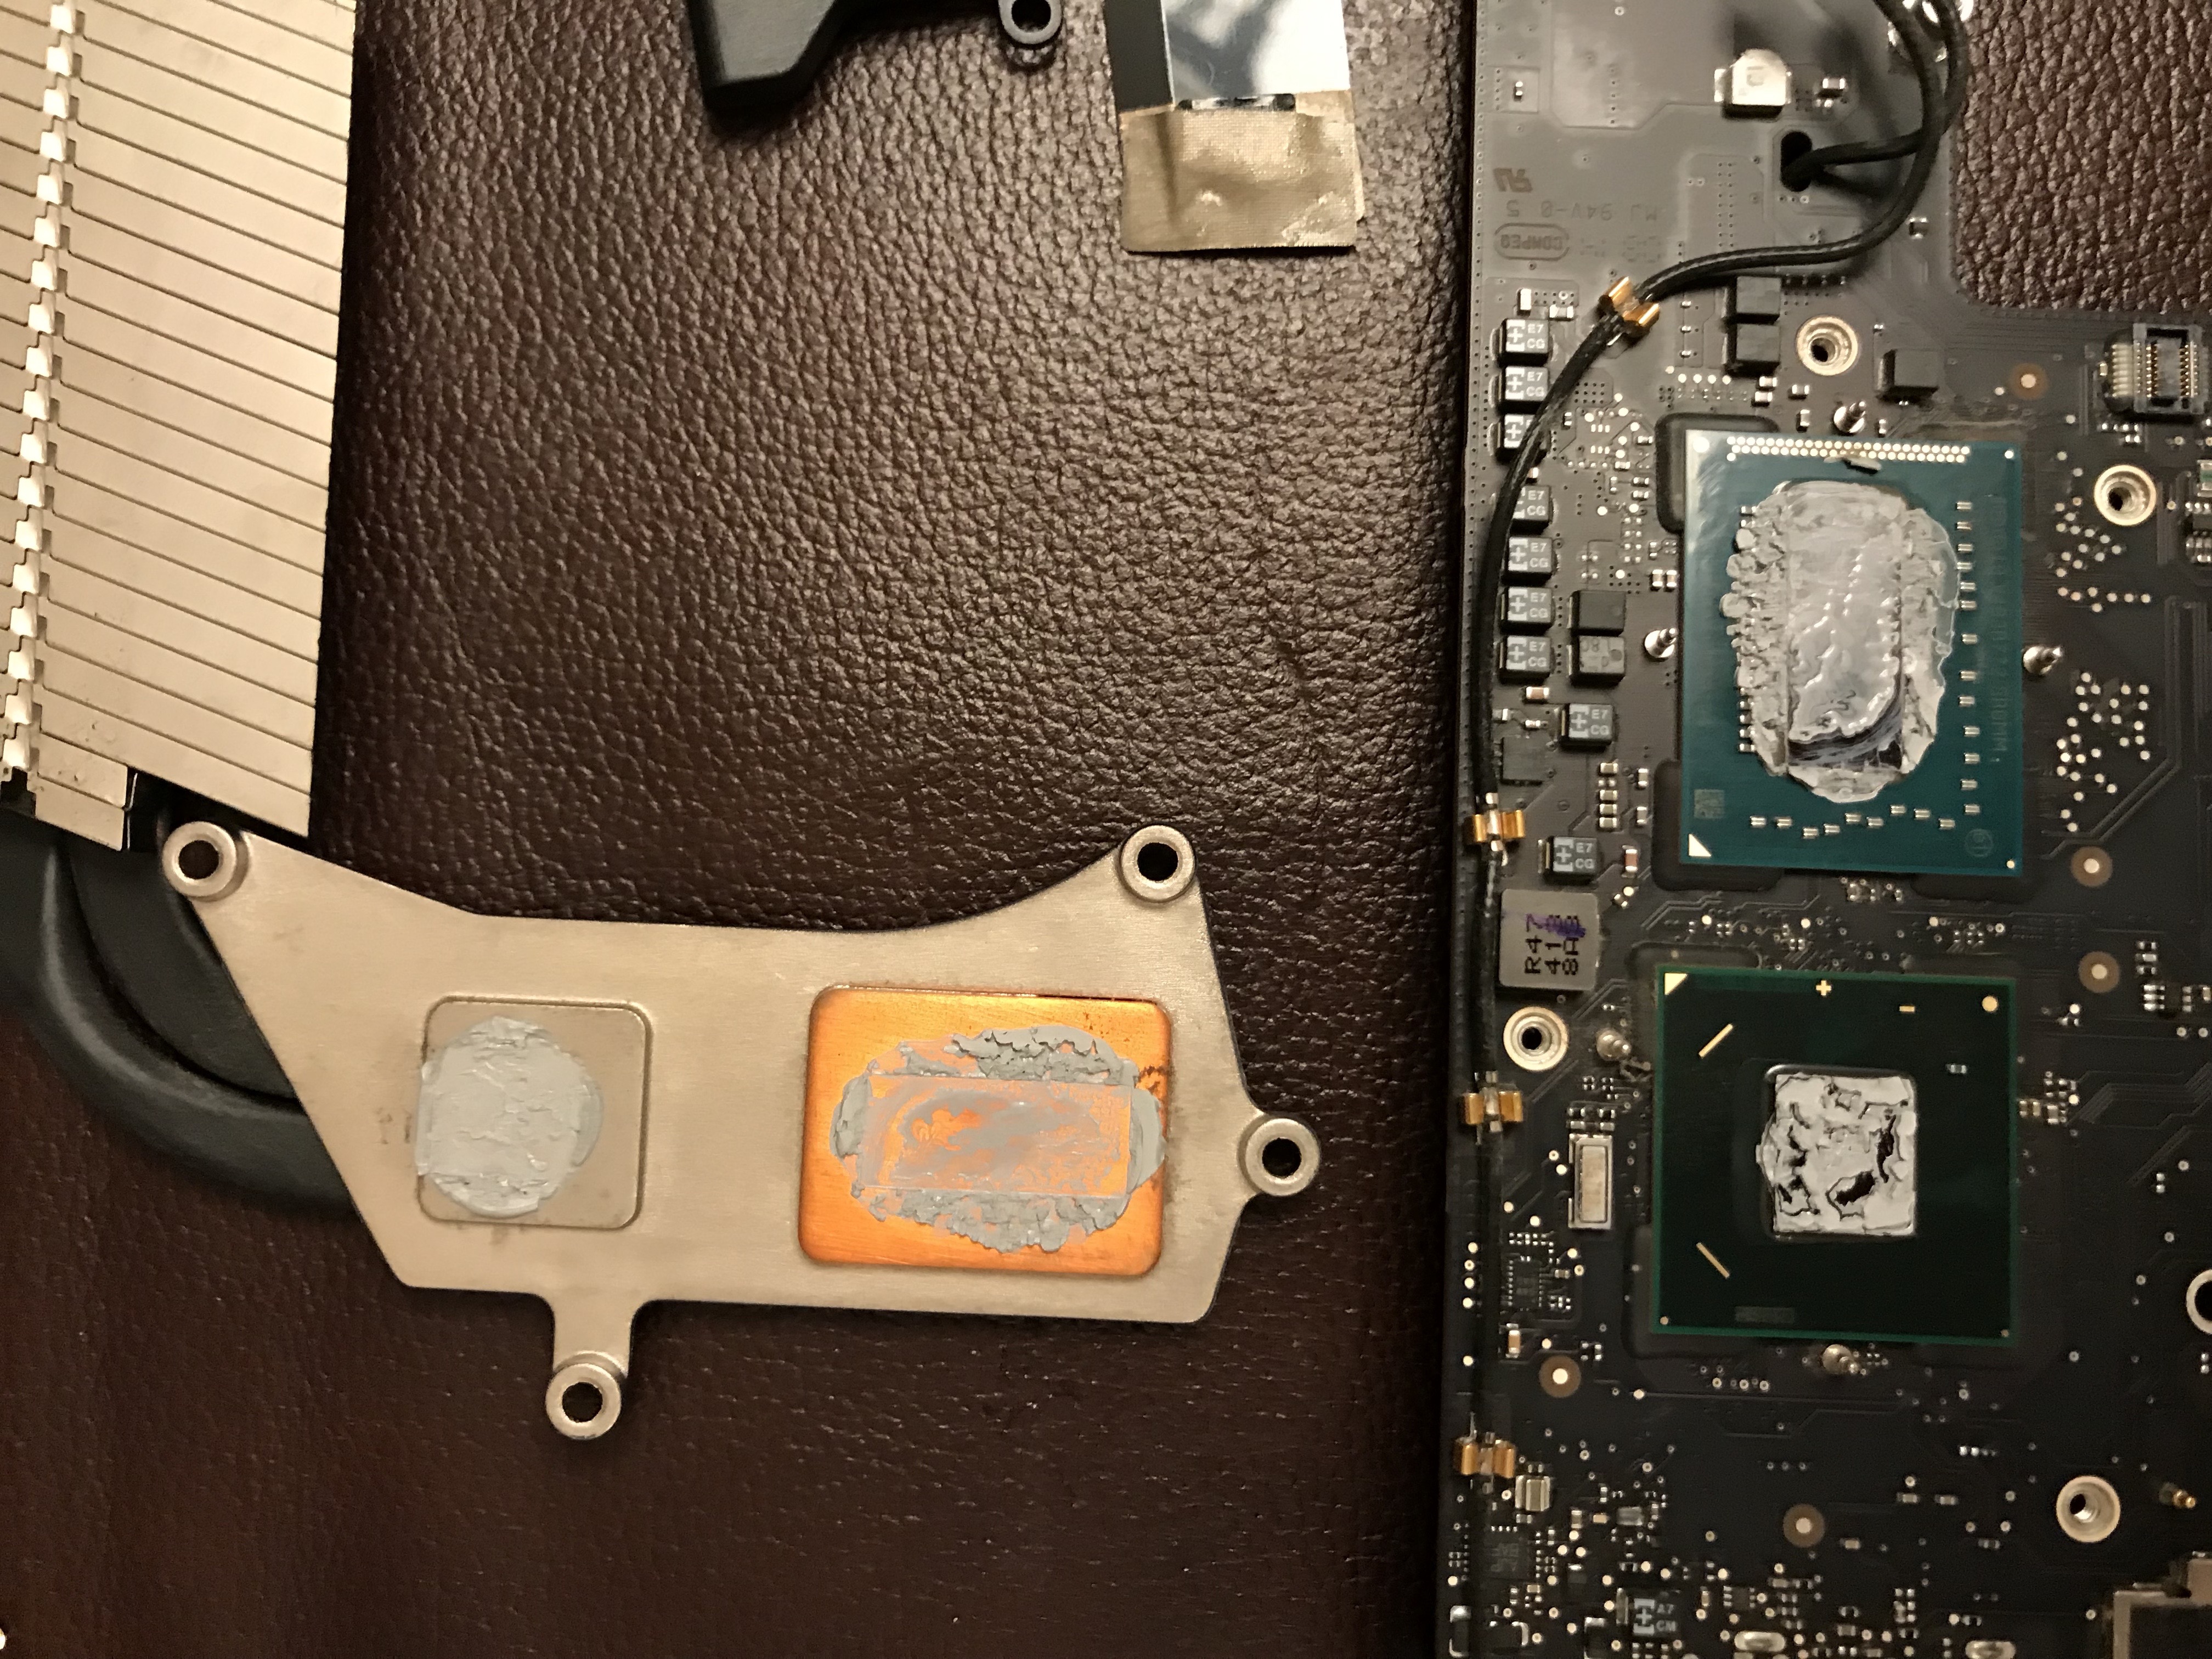
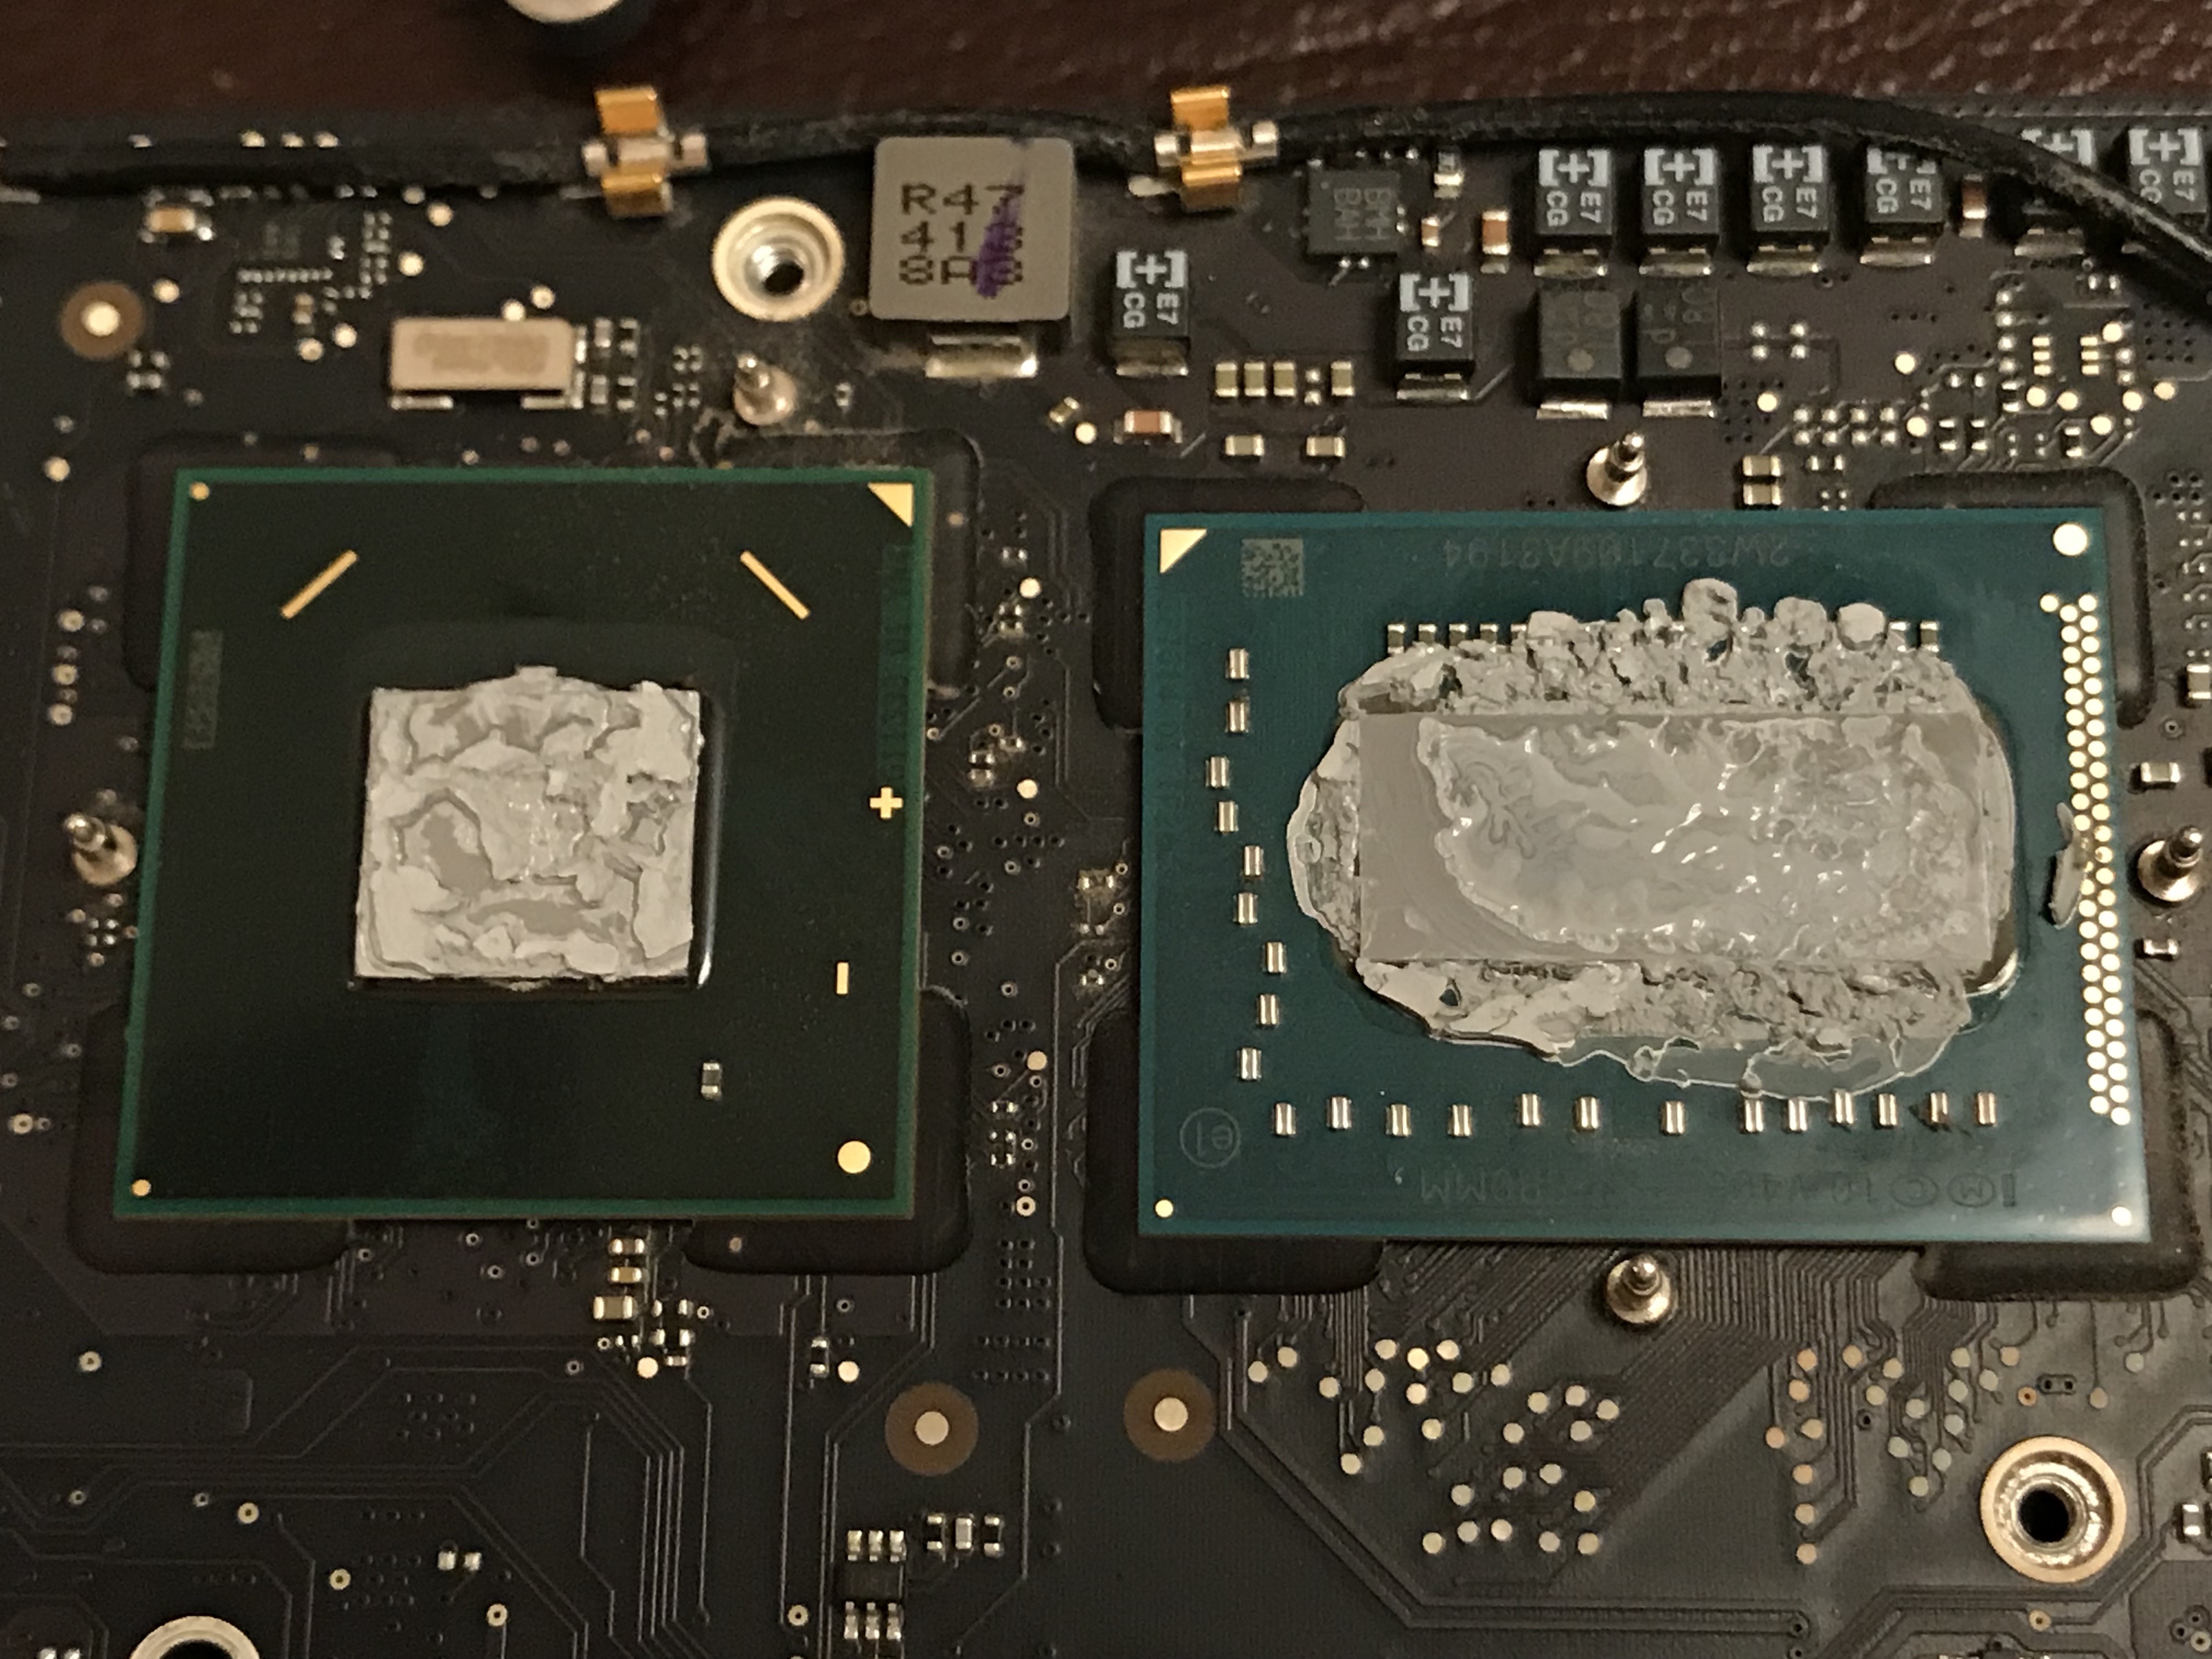
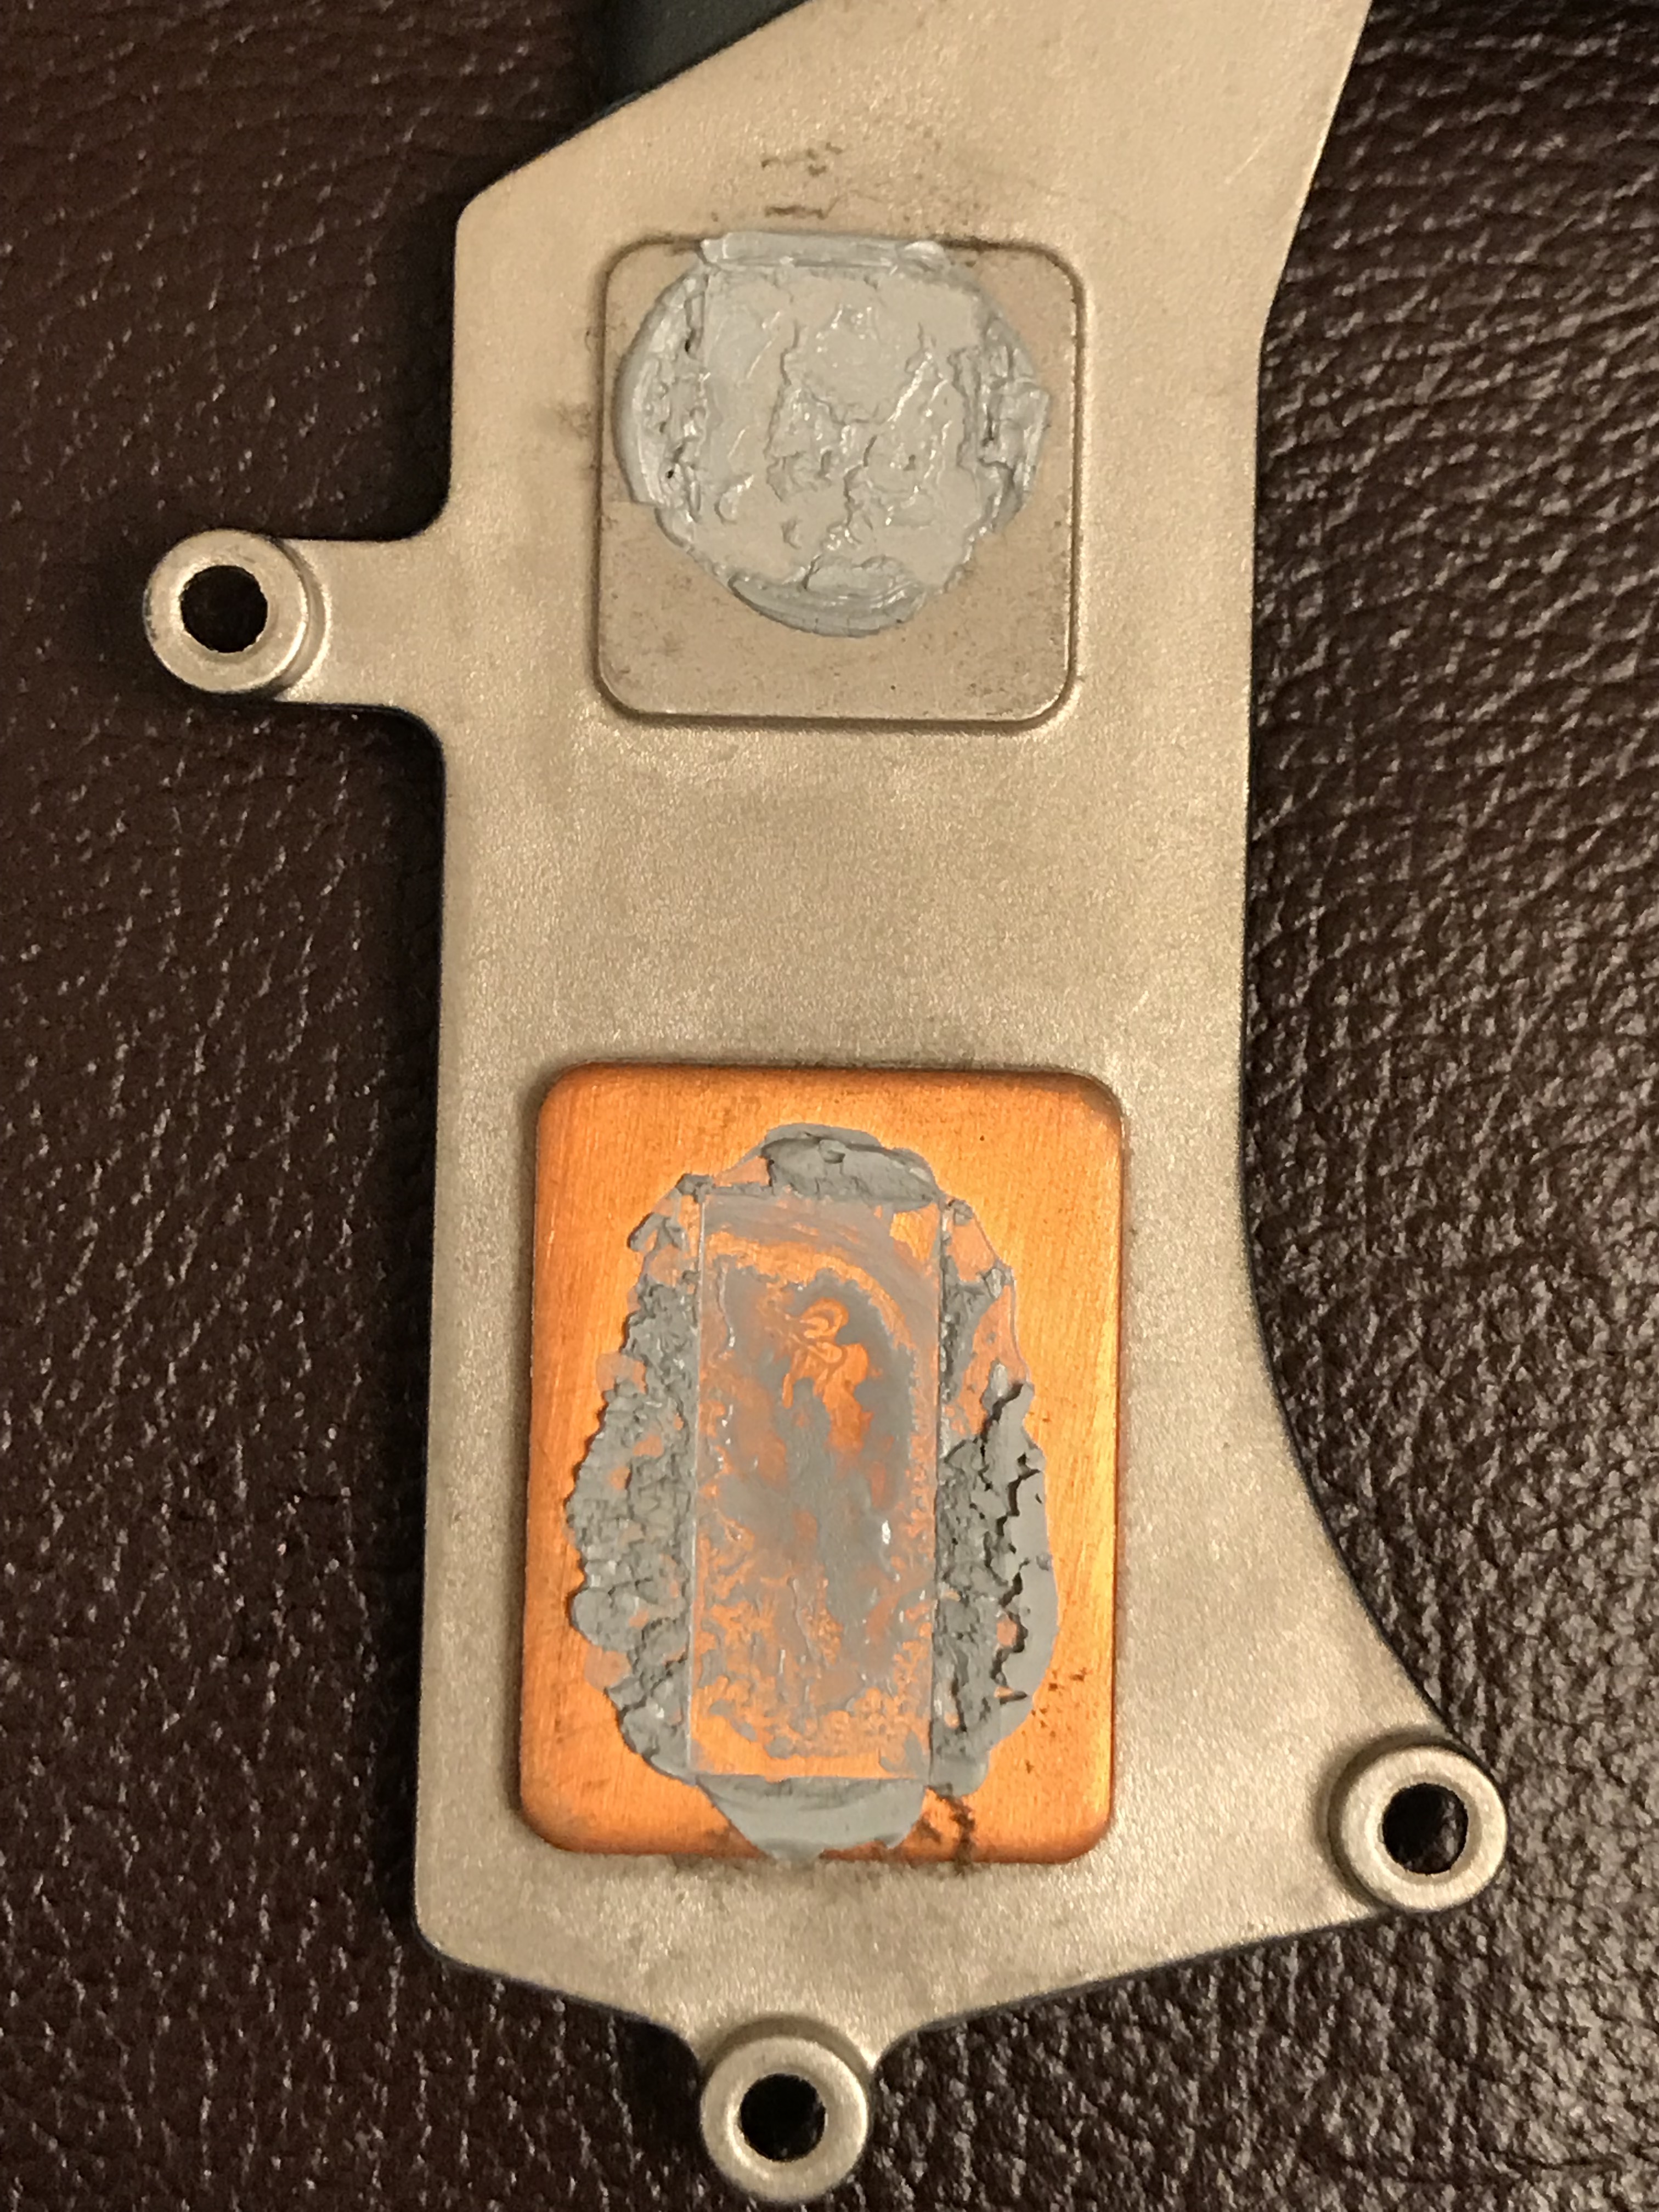
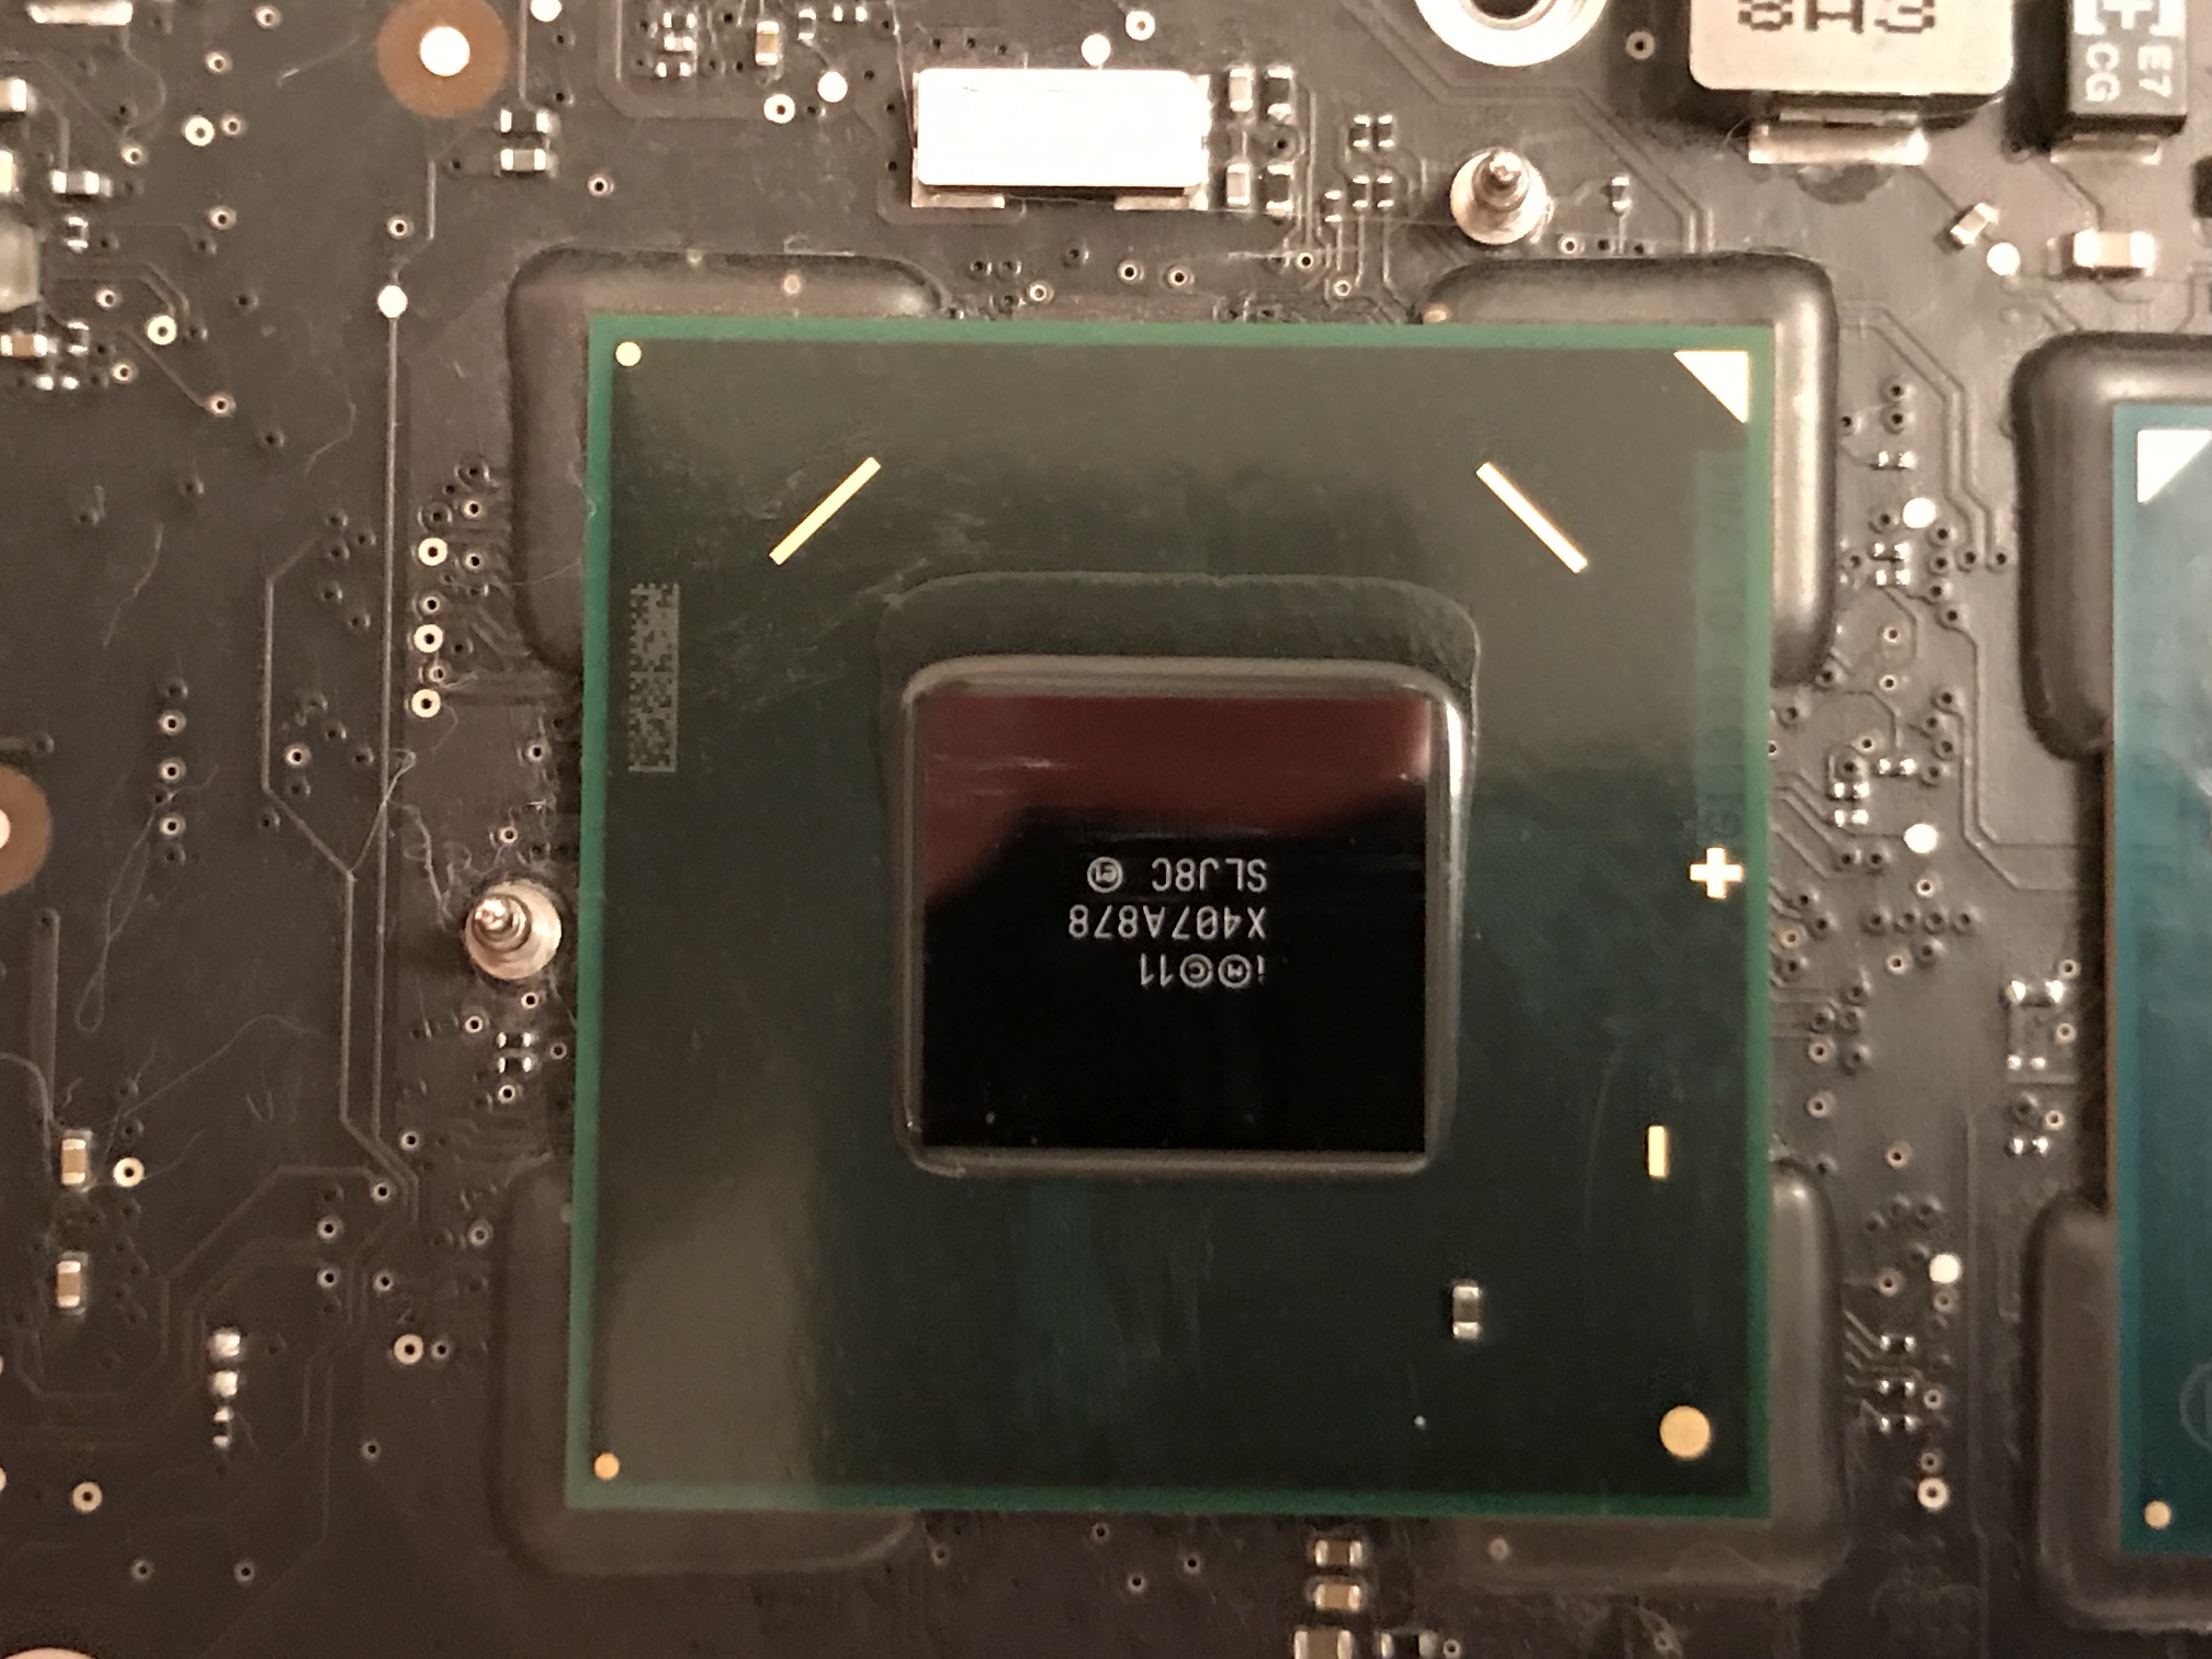
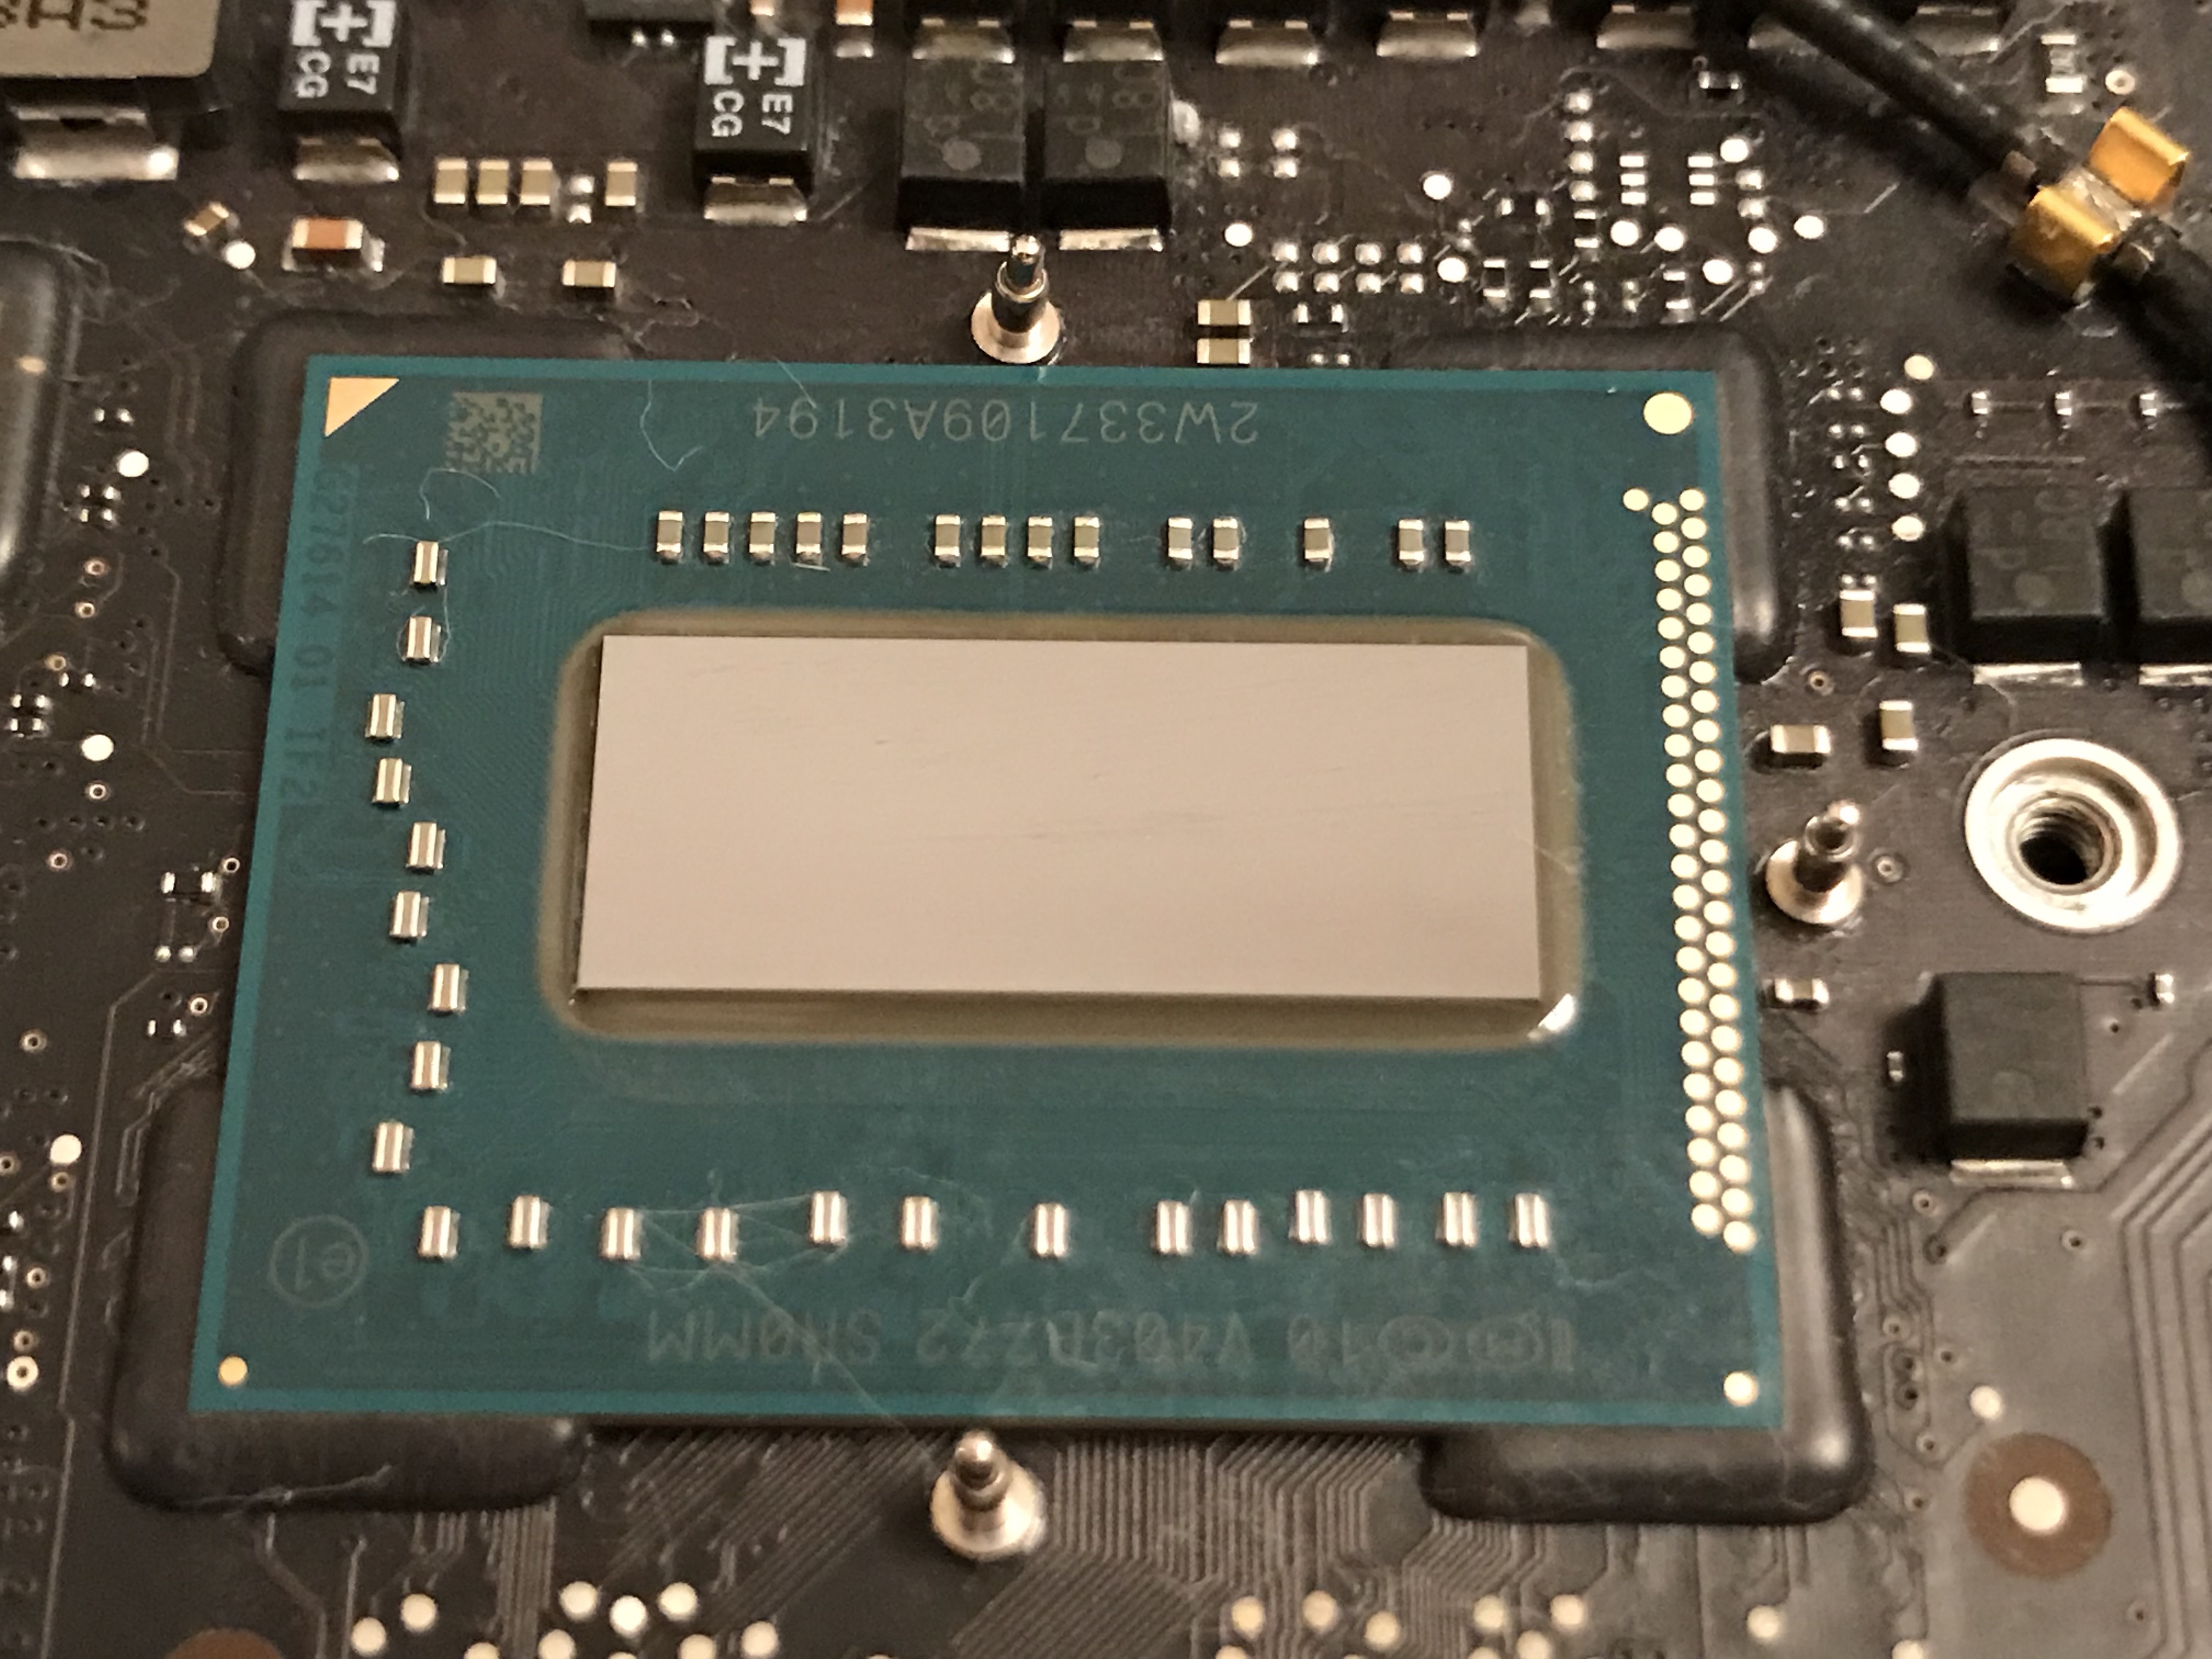
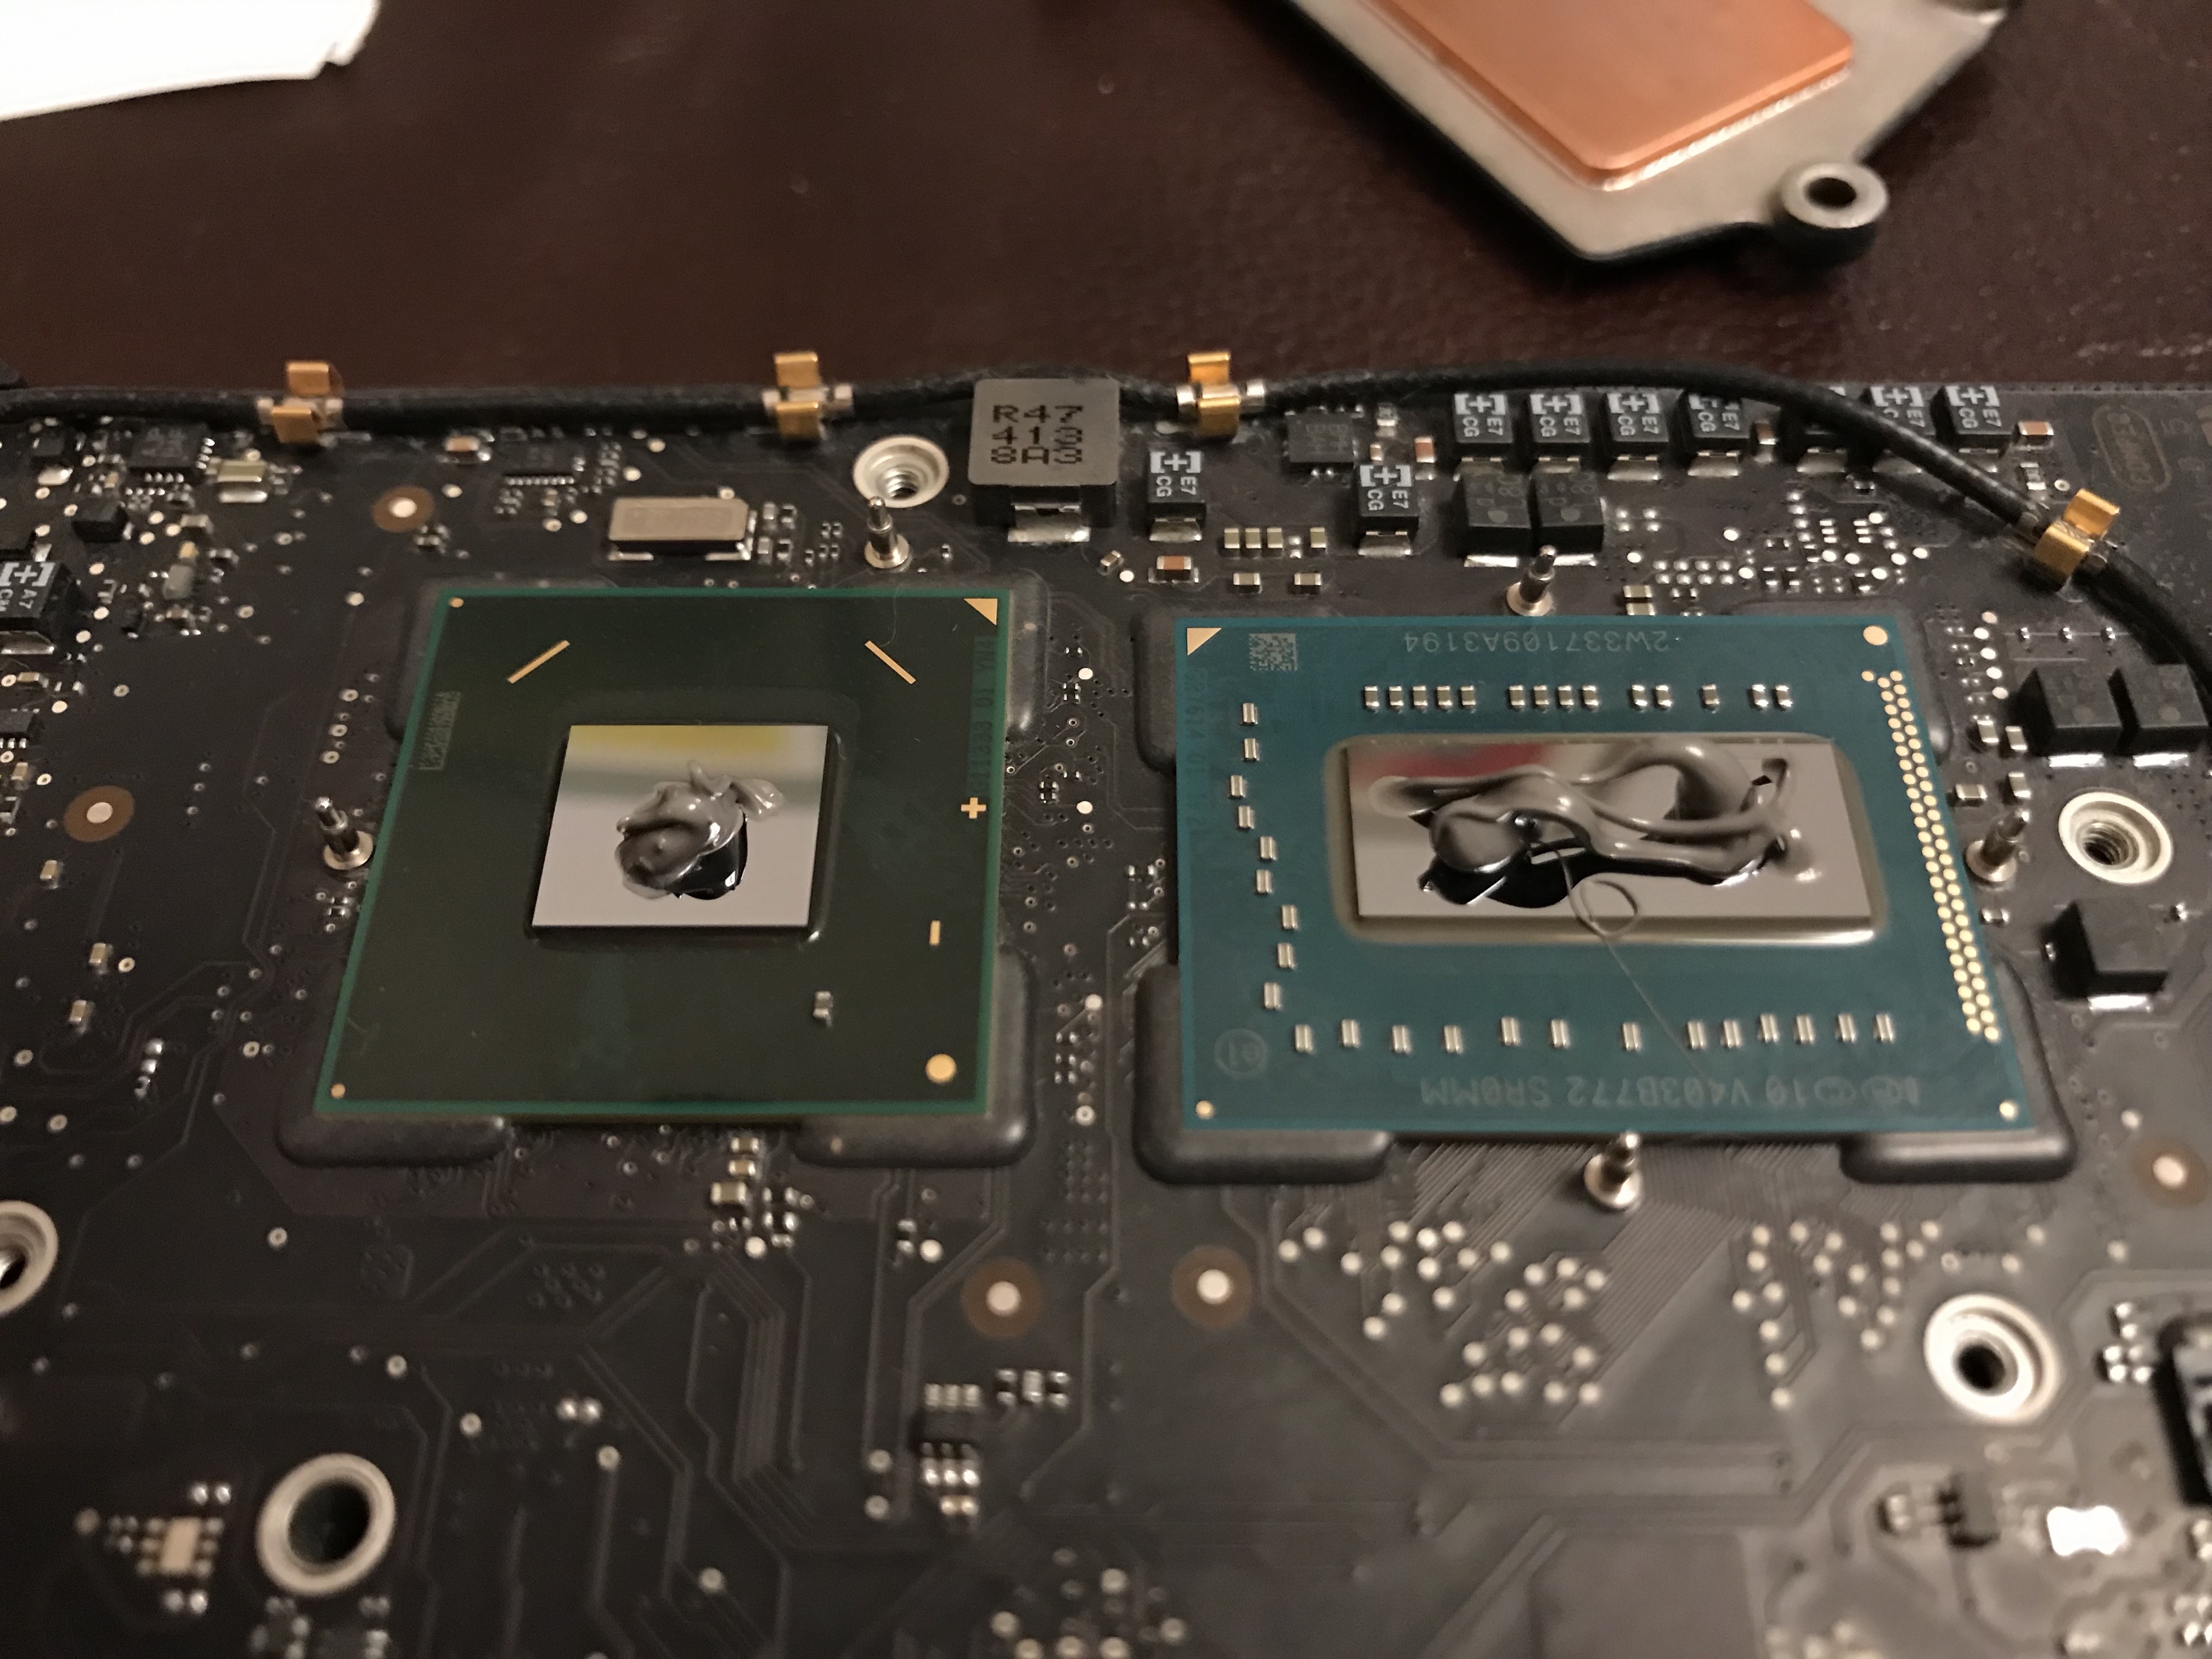
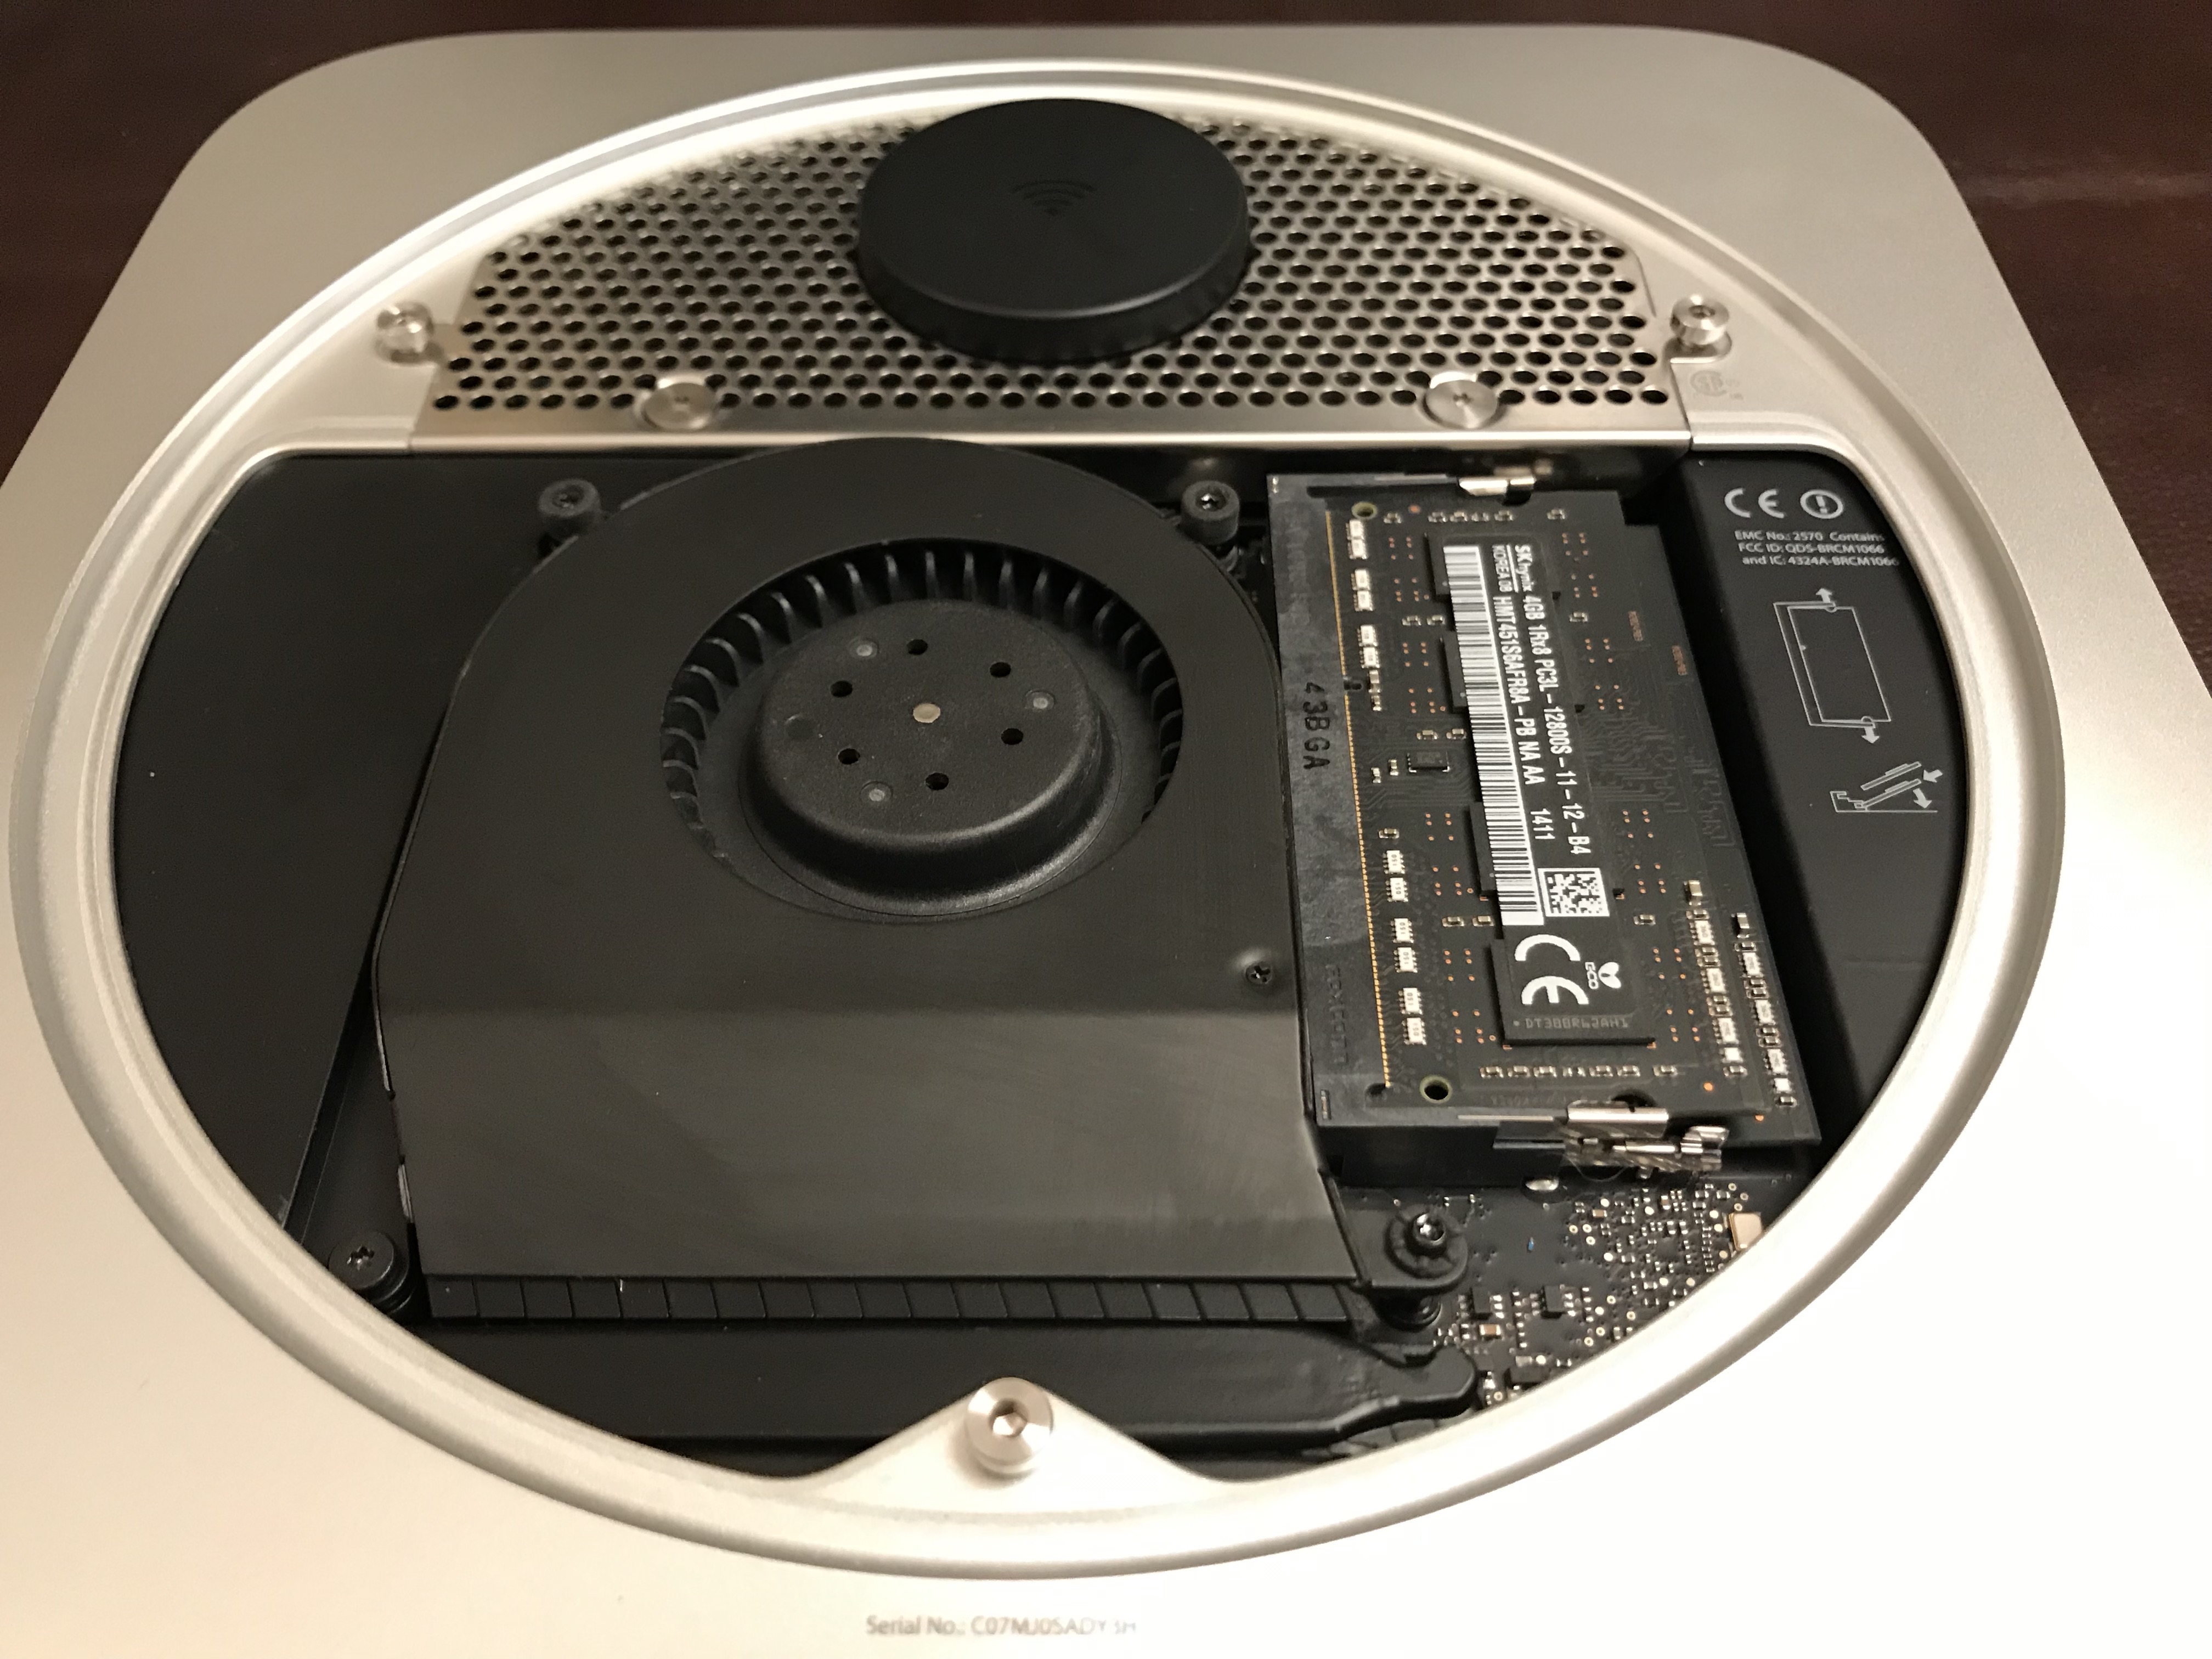
Once the SSD arrived, I got to work. I didn’t want Ligia to experience an outage longer than a few hours, so the pressure was on. My plan was to open up her machine, clean the insides thoroughly of dust, replace the thermal paste on the CPU and GPU, then replace the HDD with the SSD. After putting it back together and booting up, I would need to do a data restore.
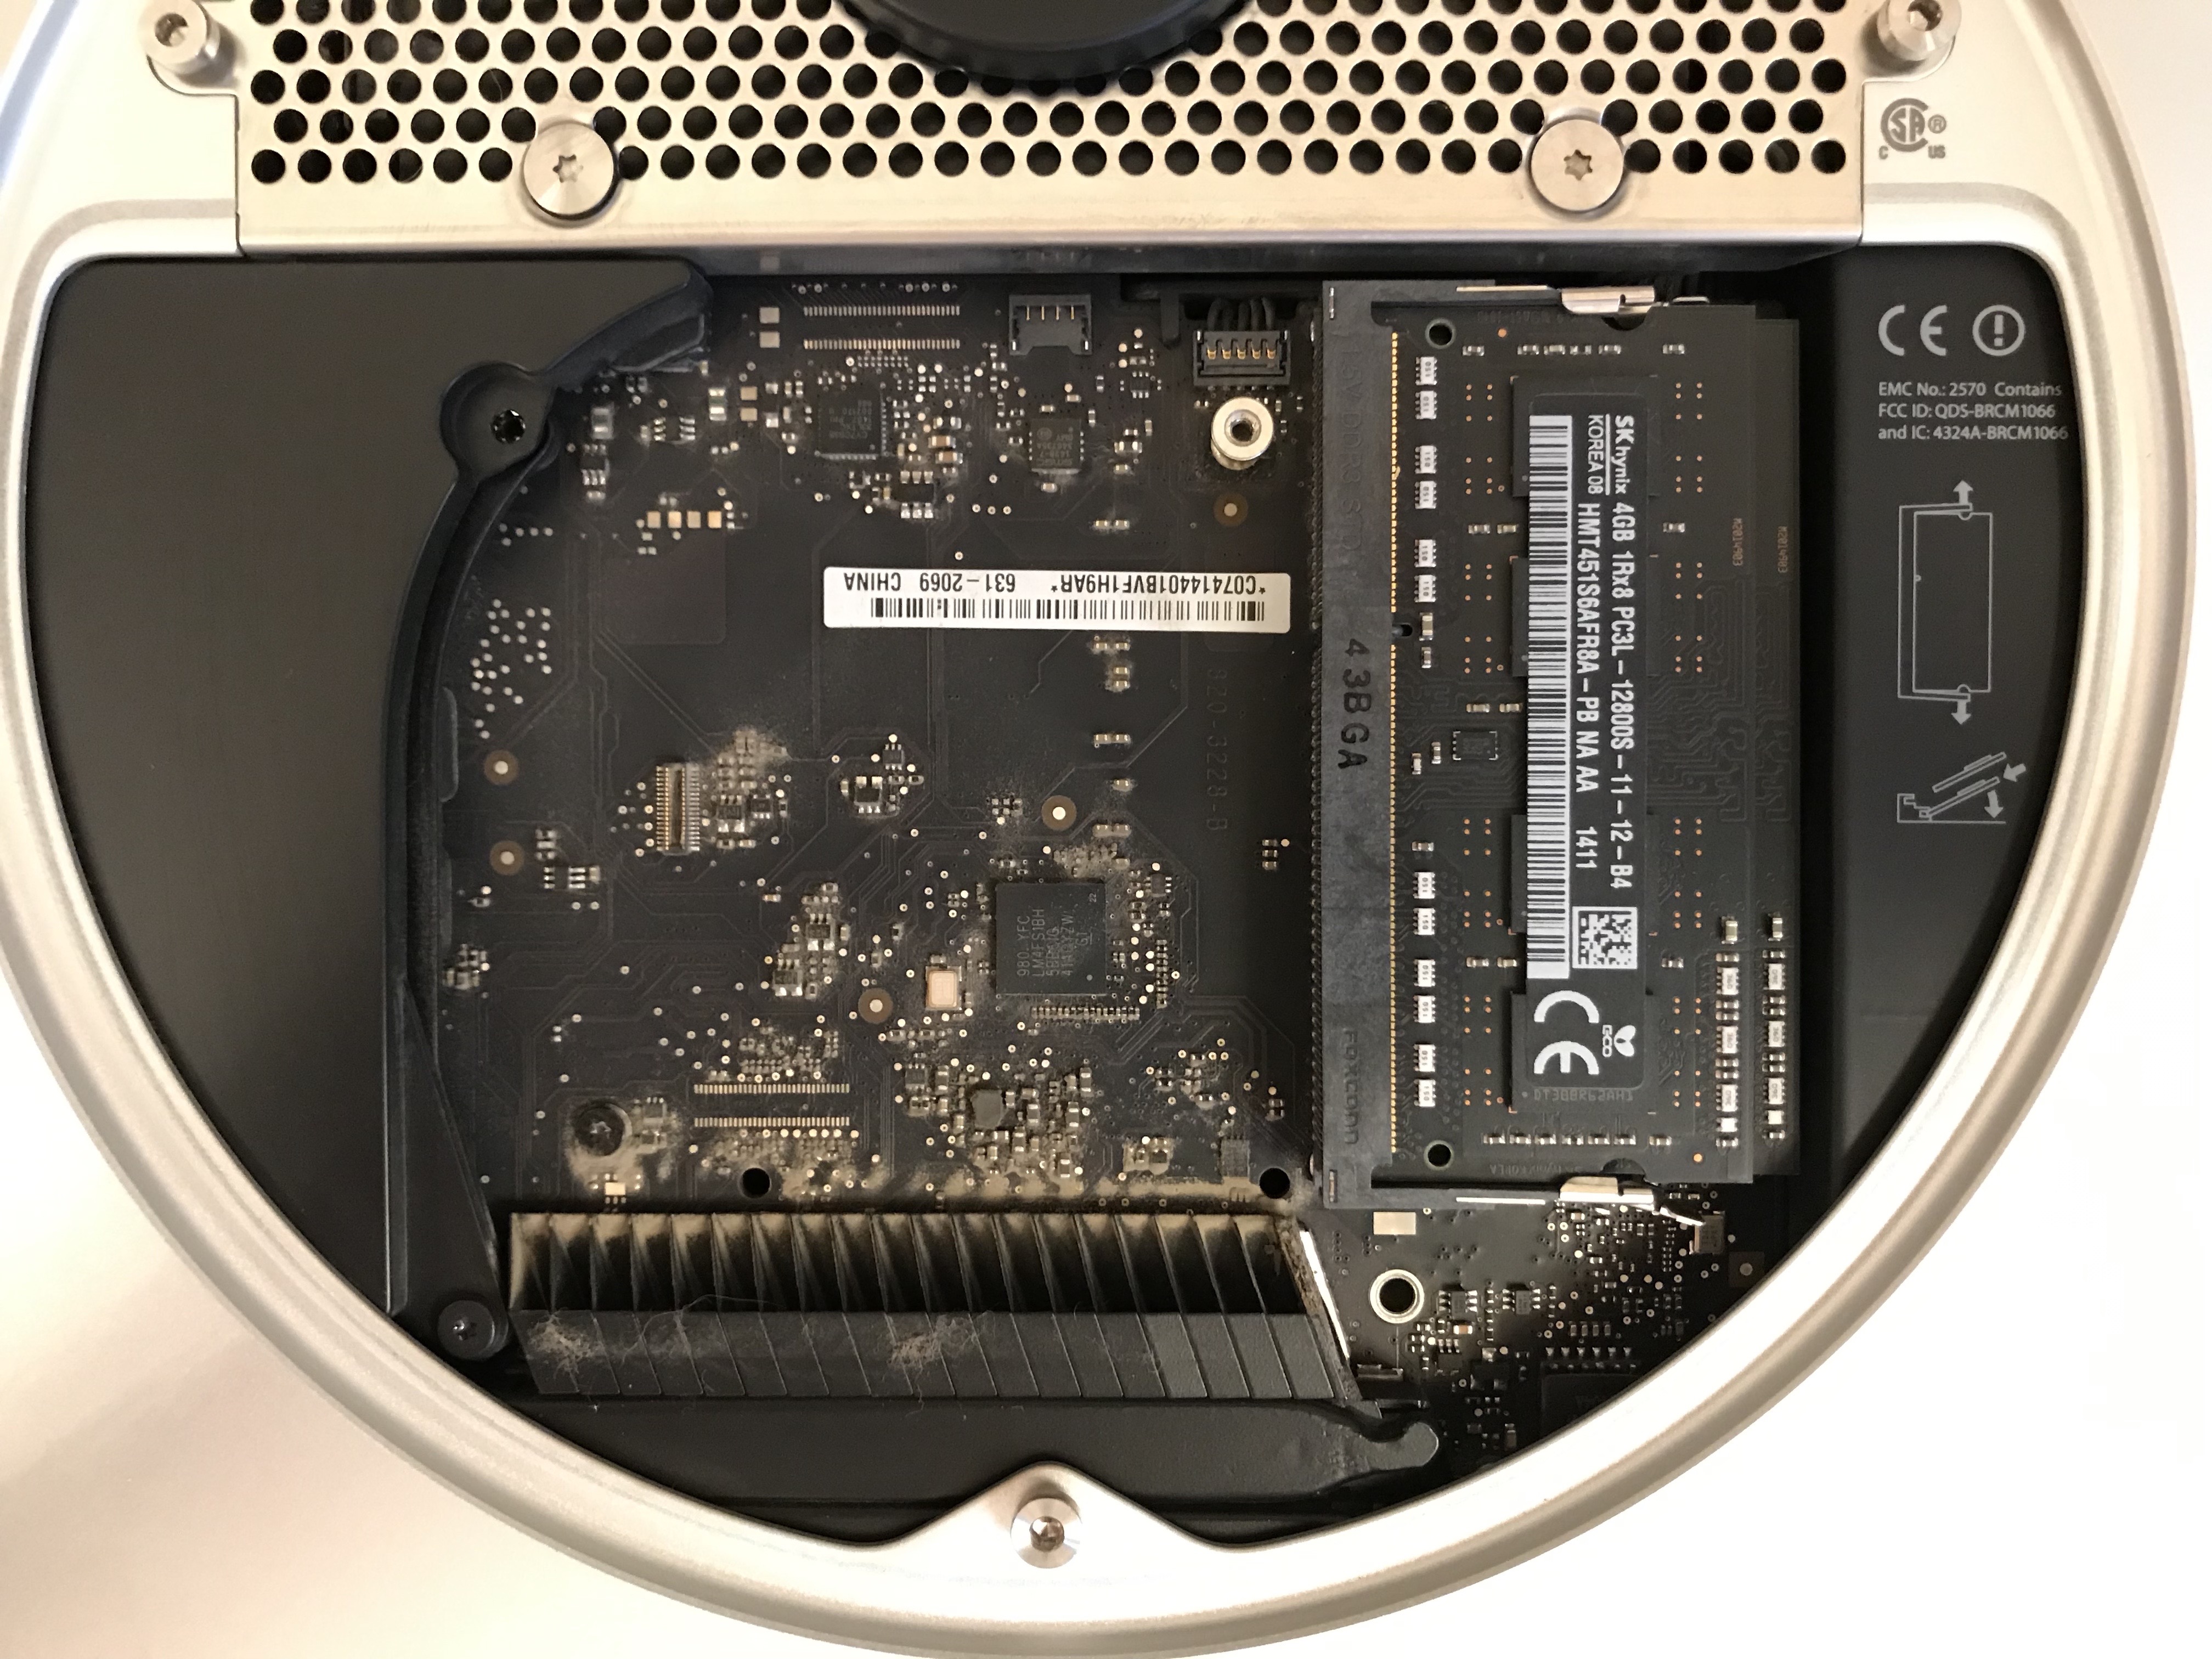
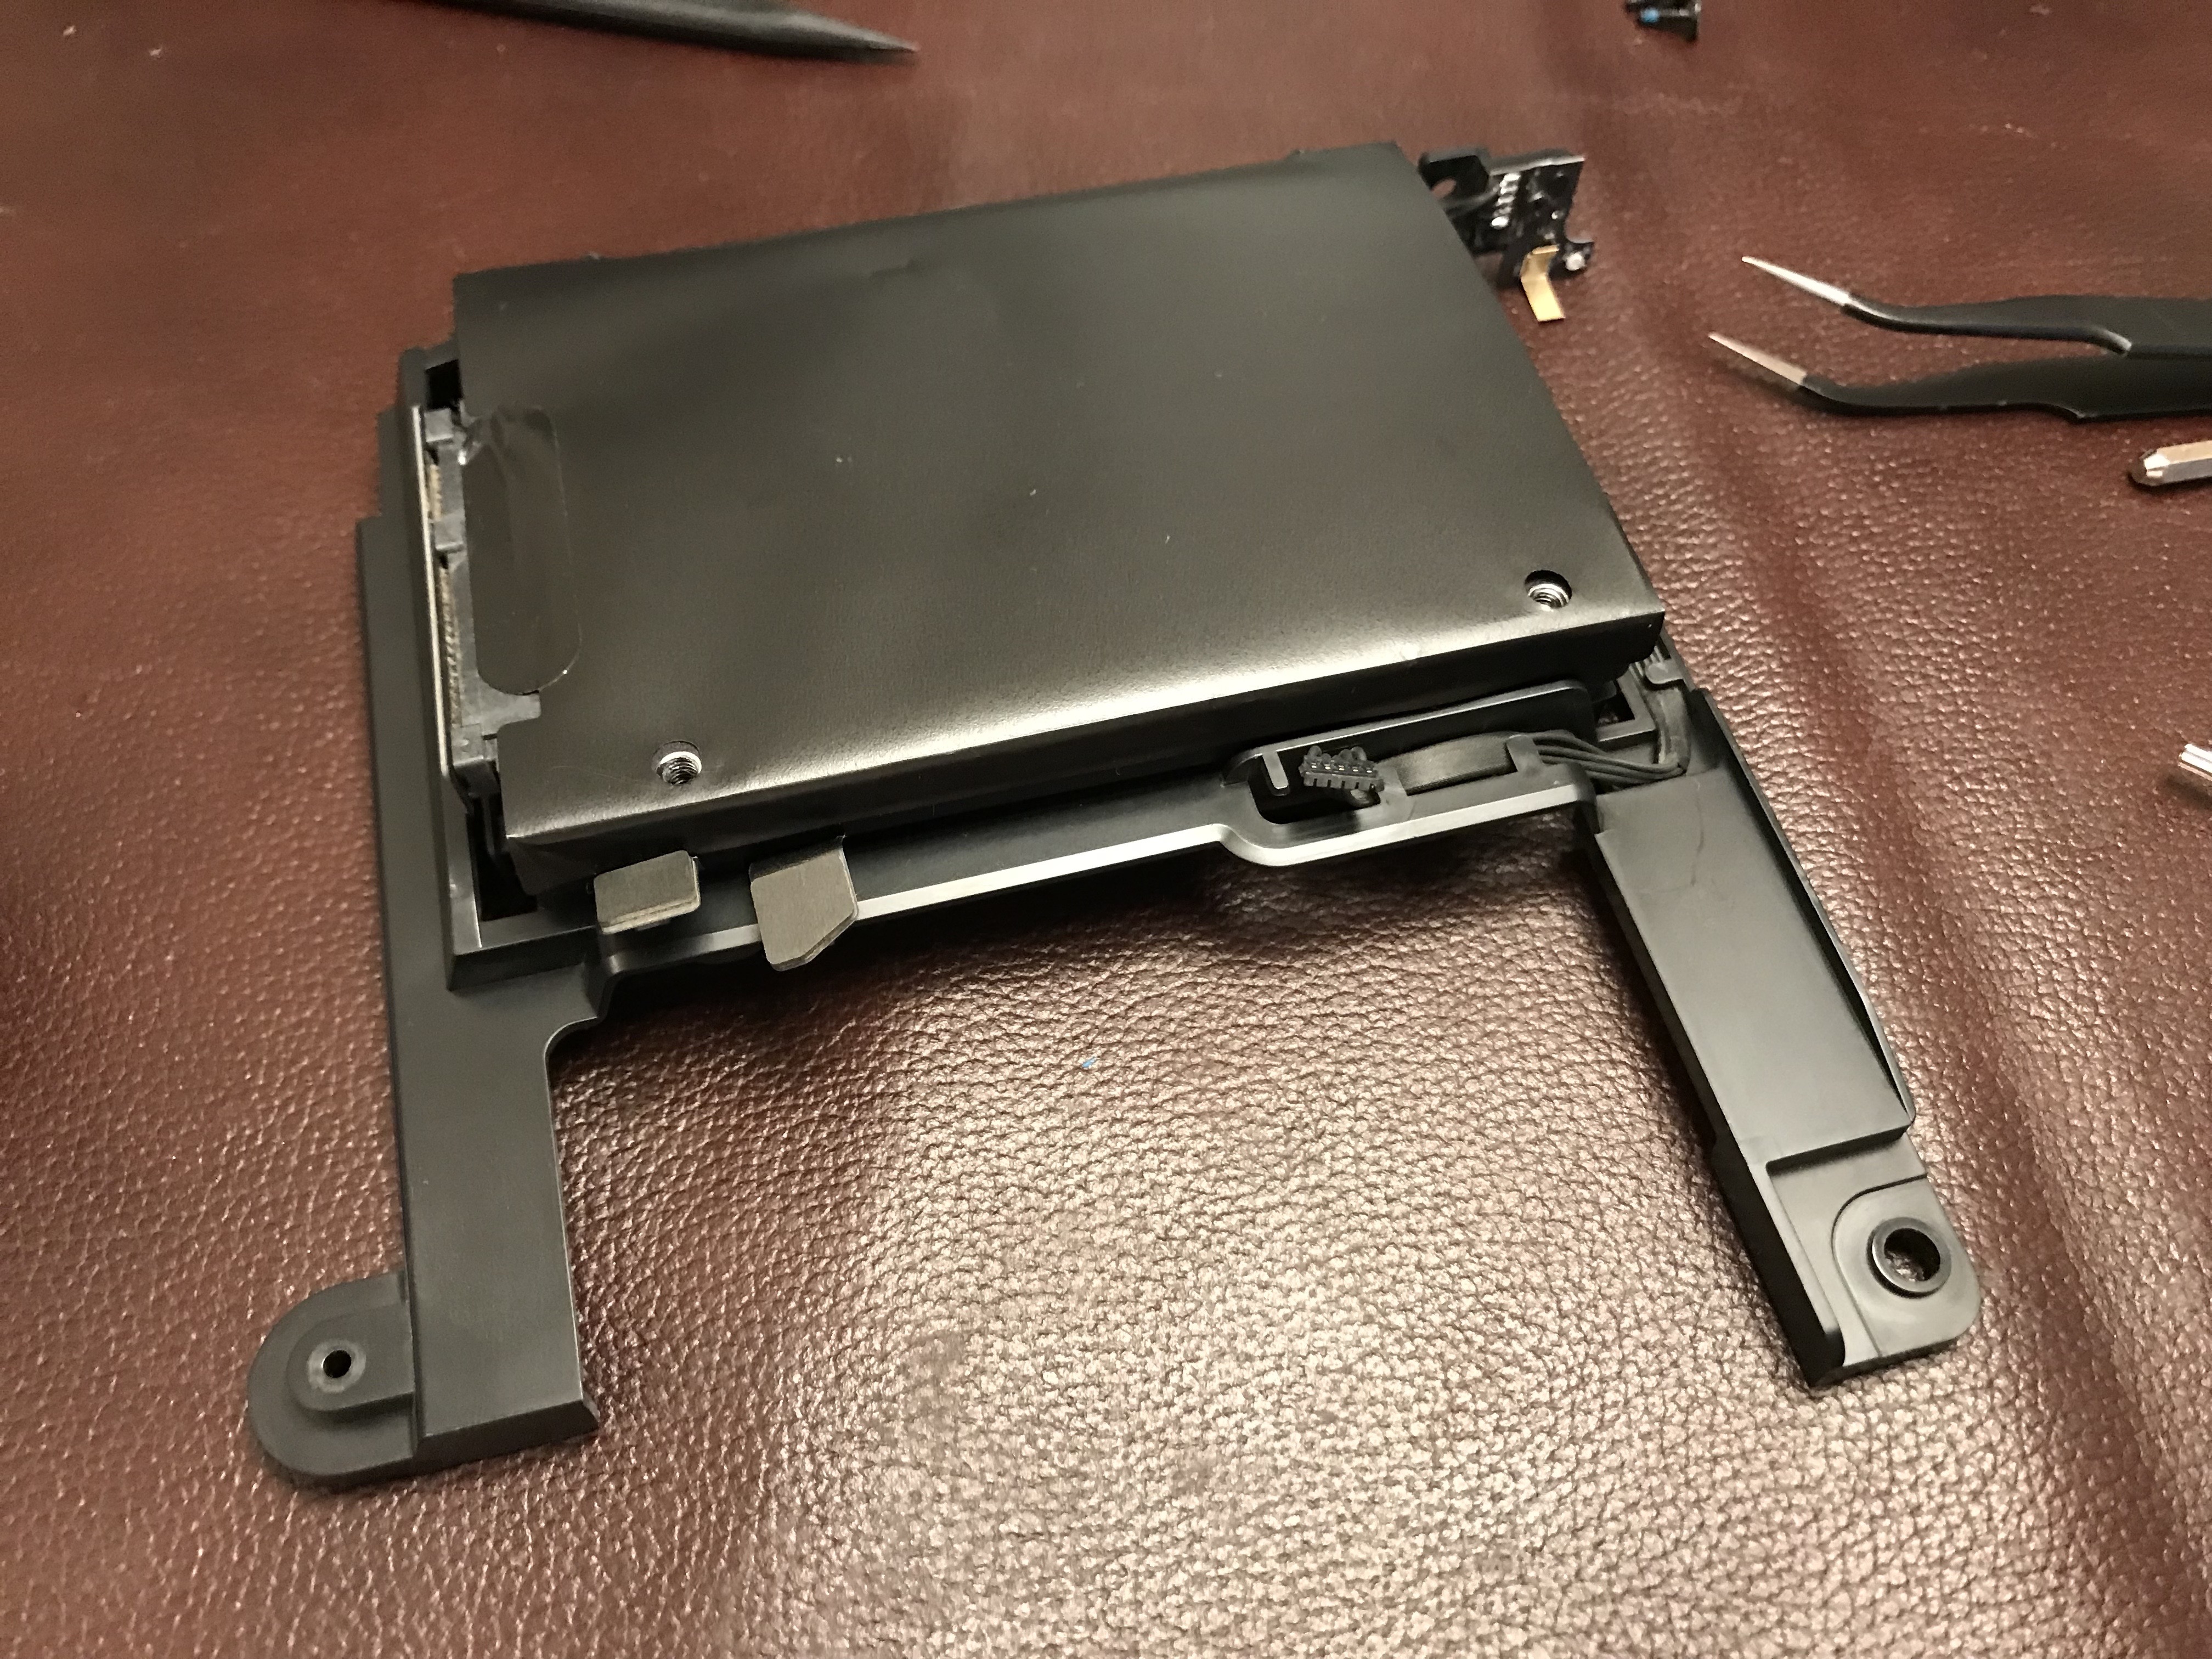
Here is a gallery of photographs from that process. The insides were indeed full of dust and the thermal paste had dried up. I followed this guide from iFixit, although I have to say it’s not entirely accurate, as detailed below.
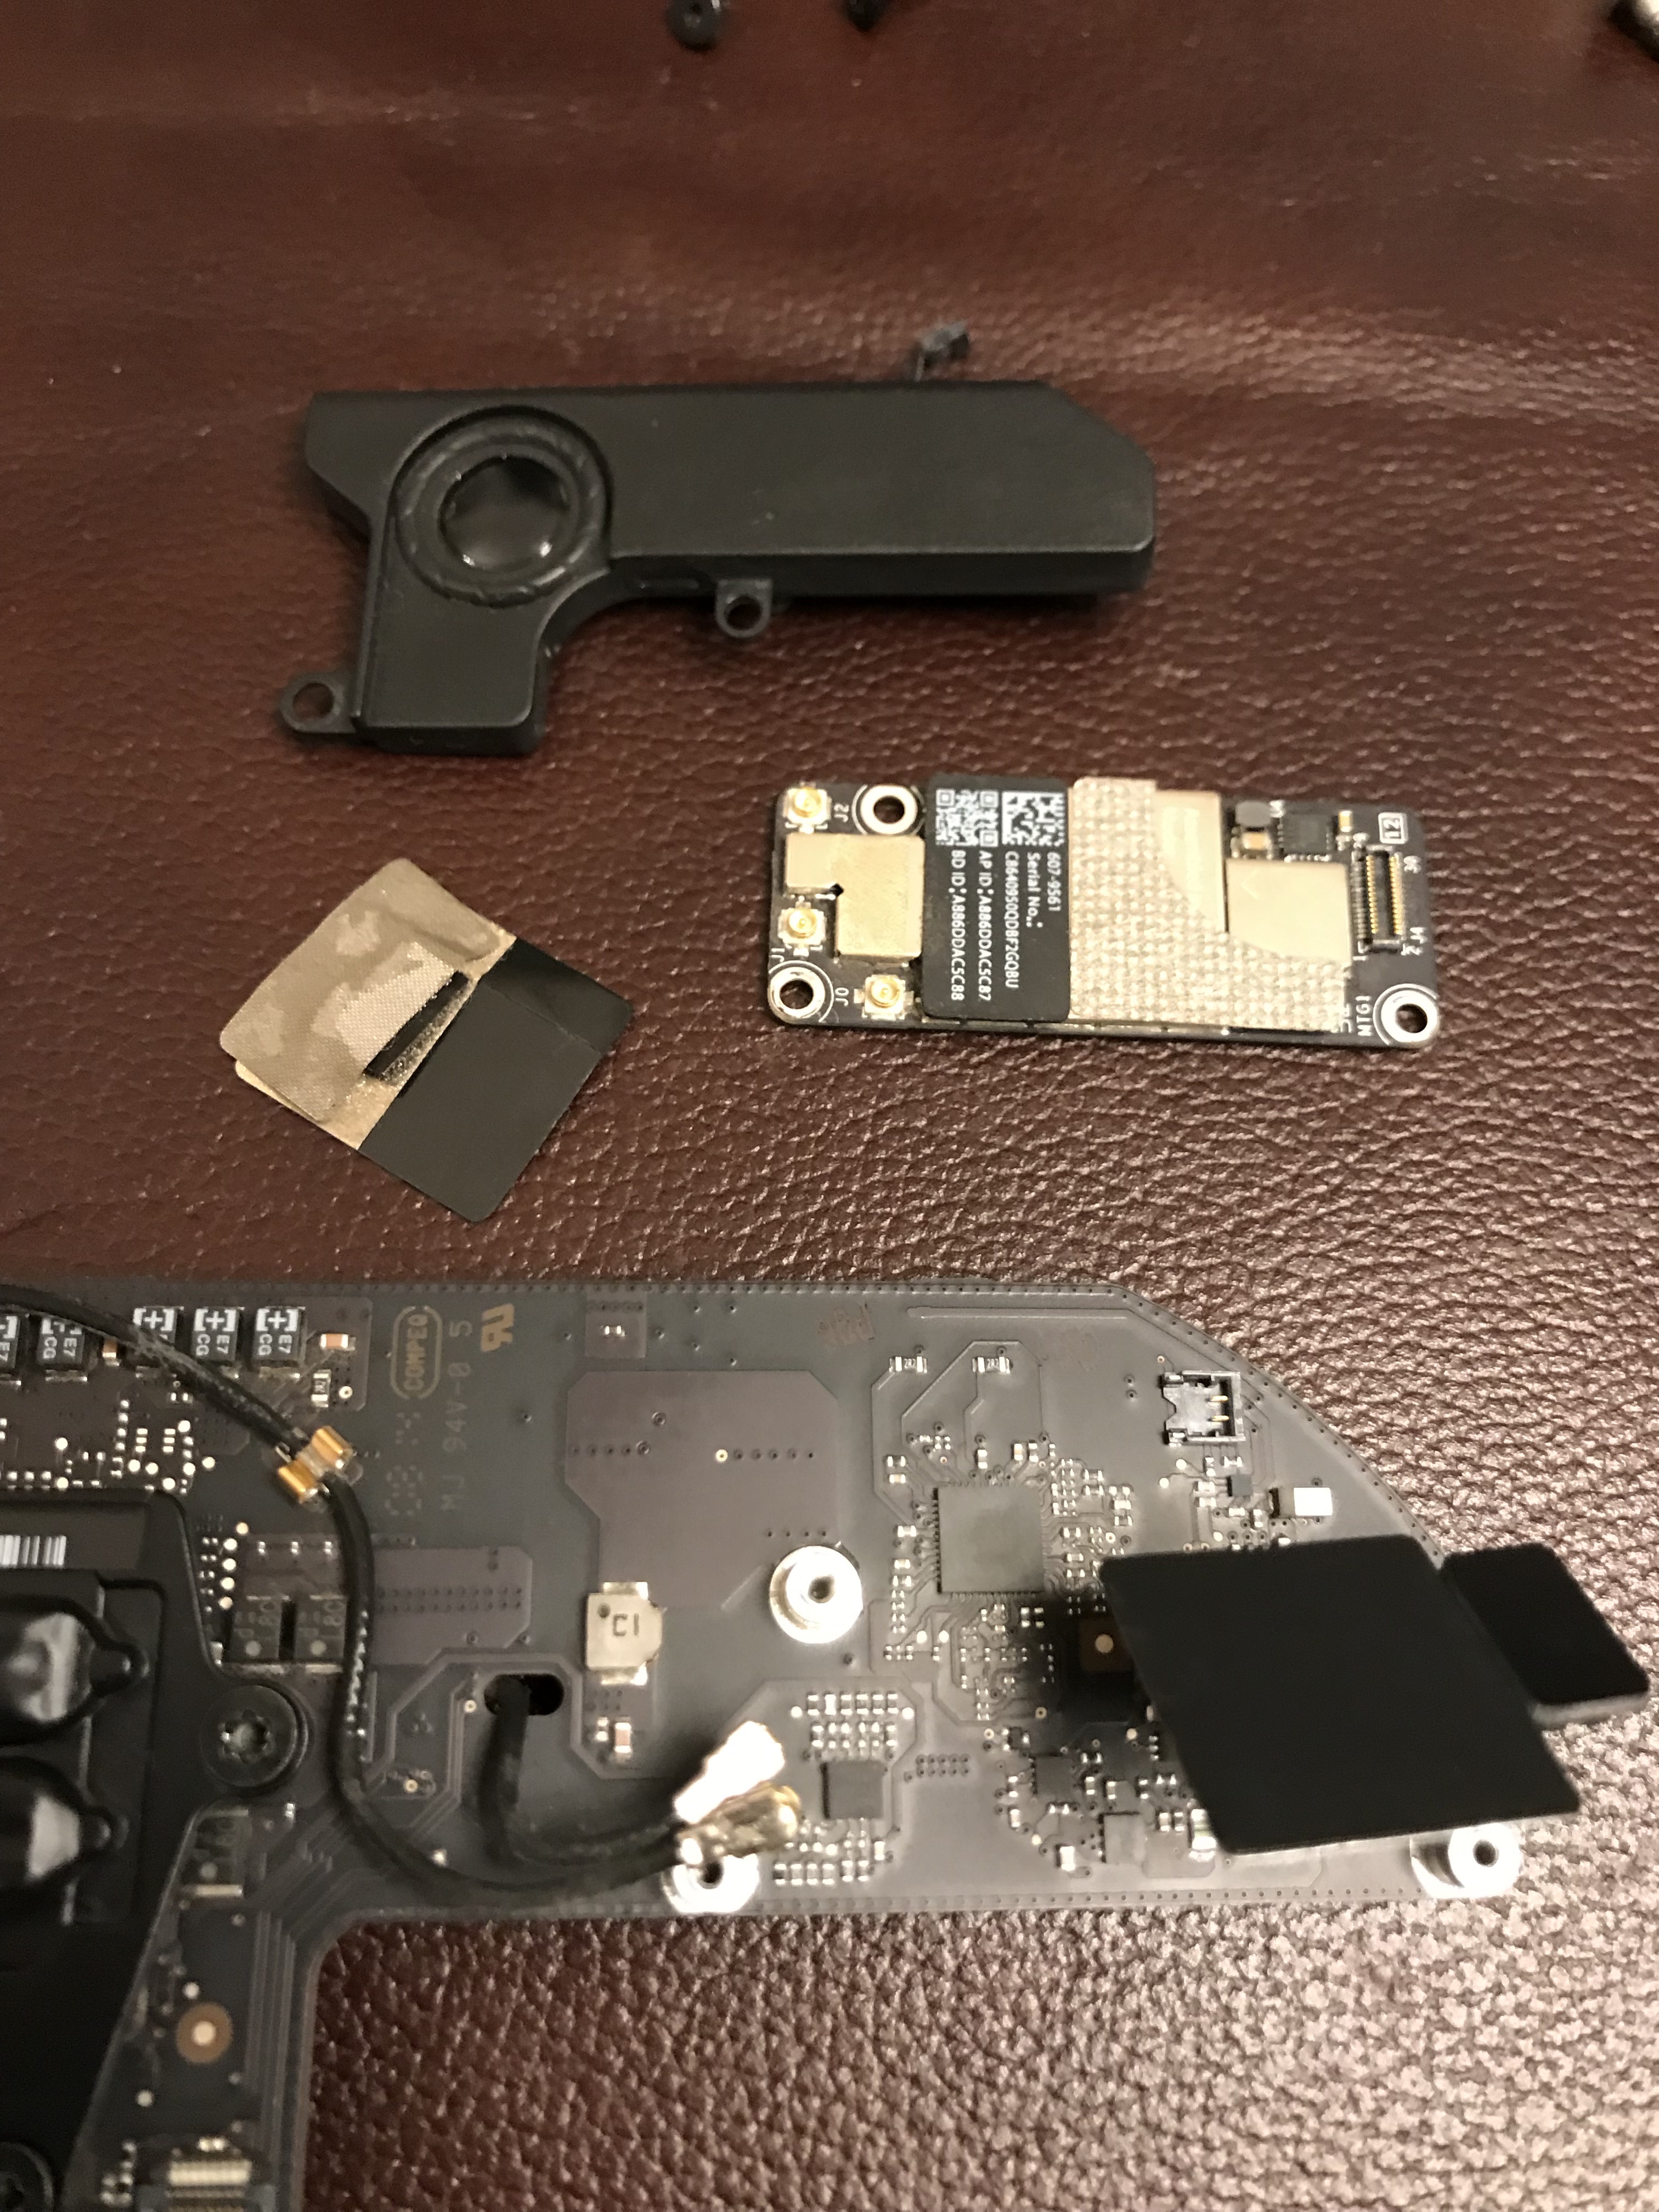
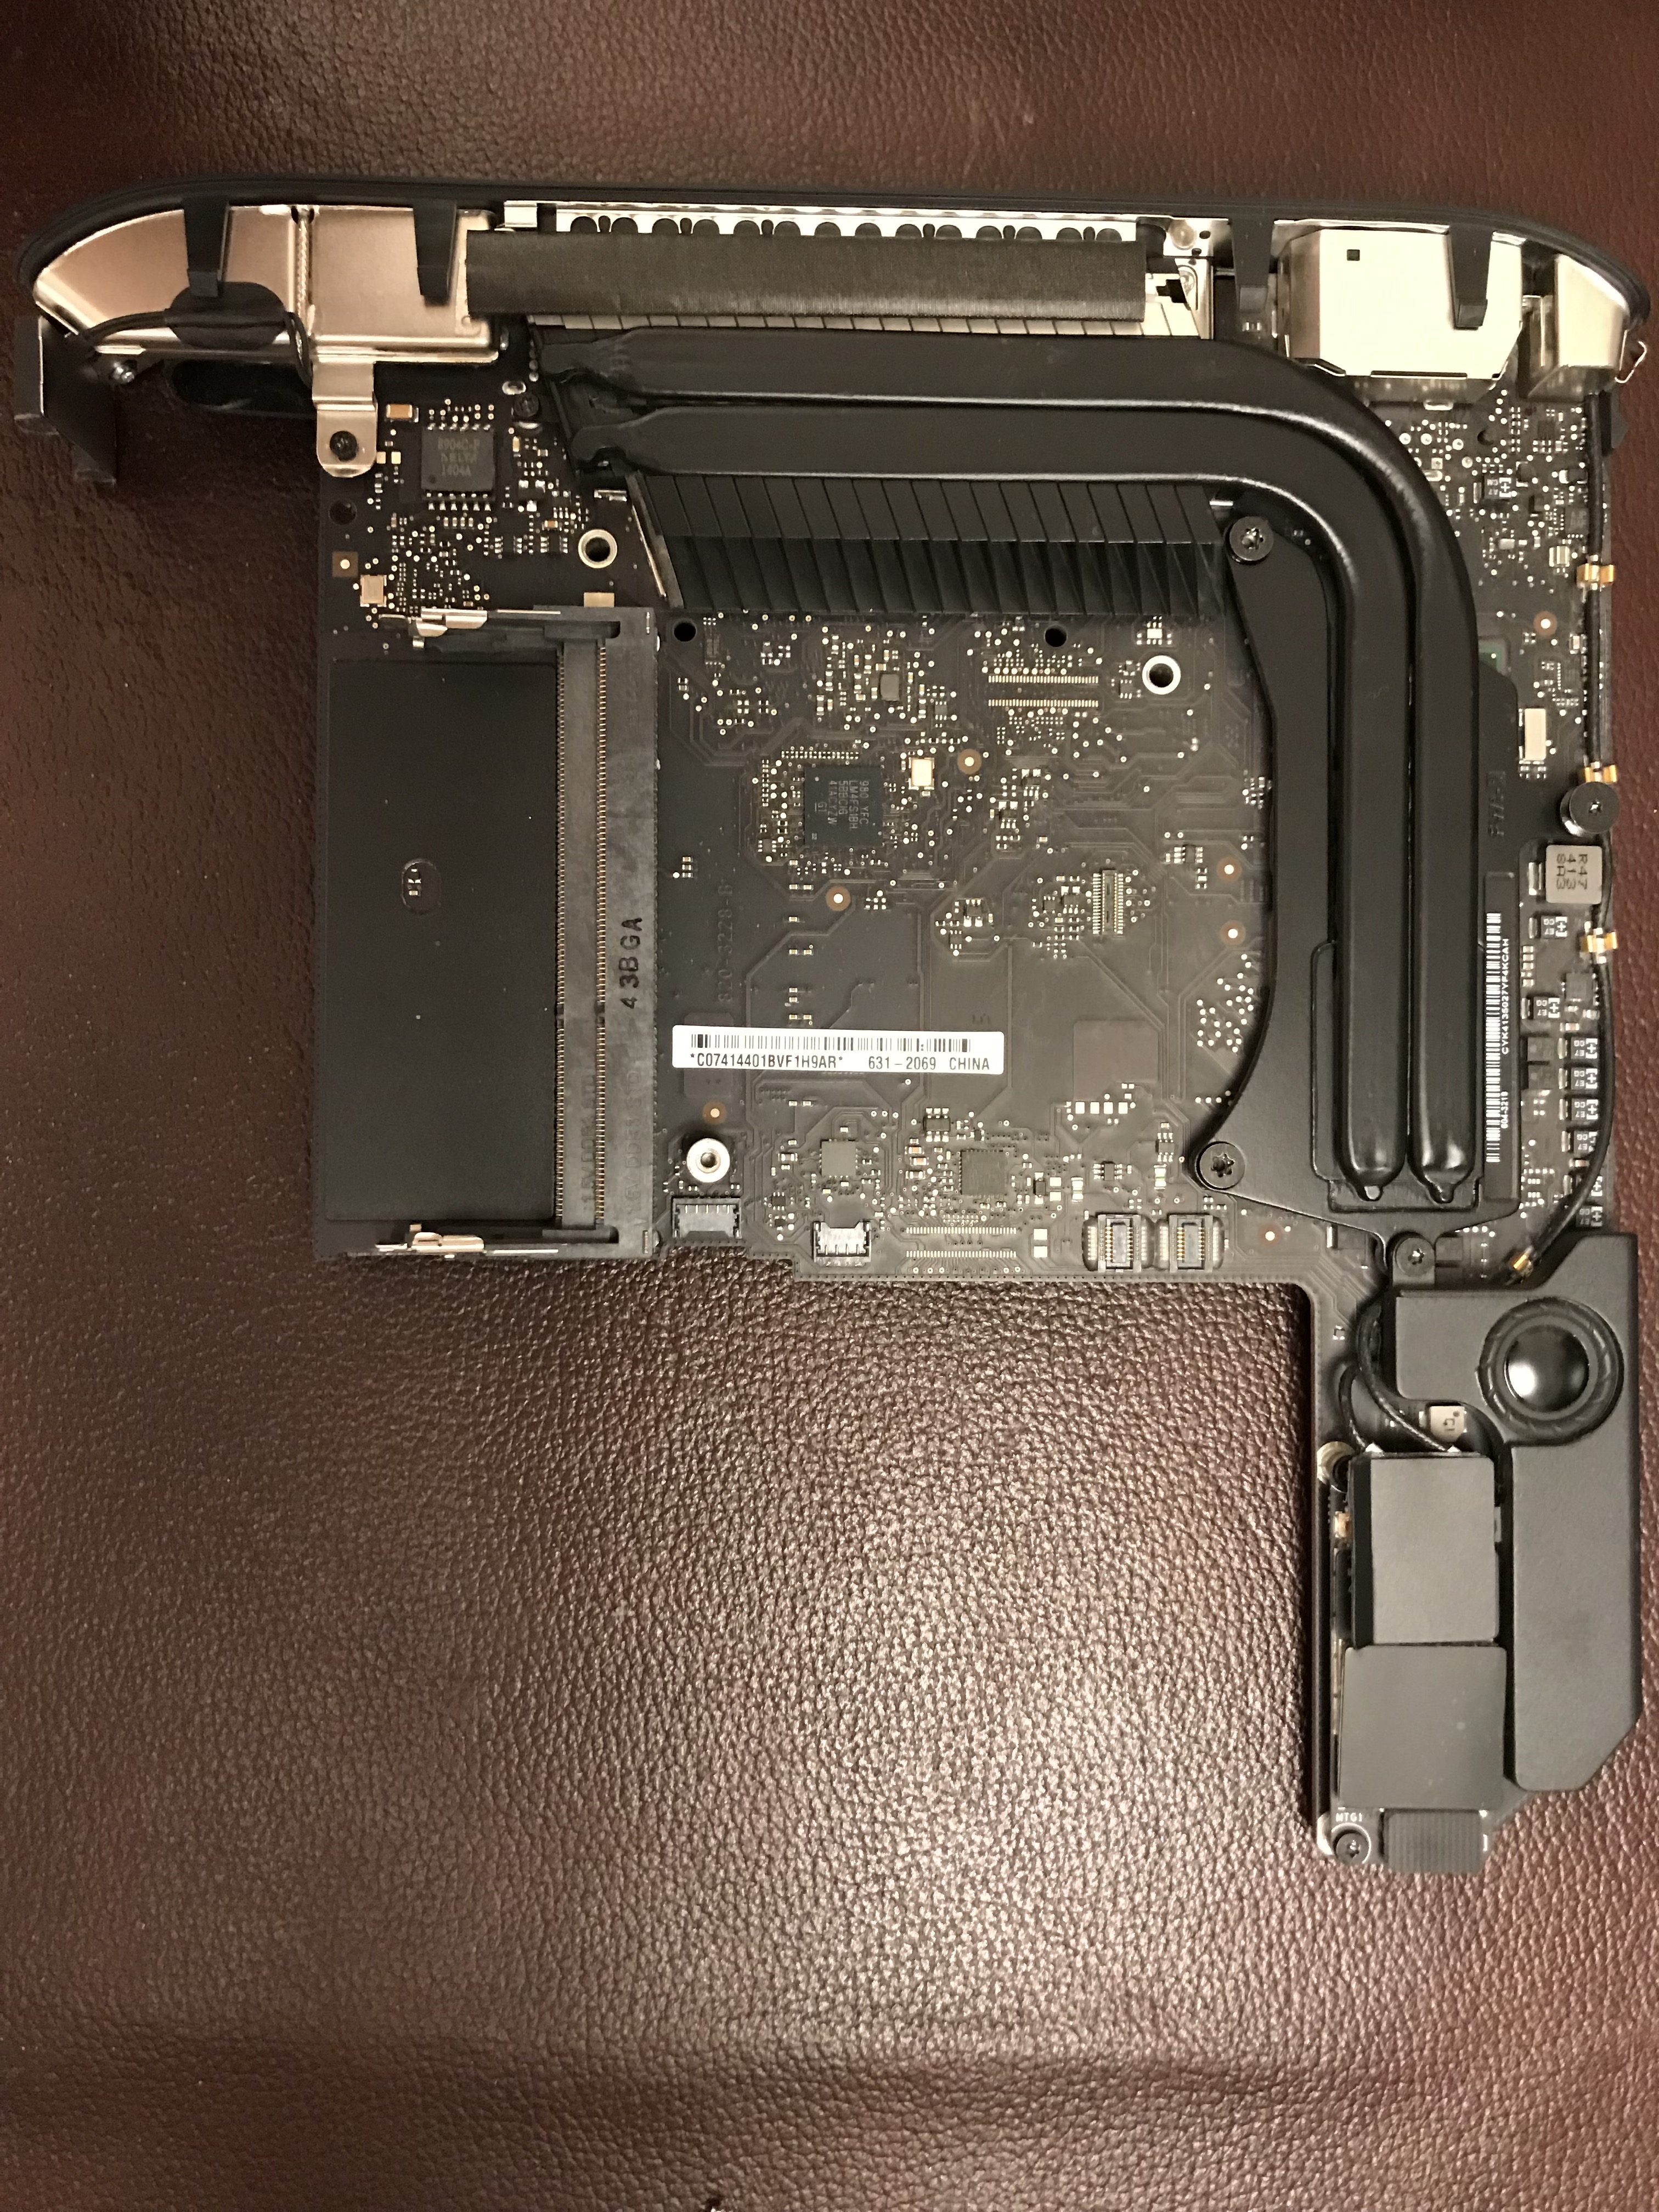
I was on my own when it came time to work on the AirPort/Bluetooth board, where the setup differed quite a bit from the guide. There were also a few screws whose location was different in the guide. So I took photos before I disassembled things, just to be safe.
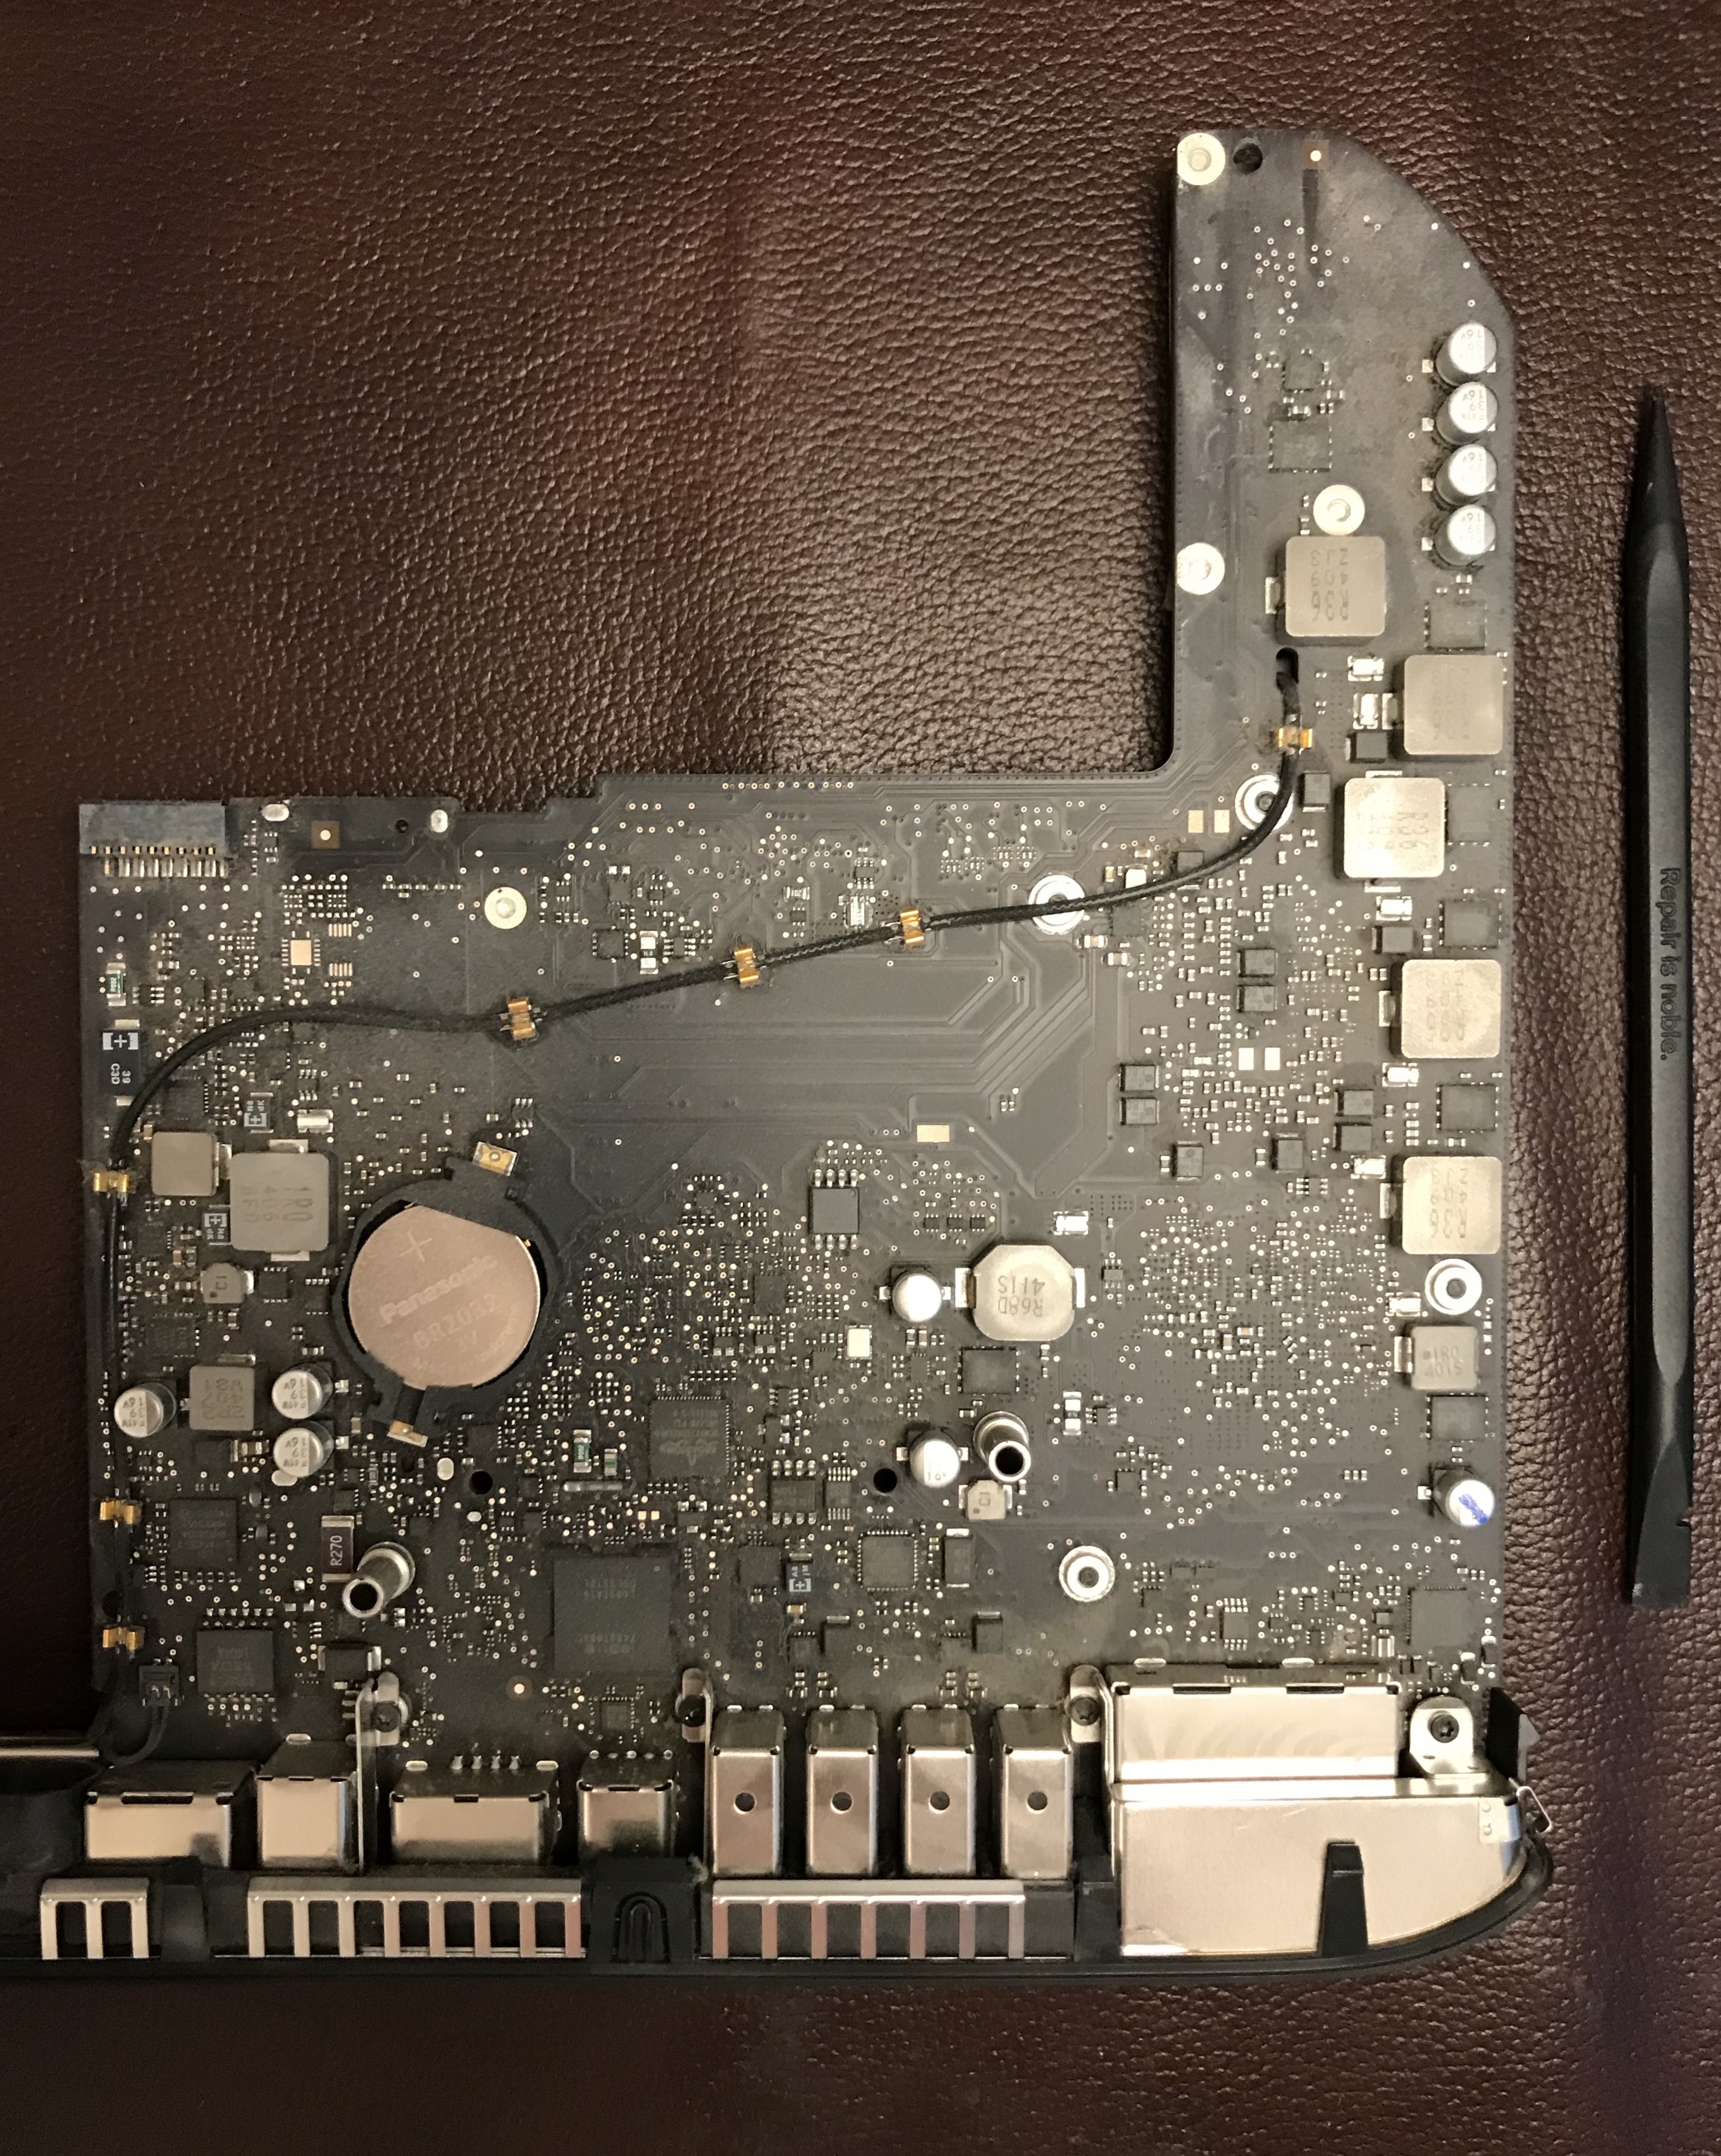
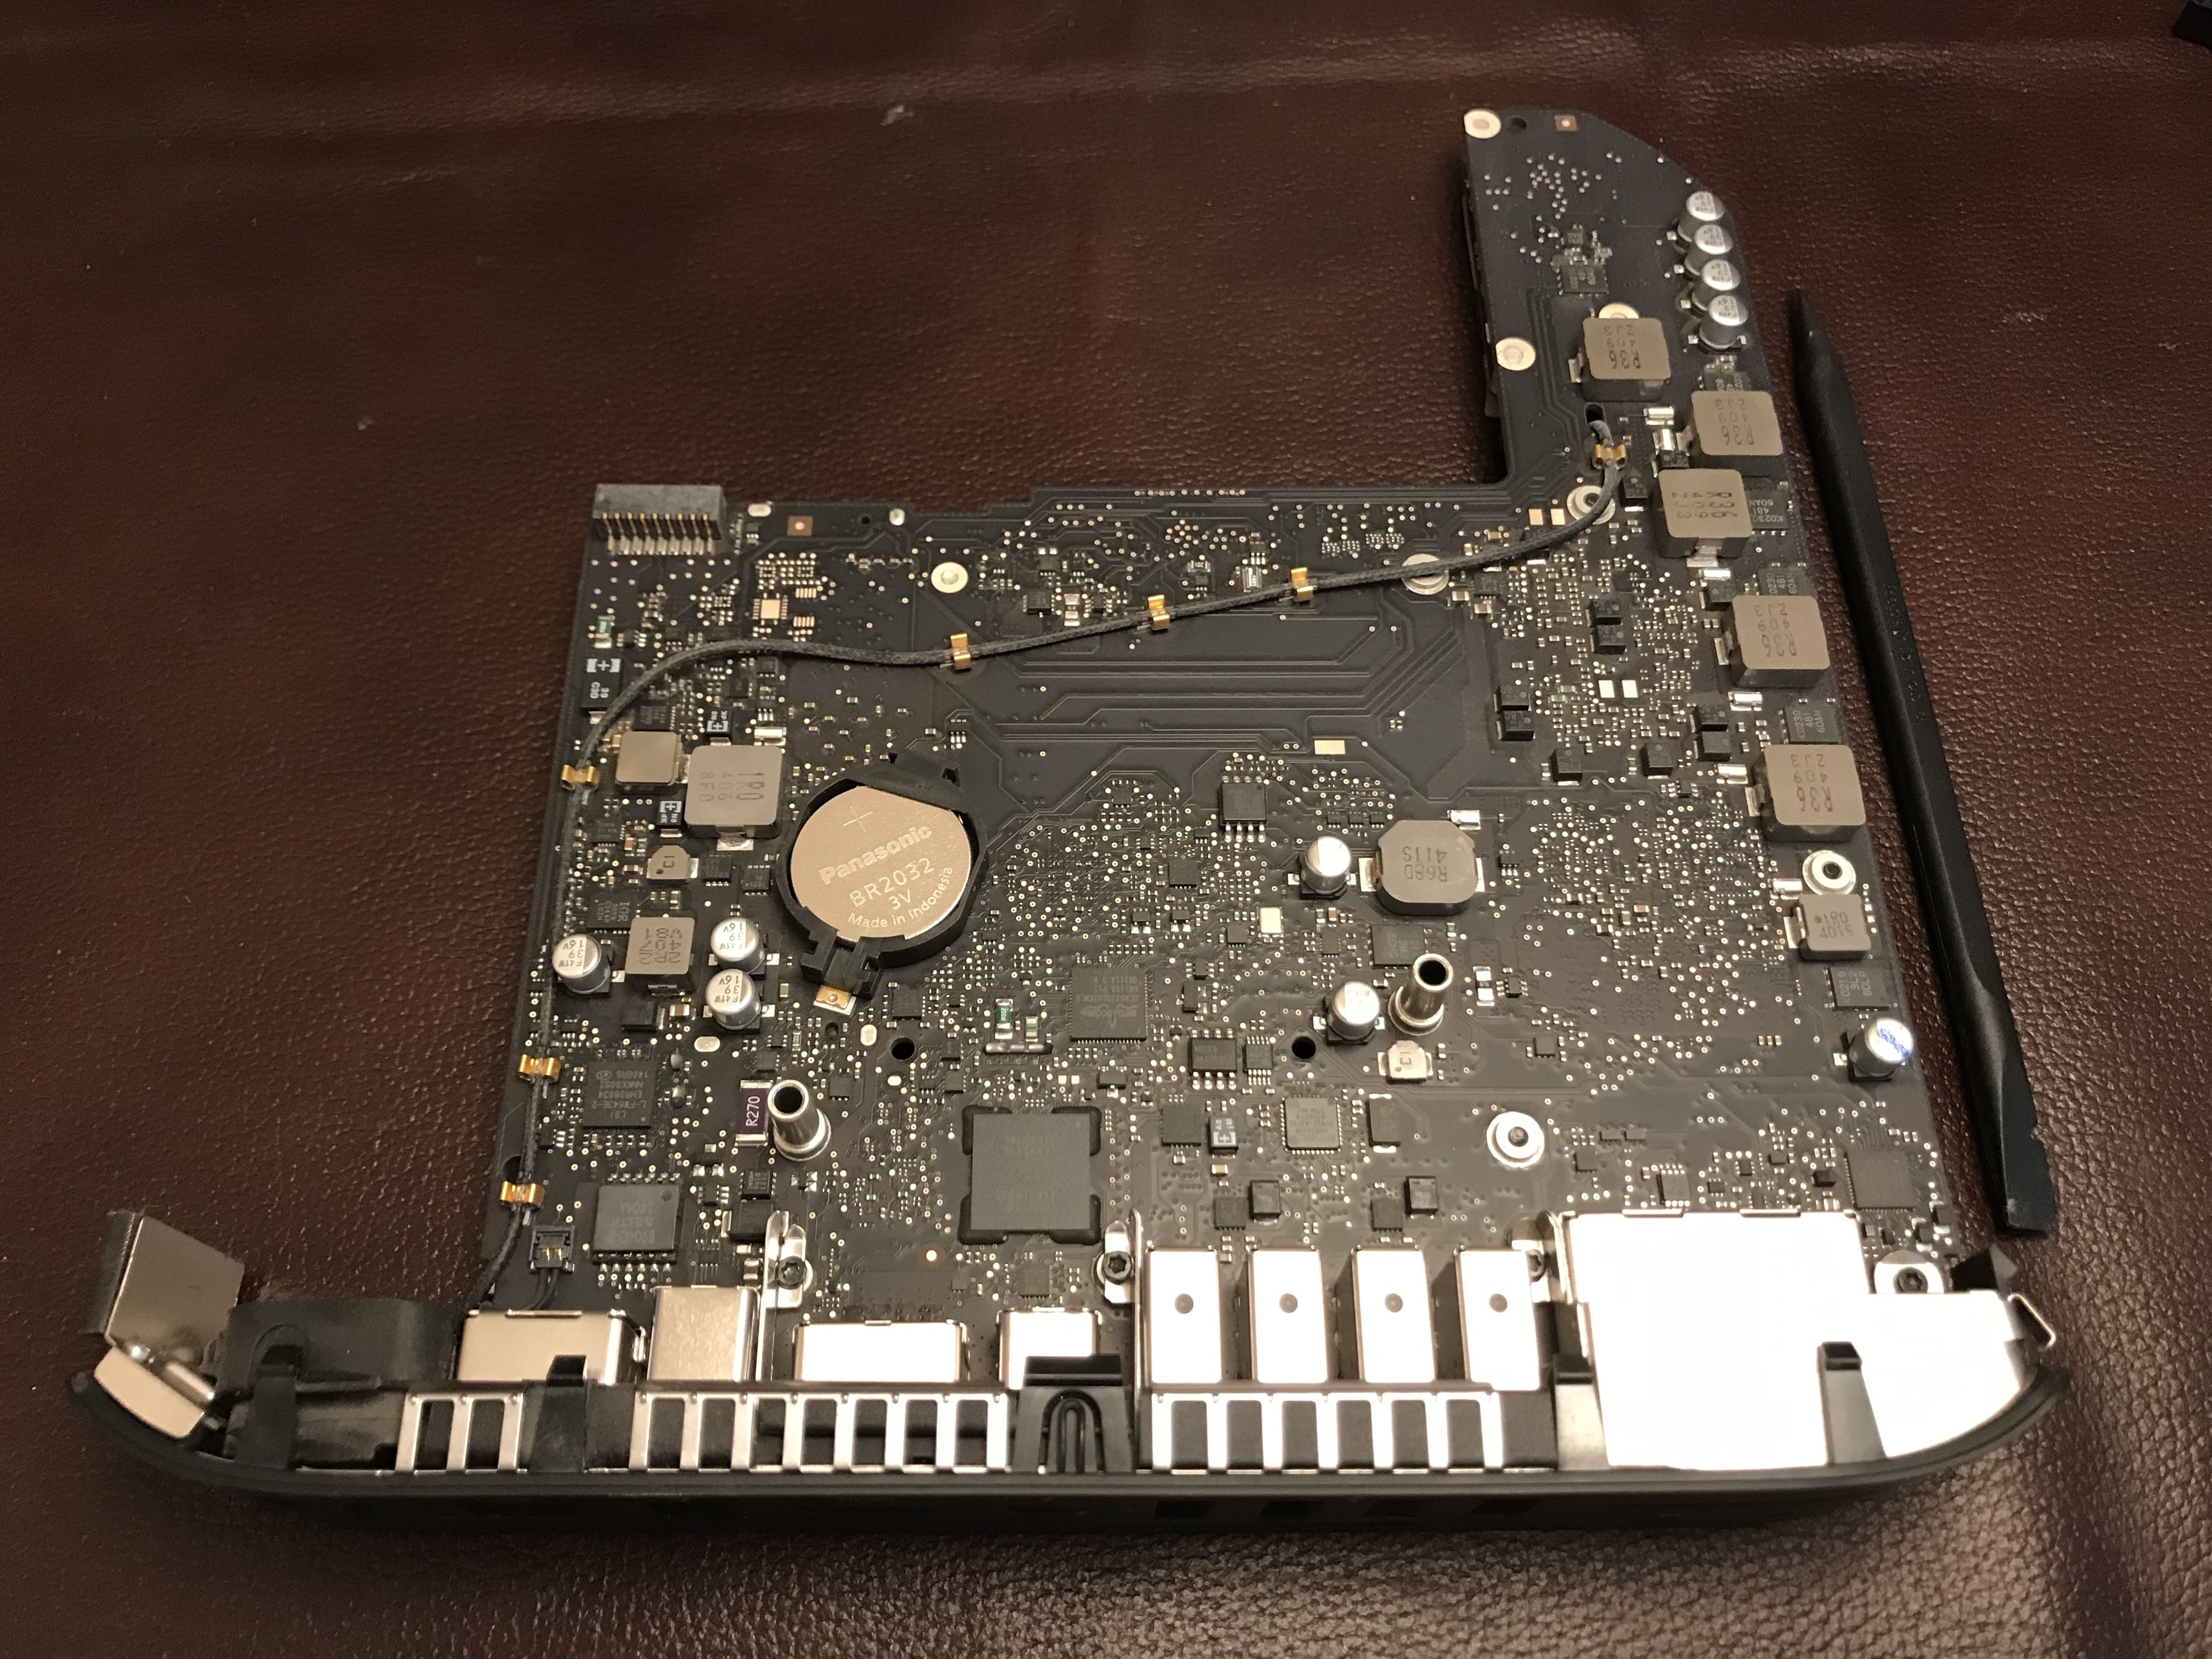
While I love the design of the Mac Mini (inside and out) and I think it’s a fantastic little computer, it’s tricky to work on. Everything has to fit together just right. The things that gave me problems when it came time to re-assemble it were:
the minified SATA cables, which kept popping out of their slots on the motherboard and are really only held in place by the cowling (the little piece of plastic in a semilune shape),
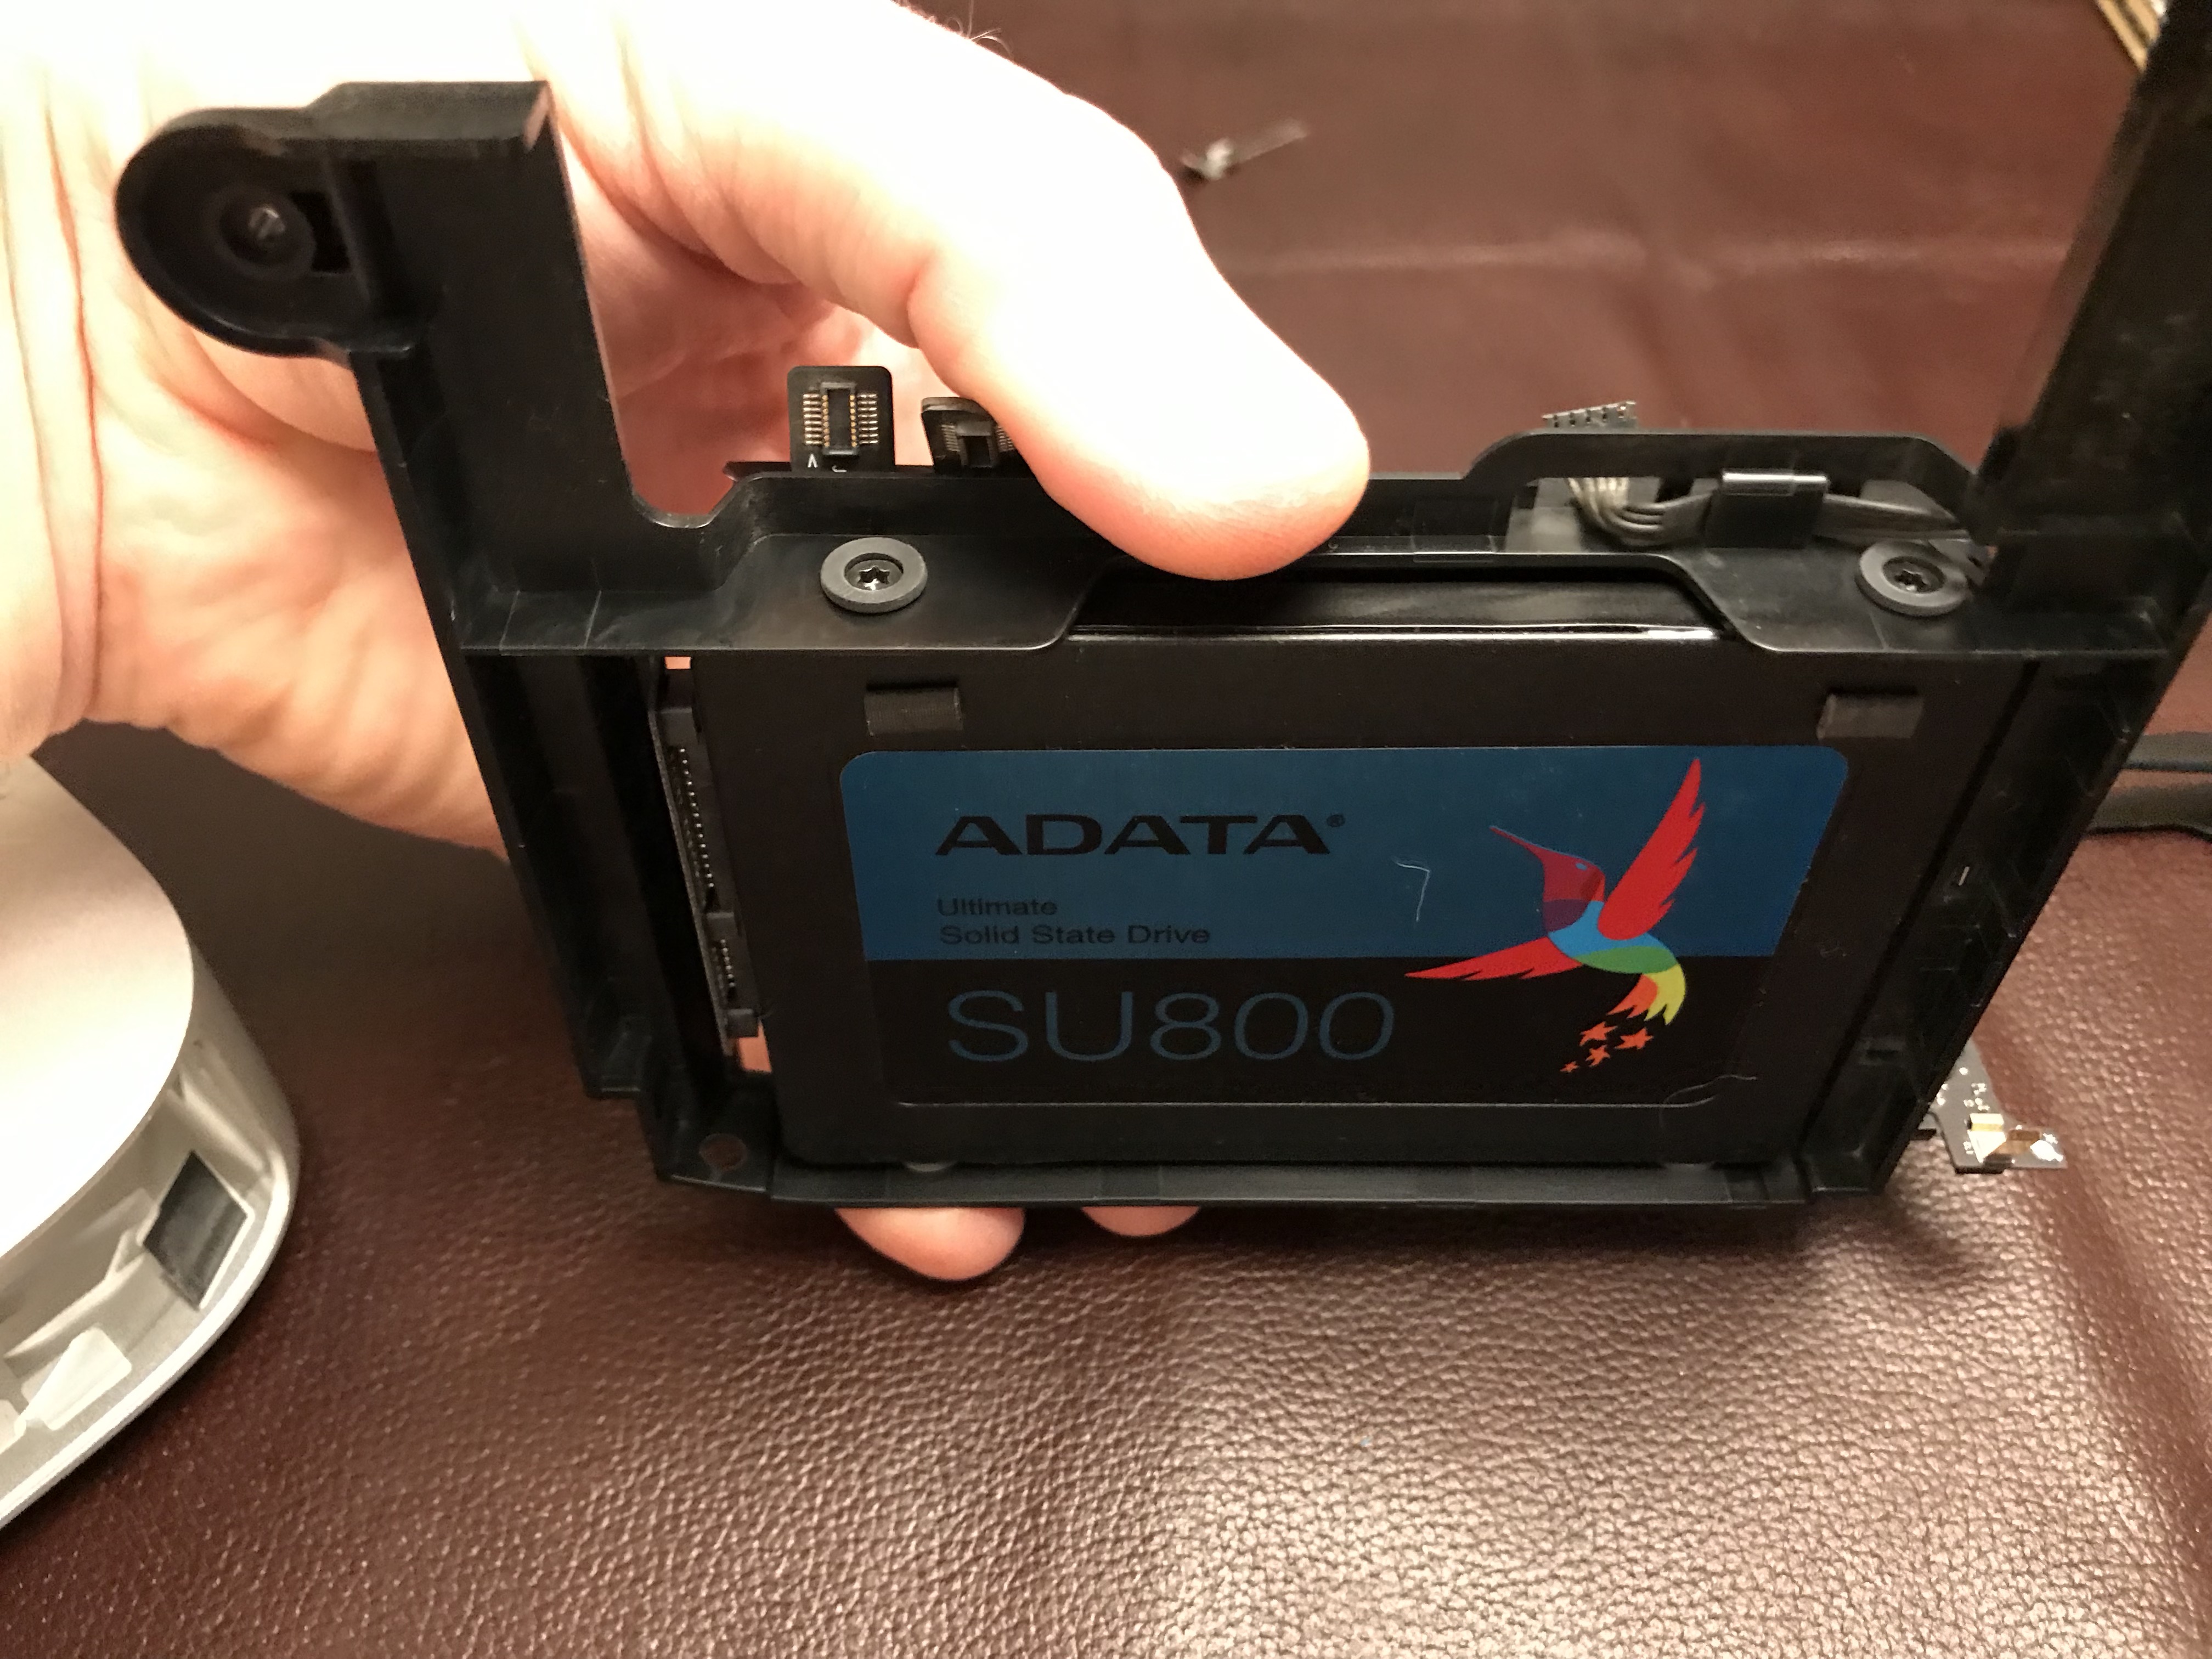
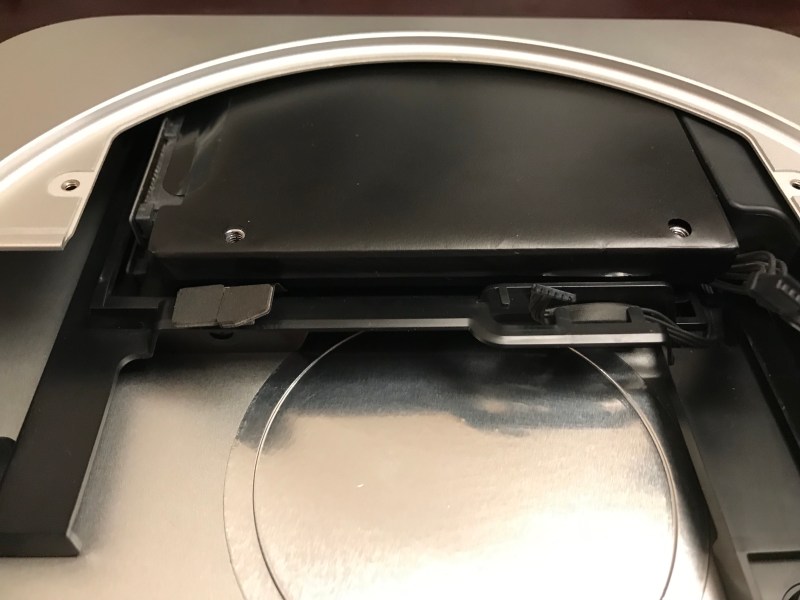
re-seating the top drive, whose side screws have to slide into some holes in the back of the case, but there is little to no tactile feedback when they’re in place, and there’s no way to check things visually; it actually fits asymmetrically over the bottom drive, which is a bit illogical, but that’s how the engineers worked out the hardware design,
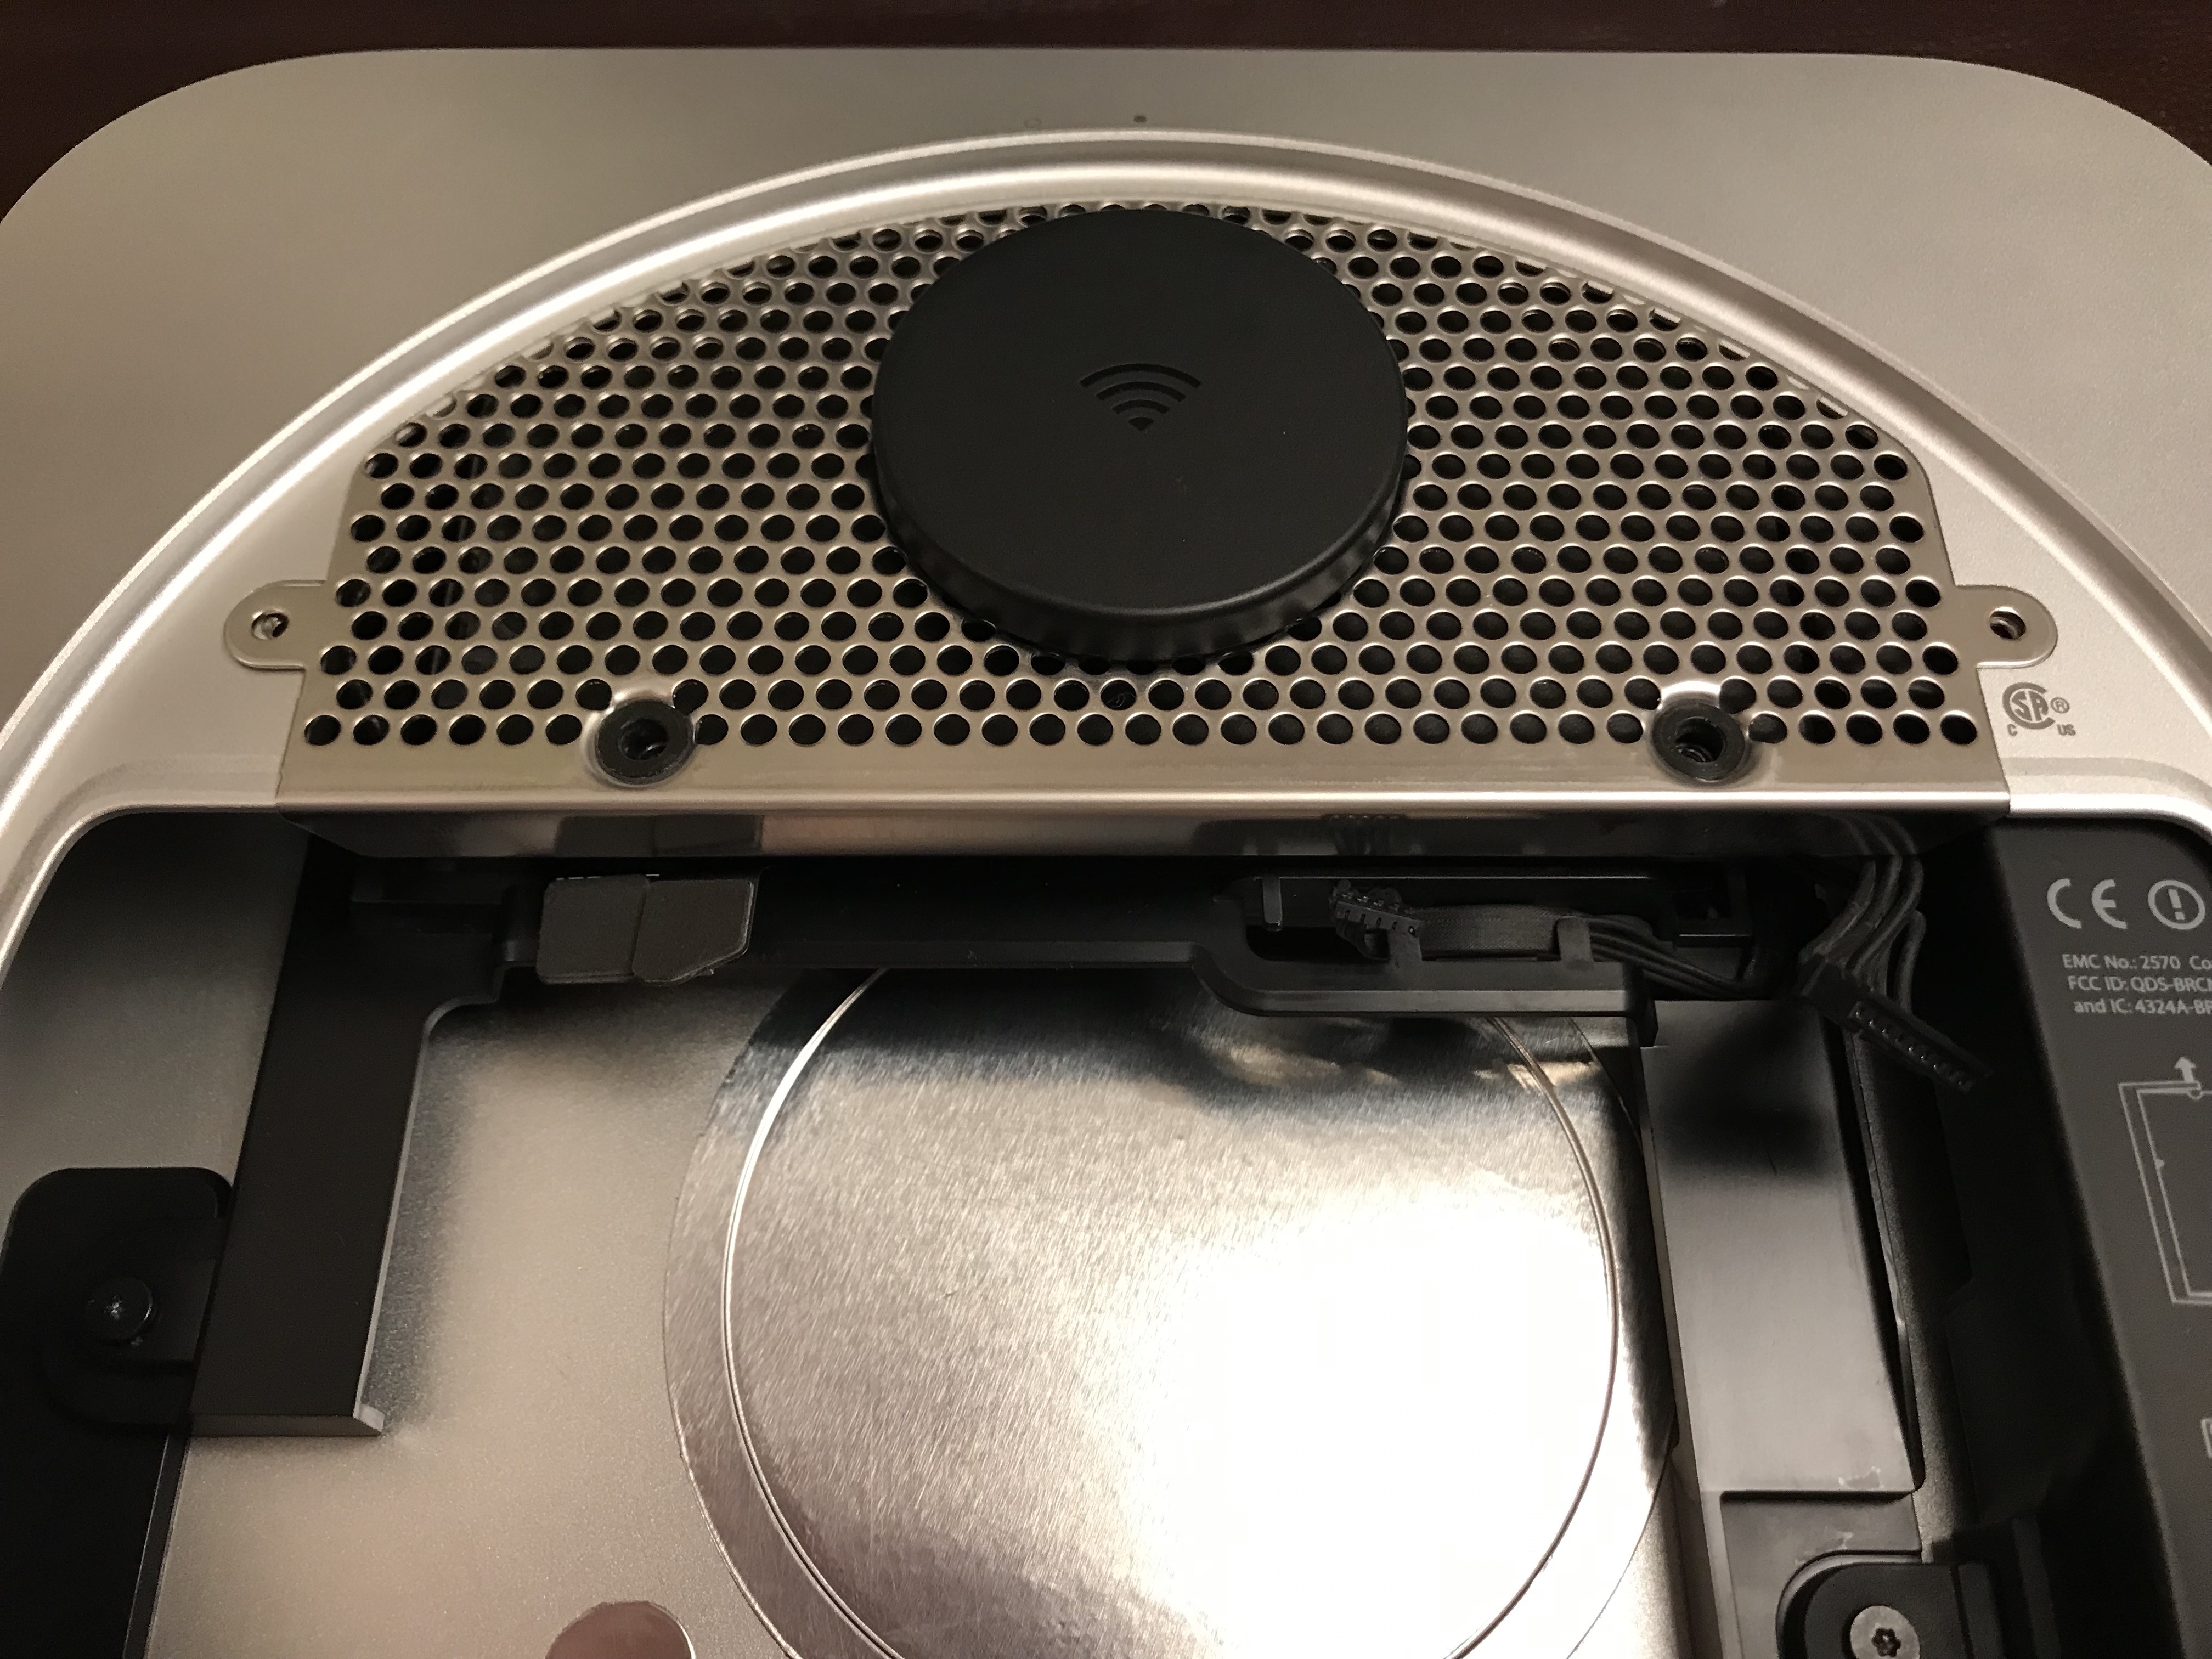
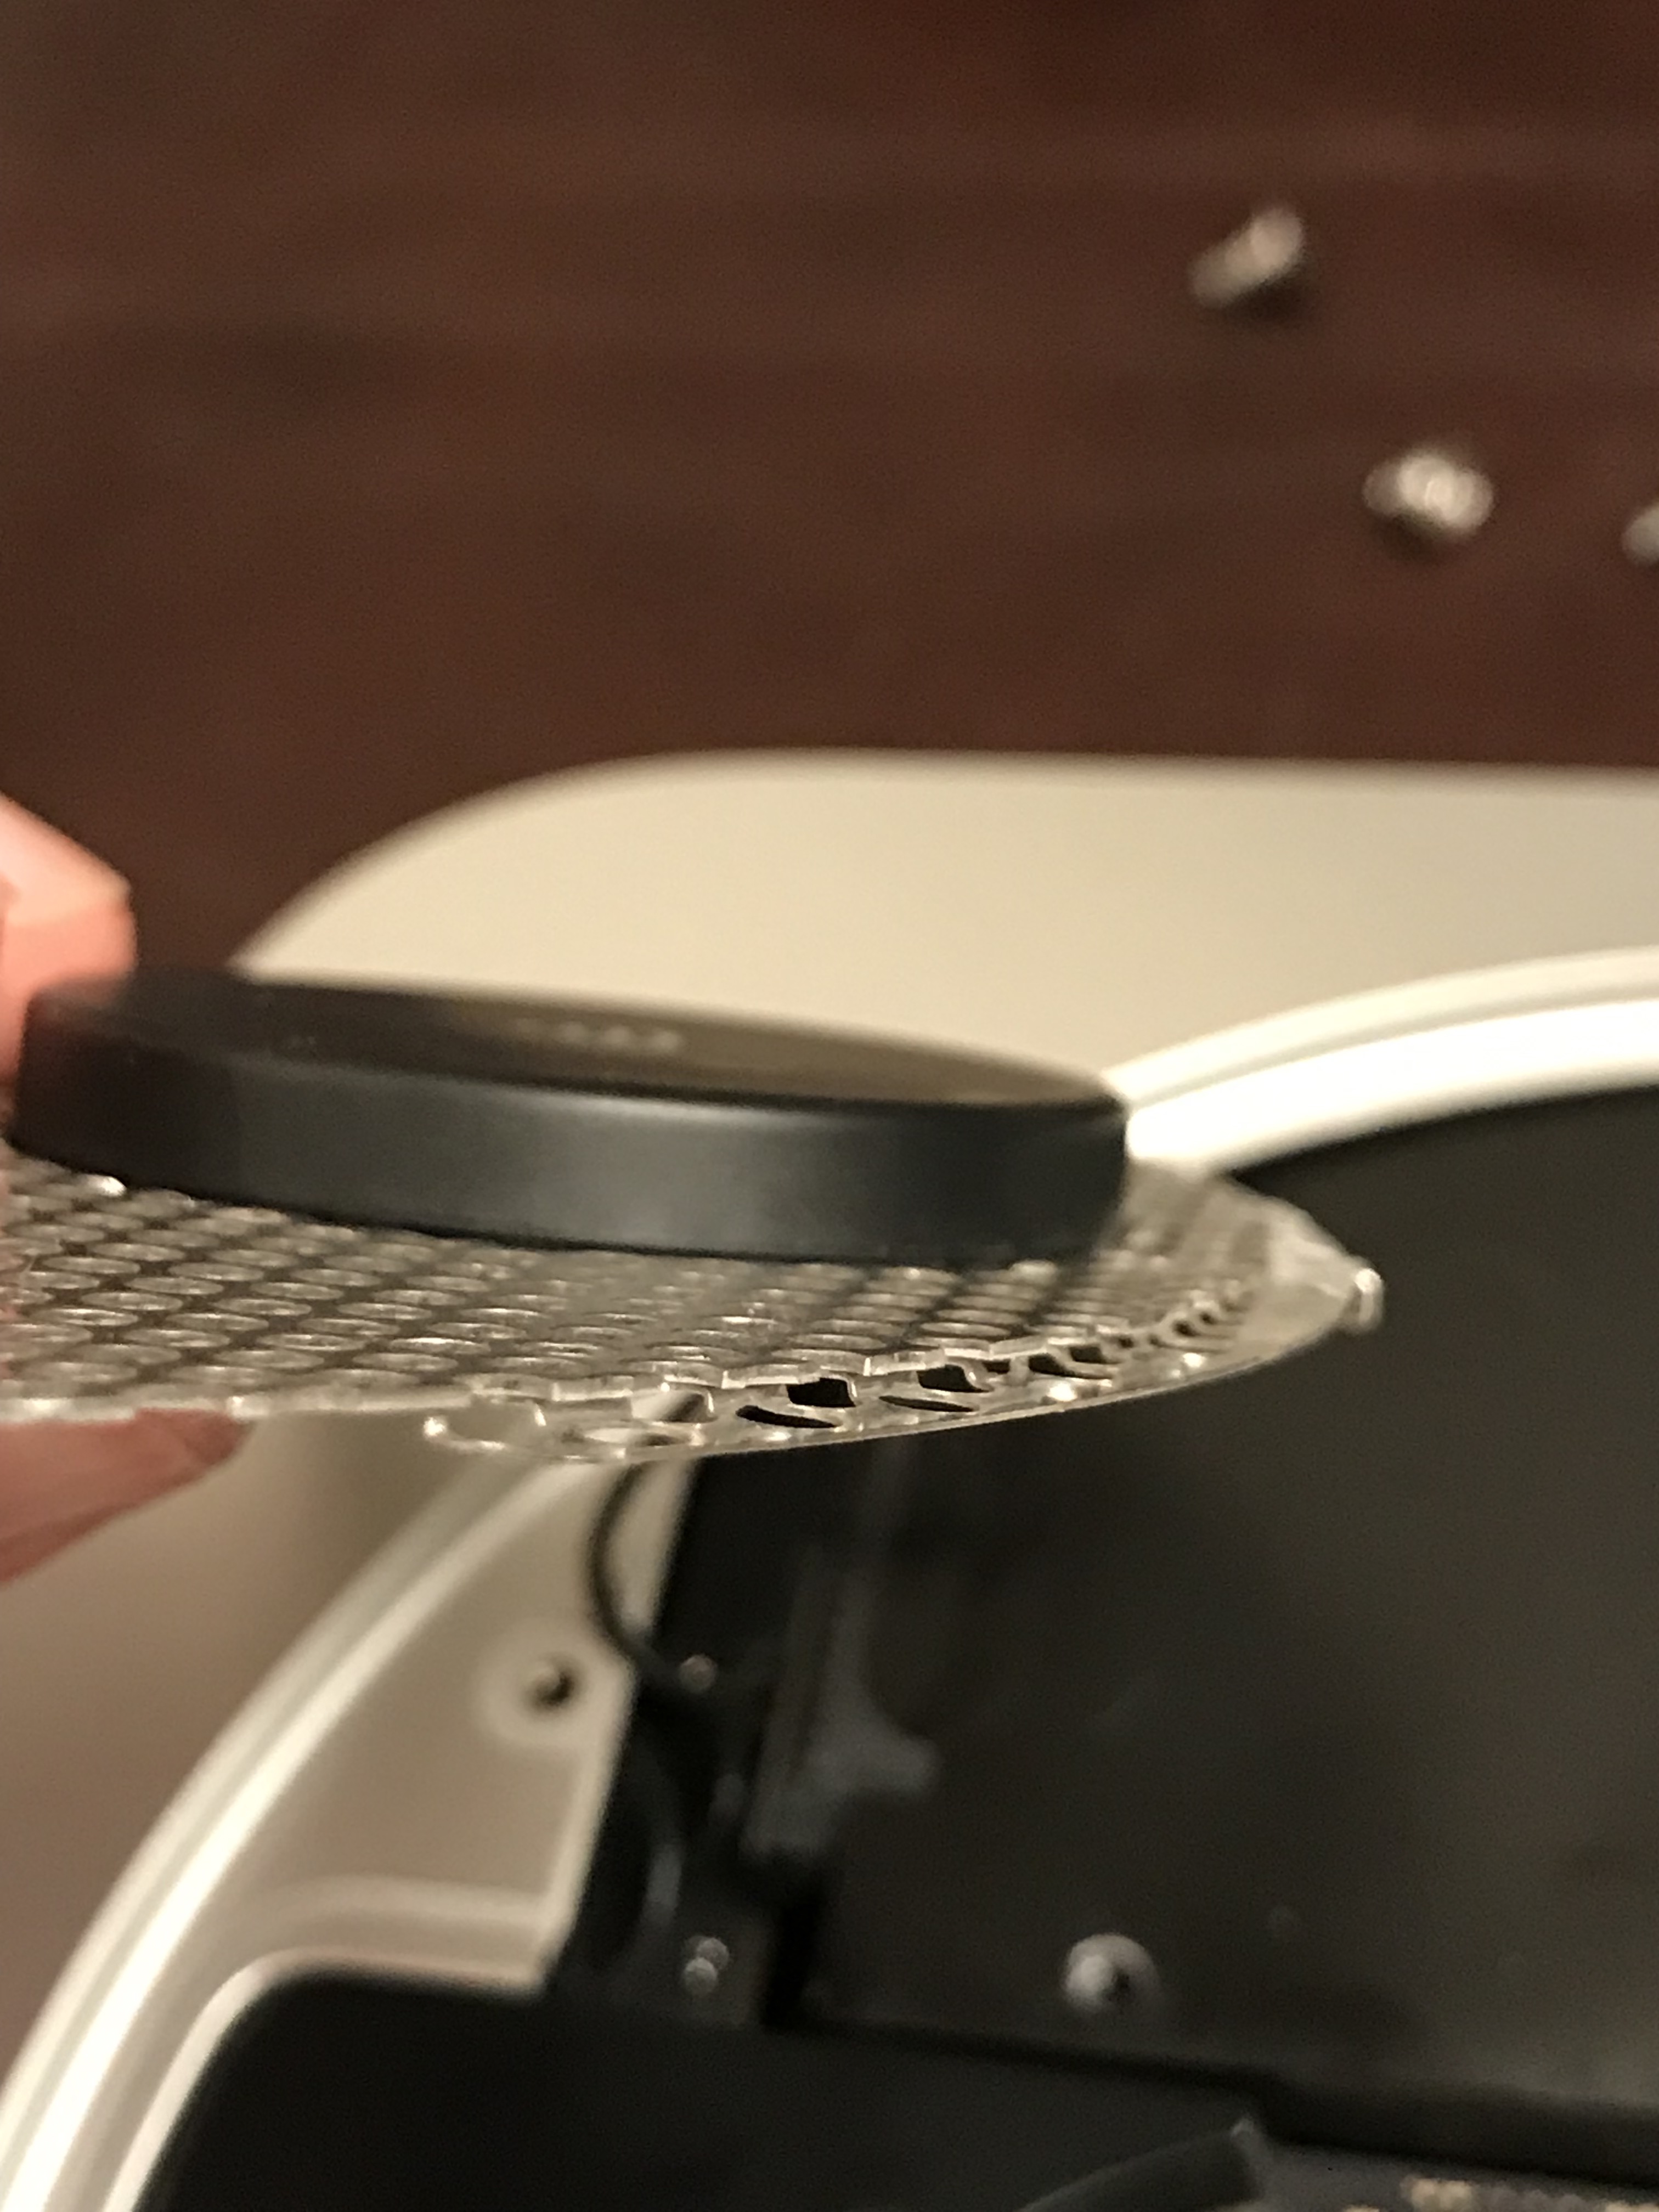
and the antenna plate. Oh wow, the antenna plate was a chore to work back in… It has to fit in just right, hugging the inside edge of the case with an indentation made in the wire mesh from which it’s constructed, and for some reason, it just didn’t want to go back in properly. It was off by less than 1 mm, yet it meant that I couldn’t put the screws back on. Be careful with that one!
When it was time to boot it up, the Mac Mini refused to do it. I stared at a black screen for a minute or two, wondering if I’d forgotten to connect some cable inside it, and then it occurred to me to re-seat the AC cable, which is notoriously hard to plug and unplug on this machine, because its slot is too tight. That turned out to be the problem. Whew.
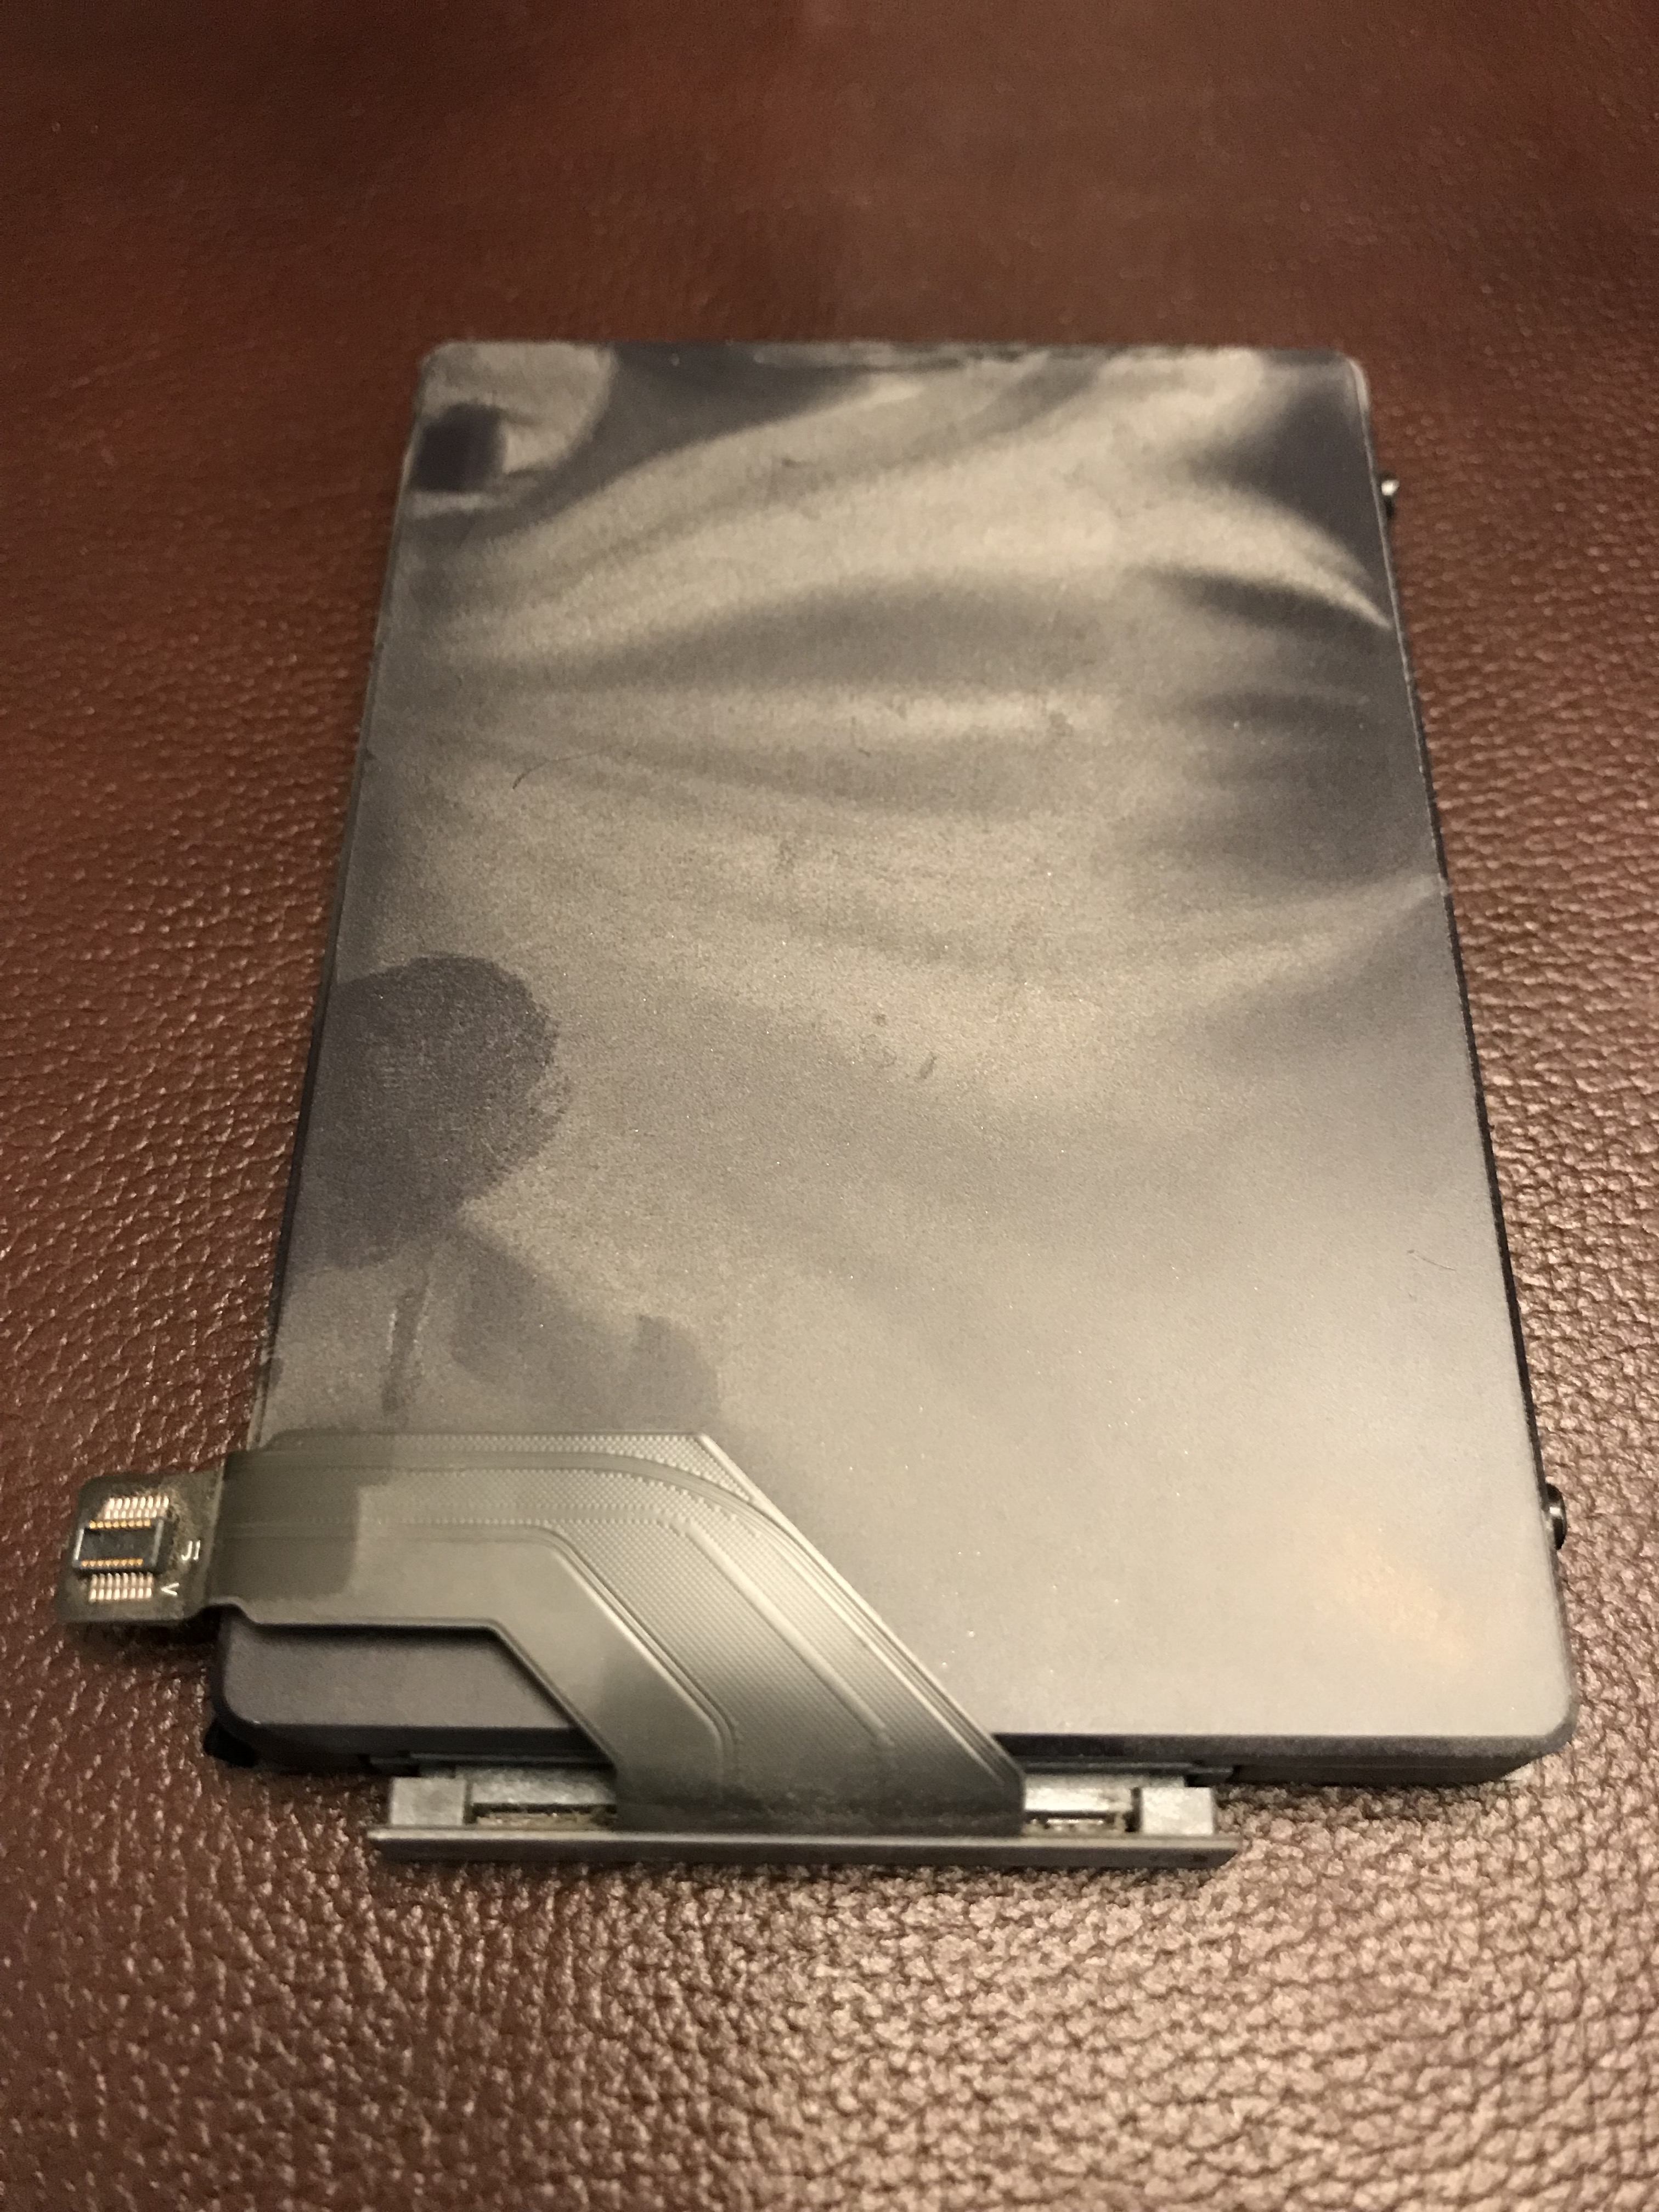
Another wrinkle that I ran into was the Fusion Drive. This machine has an actual SSD inside of it, not a blade SSD, which is what you might find in an iMac or a MacBook. That was a bit of a surprise to me. Anyway, come time to reformat the drives, I figured I could re-enable Fusion Drive and end up with a single volume that used both the Apple SSD and the new ADATA SSD. Nope. While you can run the commands in Terminal to “marry” the two SSDs into a Fusion Drive (see this post for the details), checking the resulting volume with Disk Utility gives an error and Mojave refuses to install on it. So… no Fusion Drive for my wife, I guess. Then I figured I could create a software JBOD in Disk Utility to end up with a single volume once more, and I did that, and it worked, but once again, Mojave refused to install on it. So I had to simply format each SSD as a separate drive and use the 1TB SSD as the system volume, leaving the 128GB Apple SSD as a secondary volume to be used occasionally.
A quick check with DriveDx showed me that the new SSD was doing just fine.
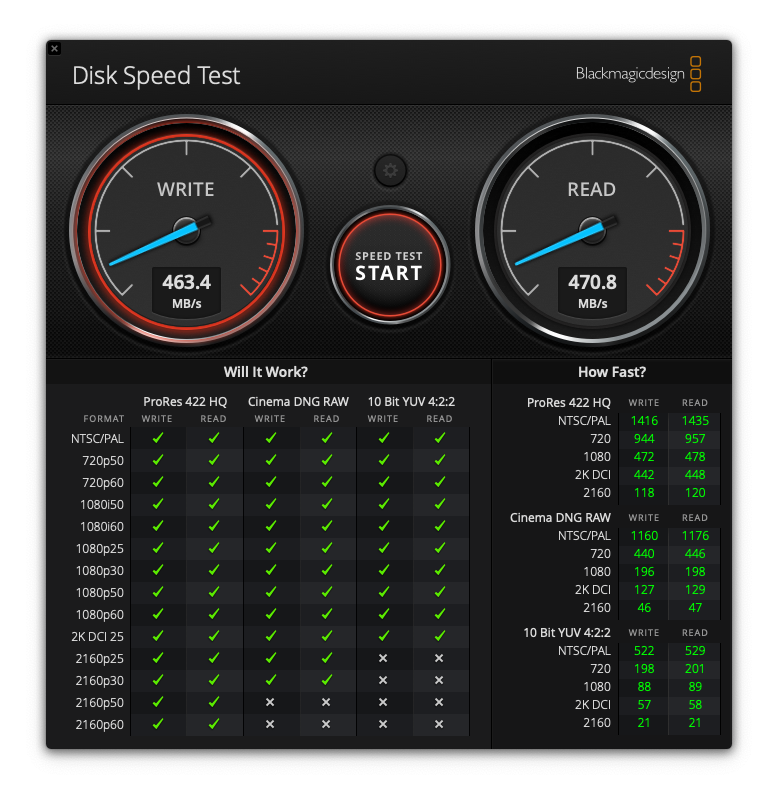
And a disk speed test showed things were humming along nicely.
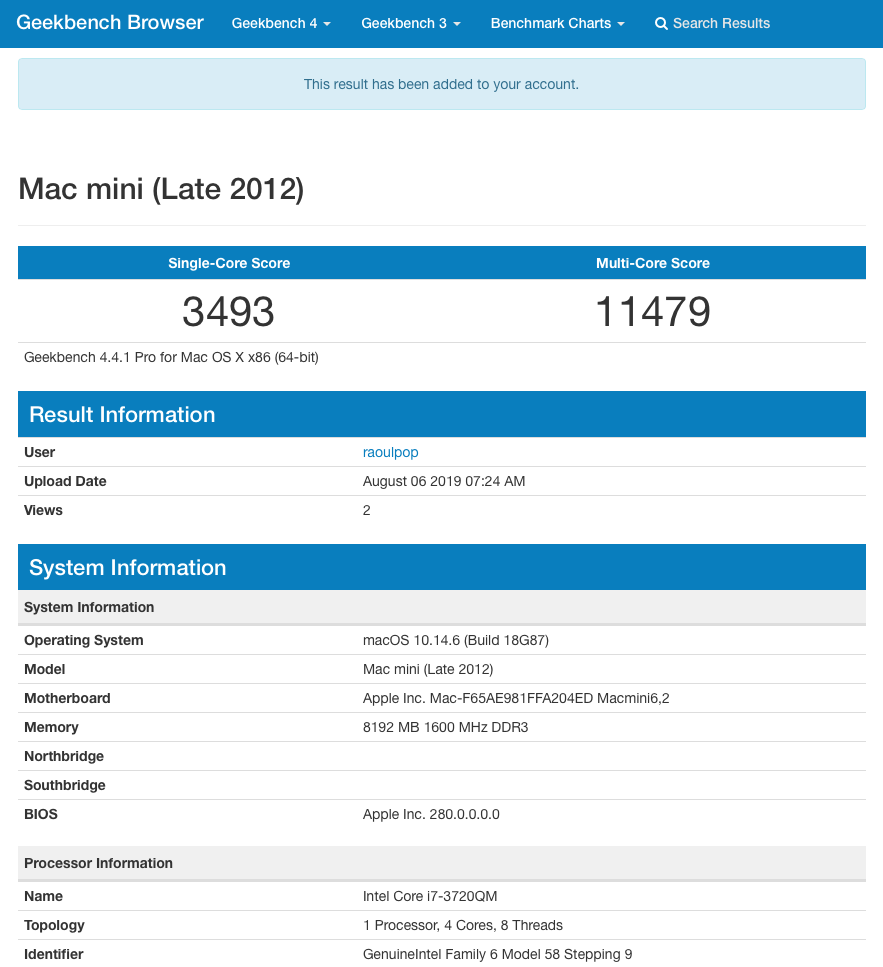
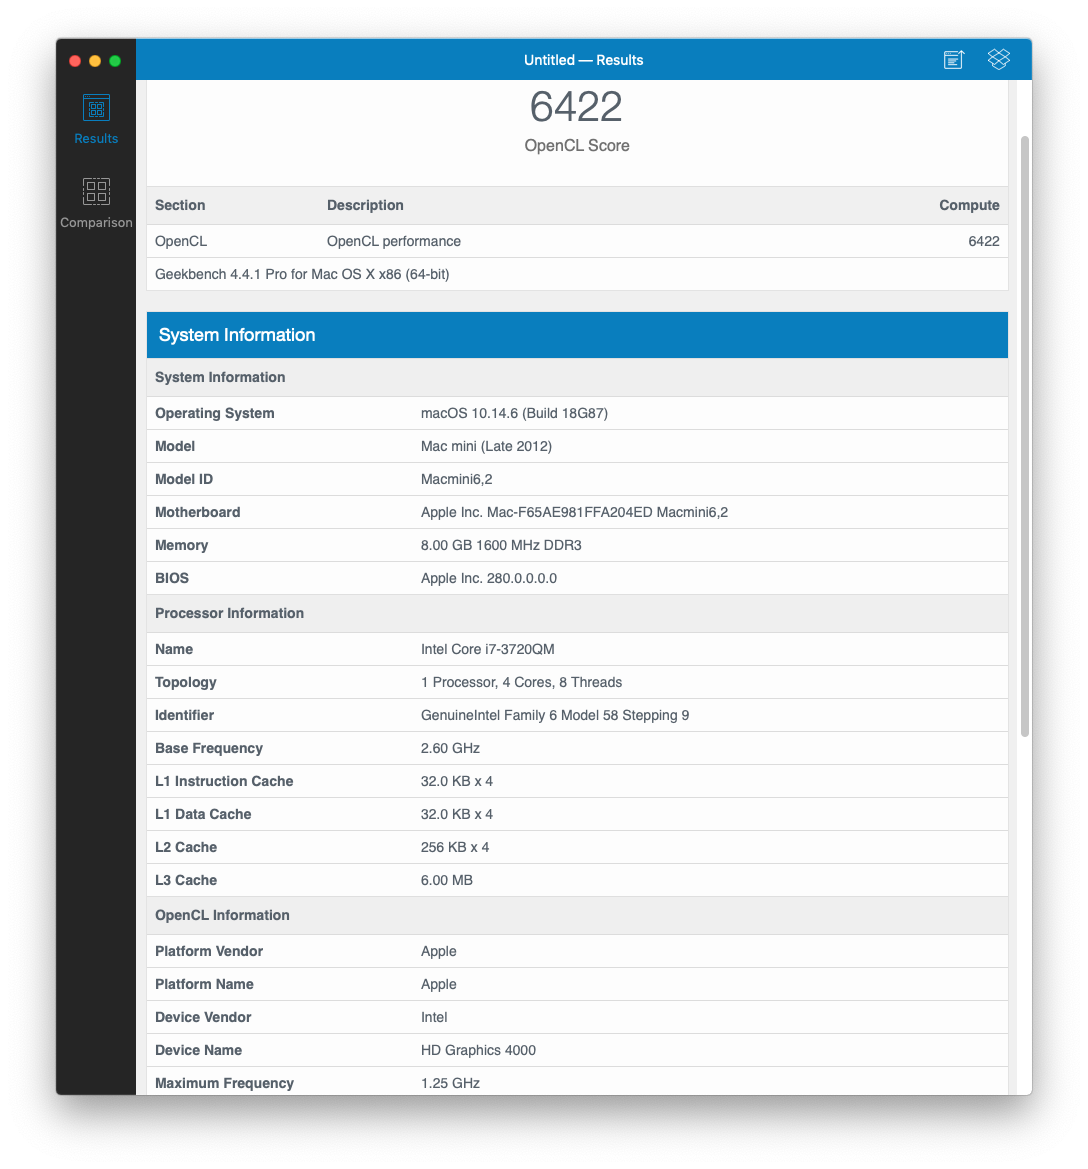
Here are some Geekbench scores for good measure.
My wife’s pretty happy with it now, she says it is faster than before and it doesn’t crash anymore, which it used to do every now and then. And if my wife’s happy, then I’m happy.
In a recent post, I wrote about upgrading the original (failing) blade SSD in my iMac to a bigger and faster NVMe module. During that upgrade process, I wondered whether splitting my Mac’s Fusion Drive would result in better performance, but decided against it for simplicity’s sake.
Even though I decided against splitting my Fusion Drive at that time, I read articles that advocated for it and suggested even better performance was to be had by allowing the SSD and HDD to run as separate volumes. The idea is to install the OS and select files and folders on the SSD, with the bulk of the files on the HDD. For the sake of experimentation and learning something new, I decided to tinker with my iMac and see if I could squeeze out some extra speed.
For those who are wondering what I’m talking about, Fusion Drive is an Apple technology built into macOS that creates what is essentially a hybrid drive, by combining an SSD module (NAND flash) with a traditional HDD (platter drive) and presenting the two as a single volume to the user. The protocols that govern the data I/O are called Core Storage. Apple writes: “Presented as a single volume on your Mac, Fusion Drive automatically and dynamically moves frequently used files to flash storage for quicker access, while infrequently used items move to the high-capacity hard disk. As a result, you enjoy shorter startup times and — as the system learns how you work — faster application launches and quicker file access.”
I’ve been using Fusion Drive since it came out, retrofitting my iMac at the time with a new blade SSD and thus making it run faster than its original specs. I love this technology, because it offers significant performance improvements for a fraction of the cost of buying a large SSD, which used to be be quite expensive a few years ago.
The long and the short of it is that it’s not worth it to split your Mac’s Fusion Drive. If you’re currently running Fusion Drive on your Mac, keep doing that, you won’t see any significant performance improvements if you split it. Actually, some things may run slower than before, and you’ll also have to deal with a few inconveniences, as detailed below.
I’ll present both scenarios here and you can decide what to do for yourself. There are multiple methods to it. These are the methods I’ve chosen. The number of Terminal commands that you have to run for either scenario is minimal, and the time involved has to do mostly with backing up your computer, waiting for the OS to reinstall and for your data to be restored from backup. For example, if you’ve got a 3TB drive and you’re at about 50-60% usage (and you should be at that threshold or lower on any hard drive), then you should figure on 4-5 hours for either of the two scenarios.
How to split your Fusion Drive
First and foremost, did you backup your computer? If you did, go ahead and create a bootable drive using Apple’s instructions, then boot into it by pressing the Option key as soon as your Mac restarts and holding it down until you see the Apple logo. You need to boot into a separate drive because you’ll be deleting your internal drives entirely, including the boot and recovery partitions.
Once you’re in, open Terminal and get a listing of your disks and volumes.
diskutil list
Your Fusion Drive presents itself as a logical volume group that appears as a separate disk with an HFS+ or APFS partition. Say your SSD is disk0 and your HDD is disk1, your Fusion Drive would be disk2 or disk3. In my case, it was disk3 (disk2 being the bootable recovery drive). Now unmount your internal disks.
diskutil unmountDisk disk0
diskutil unmountDisk disk1
You’ll want to delete that entire disk containing Fusion Drive. Be forewarned, this deletes all you data. Did you backup your computer?
diskutil apfs deleteContainer disk3
Now that Fusion Drive has been nuked, you’ll still have your separate drives that you’ll want to make sure are erased. The eraseDisk command requires that you offer a new name for each disk, so I chose to name them SSD and HDD, to keep things simple.
diskutil eraseDisk JHFS+ SSD disk0
diskutil eraseDisk JHFS+ HDD disk1
Now you’ll want to do a fresh install of macOS onto the SSD, and after that’s complete, you’ll boot up into your fresh install and go to Utilities/Migration Assistant, in order to do a selective data restore. Here you’ll have to decide for yourself, based on the total size of your SSD and your data set, how much of it you’ll want to restore onto the SSD. The rest you’ll need to copy manually from the backup drive onto the HDD. In my case, I restored my user settings and the system and libraries folders onto the SSD, and I copied the following folders onto the HDD: Documents, Downloads, Movies, Music, Parallels (in case you’re running some kind of VM software) and Pictures. Each of those folders was too big to keep on the SSD, even though I have a 512GB module (remember the rule about keeping your drive at or below 50-60% usage).
Once you complete all that work, you’ll need to create links to these folders on the HDD in place of your folders on the SSD. Mojave won’t let you do this when you’re logged into your account, so you’ll need to boot up into recovery mode and open Terminal once more.
Go to your homefolder on the SSD.
cd /Users/yourusername
Delete the folders that are now present on the HDD. You’ll need to do this for each folder that you’ve moved there. Hopefully you’ve written down their names ahead of time.
sudo rm -rf foldername
In your homefolder on the SSD (same location as above), make links to the folders on the HDD. I chose to put mine at the drive’s root level. You may choose to put them in a folder. Just don’t give it the same name as your username, I hear that may cause problems. You’ll need to do this for each folder.
ln -s /Volumes/HDD/foldername
That’s it, restart and use your computer. However, you may find a few inconveniences — these are the ones I experienced:
I noticed no performance improvements. There wasn’t even an improvement in the bootup time. Nothing, nada, zilch.
While Apps may open up faster, if they’re still accessing files on the HDD, editing will still be sluggish. In order for you to see that performance boost talked about with SSDs, both apps and their files need to be on the SSD.
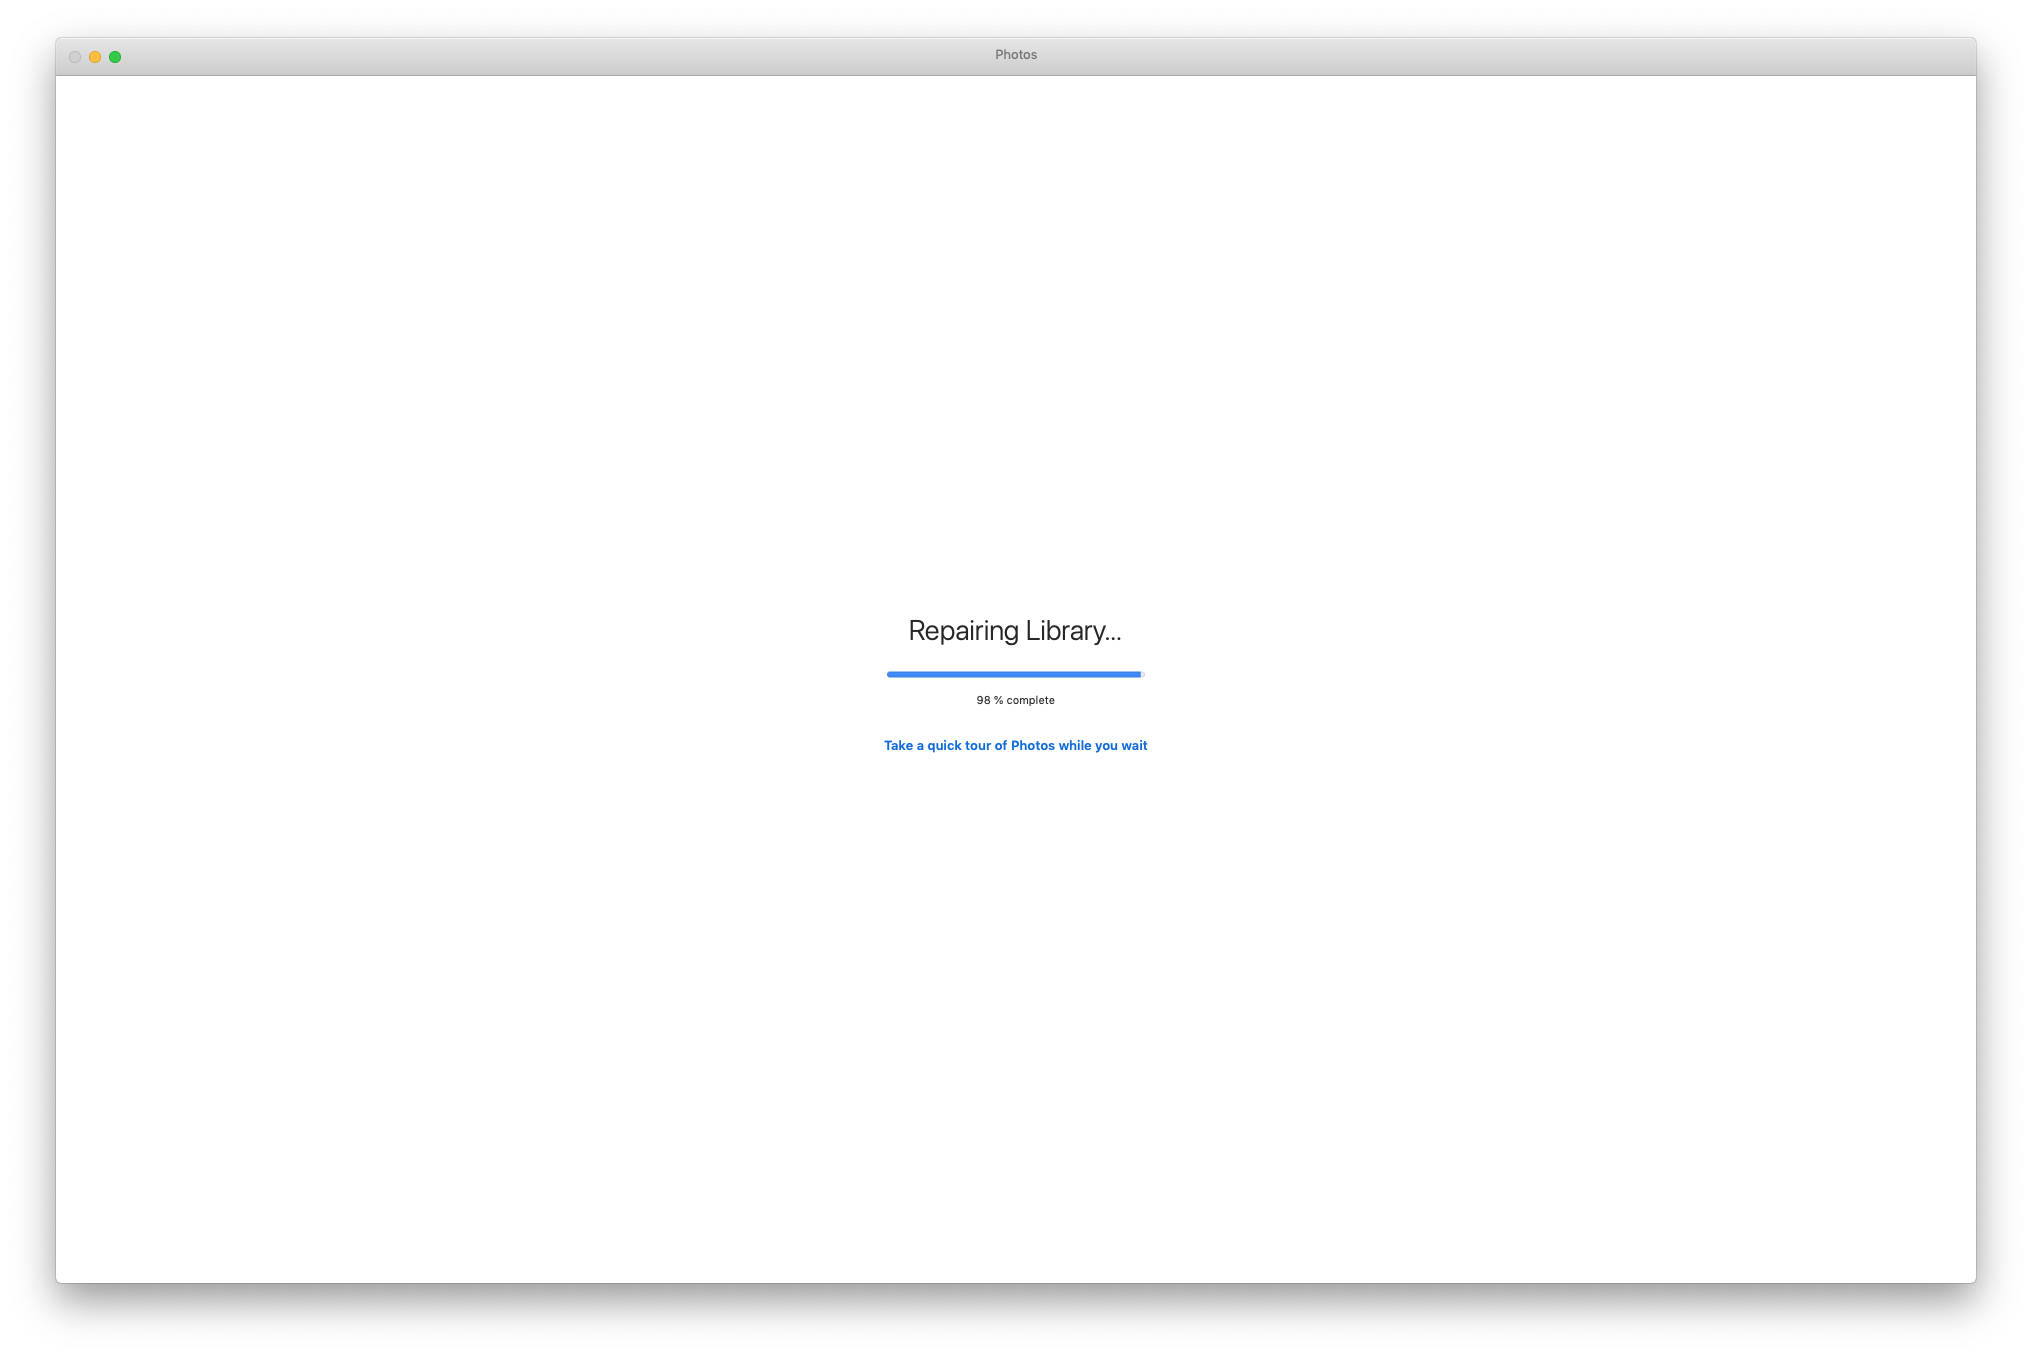
In my case, I had to keep the Photos library on the HDD, because it was too big to keep on the SSD, and while Photos may have opened up fast, loading up the library took forever, until enough of the recent photos were cached on the SSD to allow me to work with my library. So things were a LOT slower with this app.
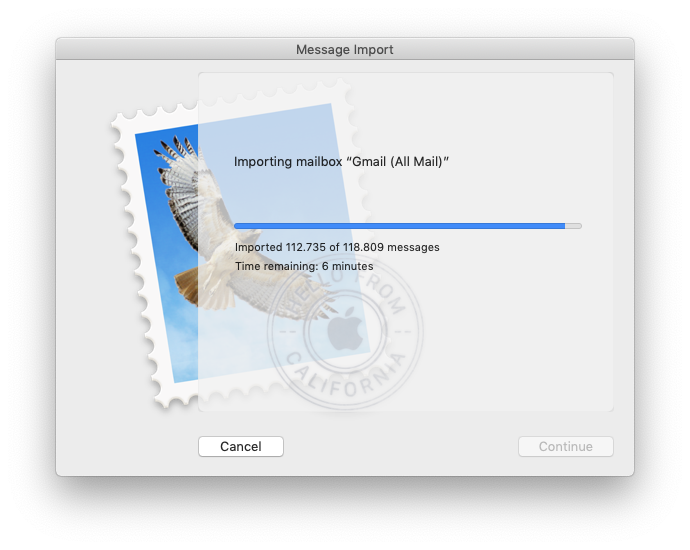
I kept my mailboxes on the SSD so I was hoping for better performance from Mail, but I didn’t get it. I have a lot of mail stored locally, so in theory, things should have worked faster because everything was on the SSD, but they didn’t. I also experienced odd issues, like when moving messages between mailboxes, it took a lot longer and sometimes didn’t register. I’d drag and drop them, then come back to the app a little while later and find them in the same place, just as if I hadn’t moved them.
iCloud would display an odd notification icon, but when I’d go into it, there was no message. This icon was displayed continually for as long as my Fusion Drive was split. See the screenshot below.
While Time Machine will backup both internal drives, data restores will only restore the files from the SSD. I don’t know why and I don’t know how to fix that, so keep this limitation in mind. You can go into the Time Machine drive manually and copy the files over afterward, but if you run a restore operation on your computer and you wonder where most of your stuff is after it’s completed, don’t freak out, just know you’ll need to get it manually from the drive.
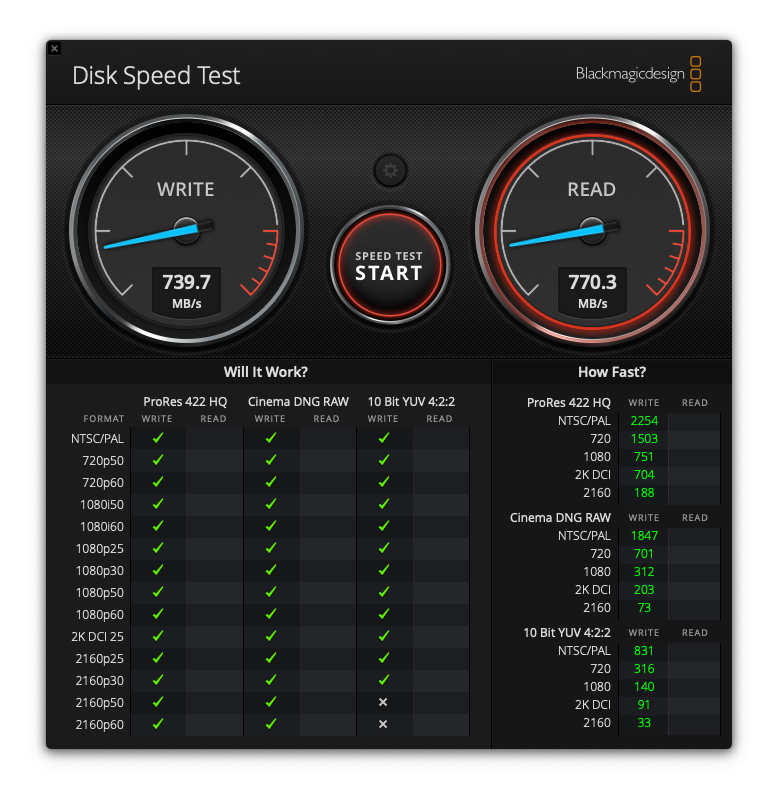
See that “1” over iCloud? It was there all the time.This is the kind of performance the SSD provided when my Fusion Drive was split. It looks impressive, but hold on until you see the same test with Fusion Drive enabled, later down in this post.
How to enable your Fusion Drive
After about a week of running my Mac with a split Fusion Drive, I’d had enough and decided to re-enable it. Here’s how I did it. Before you proceed with this, I’ll ask you again, did you do a full backup of your computer? This will wipe all your data.
Using the same bootable drive, I booted into it and opened up Terminal. Since you’ll be wiping all your internal drives again, you need to be booted from an external drive.
Apple recommends this single Terminal command that is supposed to do everything in one fell swoop. It didn’t work for me, perhaps because my SSD module was a newer NVMe running off an adapter card, not the Apple-approved blade SSD manufactured specifically for this kind of thing.
diskutil resetFusion
I had to do it with a few more commands. First, find out your disk IDs.
diskutil list
Now unmount your internal disks.
diskutil unmountDisk disk0
diskutil unmountDisk disk1
Then create a merged virtual hard drive with Core Storage.
diskutil coreStorage create Macintosh\ HD disk0 disk1
Now get its logical volume group name (the very long alphanumerical name that appears in Terminal after you type this command).
diskutil coreStorage list
Now format and create the JHFS+ volume that will run Fusion Drive.
diskutil coreStorage createVolume yourlogicalvolumegroupname jhfs+ Macintosh\ HD 100%
Don’t worry about formatting the drive to APFS. That’ll happen automatically when you install Mojave. Besides, APFS is not an entirely separate file system, it’s a container running inside HFS+, so like I said, don’t worry about it. That’s it. Now quit Terminal and do a full restore from Time Machine, but prepare yourself for an incomplete data restore (see the reasons given in the previous section). Once the data restore is complete, you’ll need to manually copy the folders that are missing from the Time Machine drive. Or, as I did, you can do a full restore to a backup set that existed before I split my Fusion Drive, which means you’ll get all your old data back in all the right places, but you’ll still need to get your newer files manually from the Time Machine drive.
In my case, I needed to copy the mailboxes, which are located in ~/Library/Mail/V6 from the newest backup set (the one with the split drive) to my computer, and that gave me all my mail, including the interim stuff. I also copied the latest Photos library, and that gave me all my photos, including the interim stuff. Then I went through the Documents and Downloads folders on the Time Machine drive, sorted by date modified and copied the interim files onto my computer. I didn’t need to go through the other folders because I knew I hadn’t worked on other stuff. And once I did this, my data restore was complete. Mail and Photos still needed to rebuild their libraries though, and that took a while.
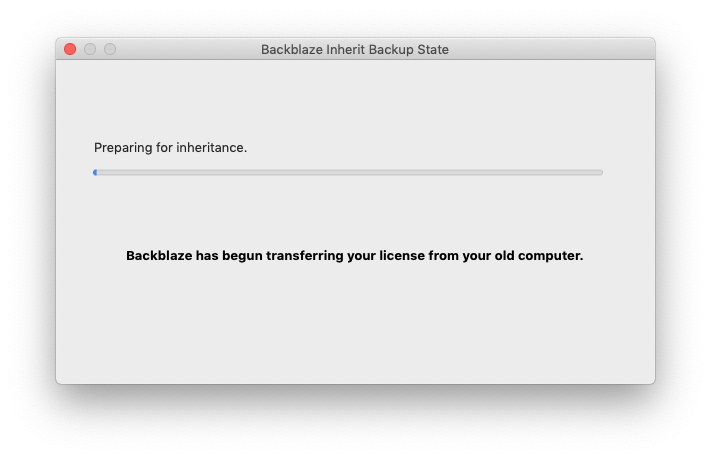
And because I use Backblaze to backup my computer offsite, I also needed to uninstall and reinstall that, then inherit a previous backup state (don’t worry about this if you’re not using Backblaze).
When that was done, Backblaze told me it had “made” my computer inherit my backup state, as if it had forced it to do this, in a non-consensual way. Kind of a funny way to word things, but their service works well.
Here’s the kicker. I ran another drive performance test after all this, and these were the results.
Actually a little bit faster than before 🧐
Everything runs fast now, and it runs as expected, without hiccups.
As I said at the start of this article, if you’re already running Fusion Drive, do yourself a favor and leave it running. You’ll avoid headaches you don’t need, unless you like complications.
The only way I can see to speed up my iMac even more, is to purchase a large 3-4TB SSD and run it as my only internal drive. That might be a little faster. But as you can see from the test screenshot shown above, my iMac is no slouch right now. And 4TB SSDs are still fairly expensive. It might actually be cheaper (and possibly faster) to get a 2TB SSD and a 512GB NVMe module, and run them together with Fusion Drive, although the overall capacity wouldn’t be the same. Food for thought.
Updated 7/30/21: I’ve since bought that larger 4TB SSD and I am very happy with the performance. Also, the Fusion Drive protocols will NOT allow you to create a Fusion Drive with two SSDs (or one SSD and one NVMe). They require the use of one SSD and one HDD. So, final(?) conclusion on this matter: larger SSDs are more affordable now and getting a nice, big one and running that alone without bothering with Fusion Drive is a viable and preferred option. Otherwise, stick with Fusion Drive.
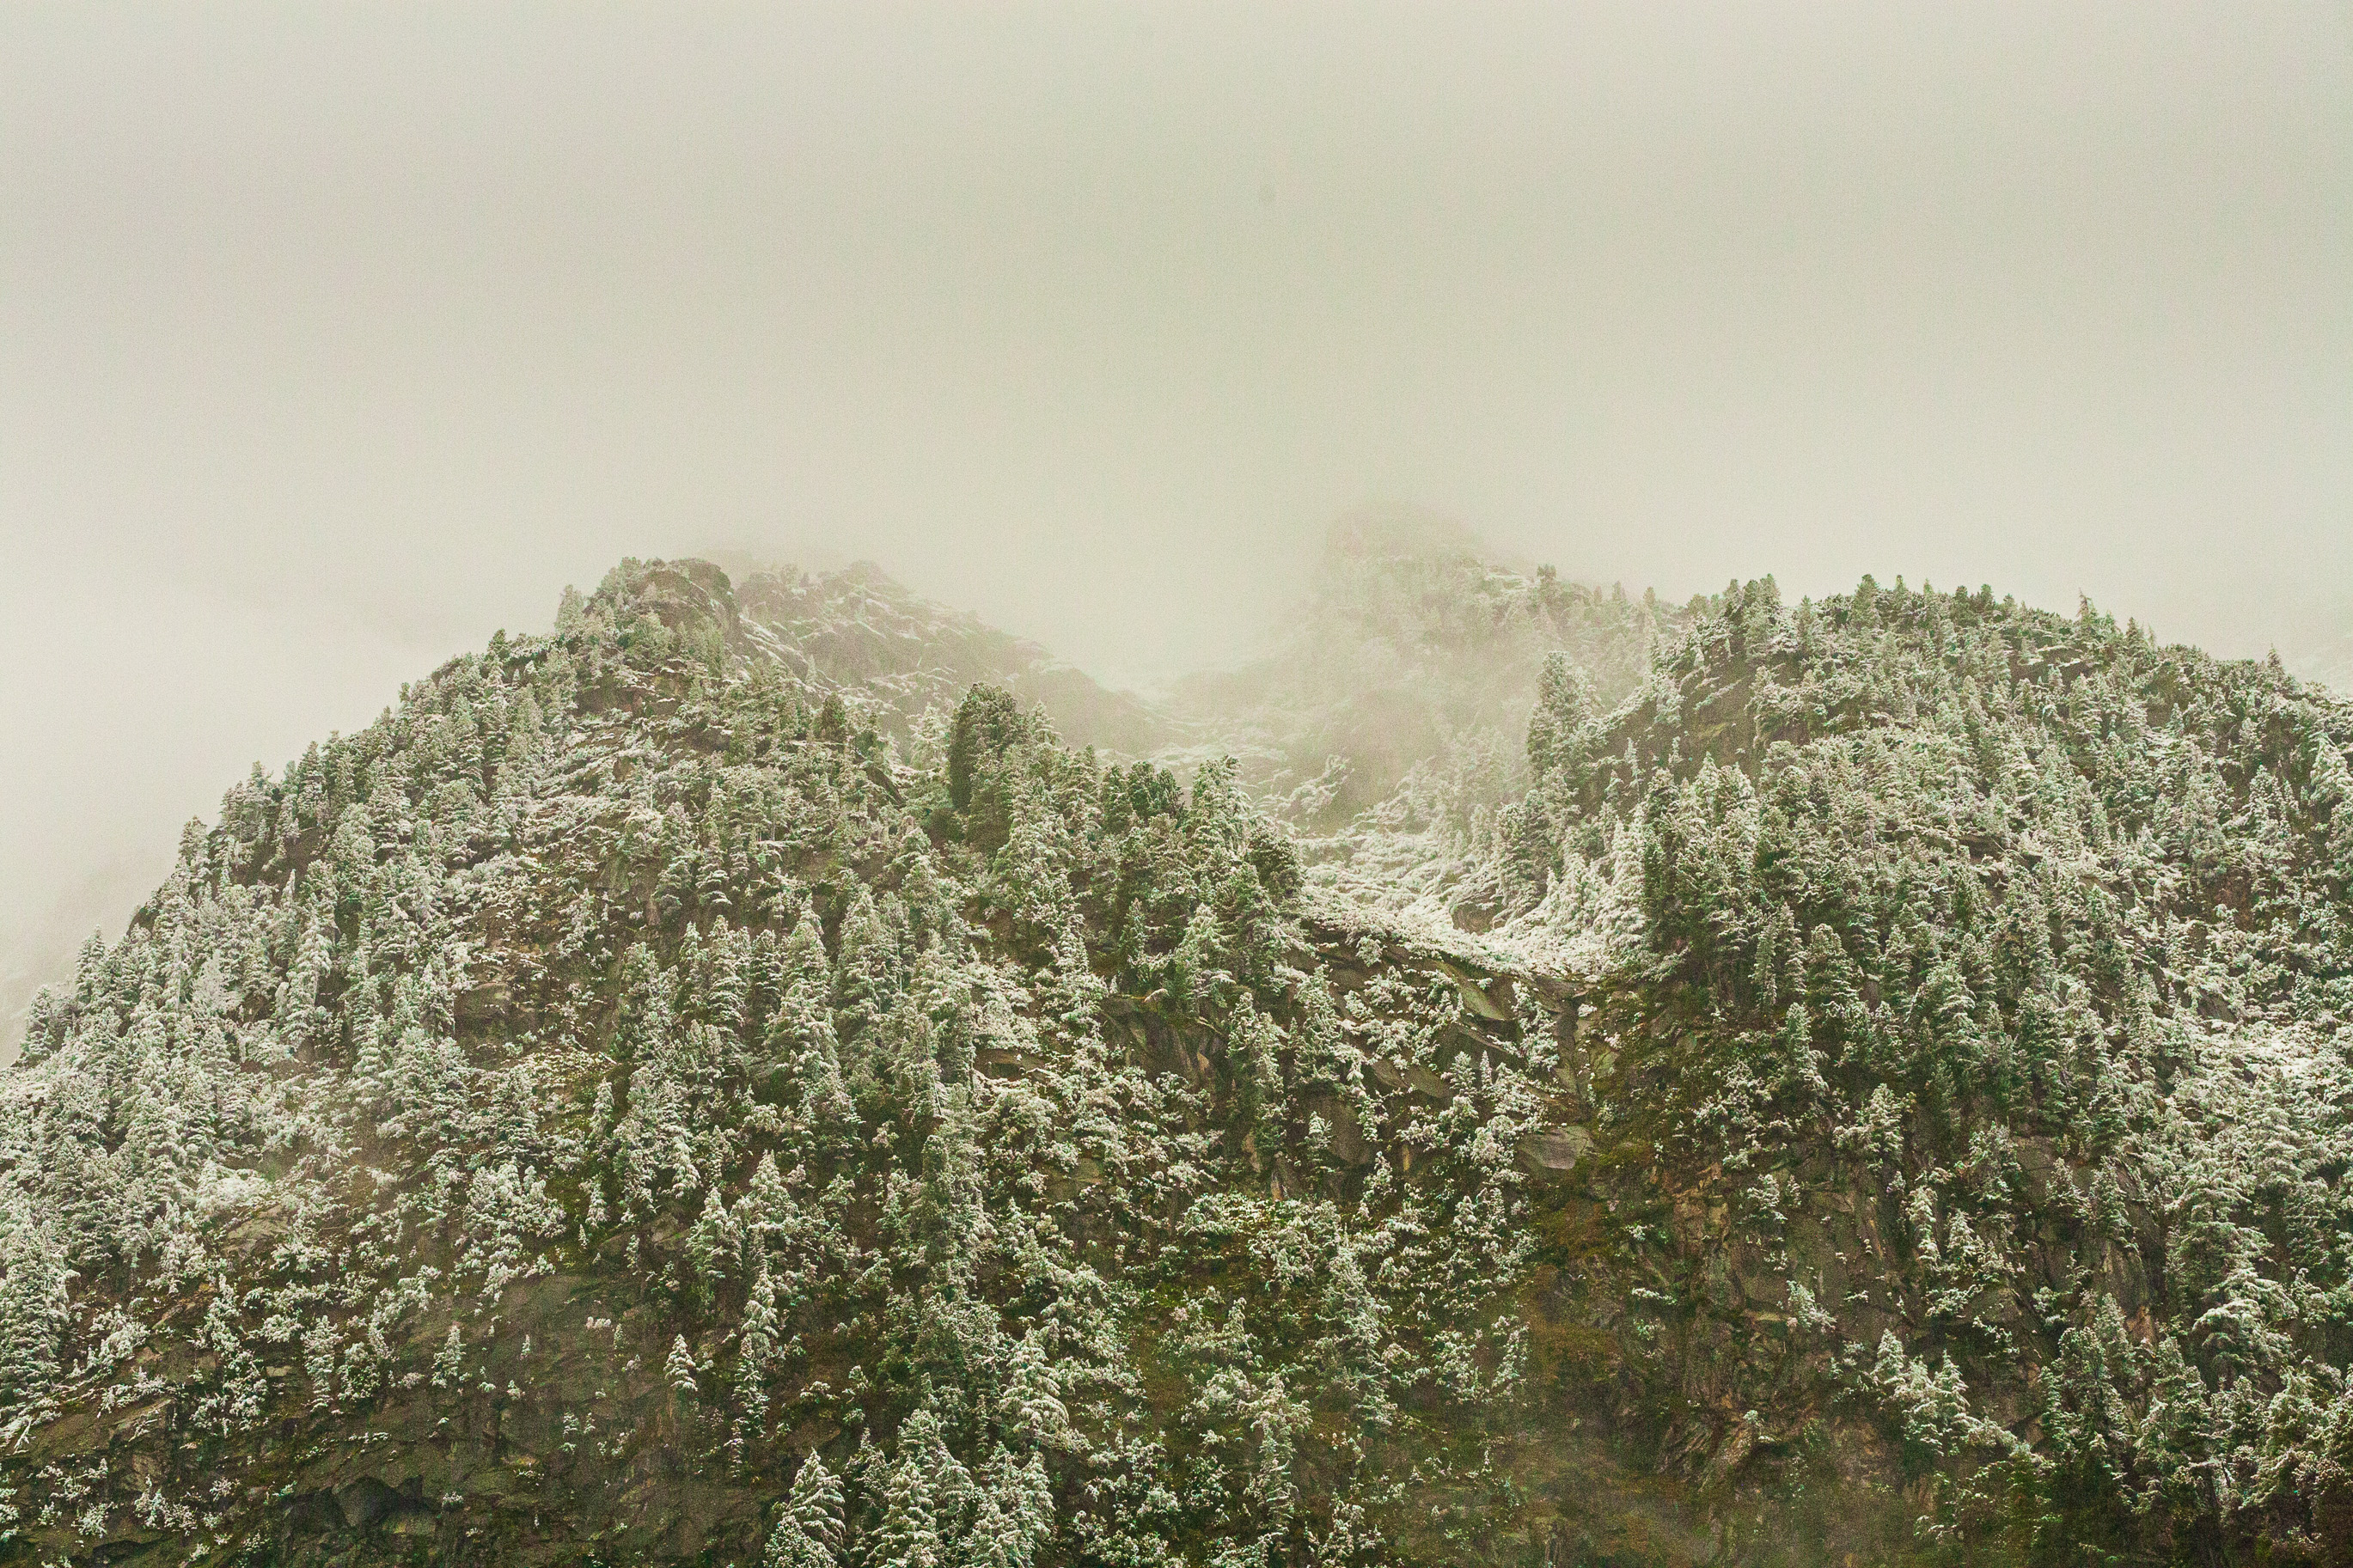
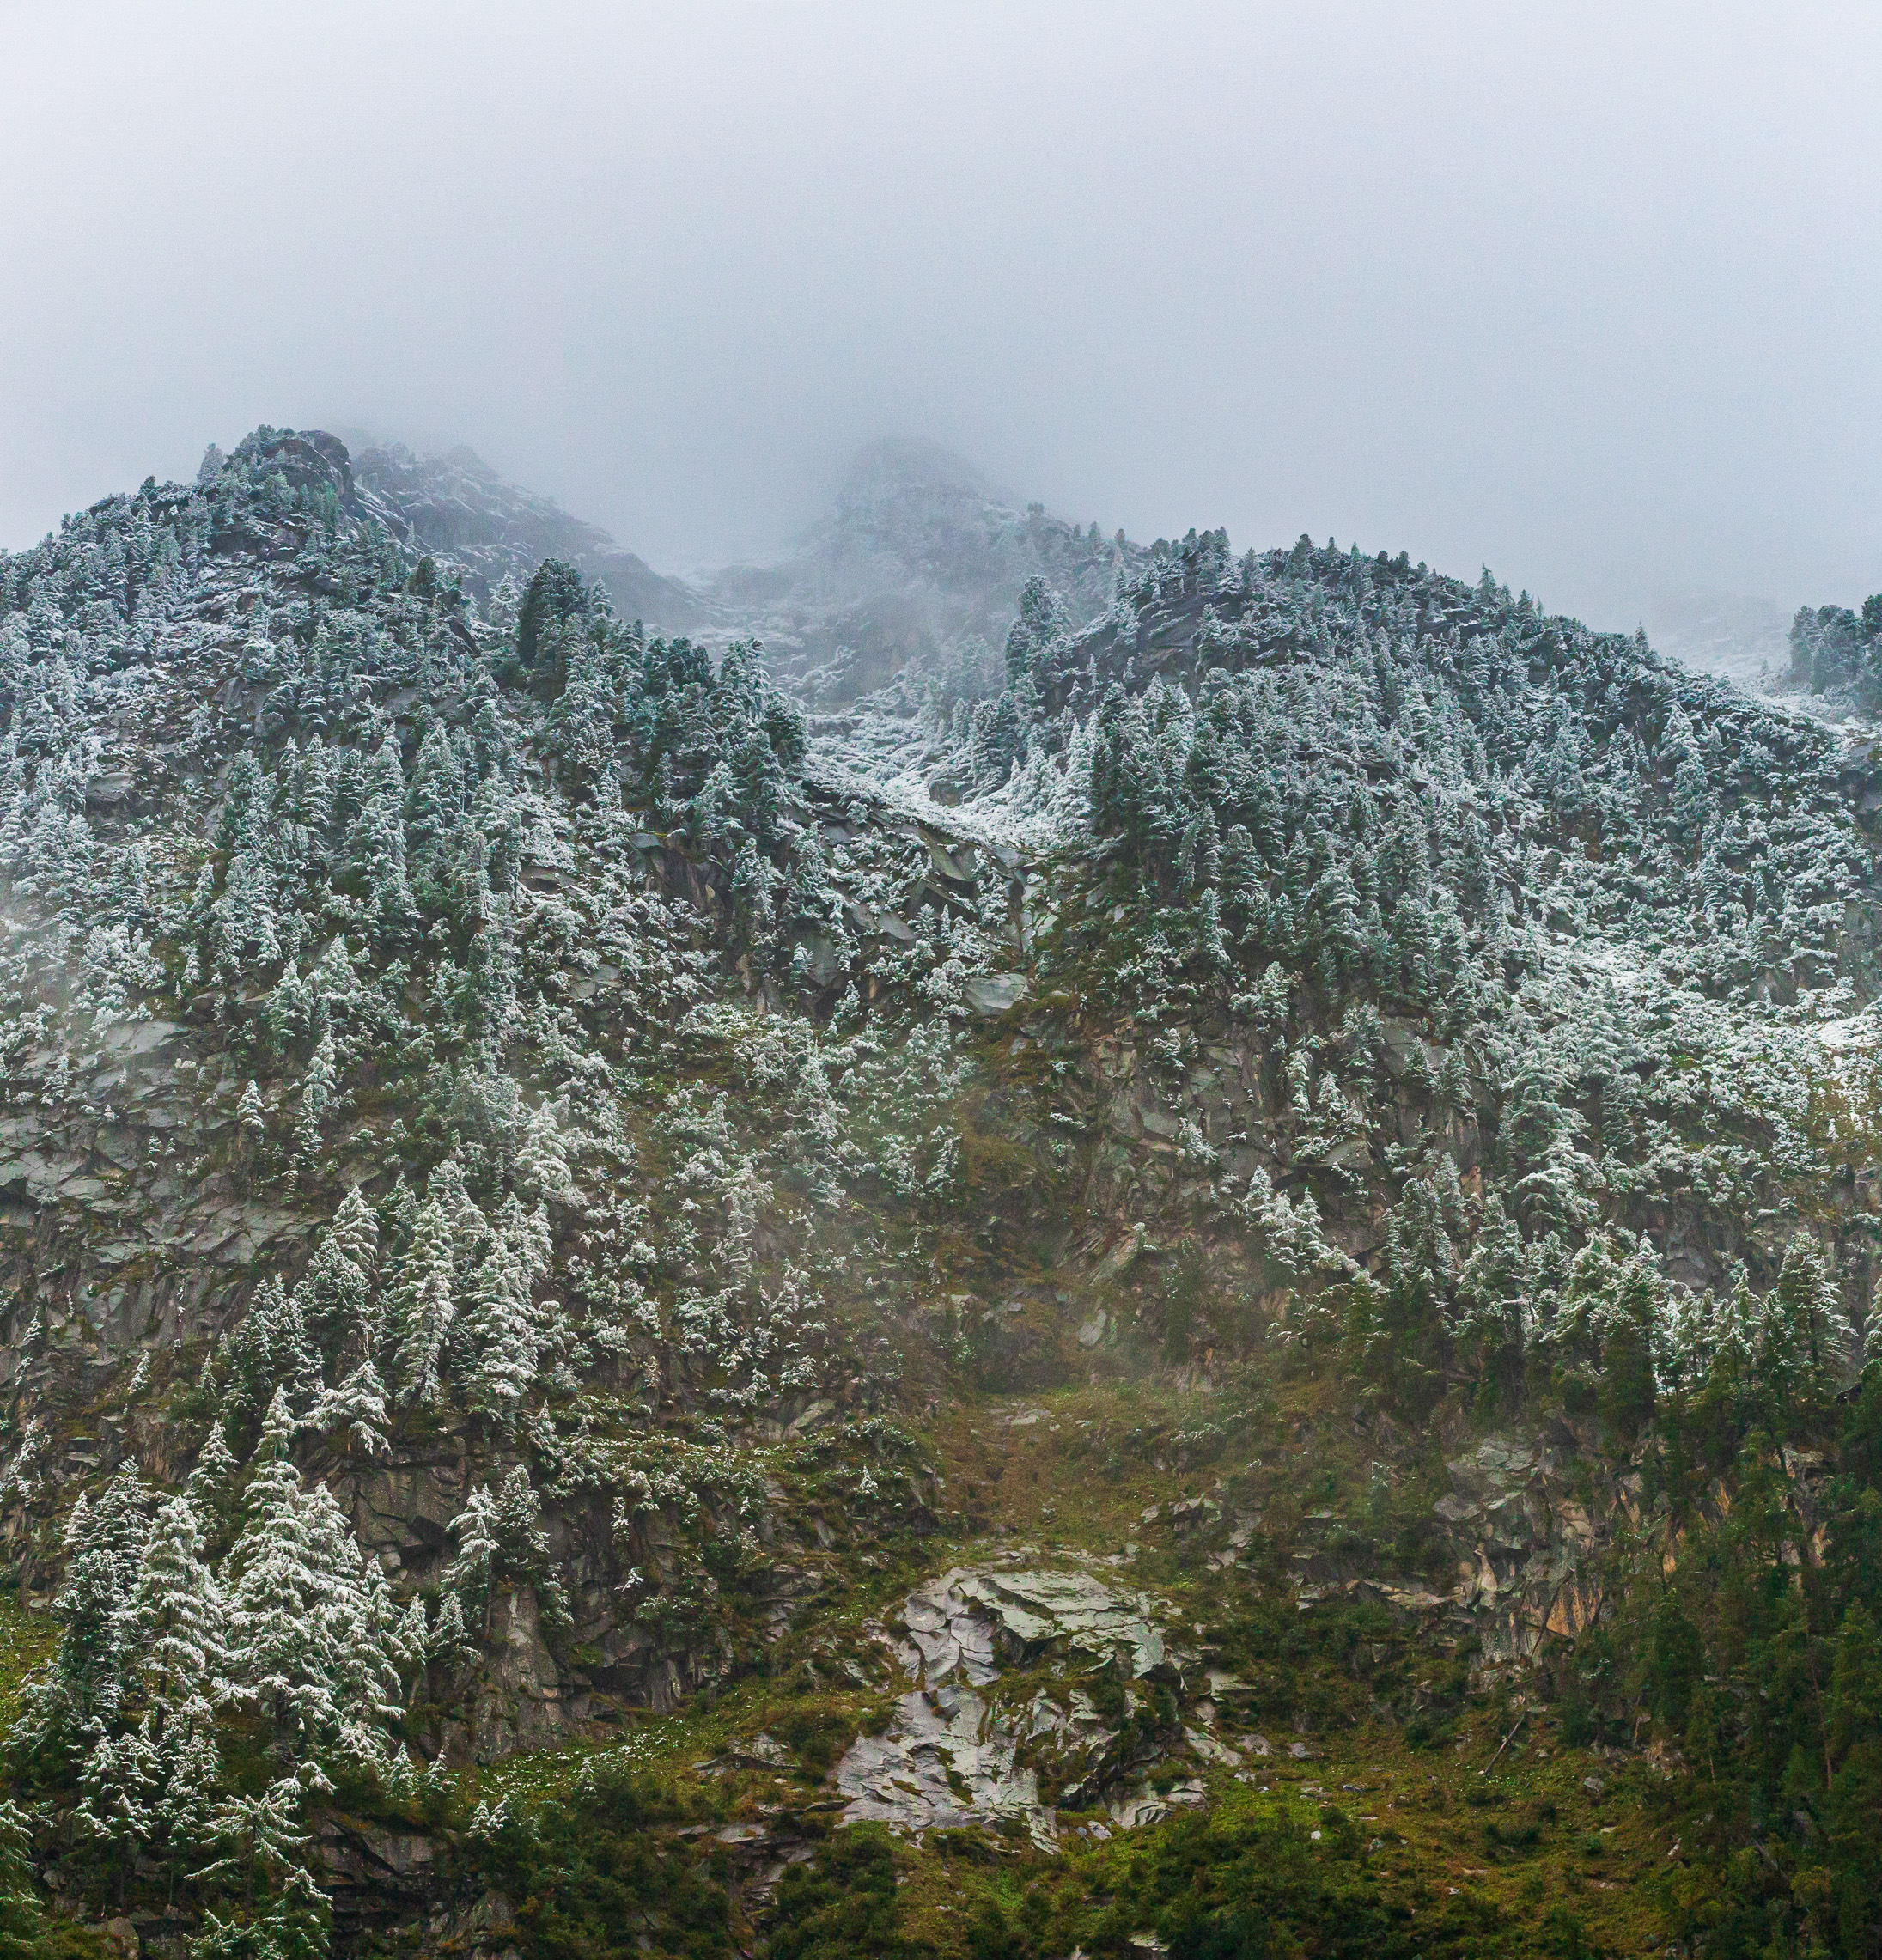
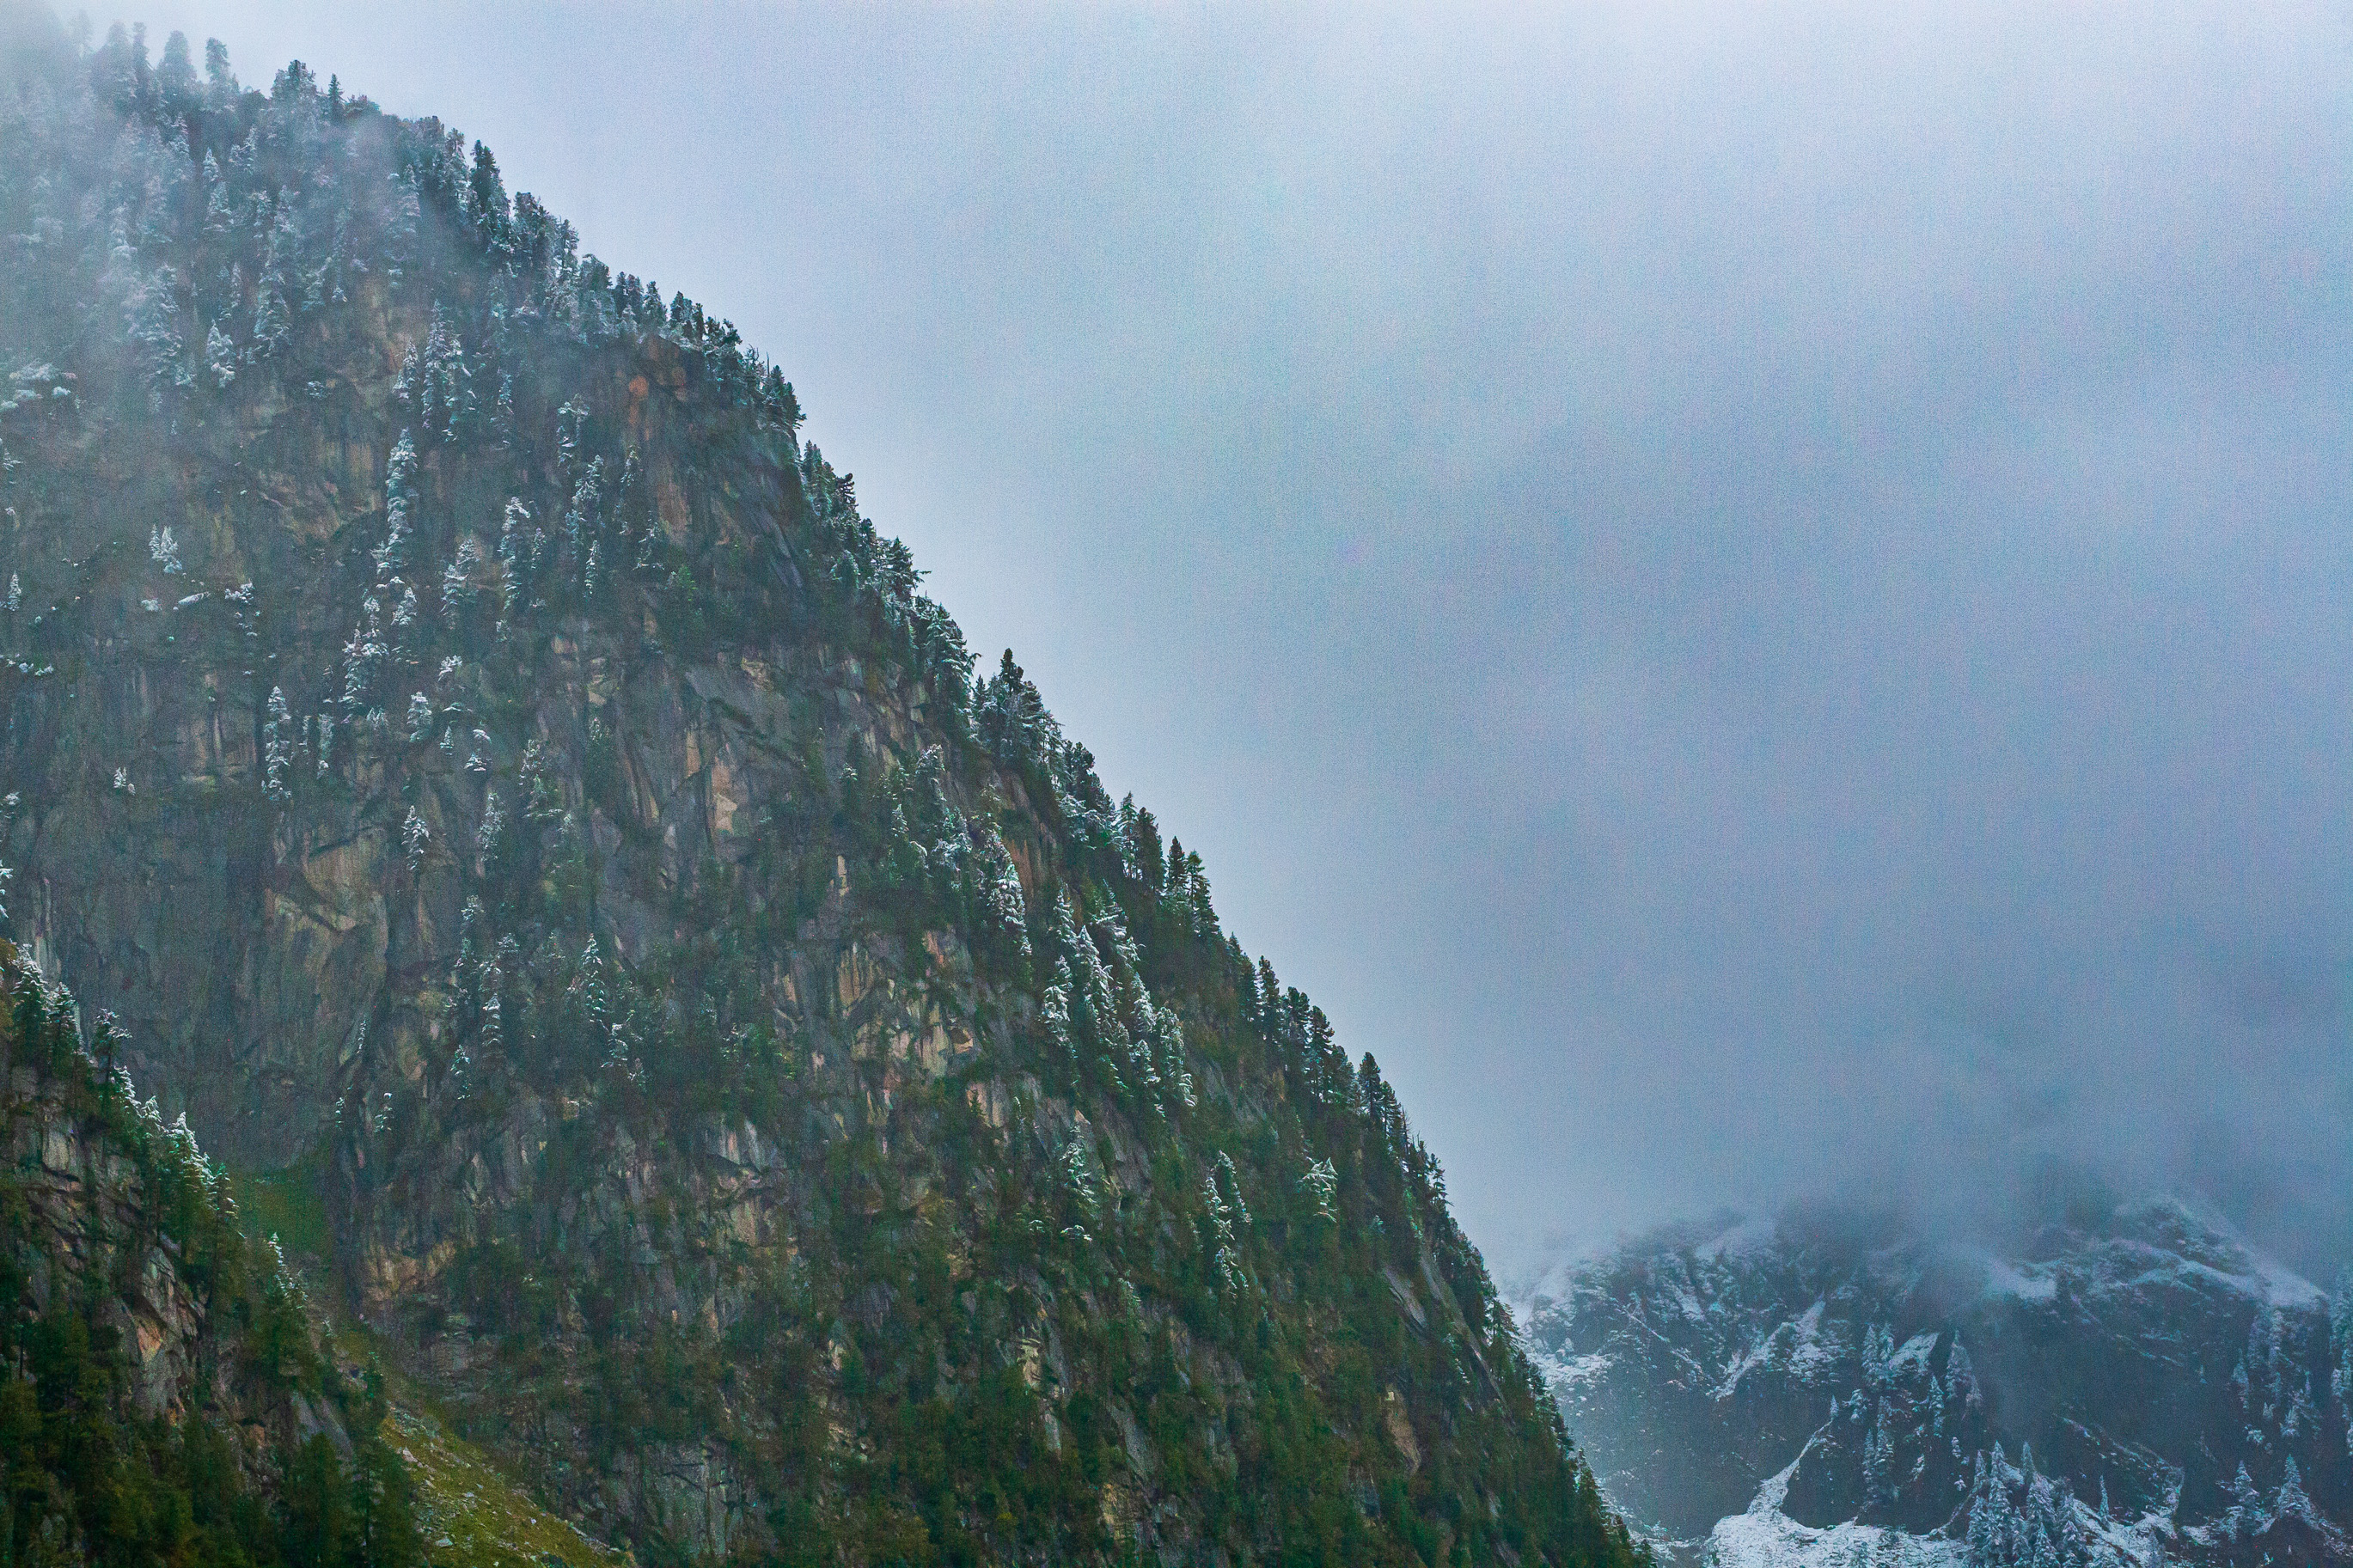
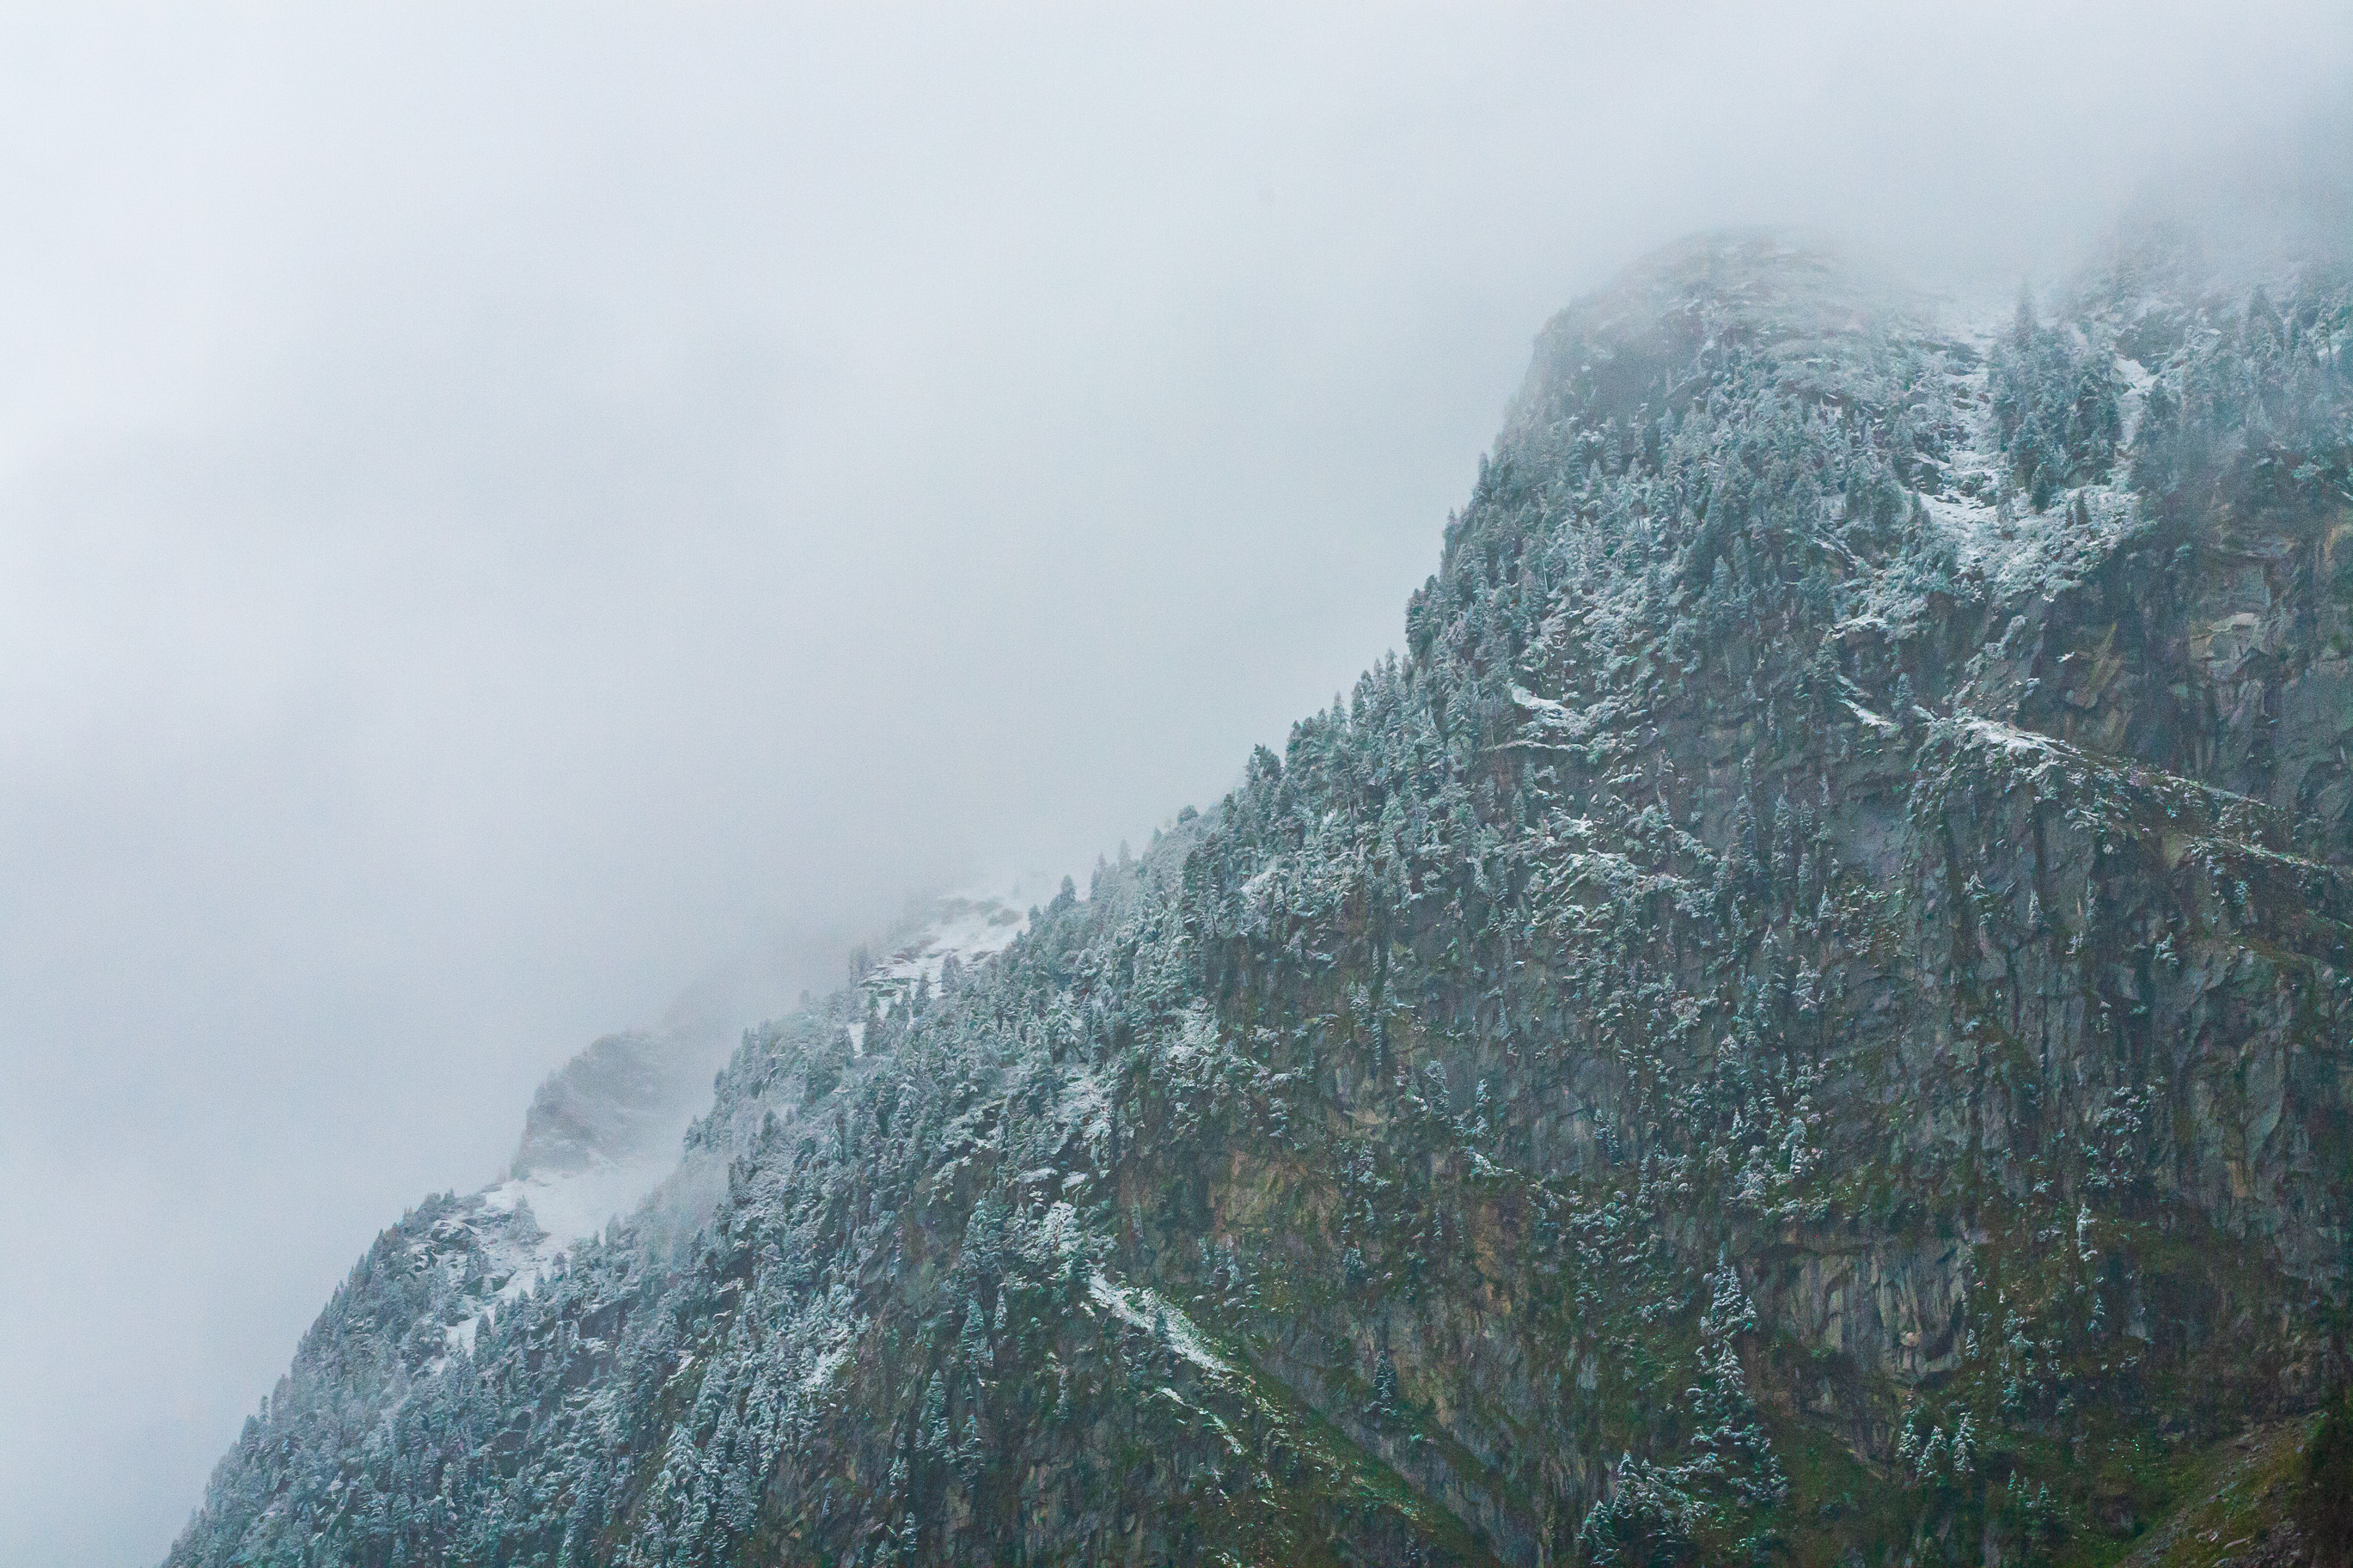
We were driving on the Felbertauern Strasse, a scenic alpine road in Austria known for its beautiful views and its tunnels, when the weather turned foggy and chilly. We stopped for a bit at a place called Rastplatz Elisabethsee to have a look around, and we were treated to these wonderful views of the mountains above, the Osttirol Alps, where a snowstorm had begun, even though it was still early autumn. The contrast between the greenery being covered by fresh snow and fog was so wonderful to see, and it was a reminder of how quickly the weather can turn at high altitudes. Enjoy the photographs!
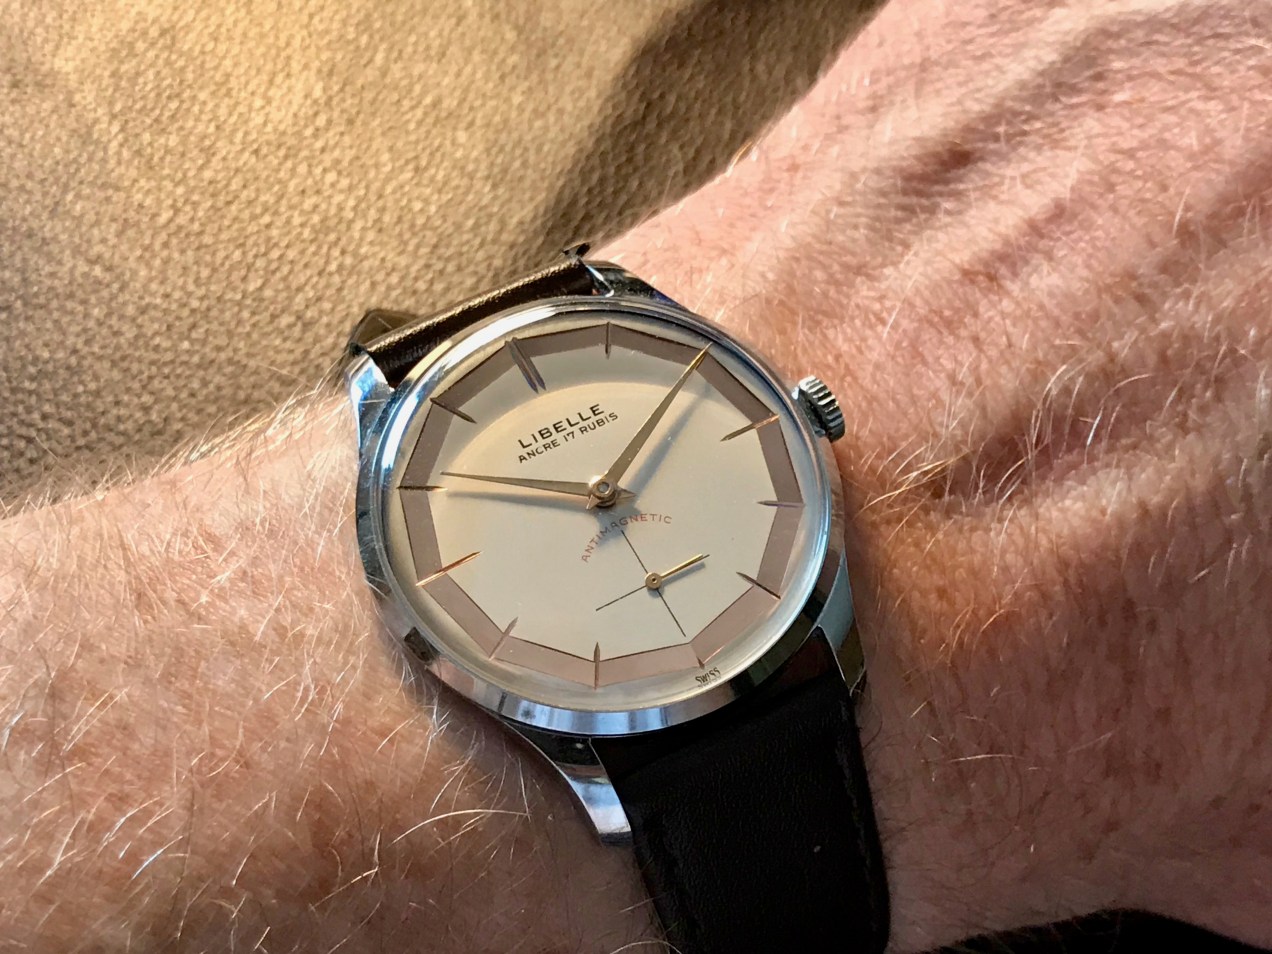
This is a 1960s Libelle watch with an Ancre 17 jewel manual winding movement. Not much is known about the brand, but these watches are likely Italian-assembled with Swiss movements. I bought it NOS from a small store in Italy and had it checked and lubricated at my watchmaker’s.