
Taken in Georgetown, DC.

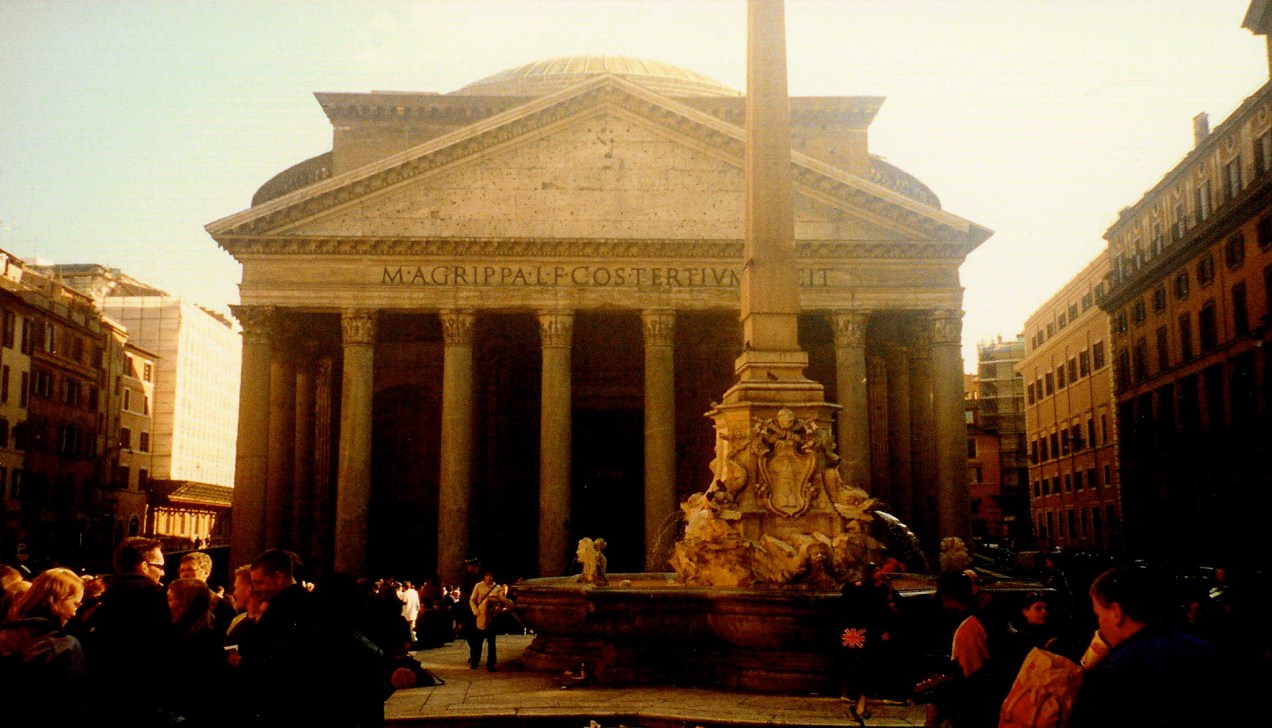
In March of 1999 I visited Rome. It was my first trip to Italy and I had a wonderful time. I stayed with my brother, who at the time was on a 3-year fellowship there to do research. He studies myths and religions and does comparisons between deities in various cultures. He also collects folklore: dying traditions and customs. Takes lots of photographs and films them as well. The latter part of his work is exciting. The former puts me to bed. Mille scusi, fratello!

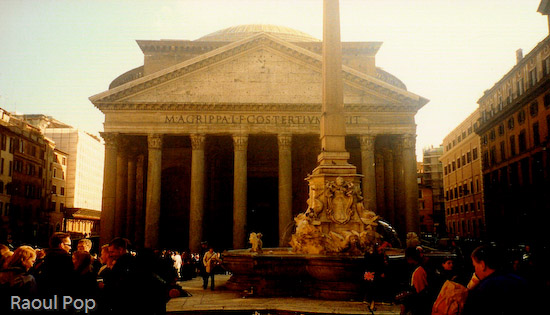
Anyway, I had the most wonderful time. Bogdan (my step-brother — he’s pictured above) had his nose buried in dusty books at various libraries in Rome, while I literally walked through the entire Rome on foot, taking photos with my trusty little Canon Elph and consulting the map here and there. The Canon has since become unusable, because APS film is no longer available, but it did help me preserve the wonderful things I saw. Over the years, the photos gathered some dust themselves in my closet, till I finally decided to scan and share them online. Since I don’t have a scanner that will work with APS film, I scanned the photos themselves. I realize that’s a real step down in quality, and given the age of the prints, it really shows, but the digitized photos still serve to convey the beauty and history of the place. Plus, the aged paper gave a nice Sepia effect to the photos that I’d be hard pressed to reproduce in Photoshop.
While I really enjoyed Rome, my experiences with Romans were mixed at best. And I had breathing problems there as well, due to the pollution. But none of that could eclipse the sense of wonder and discovery I had every day as I planned out where I’d go, then get there and take photos. Maybe I’m biased, but I find today’s architecture pathetic. It’s disposable, ugly, flimsy and imitative. Few and far between are the buildings that make a statement. Well, in Rome, as in most European cities, you’ll have no shortage of good architecture. I think that’s what makes them so beautiful.
Here are several of the photos I took during my trip.


This post is part of a series on Walt Disney World. Click on each link to access Part 1, Part 2 and Part 3.
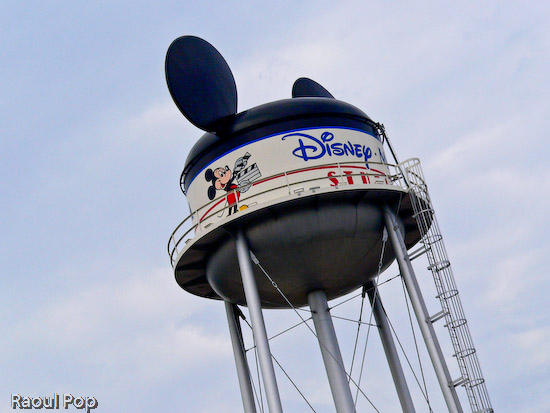
There’s a ride called the Backlot Tour at Disney MGM Studios. At first sight, it seems like nothing fancy: just a tour bus that takes you around various places. But if you assume that and never go on it, you miss out on a whole lot of fun.
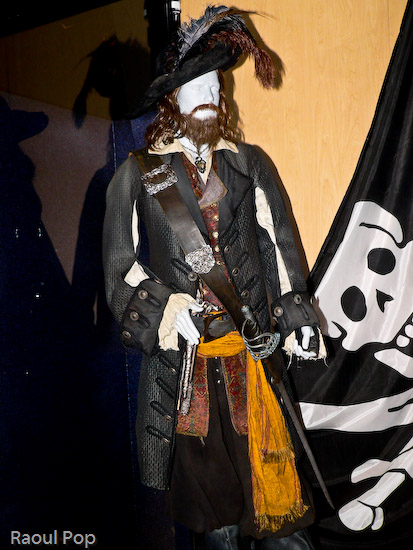
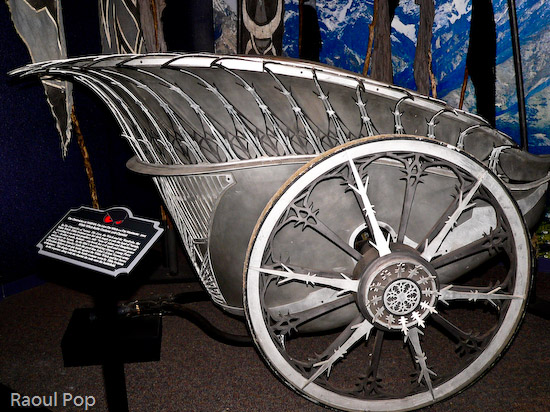
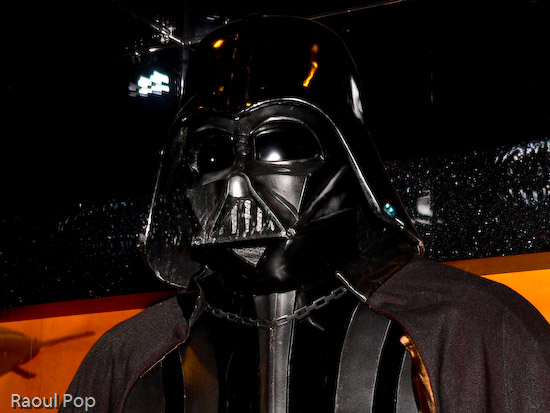
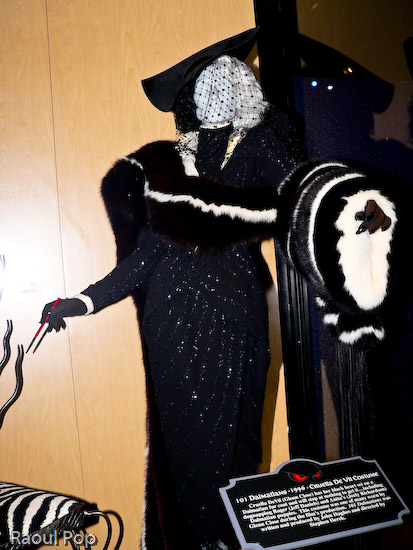
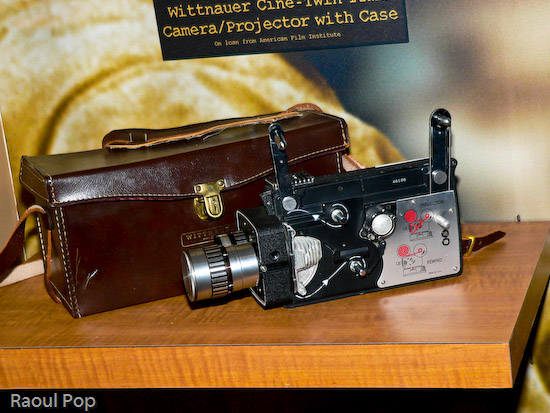
The Backlot Tour is actually made up of three segments: a pre-ride special effects show (with audience participation), the actual tour in the buses, and a very nice post-tour walk through the on-site AFI (American Film Institute) Museum, which is packed full of actual movie props and costumes.
The special effects show involves mock action sequences from Pearl Harbor, and the audience is shown how stunts like the ones in the movie were created. You also get a sense of the scale of those special effects, and of the incredible effort and planning that went into creating each action scene, even if it lasted only a few seconds.
The backlot tour gives the visitors behind-the-scenes glimpses at the work that goes on at the studio, which is supposedly in use for various movies from time to time. As the tour guide speaks, the bus snakes its way among various cars and objects used in past and recent movies.


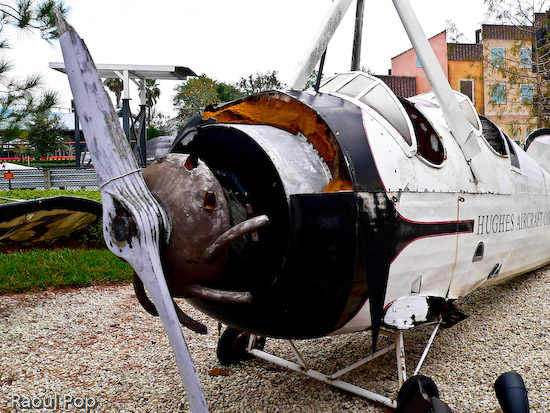
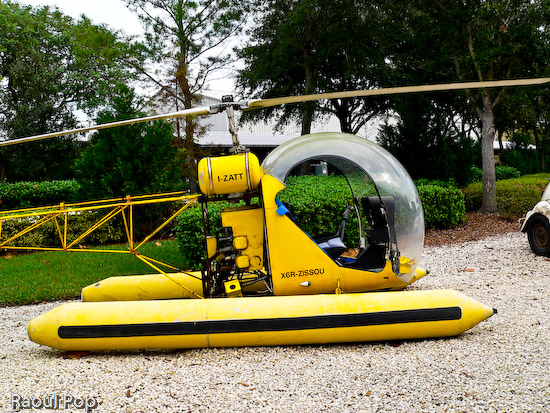
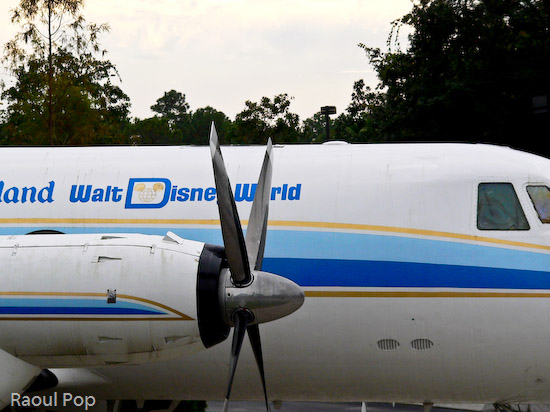
There are rare gems, like Walt Disney’s personal plane. He used it to fly over the Florida Everglades when he surveyed the land he would later purchase for Disney World. Toward the end of the tour, you’ll be taken through the costume department. There’s a tunnel built right through the building where the staff works on costumes, and large windows line it. You’ll be able to look right in and see them at work on the various costumes worn by WDW cast members.
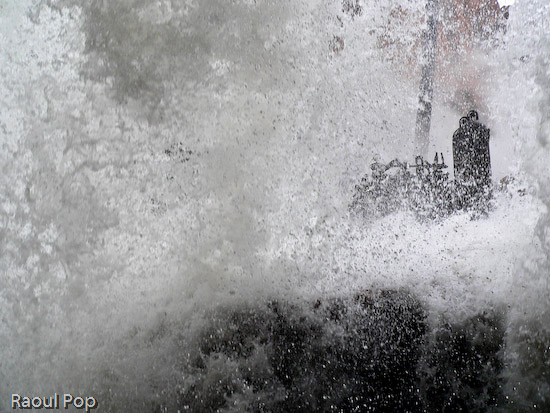
You’ll get an unexpected shock as you experience a fire and water stunt at a specially-designed canyon. Tens of thousands of gallons of water will rush past you. It’s quite a sight to see!

But what I thought was really interesting was the AFI Museum, available at the end of the tour. There was no time limit, and we could look at the various movie props and costumes as long as we wanted. It was a treat!


This post is a continuation of my series on Walt Disney World.
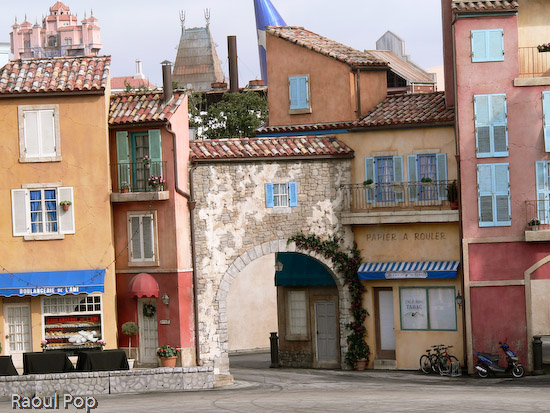
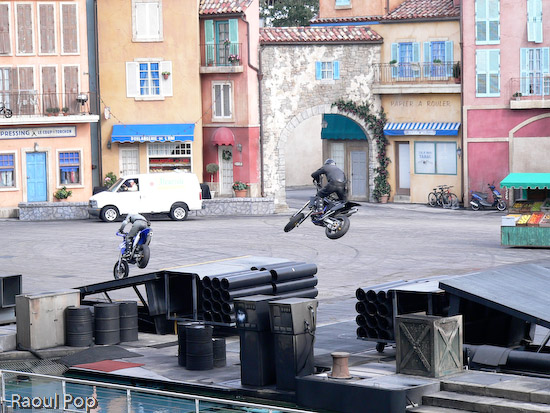
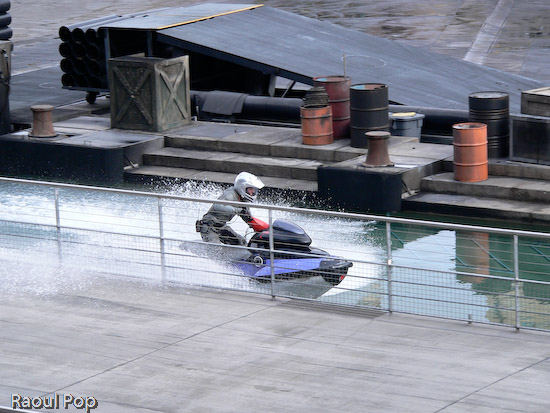
Lights, Motors, Action! is one of the shows at Disney MGM Studios. It runs only a few times a day, and it involves tightly coreographed action and stunt sequences with cars and motorcycles. The setup is that they’re filming scenes for an upcoming action movie. The truth is, they’re just trying to involve the audience a little more. I have mixed feelings about making everything seem like the movies, but I can certainly agree with this: the show and the stunts are great!
The set is built to resemble a small, Southern French town.
There’s an introduction, where the audience is told what to expect, then the stunts begin, with little breaks to allow the crew to set up the various scenes.


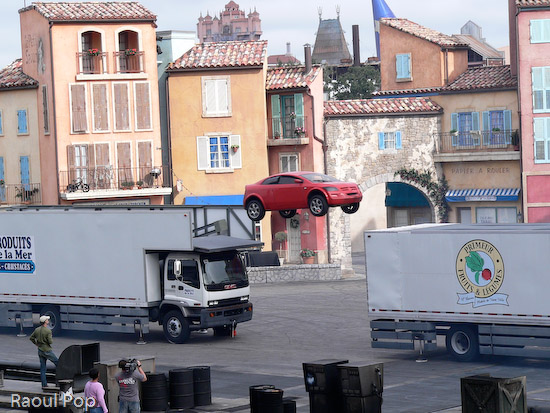
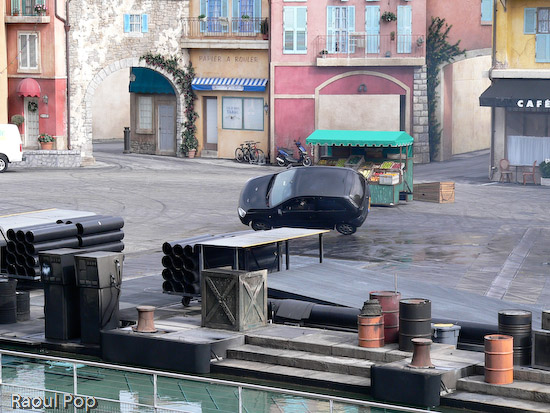

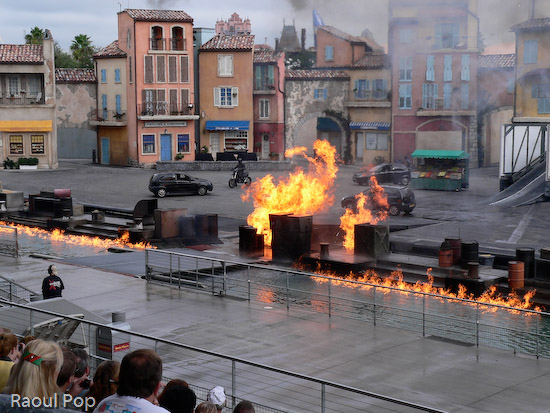
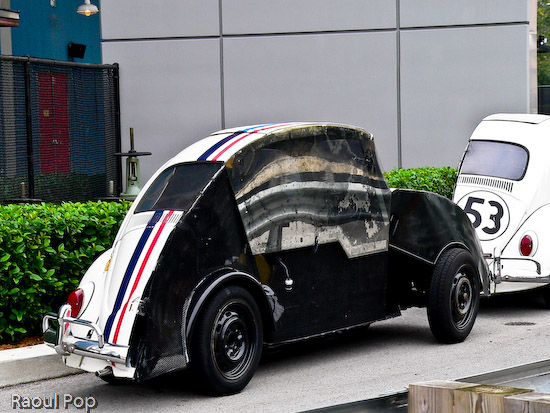
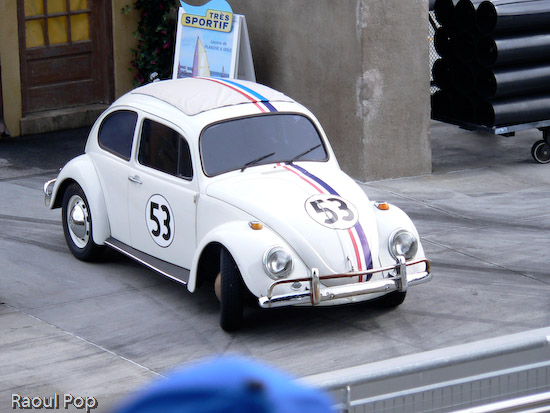
I understand the stunt drivers go through a set of tires in three days, and since the show began, they’ve worn down the pavement on the set by several inches, and it will need to be repaved. There’s also a surprise: you’ll get to see Herbie during the show!
Our recent trip to WDW was also an attempt to document the place and our experiences through serious photography, and it was a worthwhile learning experience. Some questions that I asked myself as I set out to do this were:
I thought I was prepared in terms of equipment. I had an anti-glare hood, an external flash, a tripod, an extra camera battery and the charger, extra memory cards and a lens-cleaning kit, not to mention a great camera case. The second question was a bit harder to answer, but things worked out okay because I relied on the following guidelines. I listed them below in no particular order, as they occurred to me:
So what did I learn on this trip? Well, I learned that you can never take too many photos, especially with a digital camera, where you can easily delete what you don’t want. It pays to be well stocked with memory cards. And it really pays to have a camera that can take many shots on a single charge. My camera, currently a Panasonic Lumix FZ20K, goes (or it did anyway — more on that later) through a battery charge at 250 shots, give or take a few. Even though I had a spare battery with me, I still found myself running out of juice. It also pays to have a camera that can take photos at 400, 800 and 1,600 ISO without significant noise. There were so many beautiful shots I missed because my camera could only take shots up to 200 ISO without noise, and it could only go up to 400 ISO, period. When the lights turned on at the parks, everything was more beautiful, but my camera couldn’t capture it because I would have needed to set up my tripod for every shot. That’s a bit hard to do with throngs of people around you.I also learned that my external flash and glare hood were worth purchasing. My external flash helped me immensely with people shots at night, and even with large-scale illumination of buildings and walls. The glare hood was definitely useful during the day, especially when the sun came out from behind the clouds. I counted my blessings when I discovered I could tie my camera bag around my waist instead of carrying it around my shoulders. It was immensely helpful to have easy access to my accessories as I held the camera in my hands.
It cost me nothing to throw my lens-cleaning kit in my bag alongside my camera, and it paid off tremendously during my visit. My camera’s lens got pretty dirty during heavy use. I either touched the lens inadvertently as I fiddled with the lens cap, or the camera got splashed by water drops from fountains and various rides as I took photos. I had someone sneeze right as they passed me and my camera… Regardless of what happened, having the lens cleaning solution right there was a huge help. I just sat down on a bench, squirted a drop or two of the solution onto the lens, and wiped it with the special cloth. In about a minute, I was back in business with squeaky-clean lens, ready to take more great photos. When you take event photos, and you’re only there for 1-2 hours or so, you can always go back home or to the hotel to do some maintenance work on the camera (clean the lens, wipe the body a bit, charge the batteries, etc.) When you’re out in the field the whole day, things are a little bit different (and harder). That’s why it pays to be well-prepared.
A little bit about my camera. I used a Panasonic Lumix FZ20K on this trip. I purchased it back in October, as I decided to move up to a bigger camera from my current compact digital, a Kodak EasyShare Dual Lens v610. I’ve always been a fan of small cameras that I can tuck away in my pocket and carry anywhere, but as I got more serious about photography, I found myself always bumping against the various limitations of my cameras and getting frustrated. Still, I couldn’t justify getting a bigger camera, because of two reasons: price, and more importantly, portability. I didn’t want to lug around a camera case all the time.
I got the FZ20 as a stepping stone. I wanted to see if I’d be happier with a bigger camera that wasn’t as limited as my compact, and if I could handle carrying around a case on my trips. Things turned out well. I liked it, and I was happy with the quality of the photos it took as well. I didn’t mind carrying around the camera case, and enjoyed being able to pick from a variety of accessories as needed. I looked forward to using the FZ20 for another 6 months or so, then transitioning to a DSLR. Unfortunately, the FZ20 started malfunctioning during this trip. The zoom stopped working properly, and didn’t respond when I needed to bring it back to wide from tele shots. I’d have to turn the camera off, then back on. It wasn’t fun, and after only a couple of months of use, I was disappointed to see it malfunction. Thankfully, I’d purchased it from Costco, which has an amazing return policy. Other than computers and laptops, you can return merchandise at any time. That’s fantastic! I ended up returning it yesterday, and now I’m back to my Kodak v610, which still works great, but has certain frustrating limitations and no image stabilization. 😦
I’m now saving up for a DSLR. I don’t want to buy an entry-level DSLR, because I know I’m going to be frustrated with its limitations sooner or later. I’d rather get a full-featured model that will cost more but provide me with the features and quality I need. While I was at WDW, I noticed that most of the photographers at Disney (the ones that offered to take portraits) were equipped with Nikon D70s, but those are already more than 2 years old. I’m looking at the Canon EOS 5D and Nikon D200.
I’ll post some of the photos from Walt Disney World this week or next week. There are a lot of them and I need to do some post-processing work to get them ready.
