➡ Updated 1/14/19: I have revised my opinion of Drobo devices. After experiencing multiple, serious data loss events on multiple Drobo models, even recent ones, I no longer consider them safe for my data.
➡ Updated 3/18/09: My review of the new Firewire Drobo is now published. You may want to have a look at that as well.
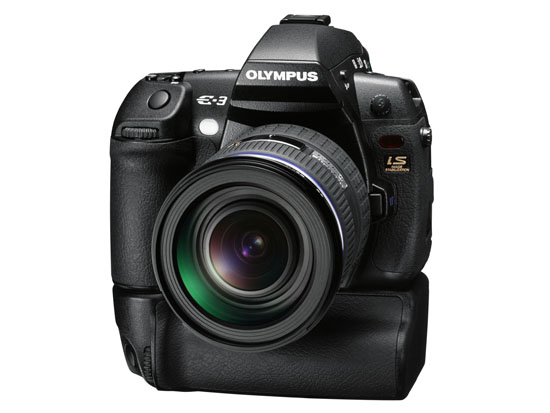
The Drobo is a new way to store your data. It works like RAID, only better. Made by Data Robotics, the Drobo is an enclosure that can use anywhere from 2 to 4 SATA hard drives of any size and brand to keep multiple copies of your files and ensure against hard drive failures.

It’s all about the data
The main advantage is that consumers are freed from the problem of having to use identical hard drives (which is how things work in RAID) and can rely on the largest and cheapest drives they can find on the market for their data storage. In a word, the Drobo turns hard drives into a commodity, a building block of your data storage that can be replaced at any time with any SATA hard drive without negatively affecting your data.
Depending on the amount of total space available on the Drobo, it can withstand the failure of one or even two of its hard drives without losing any data. (Naturally, you’ll need to have more than two hard drives in there in order for it to protect against a double hard drive failure…)
It is its capacity to withstand drive failures and use any SATA hard drives that makes it both remarkable and unique for a consumer product.
I bought a Drobo a few weeks ago, and have been using it since to store my photo library. You may recall I first tried a WD My Book World Edition II, then a WD My Book Pro Edition II to store my photos, and both failed me. The My Book Pro failed me miserably, but that’s another story. (Incidentally, I’m working with WD’s advanced tech support to see if my issues can be resolved, so I may have an update on that in the near future.)
I believe I’ve finally found my storage solution with the Drobo. It offers the data redundancy I need to keep my over 36,000 photos alive and well, and it works on both my Mac and my PC. Not only that, but I know it will grow with me as my data storage needs expand.
➡ Updated 1/6/08: Since writing this article, I purchased two more Drobos. An additional one to store my videos and other files, and one more for my parents.
How it works
I bought two 500 GB SATA hard drives with 32 MB buffers and installed them in my Drobo. Installation is a snap, you just need to slide them in and a locking lever snaps into place, securing them in their slots. (If you think a 32 MB buffer is overkill for a hard drive, you might want to have a look at my review of the Dell OptiPlex 745.)
The two drives give me about 464 GB of total storage. There’s a wonderful tool called the Drobolator that lets you see exactly how much storage you’ll get with your Drobo when you stick in drives of various sizes.

There is one detail I want to point out here that you may or may not be aware of, depending on how well you read through the Drobo literature. Because there’s an upper limit of 2 TB on a single USB volume, if your Drobo’s storage capacity exceeds that limit, your computer will then see two Drobo volumes.
Let me put it another way. If you use the Drobolator and you stick 4 (four) 1 TB hard drives into the Drobo, your total available storage will be 2.7 TB. This means, according to Drobo’s literature, that you will see two volumes on your computer. (This is because of that pesky 2 TB limit on USB devices.) Given that USB 3.0 specs are in the works now, and that Data Robotics has acknowledged they’re looking at the possibility of Firewire connectivity in the future, that may be a non-issue at some point, but it is something to know about now.
➡ Updated 1/17/08: Data Robotics will soon release a firmware update that will bump the upper limit up to 16 TB for a single USB volume. Those who already own the DroboShare accessory will already be able to format the Drobo volume at 16 TB. To get the details on how this works, read my comment below.
The perceived vs. actual size of the volumes can be confusing, so let me explain it a bit further. Even now, my computer sees my Drobo as having a size of 2 TB. The Drobo only has 2×500 GB drives in there, and the total size of my available storage is 464 GB. But since the Drobo’s storage can expand or decrease, and it needs to be a platform-independent device — one that does not depend on the computer for sizing information or partition tables — it has to declare its maximum size (2TB) from the start. That’s the perceived size. The actual size is indicated by the capacity meter, and if you’ve installed it on your machine, the Drobo software, which communicates with the device and displays information from it locally. In our case, if we were to put in 4×1 GB hard drives in the Drobo, we would have two actual volumes: a 2 TB volume, and a 700 MB volume. Their perceived size will be 2 TB each. If this is still confusing to you, don’t worry. Just go by the Drobo’s capacity meter to monitor how much free space you have left, and don’t worry about the perceived size.
Transfer speeds
Some people are saying that it’s slower than other storage solutions. In terms of speed, I’ve found it to be equivalent to RAID 1 drives like the My Book Pro II (which can be configured in RAID 0 or 1). I haven’t done benchmark testing, and I don’t intend to — I focus on real world use in my reviews, not lab tests — but it’s not what I’d call slow, and it’s not what I’d call fast. It’s somewhere in the middle, and it’s good enough for me. I’m willing to give a little when it comes to transfer speeds in exchange for data redundancy and safety.
➡ Updated 5/1/08: When the Drobo will get up to and a little over 70% used space, and even before the orange light will turn on in a drive bay to indicate that you need to puchase additional hard drives, the transfer speeds will start slowing down. I’ve experienced significant slowdowns in transfer speeds, to the point where copying a 1 GB file onto the Drobo takes 10 minutes or more (when it usually takes 1-2 minutes) when the used space was 80% or more, and the orange light wasn’t yet turned on. You may want to keep this mind as you plan your storage needs. As soon as I put in another drive and the used space dropped back down, the transfer speeds went back to normal.
➡ Updated 7/1/08: Data Robotics has released a firmware fix for the issue pointed out above, and it doesn’t occur any longer.
➡ Updated 7/15/08: Data Robotics has recently released the Drobo 2.0, a Firewire/USB version of the Drobo, which is much faster than the original USB-only Drobo.
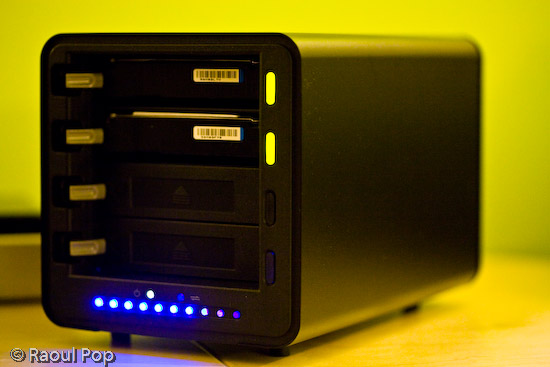
How it looks
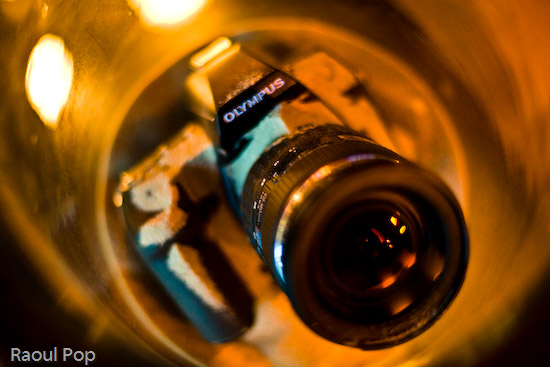
In terms of physical size, or footprint, you should know that the Drobo is significantly larger than other consumer-level storage products out there. It’s big, as you can see from both the photos and the video that accompany this review. If you’re thinking about buying it, make sure you have enough space on your desktop to accommodate it.

In the photo shown above, I’ve got a NewerTech miniStack (1st generation) sitting next to the Drobo. I’ve also got a WD Passport Drive on top of the miniStack. This is to give you an idea of how it compares to other external hard drives. The miniStack, for example, is the same size as a Mac Mini, and is actually meant to be stacked with it. I’m using it as a standalone drive, because it has both a USB and Firewire hub built in, so it’s quite versatile.
I like the design of the Drobo. I like rounded corners and glossy surfaces. Apple has spoiled me that way. The Drobo’s black, glossy ends (front and back) are really beautiful.
How it sounds
I think it’s quiet — when not accessed. Even though it has a big fan in the back, it makes barely any noise. The Drobo becomes audible when you are reading or writing to the hard drives. Because it’s a metal enclosure, the sounds generated by the seek operations are amplified slightly by it. The metal adds a melodious echo to each sound. It’s not what I would call loud, and I find it somewhat interesting. Ligia doesn’t share my opinion, but I guess you can’t please everybody. At any rate, just be aware of the fact that you will hear sounds coming from the Drobo when you’re actively using it.
➡ Updated 4/2/08: I had some noise issues with my Drobos, which were resolved nicely by Data Robotics. You can read the details at the end of my review.
➡ Updated 5/1/08: When you fill up the Drobo (all four drive bays are taken) you will notice that the fan will kick into high gear a lot more often, and even when the Drobo is barely being accessed, or not even accessed at all — only plugged into the computer’s USB port. It’s not an overheating issue, because I put my finger on all four drives, and they weren’t hot to the touch, only warm, so I think it’s a firmware issue. This has happened with two of my Drobos. It seems that if the temperature gets above 75 degrees Fahrenheit in the room, the fan will start spinning faster, and if it gets close to 80 or over it, the fan will start going nuts and will generate quite a bit of noise. For a consumer device which isn’t meant to sit in a server room (controlled temperature environment), I think this is excessive, and the fan speed needs to be adjusted in one of the next firmware releases.

Video review
I hope this video will give you a better idea of Drobo’s looks, size and functioning, as well as its sounds. I tried to make the video as useful as possible by looking at the Drobo from various angles and by comparing its size with other external drives that I own. I also pulled out one of the drives with the Drobo turned on, so you could see that that they’re hot-swappable and that it wouldn’t miss a beat. You can also watch it here, and download it as well.
If you’ve just finished watching the video, don’t worry, the hard drive status lights stopped blinking after the data check. It’s just that when you remove a drive and stick it back in, the Drobo does a thorough check to make sure all the data that should be there is there. It may even re-sync all the data across the drives. It took a few hours for that check to complete since I had over 300 GB of data. By the way, all of it (the data, that is) was accessible during the check, so yes, you can work with the Drobo immediately after you do a hard drive replacement.
A few thoughts on the design
I like the idea of the lights on the front of the drive. It’s great to have an easy-to-use capacity meter, and to indicate the health of each drive through different-colored lights next to it. What I don’t like is the blue LEDs used for the capacity meter. They’re very blue, and very strong.
Generally speaking, blue LEDs cause headaches, because the eyes can’t focus properly on them. They always seem out of focus when you look directly at them. Every time I see blue LEDs on something that’s meant for constant use I cringe. Fortunately, the Drobo isn’t meant to sit directly in front of the user, but off to the side, which is where I have it.
It would be nice if Digital Robotics would do something about the capacity meter in their next build of the Drobo. They could even leave the blue LEDs in there, but obscure the light slightly by orienting them at an angle instead of having them point straight out toward the user. I’ve found that when I look at blue LED light from an angle, it doesn’t cause the same vision problems.

I like it
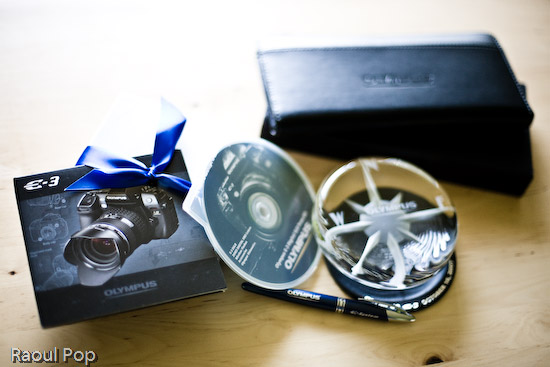
Is the Drobo a keeper? I think so. I’m happy with it. Even though there are a few sticking points, it’s nothing that would have dissuaded me from buying it, even if I had known about them beforehand. As a matter of fact, I’m so satisfied with it, that I signed up for the Drobo Evangelist program. That means that between now and December 31st, if you buy a Drobo from the Digital Robotics online store and you mention my evangelist code (EVPOP), you’ll get $25 off its purchase price. In the interest of full disclosure, you’ll also help me, because I’ll get $25 for each successful sale as well. Remember, this is only until 12/31/07, unless Data Robotics extends the program — and I haven’t heard anything about that. (Updated 1/2/08). I heard from Data Robotics today: they’ve extended the evangelist program until 6/30/08. That means the discount code will work until June 30th if you decide to use it.
Let’s review
The good points:
- Data redundancy ensures availability, even if up to 2 hard drives fail
- Virtually unlimited data storage (but remember the 2 TB limit for each volume when connected through USB 2.0)
- Independence from hard drive size and manufacturer: as long as it’s SATA, it’s fine
- Size can expand as your storage needs grow
- Great design
- Ease of use
The sticking points (nothing bad, just some things you need to consider):
- Price is hefty: total cost is significant when you count in the enclosure and the individual hard drives
- You may or may not like the sounds it makes when data gets accessed on the drives: make sure you listen to my video carefully to see what I mean (if yours is making too much noise, you may need to get it replaced)
- Blue LED lights used for capacity meter are too intense and may cause headaches if you look directly at them
- Transfer speeds may not be fast enough for you
Buy a Drobo
If you’re interested in buying one, here’s where you can find one:
Updates
➡ Updated 1/6/08: Since I now own three Drobos, I can tell you that my first impressions about the noise were wrong. It seems my first Drobo is unusually loud. My other two Drobos are very quiet. I can barely hear them, even when writing or reading to the hard drives actively and for prolonged periods of time. I’ll need to contact Drobo Support to see if I can get my first Drobo replaced.
➡ Updated 1/7/08: I called Drobo today to ask them why one of my Drobos is making more noise than the other two. I described the situation to them, and told them I’m using the exact same drives inside each Drobo (2x500GB Seagate SATA drives with 32MB cache). Their initial response was to blame the hard drives. I doubt they’re at fault, but it’s possible, since it’s the hard drive churning noises that are louder in this particular Drobo of mine. So what I’m going to do later today, since I have the luxury of having more than one Drobo at home, is I’m going to take out the two hard drives from the louder Drobo and stick them in one of my two quiet Drobos. We’ll see what happens next. If the hard drives are at fault, then the quiet Drobo will start being loud. If not, then there’s a problem with my original Drobo. I told them all this, and asked for a case number. I indicated that I’ll be looking for a replacement if it turns out that the Drobo is at fault, not the hard drives. I’ll keep this review updated with my findings.
➡ Updated 1/7/08: Okay, spoke with Drobo again about the noise, and it turns out that the hard drives are at fault. I did just what I described above. I wouldn’t have thought it, but these two drives that I’ve got in the original Drobo are louder than the four I use in the other two Drobos, even though they’re the exact same size, brand and model. I’m going to return them and order new ones, and I believe the noise will go away. This is definitely something to keep in mind if you’re having noise issues with your Drobo. Don’t assume it’s to blame. If you can, check the hard drives first. Remember to do it properly though. You have to turn OFF the Drobo and unplug it BEFORE removing the hard drives, or you’ll lose your data. Read this clarification, and if you’re still not sure, don’t take risks, call Drobo Support and have them stay on the line with you while you swap out the hard drives.
➡ Updated 1/9/08: I still have noise issues with that original Drobo even after swapping out the hard drives. At this point, I’m not sure what to think. Could it be that Adobe Lightroom, the application I use to process my photos, places such a high I/O load on the Drobo that the hard drives will churn heavily no matter what, or could it be that this particular Drobo of mine is not phonically isolated as well as my other two? Not sure. I ordered hard drives of a different brand, to see if those will be quieter. I’m going to try those out for a day or two to see what happens. Then I’m also going to switch Drobos, and use one of my quiet Drobos for a day or two with the new hard drives and with the old hard drives, and then I’ll be able to get a better idea of what’s going on. Perhaps it’s just Lightroom causing this. Perhaps it’s the Drobo. Perhaps it’s the hard drives. But one thing’s for sure, while I was on the phone with Drobo Support, I didn’t use Lightroom heavily enough in order to compare the noise levels.
➡ Updated 2/6/08: I sent two of the original Seagate 500 GB drives back, and purchased two Western Digital 500 GB drives. The difference between them, specs-wise, is that the Seagate drives have 32 MB caches, and the WD drives have 16 MB caches. But it turns out that there’s a problem with the Seagate drives where their caches default to 8 MB if the latest firmware upgrade isn’t applied. And there is NO way to apply a firmware update to the drives while they’re in the Drobo. Doesn’t work, I tried it. At any rate, the two WD drives are quieter than the Seagate drives, although they run hotter. At least noise-wise, things are alright now, and the Drobo’s cooling system seems to handle the extra heat just fine.
➡ Updated 2/6/08: You’d think now that I’ve got the noise issues straightened out, things have quieted down, but they haven’t. I’ve got noise issues with one of my other Drobos, and this time it’s related to the fan for sure. I’ve swapped out the drives, and I’ve swapped the Drobos, and I’ve pushed on various drive bay flaps and listened carefully, and it’s the fan. Trust me, I spent about a month ferreting out this particular noise issue. I arranged for an RMA, which arrived today, only to disappoint me thoroughly.
Guess what? I received a heavily used Drobo from Data Robotics in return for my brand new Drobo (thanks for nothing!), even after I’d asked them kindly over the phone not to send me a used one or a damaged one. To make things worse, there’s serious dust in the crevices of this Drobo. The drive bays themselves are lined with dust that sticks to my finger when I touch it. One of the blue LED capacity indicators doesn’t light up (it’s broken), and as if that’s not enough, one of the ejection springs for the drive bays doesn’t work. When I wanted to take out a drive, it wouldn’t push it out. I had to point the Drobo’s mouth downward and shake it. To top it all off, it makes the same fan noise as my own Drobo.
But wait, there’s more! The firmware versions are different! While this replacement Drobo was able to read all of my data from the drives, when I turned it off (disgusted by all its problems) and removed the drives, intending to put them back in my own Drobo, I found out I couldn’t! That’s right, because the firmware versions are different, my original Drobo now can’t read any of my precious data. I’m stuck. My Mac wanted to initialize the Drobo, which would have meant erasing all of my data. I think at this point I’m stuck transferring all of my data to external USB drives and reformatting my Drobo, only to stick all of the data back onto it afterwards.
Understandably enough, I’m upset and disappointed with Data Robotics. To send me a heavily used Drobo with existing problems, and then to also put my data in danger when they’re supposed to make my data safer, is simply not acceptable. I notified them by phone and email, and will give them a chance to make things right. I’ll keep you updated of what happens.
➡ Updated 2/7/08: Drobo’s Tier-3 Support replied to my emails. They were courteous, apologized for the experience, and promised to make it right. I believe they’ll try to ship out a new drive to me in replacement in a few days. Until then, they emailed me the latest version of the firmware (which is not yet available to the public) and showed me how to upgrade my Drobos manually. I upgraded the firmware on all of my Drobos, successfully, and now my original Drobo can read my drives without any problems. I didn’t lose any data after all. I’m very glad things have worked out!


")
")
")
")
")
")