Reviews

Hardware review: Drobo

➡ Updated 1/14/19: I have revised my opinion of Drobo devices. After experiencing multiple, serious data loss events on multiple Drobo models, even recent ones, I no longer consider them safe for my data.

➡ Updated 3/18/09: My review of the new Firewire Drobo is now published. You may want to have a look at that as well.

The Drobo is a new way to store your data. It works like RAID, only better. Made by Data Robotics, the Drobo is an enclosure that can use anywhere from 2 to 4 SATA hard drives of any size and brand to keep multiple copies of your files and ensure against hard drive failures.

Drobo (front view with cover on)

It’s all about the data

The main advantage is that consumers are freed from the problem of having to use identical hard drives (which is how things work in RAID) and can rely on the largest and cheapest drives they can find on the market for their data storage. In a word, the Drobo turns hard drives into a commodity, a building block of your data storage that can be replaced at any time with any SATA hard drive without negatively affecting your data.

Depending on the amount of total space available on the Drobo, it can withstand the failure of one or even two of its hard drives without losing any data. (Naturally, you’ll need to have more than two hard drives in there in order for it to protect against a double hard drive failure…)

It is its capacity to withstand drive failures and use any SATA hard drives that makes it both remarkable and unique for a consumer product.

I bought a Drobo a few weeks ago, and have been using it since to store my photo library. You may recall I first tried a WD My Book World Edition II, then a WD My Book Pro Edition II to store my photos, and both failed me. The My Book Pro failed me miserably, but that’s another story. (Incidentally, I’m working with WD’s advanced tech support to see if my issues can be resolved, so I may have an update on that in the near future.)

I believe I’ve finally found my storage solution with the Drobo. It offers the data redundancy I need to keep my over 36,000 photos alive and well, and it works on both my Mac and my PC. Not only that, but I know it will grow with me as my data storage needs expand.

➡ Updated 1/6/08: Since writing this article, I purchased two more Drobos. An additional one to store my videos and other files, and one more for my parents.

How it works

I bought two 500 GB SATA hard drives with 32 MB buffers and installed them in my Drobo. Installation is a snap, you just need to slide them in and a locking lever snaps into place, securing them in their slots. (If you think a 32 MB buffer is overkill for a hard drive, you might want to have a look at my review of the Dell OptiPlex 745.)

The two drives give me about 464 GB of total storage. There’s a wonderful tool called the Drobolator that lets you see exactly how much storage you’ll get with your Drobo when you stick in drives of various sizes.

Drobo (front view with cover off)

There is one detail I want to point out here that you may or may not be aware of, depending on how well you read through the Drobo literature. Because there’s an upper limit of 2 TB on a single USB volume, if your Drobo’s storage capacity exceeds that limit, your computer will then see two Drobo volumes.

Let me put it another way. If you use the Drobolator and you stick 4 (four) 1 TB hard drives into the Drobo, your total available storage will be 2.7 TB. This means, according to Drobo’s literature, that you will see two volumes on your computer. (This is because of that pesky 2 TB limit on USB devices.) Given that USB 3.0 specs are in the works now, and that Data Robotics has acknowledged they’re looking at the possibility of Firewire connectivity in the future, that may be a non-issue at some point, but it is something to know about now.

➡ Updated 1/17/08: Data Robotics will soon release a firmware update that will bump the upper limit up to 16 TB for a single USB volume. Those who already own the DroboShare accessory will already be able to format the Drobo volume at 16 TB. To get the details on how this works, read my comment below.

The perceived vs. actual size of the volumes can be confusing, so let me explain it a bit further. Even now, my computer sees my Drobo as having a size of 2 TB. The Drobo only has 2×500 GB drives in there, and the total size of my available storage is 464 GB. But since the Drobo’s storage can expand or decrease, and it needs to be a platform-independent device — one that does not depend on the computer for sizing information or partition tables — it has to declare its maximum size (2TB) from the start. That’s the perceived size. The actual size is indicated by the capacity meter, and if you’ve installed it on your machine, the Drobo software, which communicates with the device and displays information from it locally. In our case, if we were to put in 4×1 GB hard drives in the Drobo, we would have two actual volumes: a 2 TB volume, and a 700 MB volume. Their perceived size will be 2 TB each. If this is still confusing to you, don’t worry. Just go by the Drobo’s capacity meter to monitor how much free space you have left, and don’t worry about the perceived size.

Transfer speeds

Some people are saying that it’s slower than other storage solutions. In terms of speed, I’ve found it to be equivalent to RAID 1 drives like the My Book Pro II (which can be configured in RAID 0 or 1). I haven’t done benchmark testing, and I don’t intend to — I focus on real world use in my reviews, not lab tests — but it’s not what I’d call slow, and it’s not what I’d call fast. It’s somewhere in the middle, and it’s good enough for me. I’m willing to give a little when it comes to transfer speeds in exchange for data redundancy and safety.

➡ Updated 5/1/08: When the Drobo will get up to and a little over 70% used space, and even before the orange light will turn on in a drive bay to indicate that you need to puchase additional hard drives, the transfer speeds will start slowing down. I’ve experienced significant slowdowns in transfer speeds, to the point where copying a 1 GB file onto the Drobo takes 10 minutes or more (when it usually takes 1-2 minutes) when the used space was 80% or more, and the orange light wasn’t yet turned on. You may want to keep this mind as you plan your storage needs. As soon as I put in another drive and the used space dropped back down, the transfer speeds went back to normal.

➡ Updated 7/1/08: Data Robotics has released a firmware fix for the issue pointed out above, and it doesn’t occur any longer.

➡ Updated 7/15/08: Data Robotics has recently released the Drobo 2.0, a Firewire/USB version of the Drobo, which is much faster than the original USB-only Drobo.

How it looks

In terms of physical size, or footprint, you should know that the Drobo is significantly larger than other consumer-level storage products out there. It’s big, as you can see from both the photos and the video that accompany this review. If you’re thinking about buying it, make sure you have enough space on your desktop to accommodate it.

Drobo (top view - size comparison with other external drives)

In the photo shown above, I’ve got a NewerTech miniStack (1st generation) sitting next to the Drobo. I’ve also got a WD Passport Drive on top of the miniStack. This is to give you an idea of how it compares to other external hard drives. The miniStack, for example, is the same size as a Mac Mini, and is actually meant to be stacked with it. I’m using it as a standalone drive, because it has both a USB and Firewire hub built in, so it’s quite versatile.

I like the design of the Drobo. I like rounded corners and glossy surfaces. Apple has spoiled me that way. The Drobo’s black, glossy ends (front and back) are really beautiful.

How it sounds

I think it’s quiet — when not accessed. Even though it has a big fan in the back, it makes barely any noise. The Drobo becomes audible when you are reading or writing to the hard drives. Because it’s a metal enclosure, the sounds generated by the seek operations are amplified slightly by it. The metal adds a melodious echo to each sound. It’s not what I would call loud, and I find it somewhat interesting. Ligia doesn’t share my opinion, but I guess you can’t please everybody. At any rate, just be aware of the fact that you will hear sounds coming from the Drobo when you’re actively using it.

➡ Updated 4/2/08: I had some noise issues with my Drobos, which were resolved nicely by Data Robotics. You can read the details at the end of my review.

➡ Updated 5/1/08: When you fill up the Drobo (all four drive bays are taken) you will notice that the fan will kick into high gear a lot more often, and even when the Drobo is barely being accessed, or not even accessed at all — only plugged into the computer’s USB port. It’s not an overheating issue, because I put my finger on all four drives, and they weren’t hot to the touch, only warm, so I think it’s a firmware issue. This has happened with two of my Drobos. It seems that if the temperature gets above 75 degrees Fahrenheit in the room, the fan will start spinning faster, and if it gets close to 80 or over it, the fan will start going nuts and will generate quite a bit of noise. For a consumer device which isn’t meant to sit in a server room (controlled temperature environment), I think this is excessive, and the fan speed needs to be adjusted in one of the next firmware releases.

Drobo (back view)

Video review

I hope this video will give you a better idea of Drobo’s looks, size and functioning, as well as its sounds. I tried to make the video as useful as possible by looking at the Drobo from various angles and by comparing its size with other external drives that I own. I also pulled out one of the drives with the Drobo turned on, so you could see that that they’re hot-swappable and that it wouldn’t miss a beat. You can also watch it here, and download it as well.

If you’ve just finished watching the video, don’t worry, the hard drive status lights stopped blinking after the data check. It’s just that when you remove a drive and stick it back in, the Drobo does a thorough check to make sure all the data that should be there is there. It may even re-sync all the data across the drives. It took a few hours for that check to complete since I had over 300 GB of data. By the way, all of it (the data, that is) was accessible during the check, so yes, you can work with the Drobo immediately after you do a hard drive replacement.

A few thoughts on the design

I like the idea of the lights on the front of the drive. It’s great to have an easy-to-use capacity meter, and to indicate the health of each drive through different-colored lights next to it. What I don’t like is the blue LEDs used for the capacity meter. They’re very blue, and very strong.

Generally speaking, blue LEDs cause headaches, because the eyes can’t focus properly on them. They always seem out of focus when you look directly at them. Every time I see blue LEDs on something that’s meant for constant use I cringe. Fortunately, the Drobo isn’t meant to sit directly in front of the user, but off to the side, which is where I have it.

It would be nice if Digital Robotics would do something about the capacity meter in their next build of the Drobo. They could even leave the blue LEDs in there, but obscure the light slightly by orienting them at an angle instead of having them point straight out toward the user. I’ve found that when I look at blue LED light from an angle, it doesn’t cause the same vision problems.
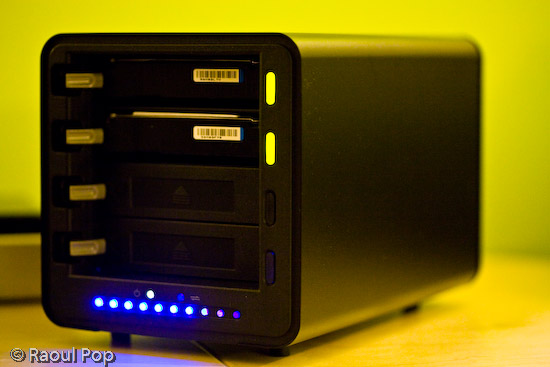
Drobo (front view with cover off)

I like it

Is the Drobo a keeper? I think so. I’m happy with it. Even though there are a few sticking points, it’s nothing that would have dissuaded me from buying it, even if I had known about them beforehand. As a matter of fact, I’m so satisfied with it, that I signed up for the Drobo Evangelist program. That means that between now and December 31st, if you buy a Drobo from the Digital Robotics online store and you mention my evangelist code (EVPOP), you’ll get $25 off its purchase price. In the interest of full disclosure, you’ll also help me, because I’ll get $25 for each successful sale as well. Remember, this is only until 12/31/07, unless Data Robotics extends the program — and I haven’t heard anything about that. (Updated 1/2/08). I heard from Data Robotics today: they’ve extended the evangelist program until 6/30/08. That means the discount code will work until June 30th if you decide to use it.

Let’s review

The good points:

  • Data redundancy ensures availability, even if up to 2 hard drives fail
  • Virtually unlimited data storage (but remember the 2 TB limit for each volume when connected through USB 2.0)
  • Independence from hard drive size and manufacturer: as long as it’s SATA, it’s fine
  • Size can expand as your storage needs grow
  • Great design
  • Ease of use

The sticking points (nothing bad, just some things you need to consider):

  • Price is hefty: total cost is significant when you count in the enclosure and the individual hard drives
  • You may or may not like the sounds it makes when data gets accessed on the drives: make sure you listen to my video carefully to see what I mean (if yours is making too much noise, you may need to get it replaced)
  • Blue LED lights used for capacity meter are too intense and may cause headaches if you look directly at them
  • Transfer speeds may not be fast enough for you

Buy a Drobo

If you’re interested in buying one, here’s where you can find one:

Updates

➡ Updated 1/6/08: Since I now own three Drobos, I can tell you that my first impressions about the noise were wrong. It seems my first Drobo is unusually loud. My other two Drobos are very quiet. I can barely hear them, even when writing or reading to the hard drives actively and for prolonged periods of time. I’ll need to contact Drobo Support to see if I can get my first Drobo replaced.

➡ Updated 1/7/08: I called Drobo today to ask them why one of my Drobos is making more noise than the other two. I described the situation to them, and told them I’m using the exact same drives inside each Drobo (2x500GB Seagate SATA drives with 32MB cache). Their initial response was to blame the hard drives. I doubt they’re at fault, but it’s possible, since it’s the hard drive churning noises that are louder in this particular Drobo of mine. So what I’m going to do later today, since I have the luxury of having more than one Drobo at home, is I’m going to take out the two hard drives from the louder Drobo and stick them in one of my two quiet Drobos. We’ll see what happens next. If the hard drives are at fault, then the quiet Drobo will start being loud. If not, then there’s a problem with my original Drobo. I told them all this, and asked for a case number. I indicated that I’ll be looking for a replacement if it turns out that the Drobo is at fault, not the hard drives. I’ll keep this review updated with my findings.

➡ Updated 1/7/08: Okay, spoke with Drobo again about the noise, and it turns out that the hard drives are at fault. I did just what I described above. I wouldn’t have thought it, but these two drives that I’ve got in the original Drobo are louder than the four I use in the other two Drobos, even though they’re the exact same size, brand and model. I’m going to return them and order new ones, and I believe the noise will go away. This is definitely something to keep in mind if you’re having noise issues with your Drobo. Don’t assume it’s to blame. If you can, check the hard drives first. Remember to do it properly though. You have to turn OFF the Drobo and unplug it BEFORE removing the hard drives, or you’ll lose your data. Read this clarification, and if you’re still not sure, don’t take risks, call Drobo Support and have them stay on the line with you while you swap out the hard drives.

➡ Updated 1/9/08: I still have noise issues with that original Drobo even after swapping out the hard drives. At this point, I’m not sure what to think. Could it be that Adobe Lightroom, the application I use to process my photos, places such a high I/O load on the Drobo that the hard drives will churn heavily no matter what, or could it be that this particular Drobo of mine is not phonically isolated as well as my other two? Not sure. I ordered hard drives of a different brand, to see if those will be quieter. I’m going to try those out for a day or two to see what happens. Then I’m also going to switch Drobos, and use one of my quiet Drobos for a day or two with the new hard drives and with the old hard drives, and then I’ll be able to get a better idea of what’s going on. Perhaps it’s just Lightroom causing this. Perhaps it’s the Drobo. Perhaps it’s the hard drives. But one thing’s for sure, while I was on the phone with Drobo Support, I didn’t use Lightroom heavily enough in order to compare the noise levels.

➡ Updated 2/6/08: I sent two of the original Seagate 500 GB drives back, and purchased two Western Digital 500 GB drives. The difference between them, specs-wise, is that the Seagate drives have 32 MB caches, and the WD drives have 16 MB caches. But it turns out that there’s a problem with the Seagate drives where their caches default to 8 MB if the latest firmware upgrade isn’t applied. And there is NO way to apply a firmware update to the drives while they’re in the Drobo. Doesn’t work, I tried it. At any rate, the two WD drives are quieter than the Seagate drives, although they run hotter. At least noise-wise, things are alright now, and the Drobo’s cooling system seems to handle the extra heat just fine.

➡ Updated 2/6/08: You’d think now that I’ve got the noise issues straightened out, things have quieted down, but they haven’t. I’ve got noise issues with one of my other Drobos, and this time it’s related to the fan for sure. I’ve swapped out the drives, and I’ve swapped the Drobos, and I’ve pushed on various drive bay flaps and listened carefully, and it’s the fan. Trust me, I spent about a month ferreting out this particular noise issue. I arranged for an RMA, which arrived today, only to disappoint me thoroughly.

Guess what? I received a heavily used Drobo from Data Robotics in return for my brand new Drobo (thanks for nothing!), even after I’d asked them kindly over the phone not to send me a used one or a damaged one. To make things worse, there’s serious dust in the crevices of this Drobo. The drive bays themselves are lined with dust that sticks to my finger when I touch it. One of the blue LED capacity indicators doesn’t light up (it’s broken), and as if that’s not enough, one of the ejection springs for the drive bays doesn’t work. When I wanted to take out a drive, it wouldn’t push it out. I had to point the Drobo’s mouth downward and shake it. To top it all off, it makes the same fan noise as my own Drobo.

But wait, there’s more! The firmware versions are different! While this replacement Drobo was able to read all of my data from the drives, when I turned it off (disgusted by all its problems) and removed the drives, intending to put them back in my own Drobo, I found out I couldn’t! That’s right, because the firmware versions are different, my original Drobo now can’t read any of my precious data. I’m stuck. My Mac wanted to initialize the Drobo, which would have meant erasing all of my data. I think at this point I’m stuck transferring all of my data to external USB drives and reformatting my Drobo, only to stick all of the data back onto it afterwards.

Understandably enough, I’m upset and disappointed with Data Robotics. To send me a heavily used Drobo with existing problems, and then to also put my data in danger when they’re supposed to make my data safer, is simply not acceptable. I notified them by phone and email, and will give them a chance to make things right. I’ll keep you updated of what happens.

➡ Updated 2/7/08: Drobo’s Tier-3 Support replied to my emails. They were courteous, apologized for the experience, and promised to make it right. I believe they’ll try to ship out a new drive to me in replacement in a few days. Until then, they emailed me the latest version of the firmware (which is not yet available to the public) and showed me how to upgrade my Drobos manually. I upgraded the firmware on all of my Drobos, successfully, and now my original Drobo can read my drives without any problems. I didn’t lose any data after all. I’m very glad things have worked out!
Standard
Reviews

Camera review: Kodak EasyShare v610 Dual Lens

I have owned the Kodak EasyShare v610 Dual Lens digital camera for the past year and a half, and I’ve meant to write about it for some time. This will be a nostalgic review, since the camera is no longer being made.

Last weekend, I put together an 8-minute video review, and also took some photographs of the camera. I’ll accompany those two offerings with my insights, gathered after a LOT of use in just about any weather and light conditions. At the end of the review, I’ll also post selected photos taken with the camera.

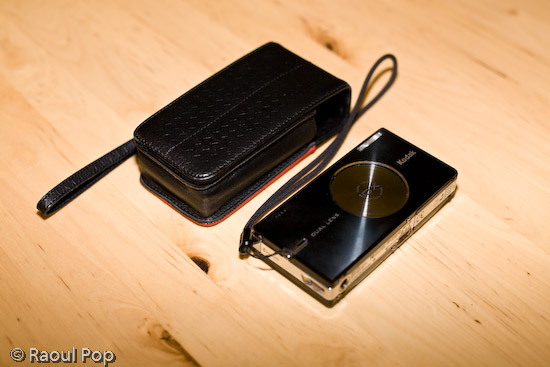
There’s what the camera looks like at first glance. I purchased a matching leather case for it, and I’m not sorry I did it. It protected the LCD screen from scratches, and it helped protect the camera itself when I threw it about from bag to bag. Back when I was in college, in the mid 90s, my parents gave me a first generation Canon Elph. It used APS film, and it was a small, beautiful and elegantly designed little camera for its time. I’m talking about this because I got a leather case for that camera as well, and it helped keep that camera running in good condition for several years. My advice to you if you get a small camera is to get a good case for it as well. Make it sturdy, so it can withstand abuse, and make it stylish, so you won’t be ashamed to be seen with it in public. Leather fits that bill quite nicely, doesn’t it?

Video review

The video I recorded is enclosed below. You can also view it here, or download it if you like. If you’ve seen some of my other video reviews, you’ll have to excuse the lower overall quality of this one. I shot it this past Sunday, informally, during a very hectic weekend. I had a limited amount of time at my disposal, I was rushed, and it shows. But I managed to get my points across, and I’m happy about that, so it is worth watching.

Kodak EasyShare v610 from Raoul Pop on Vimeo and on YouTube

Dual lenses

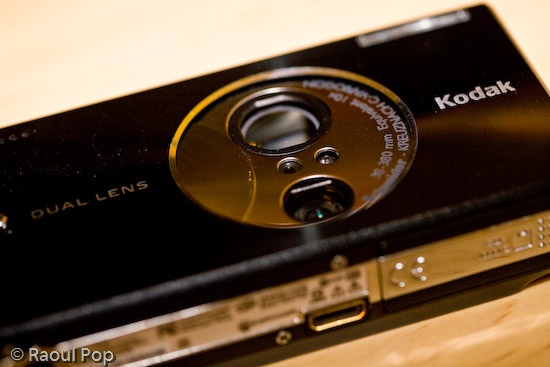
One of the striking features of the camera is its dual lens setup. Back when it came out, a 10x zoom on a camera this compact was virtually unheard of. It’s still fairly uncommon. The only way this could be accomplished, while still keeping things looking great and with no external zoom extending outwards from the camera body, was with two lenses, one for closer distances, and one for what could be called tele. The first lens — the bottom one — is for 1-5x, and the second lens — the top, larger one — is for 5-10x, as you can see below.

Kodak v610 dual lens setup

The two lenses together have an astounding range of 38-380 equivalent focal millimeters. The first lens goes from 38-114mm, and the second goes from 130-380mm. I have good things to say about the quality of the optics. The images were sharp when in focus, and there was little fringing and chromatic aberration. There were two drawbacks to the lenses.

  • One, they were fairly slow. What I mean by that is that they didn’t open up quite enough, and that tended to make the camera pretty hard to use in low light situations without a tripod. The smaller lens (1-5x) is rated from f/3.9 to f/4.4, and the large lens (5-10x) is rated to f/4.8.
  • Two, there was a pause when zooming out past the 5x mark. The camera’s zoom would stop when it reached the end of the focusing range of the first lens, and I would have to press the tele button again to pick up the next lens and focus further than that. Over long periods of use, that tended to be pretty annoying.

But I didn’t let these things bother me too much. After all, I got 10x zoom in a very compact package.

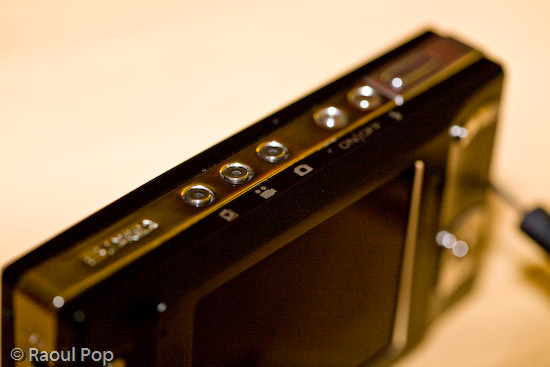
Kodak v610 mode and on/off buttons

Controls and ease of use

What I liked most about the camera was its ease of use for basic photo taking. That proved to be both good and bad. Anything more advanced (such as long exposures, a change in ISO, or White Balance) required some menu surfing, and any custom settings were erased when the camera was turned off. Even something as simple as delayed exposures (2 or 10 seconds, for example) needed to be set for every single photo where they were needed. One couldn’t just turn on that setting and keep it on. It would reset after every exposure.

Even though I didn’t like this, I can understand the rationale for it very well. After all, this camera is a compact point and shoot meant for people who just want to pull it out and take photos, not for more serious tasks. And let me tell you, if someone that doesn’t know much about cameras picks up a Kodak v610, messes with the settings, and doesn’t know how to get it back to normal, they’ll be VERY much relieved when they find out all they have to do is turn it off, then back on.

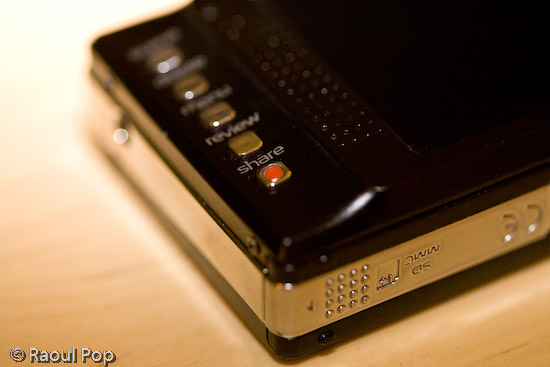
The controls on the camera are wonderfully designed. The buttons are either metal or very hard plastic, and I am not about to scratch them to find out what they’re made of. At any rate, they’re the right shape and texture, and it’s fun to press them.

They’re intuitive, they fit well within the camera’s interface, and there aren’t too many of them, which is the right decision for a compact camera such as this.

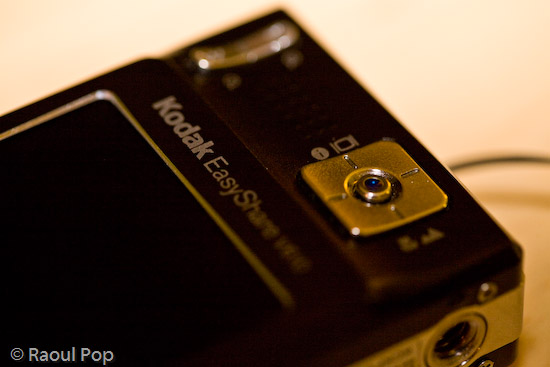
Kodak v610 zoom and selection controls

I loved the easy way to switch between normal, macro and tele mode. See the big, square button above? Turn the camera on, and you’re in normal mode, where the camera can focus from 2 feet to infinity. Take photos as would normally do. Press the bottom part of the button once, and you’re in macro mode, where the camera can focus from 2 inches to 2.3 feet. Press it again, and you’re in tele mode, where you can take photos of things very far away and not have to worry about focus. The camera focuses to infinity automatically and picks a higher aperture, which means you’ll get a larger depth of field.

The build quality of the camera was evident everywhere. The tripod mount is a great example of this. It was pre-planned and integrated into the silver metal border that lines the camera’s sides. Not only that, but the mount itself is metal, not plastic. Given the camera’s light weight and compact size, one wouldn’t think it’d need a metal tripod mount, but there it is, and I love it!

One point of contention with the camera is the USB connector, which is a custom one. I would have loved to see Kodak put a standard USB mini connector on the camera, but they didn’t. That’s probably because they wanted it to integrate with their camera stands and plug right into their photo printers, but come on, there are volumes to be said about standardization… It’s really important when it comes to good design.

Capabilities

The camera includes a movie mode which records Quicktime movies using MPEG-4 compression at 30fps. I found the quality of the movies (640×480 pixels) to be plenty for my on-the-go needs, and often used it as my primary video camera. I have a confession to make: it was also my only video camera. 🙂 Remember my video review of the Canon Rebel XTi? It was done with the Kodak v610 mounted to a tripod. Came out great, didn’t it?

With a 2GB SD card in the camera, it could record over 1,100 photos or 1 hour of video, which is more than plenty for such a compact camera. The only problem was, the camera’s battery would only last for about 125 photos. I’m not sure how many minutes of video the camera could do on a fully charged battery, so I can’t speak for that. But I did find myself frustrated by the low battery life when taking photos, and ended up purchasing a second battery. With judicious use of the zoom and LCD screen, I found I could extend the battery life to 135-150 photos, but that was still not quite enough for me, and it was pretty frustrating to be out in the city, taking photos, only to have the camera die on me.

Again, I think this is a design issue, and I wouldn’t necessarily call it a flaw. This is a small, stylish camera meant for the person who would pull it out every once in a while and take a few photos, not for someone who wants to take lots of photos. That person should opt for a bigger camera with more battery life.

One other point I wanted to mention was the sensor’s light sensitivity. It was capable of 64-800 ISO on paper. In real life, I found 400 ISO to be barely acceptable, and 800 ISO unusable. 64, 100 and 200 worked out great. If I left it on Auto ISO, it varied it between 64-200 automatically to get the optimal exposure. The camera changed the ISO settings in increments of 10 between 70-200 ISO, and I’d always get a chuckle out of seeing all sorts of ISO speeds show up in my photos’ meta-data.

Overall, I was pretty happy with the camera. I say “was” because I recently gave it to my parents. They had a more complicated digital camera, and they often couldn’t understand the settings and were frustrated because they couldn’t get the photos they wanted. The Kodak v610 will work out much better for them since it’s more compact, it’s fully automatic, and it resets its settings with every “reboot”.

The camera also has a blurry photo indicator that can be turned on. If a photo is good, a little green hand will appear. If the photo is marginally acceptable, the little hand will turn orange. And if the photo’s not good at all, the little hand will turn red. That’s easy enough for anyone to understand. I told them to re-take any photos where the little hand will turn red, and if they can’t get anything orange or green to seek more light or give up. I think they’ll finally be able to get more decent photos now.

Let me show you a few photos I took with the camera to illustrate what it could do. I can’t emphasize enough how useful that 10x zoom proved to be, and you’ll see what I mean as you look at the photos.

Sample photos

This first photo is quite appropriate for this time of the year, as it represents a group of merry carolers on a sled.

This is another macro shot, this time of colorful beads in a public market.

The wide focal range allowed me to get photos of entire valleys from mountain tops. This is a photo of a portion of the Shenandoah Valley, as seen from Skyline Drive. Here you can see the typical bluish tinge caused by UV haze. This gets exacerbated by the CCD sensors of smaller cameras. I’ve seen it on many small cameras. For example, the iPhone’s built-in camera suffers from this defect to what I consider an unacceptable degree.

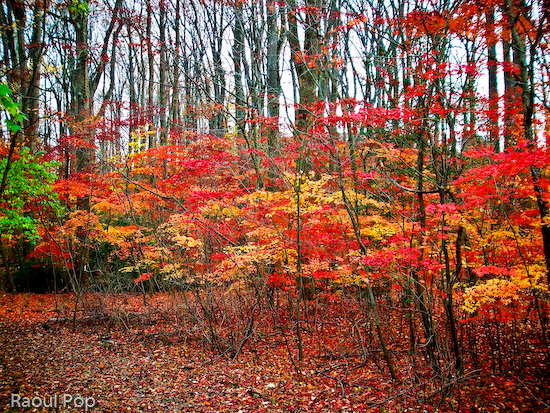
The camera’s CCD sensor was fairly adept at capturing color.

These very red and vibrant fall foliage was captured last year at our local Audubon Naturalist Society in Bethesda, MD.

During one weekend morning, I decided to set up the camera on a tripod and play around with water drops on petals. I got some really nice photos out of that session. This is one of them.

Waterdrops on petals

There’s a WWI memorial in downtown DC, and the crowning piece is this golden statue.

Liberty points the way

I love great sunrises, and I captured many of them with the Kodak v610. This is one of those photos.

Passionate sunrise

The inside courtyard of the Watergate Hotel in Washington, DC is shown below. The camera always managed to expose photos decently when confronted with situations like this: a wall in shade and the bright sky above. A LOT of cameras have problem with this kind of a setup, including my 5D, which tends to overexpose the sky.

Watergate

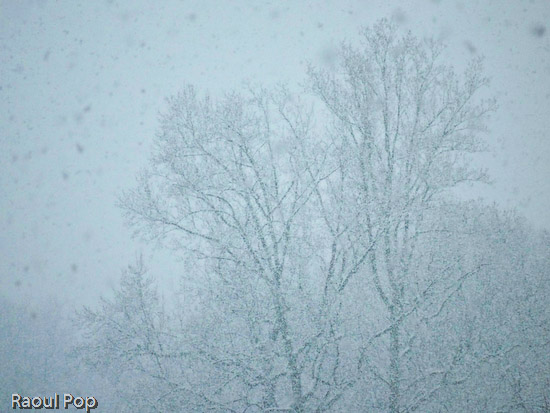
Taken during a fierce snowstorm (we get one of those every year around here). It’s too bad the snow melts away so quickly afterwards.

During the snowfall

The next day, snow began to melt, as expected. I rushed to get a few photos before it would all be gone. This photo was post-processed to emphasize the frozen atmosphere — wishful thinking on my part, since the temperature was above 32 degrees Fahrenheit.

Frozen

We were walking along the C&O Canal this past spring, and spotted a fox walking around in the forest. It stopped to check us out as well. This is where the camera’s 10x zoom was very useful. We were able to get up close even though we were separated by a body of water.

Fox in spring

The camera’s compact size made it a breeze to use when an opportune moment was spotted, like with this lone tulip outlined against a green wall.

Tulip

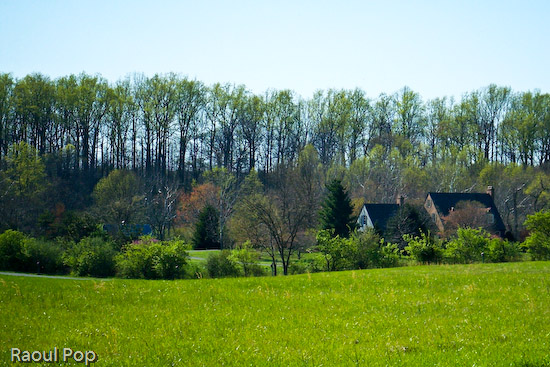
The zoom once again proved useful for getting closer to this lovely country house. In reality it was quite far from the road.

Lovely country house

Although there’s some lens flare in this photo, which could have been avoided with a lens hood (but the camera isn’t equipped with one) I love it. This is a portion of the C&O Canal where the water has pooled and is now stationary. Since the canal is no longer maintained, this portion has turned into a swamp. While I wouldn’t wade around in it, it makes for an interesting wildlife habitat, and the afternoon light is superb.

C&O Canal, now stationary

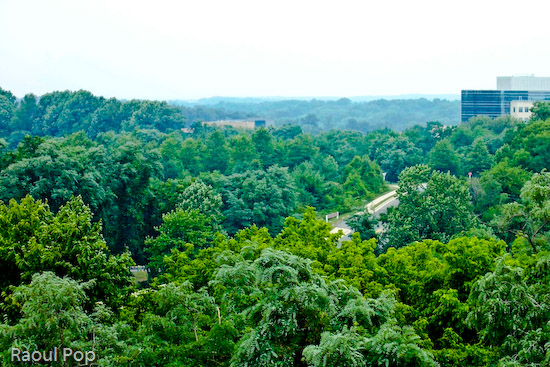
Guess where this photo was taken? It was at the top of the Tyson’s Corner Mall parking lot, looking toward DC. Summer was in full swing, and that’s the reason for the rich, deep green foliage of the trees.

Virginia forest from above

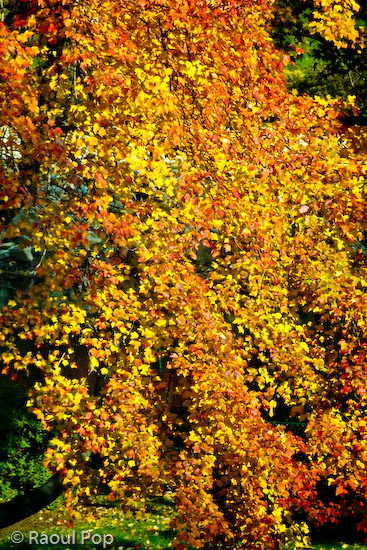
This was taken more recently, right in my community. Those beautiful golden hues can be seen every fall, but I won’t tell you where. I’ll keep it a secret for now. 🙂

Golden fall foliage

I leave you with another beautiful sunrise.

Golden sunrise

Summary

If you’re interested in a capable little point and shoot with a very powerful zoom for its size, try finding the Kodak v610. I checked and it’s out of stock even at Kodak’s own online store. It seems only Amazon still has a few units left. Though it’s no longer being made, if you can pick up a used one at a reasonable price and provided you understand its limitations, I think you’ll enjoy using it.

More information

Standard
Reviews

Camera review: Canon Rebel XTi DSLR

Released on August 24, 2006, the Rebel XTi is Canon’s newest entry-level prosumer DSLR. It’s an update on the popular Rebel XT, and it’s different from it as follows:

  • Slightly thinner body, heavier (2.56in vs. 2.63in and 510g vs. 485g)
  • Newer, re-designed sensor with higher resolution (10 megapixels vs. 8.2 megapixels)
  • Sensor cleaning technology (dust shaken off the sensor with ultrasonic waves)
  • Bigger display (2.5in vs. 1.8in)

I only listed the significant differences above. You’re welcome to compare the detailed specs if you’d like, right on Canon’s website. Go to the More Information section at the end of this post and use the links listed there to get the full specs.

Canon Rebel XTi (front)

In my reviews of other DSLRs, like the Canon 30D, the Olympus E-510, or the Olympus E-500, I criticized the Rebel XTi’s small grip, and I still think I’m right. It’s much too small to be held comfortably in a man’s hand, and that’s unfortunate, because the camera is great in every other aspect.

In spite of the camera’s small grip, I was pleasantly surprised by the quality of the photos it produced, and I wanted to share my findings with you. I avoided reviewing it until now on purpose — as I said, I was displeased with its body design — but after using it, I’m happy to say I would recommend it.

I made a video review of the XTi, which should help you get a better idea of the its dimensions. I discussed the camera at length in the video, and also did a side-by-side comparison between it and my Canon 5D. You can watch it below, or scroll past it to read the rest of my review. You can also watch it here, or download it if you like.

I should also mention I goofed in the video. I talked about the XTi having the DIGIC III processor, but it turns out it still has the DIGIC II processor. What I said about the differences between it and the 5D and 30D with respect to exposure value settings is still correct, so don’t disregard that. You may or may not be aware that when you do not adjust the EV settings on a 5D or 30D, and you shoot outside in bright light, the processor will overexpose the shot. The quick fix is to dial down the EV by 1/3rd, and that usually does the trick. But that’s not right. Shots shouldn’t be overexposed, and I’m glad to see the XTi doesn’t suffer from that bug. It exposes shots beautifully, and you’ll see what I mean when you look at my sample photographs below.

Even though the overall design of the camera is similar to that of the larger DSLRs that Canon makes, certain differences are there, and they are caused both by the price and size of the camera. For example, being used to the 5D, I missed the small at-a-glance display on top of the camera. On the 5D, it lets me know what my settings are without having to consult the LCD screen. I also missed the large settings dial next to the LCD that’s a staple on every other Canon prosumer and pro DSLR. I love that dial/wheel, and I miss it on every non-Canon camera I use.

The exposure value adjustment button, along with the drive settings button, are located next to the display instead of the top of the camera. There is no jog controller for the focus point selection, either. But you can’t have everything. The Rebel XTi is an entry-level DSLR, so you can’t have features that are normally found on the more expensive DSLRs. Plus, its body size makes it impossible to have the same button arrangement.

Canon Rebel XTi (back)

Despite my gripes, I liked the size of the body, and I liked the feel of the buttons. They had a soft, glossy surface that made it a joy to press them. The small body of the camera makes it possible to hold it very comfortably in the palm of your hand, and that’s a huge plus, because you can stabilize shots a lot better that way.

I really liked the quality of the photos from the XTi. I shot in RAW format, and I was very pleasantly surprised to see how well exposed the photos were, and how accurate the color reproduction was. I’ll show you some photos very shortly where I made no adjustments in post-processing other than adding meta-data, and I think you, too, will find it hard to believe that those were RAW shots straight from the camera.

I can tell you this: the RAW files made by the XTi have better exposure and color, right out of the camera, than the RAW files made by my 5D. It’s a shocker, yes, but it’s true. I suppose that’s to be expected. The 5D uses technology developed in 2005, while the XTi uses technology developed in 2006. But still, I had to see it with my own eyes to believe it, and being a 5D owner who’s shot tens of thousands of photos with the 5D, this was a hard pill to swallow. Having said this, would I give up my 5D for a Rebel XTi? I’m tempted, but no. 🙂

On to the photos. These are two that I took in early afternoon light, which was bright and unforgiving. I shot in RAW and developed the photos in Lightroom. I had to do very little exposure adjustment. Can you believe how well the XTi exposed the photos and reproduced the colors? Can you believe the dynamic range of the sensor? I didn’t expect this from the XTi.

November afternoon

Light and shadow

Here’s another photo that shows off the dynamic range of the camera. I shot this with the wonderful 18-55mm kit lens. If you’re confused by my characterization of that lens, watch the XTi’s video review, and I think you’ll understand.

Go to the mat

Here’s a macro shot I took with the same 18-55mm kit lens. I was pleasantly surprised with the low noise at 800 ISO.

Cone job

I said it before, and I’ll say it again. I love the colors that I get out of this camera! Have a look at these two photos to see what I mean.

Knobular

Spoon!

I thought I’d put in a dog photo for good measure. This happy pooch posed for me in downtown Alexandria this past summer. I used Keith McCammon‘s XTi for the shot.

Smile for the camera

What else can I say? If I’ve missed anything, let me know in the comments. The Canon Rebel XTi is a great prosumer DSLR. You won’t have to try very hard to get wonderful photos with it, and its affordable price will help make your decision a little easier.

Gilded

Pastels

Buy the XTi

Troglodyte

Bohio’s


World at your feet

Etched in stone

Hand that feeds

Standard
Thoughts

Better video

I’ve wanted to be able to post the videos I upload to Vimeo on my blog for some time, but the WP video plugins just hadn’t caught up. I’m glad to say that I found one tonight. It’s called, appropriately enough, WordPress Video Plugin. It’ll work just great for most people, so I encourage you to try it out.

I wanted to take advantage of the full width of my blog’s content column, so I modified the Vimeo code to make sure that my videos get sized to a width of 550 pixels and also stay centered.

I’m happy to say that I really like the results. You can see the modified plugin in action on these three posts:

Since I record my videos at a resolution of 640×480 pixels, it’s only natural that I display them at the maximum width possible on my site, right?

Standard
Events

The Olympus E-3 Launch Party

Back on August 15, I wrote about the “new E-1”, the Pro DSLR from Olympus that would replace the existing E-1. I had the wonderful opportunity to attend the launch party for that new DSLR, officially called the E-3, on October 16. The party was held at the Museum of Natural History in NYC, and it started at 5:30 PM EST.

This post is rather long, so I thought I’d summarize it for your benefit:

  • First part: my thoughts on the event and the E-3, with photos of the camera
  • Second part: video from the event
  • Third part: my photos from the event

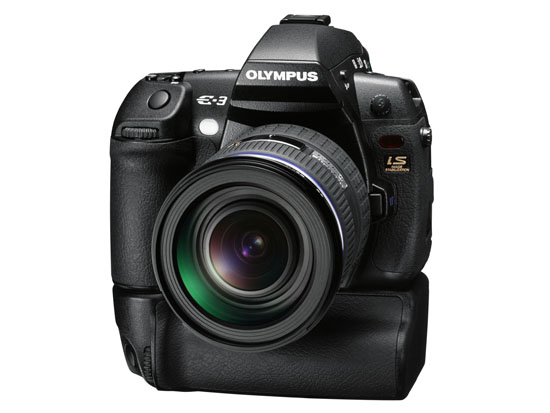
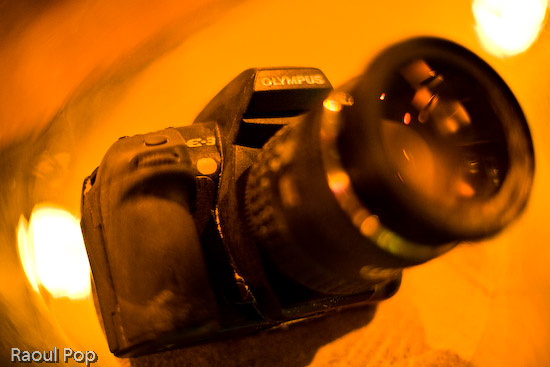
Olympus E-3 DSLR (front view with battery grip)

I was impressed with the quality of the event. Olympus rented an entire wing at the Museum of Natural History, and set up stations where we could talk with specially-chosen pro photographers about the E-3 and try out beta units of the camera. (The firmware isn’t yet finalized, so actual review units weren’t available.) There were food and drink bars (the cheese was fantastic) and all sorts of other goodies were spread all around (like a timeline display of all of the representative Olympus digital cameras, starting with their first model, and ending with the E-3). The event went nicely according to plan, and there was even a drawing where a lucky winner got an E-3 Pro Package (camera, speedlite, lenses, etc.) plus an all-expenses paid trip to India with one of the Olympus pros. I didn’t win it, unfortunately.

The atmosphere wasn’t one of hard sell. I could chat at ease with photographers and relax while looking at slideshows of photos taken by the pros or snacking on food. Ligia and I enjoyed ourselves. The weather was gorgeous. It had been sunny all day, and as evening descended on the city, the sky stayed clear, and a cooler breeze made it feel like a proper autumn night.

The E-3 surprised me in several ways:

  • It didn’t differ much from the concept photos I’d seen earlier, which was interesting. It means Olympus had been working on it for a long time, pretty much had the form factor down, and were simply perfecting it.
  • It was bigger and heavier than I expected. Having worked with the E-500, E-510 and E-410, I expected the body to be lighter and smaller. It wasn’t. The weight of the E-3 is exactly the same as the weight of my Canon 5D: 810 grams. It’s also as big as my 5D – actually, a little taller.
  • It felt very solid. When I gripped it, there was no mistaking it: I held a Pro DSLR in my hand.
  • The ISO sensitivity went all the way to 3200. What’s more, the camera’s Auto ISO function also varied the ISO from 100 to 3200. That’s a rarity. There’s usually an upper limit (something like 800) to Auto ISO on other cameras.
  • The camera uses an 11-point AF system. I complained about the 3-point AF on the E-510, and it looks like that’s not a problem on the E-3. It could focus very fast in lower light conditions, even at f/4.
  • The CMOS resolution is 10.1 megapixels. I honestly expected it to be 12 megapixels, just because everyone is pushing the envelope on resolution these days. I have a feeling this may be a limitation of the sensor’s surface area. The more megapixels one crams onto a sensor, the more chance there is for noise in lower light. It’ll be very interesting to watch and see how Olympus deals with the need for increased resolution in their Four-Thirds system.
  • The LCD screen swivels out, just like on the E-330.

Here are some more photos of the E-3, from various angles. The E-3 was launched with a brand new lens, the 12-60mm f/2.8-4. The effective focal range of this lens is 24-120mm, because of the 2x crop factor of the Four-Thirds system sensors.

I didn’t get a chance to play too much with the controls on the camera. One thing to say here is that Olympus built in a lot of buttons to allow for one-touch access to the camera’s most-used functions. I did find it a bit awkward to change the mode and ISO settings. To change the mode, I had to press the Mode button on the camera’s top left side, then rotate the back dial. To change the ISO, I had to press the ISO button on the top right of the camera, then rotate the front dial (located underneath the ISO button). Both movements felt odd, and I wondered how this would work out in the field.

To be fair, I don’t know if that was the right or only way to change those settings, and I can’t really judge the placement and ergonomics behind the controls after only a few minutes of trying out the E-3. I did like the idea of having two dials, one for the thumb and one for the index finger. I look forward to trying out a review unit for my usual 30 days, and then deciding if the controls work well or not.

I took a few photos at high ISO (1600 and 3200) and was pleasantly surprised by the low noise visible on the camera’s LCD screen, even at f/4. Since I used my own CF card to take the photos, I really looked forward to examining those photos closer when I got home. Unfortunately, one of the Olympus representatives present at the event saw me do it and erased my card. His reasoning was that the camera’s firmware is not yet final, and he didn’t want me to get the wrong impression about the E-3’s capabilities. Sounds logical, and he apologized profusely, but I still couldn’t help feeling it was a pretty stinky thing to do to me, right after I’d talked with an Olympus engineer from Japan who had no problem whatsoever with the photos I’d taken, and who actually encouraged me to go home and have a look at them on my computer. I have to say I was pretty disappointed about that, but I didn’t let it ruin my evening.

Olympus launched three new lenses with the camera. Two were new (12-60mm f/2.8-4 SWD and 14-35mm f/2.0 SWD), and one was re-engineered (50-200mm f/2.8-3.5 SWD). They also launched a re-engineered FL-50 speedlite. I realized once more the big advantage of the Four-Thirds system when I looked at their lens line-up, which was on display at the event. They have a 150mm f/2.0 lens, and a 300mm f/2.8 lens. You may not think that’s much until you realize their crop factor is 2x. That means that they’ve really got a 300mm f/2.0 lens and a 600mm f/2.8 lens. Let that sink in for a bit. That’s pretty spectacular. No one has lenses with that focal reach and at that large aperture on the market. To think that you can get f/2.8 at 600mm effective focal length is mind-boggling to me. Wow.

Overall, the E-3 is truly the new flagship camera from Olympus. It represents the culmination of their efforts in many areas: the Four-Thirds system, AF, durability, ruggedness, optics and image processing. Now that it has arrived, I’m sure many people, including myself, can’t wait to try it out and see what it can do.

I put together a short video (about 4 minutes) of the party. It ends with the lens line-up and a cross-section of the E-3 with the 12-60mm lens mounted on. It’s pretty cool, and it gives you a unique look at the camera from the inside out. You can watch it below or here.

I’ve also got more photos from the event below. They were not taken with the E-3 (for the reason given a few paragraphs above). They were taken with my Canon 5D.

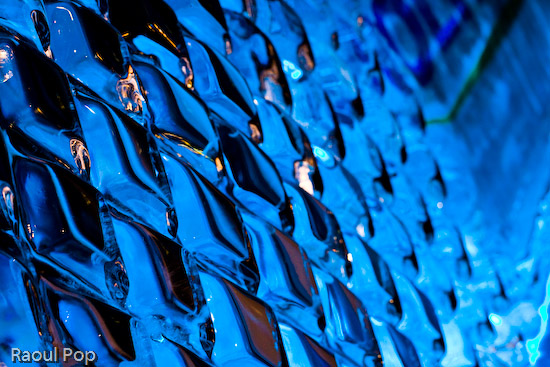
There were some really, really cool ice sculptures on display at the event. There was even a bar made out of ice, with the Olympus logo embedded in it.

Rhomboid

Mellow yellow

Ice sculpture

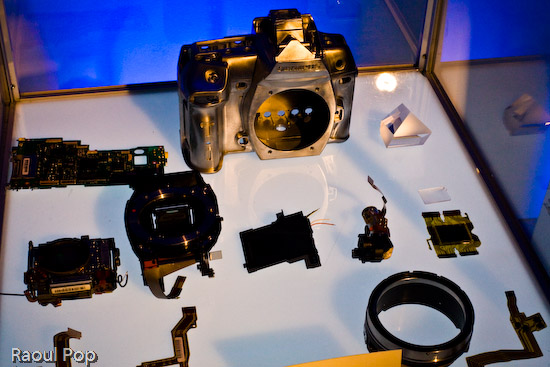
The guts of the E-3 were on display.

The components of the E-3 DSLR

Gene Hirschel of Internet News was there. I met him at the previous Olympus PR event, which announced the E-510 DSLR.

Gene Hirschel

John Isaac is one of the Olympus Pro photographers, and he’s currently specializing in wildlife. He worked at the UN for 30 years as an official photographer.

John Isaac

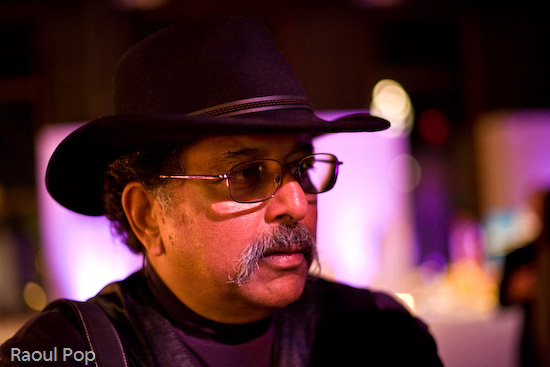
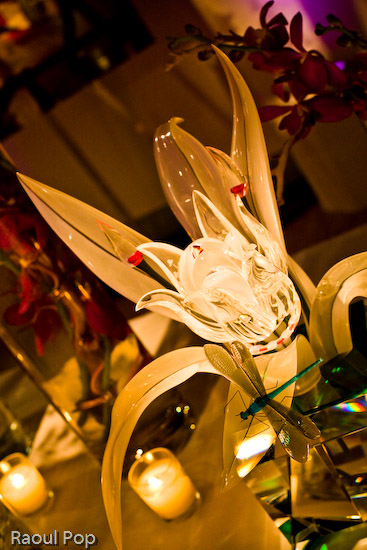
The man below is the sculptor of the many amazing crystal figures on display at the event. I have a photo of one of them below, and they’re also featured in the short video I made. I’m terrible with names and I didn’t catch his.

Crystal sculptor

One of the crystal sculptures

Guess who took this photo of us? It was Anne Day, and she used my 5D. I consider it a privilege, especially after I saw some of the other people whose photographs she’s taken. Have a look at her site and see what I mean.

Ligia and Raoul

Here’s Anne Day in person:

Anne Day

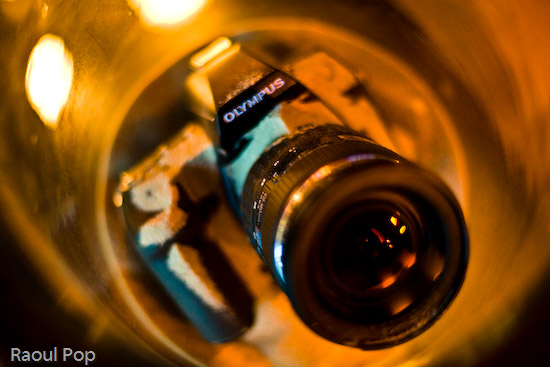
I took this as I rested on a table, watching slideshows of travel photography. The blue light of the LCD projected reflected in my glass of tonic water.

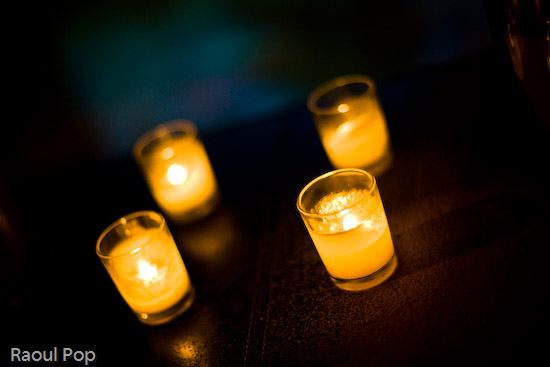
A glass of tonic water by candlelight

I caught Ligia thinking about something when I took this.

Ligia

If you thought Ligia’s photo was out of focus, you’re going to get a real surprise out of the next one. The thing is, I LOVE out of focus photographs. There’s a certain sweet spot that varies with lighting, distance and focal length, but if you get it just right, the colors really pop, and the shapes become very interesting. These are people at the launch party. I’m probably going to share more of my out of focus photographs in the near future. I’ve been accumulating a lot of them within the past several months.

People at the launch party

To demonstrate the E-3’s dust proofing, they buried two cameras in sand. They’re supposed to still work without any problems after this happens to them. I didn’t try them out, but it’s very likely that they worked just fine afterwards.

Olympus E-3 buried in sand

Olympus E-3 buried in sand

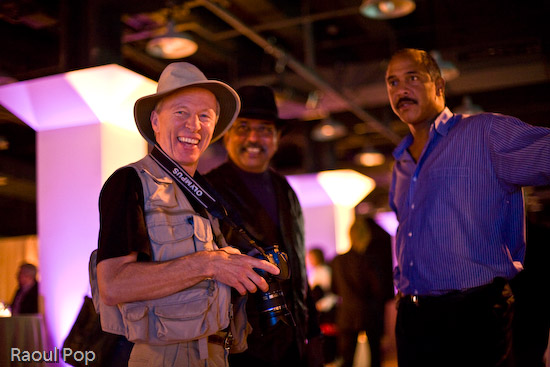
Gary Kralle (one of the other Olympus Pros), John Isaac and a friend were talking when I took this photo. Gary came up to me afterwards and we chatted a bit about cameras.

Gary Kralle, John Isaac and friend

I love abstract shots that emphasize bokeh. Here are a few that I took at that night.

Grow

Cactus

Four lights

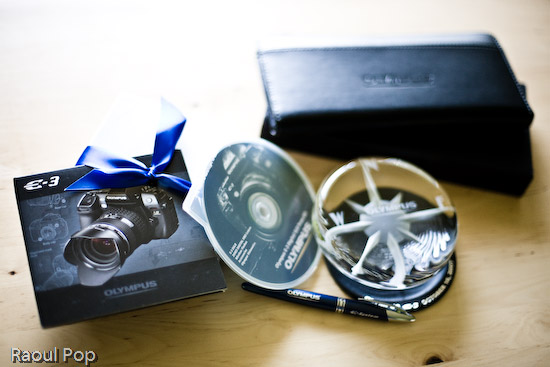
When we left, there were swag bags ready for us. Here’s what was inside: a travel document holder, a pen, a paperweight, a coaster, and lots of details on the E-3. All were emblazoned with the Olympus logo. Pretty nice!

Swag from launch party

Michael Bourne, thank you very much for the invite! I look forward to reviewing the E-3 properly when it becomes available.

More information:

Standard