How To

Can the WD TV be networkable with firmware upgrade?

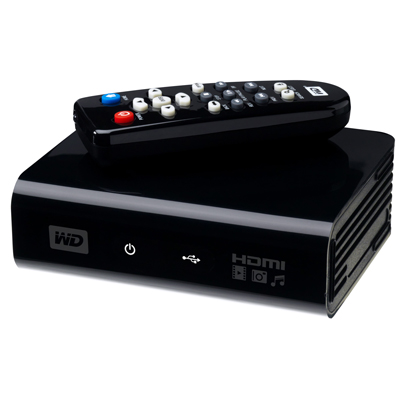
The WD TV can be placed on a network via an unofficial firmware upgrade available from B-RAD. The souped-up firmware apparently allows one to plug USB ethernet sticks (I’ve had one of those lying around in my desk drawer for years) into the WD TV and mounts its connected drive(s) onto the network — among other additional features.

I haven’t tried this yet. I found out about it from Tobias Schneble, a reader from Germany who emailed me after seeing my article on upgrading the WD TV to the new official firmware from WDC. Tobias tells me there’s a wiki site where detailed instructions are given.

Updated 4/5/09: I modified the post in accordance with the very helpful comment you see below, provided by the fellow who runs the B-RAD website. It turns out that hacking the WD TV to add it to a network and to enable other extra features is as easy as upgrading it with a normal firmware package. That’s great!

Standard
How To

Firmware update available for WD TV

There’s a firmware update available for the WD TV. It’s version 1.01, and you can download it and install it right now from the WD website. A lot of issues were resolved. The complete list is available in the release notes.

Here’s a summary of the salient points:

  • Now you can update the firmware when using a drive larger than 500GB. You may think this is an unlikely scenario until you try to use a large storage device like the Drobo with the WD TV.
  • Better subtitle support (SMI, SUB, ASS, SSA, MKV) with user-selectable font size for subtitles
  • Disk volume name display in folder navigation; this was an annoying bug, as you couldn’t tell which drive you were browsing if you had two of them connected to the WD TV
  • Jump feature: while fast forwarding or rewinding, if next of previous buttons are pressed, the WD TV will jump 10 minutes forward or backward
  • EXIF orientation flag functionality for auto picture rotate. Thank goodness! It was really annoying to have to turn my head sideways or bother with the rotate feature every time a photo taken in portrait mode was displayed.
  • Display sizing menu for photo playback: fit to screen, full screen, keep as original
  • Resolved issue where WD TV would not turn back on with remote after extended period of inactivity; previously WD TV had to be unplugged and was unrecoverable with the remote
  • Added 1080p 24hz support
  • Resolved info bar display issues in PAL (European display standard) mode

It’s important to note that there’s still a known and unresolved issue, namely this: if the user unsafely removes an HFS+ formatted drive from the media player without using the Eject button, the drive will become read only media. I’m not sure when this will be resolved.

The installation instructions for the firmware are what one would expect them to be and fairly simple to follow. I’ll reproduce them for you here from the WD release notes for firmware version 1.01:

  1. Go to http://support.wdc.com and download the latest firmware update compressed file for your Media Player. (Here’s the direct download link for version 1.01.)
  2. Click “Downloads” then the product name (or photo).
  3. Extract the two files (.BIN and .VER files) to the root folder of a portable USB drive.
  4. Connect the USB drive to the HD media player’s USB port.
  5. Press HOME, and then select the Settings bar.
  6. Select the firmware upgrade icon, and then press ENTER.
  7. You are prompted to perform the firmware upgrade.
  8. Select OK on the firmware update prompt, and then press ENTER.  This will restart the system.
  9. After restarting, the system automatically enters firmware upgrade mode.
  10. Once the update process is completed, the HD media player will restart again.
  11. Once the HD media player restarts, the new firmware is automatically loaded.
Standard
How To

How to use a Drobo with the WD TV

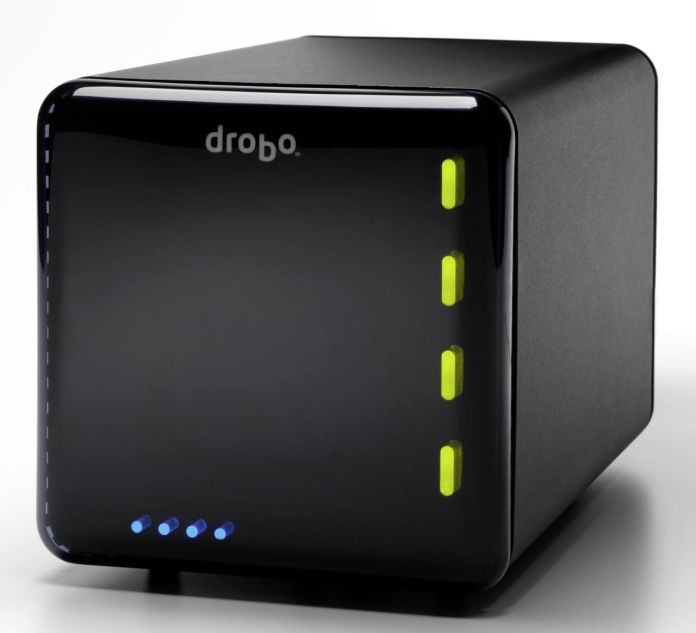
The WD TV is my favorite media player (I think it’s better than the Apple TV), and since I also love the Drobo, I wanted to combine the two and have the ultimate media entertainment center: a Drobo packed full of videos, photos and music, connected to a WD TV, which is connected to a large-screen HDTV. I did just that for my parents in December. It was my Christmas gift to them.

Here’s what you need to keep in mind if you want to do the same thing. As you might guess, several complications arise when you attempt to get a device with huge storage capability connected to a media player. The complications have to do mainly with the file systems that the media player can read and use properly, and with the ability of the on-screen menus to navigate an abundance of content efficiently.

The WD TV can only work fully with NTFS, HFS and FAT32 file systems. By “fully”, I mean will build its own catalog of the media present on those devices, store it at the root level of those drives as a hidden directory, and will let you browse using its on-screen menus, by date or by file name. It will also read the HFS+ file system, which is native to the modern Macs, but it will not be able to write to it and build its own catalog; this means you’ll only be able to navigate the media on that device by folder.

The Drobo can be formatted as an NTFS or FAT32 volume when using a PC, or as an HFS+ or FAT32 volume when using a Mac, if you happen to use the Drobo Dashboard to do it. If you use the Disk Utility app on a Mac, and you also happen to have the 3G NTFS drivers installed, you can also format the Drobo as a 3G NTFS or as an HFS volume.

I ended up formatting my parents’ Drobo as an HFS+ volume. I’ll tell you why below. If you’re not interested in the minutiae, skip ahead to the next paragraph.

  • First, I tried formatting it as a 3G NTFS volume. For some reason, the formatting process either froze or took unusually long to complete, and the resulting volume wasn’t readable on the Mac or on the WD TV. I have a feeling that had to do with the fact that the volume was over 2TB in size, and 2TB is the upper limit for NTFS volumes, but I’m not sure.
  • I tried splitting the Drobo into two HFS+ volumes, one 2TB and the other 400GB (2.4 TB was the total available space on the Drobo), then formatting those volumes as 3G NTFS volumes, but that didn’t work either. The formatting process kept hanging up in Disk Utility.
  • I tried formatting the Drobo as a straight NTFS volume using a Parallels VM running Windows XP (I installed the Drobo Dashboard inside the VM), but that kept hanging up as well. Not sure why. Perhaps I should have used a physical Windows machine, but I didn’t have one available to me.
  • I then formatted the Drobo as a FAT32 volume. The upper limit on that was once again 2TB, and I had 2.4TB available. I thought I’d forget about the extra 400GB for a while and just focus on getting the 2TB volume working. Predictably enough, after copying some media over and testing it, it worked fine, but I noticed two things:
    • The WD TV took longer and longer to read the device and build its catalog once I connected the Drobo. The more movies I had on the Drobo, the longer it took the WD TV to catalog each of them. That meant waiting up to 20 minutes for the WD TV to get done with its work before I could use it. I didn’t like that.
    • I had several movies that were over 4GB in size, and since that’s the upper limit for a single file in the FAT32 system, I couldn’t get them copied over to the Drobo. I didn’t like that either.
  • I thought I’d try another route, so I formatted the Drobo as an HFS volume. While this was fully readable and writable on a Mac and also on the WD TV, unfortunately, the maximum file size on HFS is 2GB, and the maximum volume size is also 2TB, same as FAT32 and NTFS. Not much help there.
  • The only choice left to me was HFS+. In spite of the fact that the WD TV can only read it, not write to it, this was and still is, I think, the best choice for formatting a Drobo and for working with the WD TV, from the entire group (NTFS, FAT32, HFS and HFS+). The upper limit on an HFS+ volume is 16 EB (exbibytes), which is equal to 1024 pebibytes — basically, an incredible amount of space. One pebibyte is equal to 1024 terabytes, and the upper limit one can get with a Drobo at the moment is 5.5 terabytes, so it’s nowhere near the technical capability of the file system. Furthermore, the upper limit on a single file in HFS+ is 8 exbibytes, which, as shown above, is just plain huge. In plain English, this mean I could format the Drobo as a single HFS+ volume and not worry about any of my movie files exceeding 4GB or more in size.

Great! Now that I’ve put you to sleep, let’s move on. Next on the agenda came the transfer of all the data to the Drobo. You see, I’m also using my parents’ Drobo as an offsite storage device. You know what they say, give and ye shall receive, right? I made them happy by setting up their media center and also got to back up most of my data, media, and photographs. The transfer of the information took a while, as you might imagine. I didn’t time it, but I think it was somewhere between 24-36 hours to copy about 2TB of data from my Drobo to their Drobo. I’m happy to say that the copy operation did not crash, and completed successfully. That’s a testament to the stability of the Drobo as a storage device.

After the data transfer was complete, I was done. It was time to sit back on the sofa and enjoy my hard work. Even though the WD TV couldn’t aggregate the media on the Drobo and build its catalog, which would have let me browse the media by type (video, photo or music), date or title, I was able to browse the Drobo by folder. Since I’d already organized the media that way, I didn’t mind it at all. I had my videos broken down into separate folders for Cartoons (I love classic cartoons), Movies, Documentaries and TV Shows (I love Mister Ed), and I was able to watch most of my stuff.

As a side note, even though the WD TV manual says it’ll play WMV9 files, and my Mister Ed episodes were encoded (I believe) with WMV9 technology, I can’t play them on the WD TV. I’m sad about that, but at least I can watch them on my MacBook and iMac. Perhaps I’ll re-encode them into MP4 files at some point.

I mentioned something at the start of the article about the on-screen menus and their ability to navigate the content efficiently. The WD TV lists the media in thumbnail mode by default, which means you’ll have a little icon next to each media file. When you have a ton of files to look through, that’s not very efficient. Fortunately, you can go into the WD TV settings and change it to List mode. This will list each piece of content on a single line, and will let you see more titles per screen. To scroll up and down the file lists faster, simply hold down the up or down arrows on the WD TV remote, and it’ll accelerate, speeding through the titles.

I’ll concede that the on-screen menus for the WD TV aren’t as slick as those you see on the Apple TV — and by that I mean how easy and quick it is to navigate to a particular title, not the glitz and glamour of a fancier UI skin — so there’s some work to be done there, but the WD TV is much more practical than the Apple TV when it comes to playing your media. You simply plug in a USB drive loaded to the gills with movies and photos, and it’ll play them right away, which is something that the Apple TV just doesn’t do out of the box.

That’s it, folks! Let me summarize things to make it easy for you:

  1. Format your Drobo in HFS+ if you have a Mac, or NTFS if you have a PC. Keep in mind there’s a 2TB per volume limit under NTFS, and that WD TV will only recognize one volume at a time (at least currently). Stay away from FAT32 and HFS because of the file-size limitations (4GB for FAT32 and 2GB for HFS).
  2. Transfer your media to the Drobo.
  3. Enjoy!

Buy a WD TV or a Drobo.

Standard
Reviews

WD TV is better than Apple TV

WD has put a new device on the market, and it’s called the WD TV HD Media Player. It’s a small box that can connect to a TV via HDMI or Composite output cables, and can take most USB external hard drives as input (it should even read USB flash drives as long as they’re formatted in FAT32). Once a device is connected, the WD TV will read the media from that drive (movies, photos, music) and let you browse through them and play them on your TV. What sets this device apart for me is that it has gone beyond other similar devices like the LaCinema Premier, or Apple TV. I’ll explain below.

The LaCie product, for example, doesn’t play as many formats as WD TV, and can only support NTFS and FAT32 file systems.

You’re limited in the amount of content you can play with LaCinema Premier, since the drive is integrated within the device itself, and because not as many video formats are supported (see the specs on the LaCie website). That means you have to lug the whole thing from your home office to your living room, re-connect it at each place, and copy files onto it when you want to refresh its inventory. The remote also leaves something to be desired (too many buttons).

I know and like Apple TV myself, having bought one and configured it for my parents, but frankly, I find it overpriced and under-featured. The more you use Apple TV, the more limitations you find:

  • It has an internal hard drive that syncs with content over a wireless network, which means you have to wait forever to get a movie onto it. The drive can also fill up quickly, depending on which size you pick. (Yes, you can also connect it via a Gigabit network, if you’ve pre-wired your living room and home office with Gigabit wires already — but most people have not.)
  • You can stream to it, but then you always have to keep iTunes open, and it’s a hassle to remember that, especially when you’ve just sat down on the living room couch and turned on the TV.
  • You also need to be able to troubleshoot WiFi issues in case you’re not getting enough bandwidth and Apple TV playback stutters.
  • You have to add every single video clip you want to play on Apple TV to the iTunes library, and I don’t care for that sort of thing. I just want to store my stuff in folders and browse it from a device (like WD TV).
  • Apple TV has a USB port on the back, but you can’t use it for anything but “diagnostics” unless you hack the device. This is stupid. I can’t use the port to connect Apple TV to my computer and copy content onto it, I can’t use it to connect an external hard drive to it and have it read the content from it (like WD TV), and it just sits there, unused, unless I pay for a hacking device like aTV Flash.
  • It overheats like crazy. It can burn your fingers if you’re not careful.

I love the design of Apple TV and its diminutive remote. I love the fact that I can swap remotes between it and my laptop if I want to. I think the on-screen menus are well done. I also like the fact that it can stream Flickr photos and YouTube videos, but these extra functions are just that: extra-neous. It simply cannot do its basic job well, and that is to play my media conveniently.

I’m not alone in being frustrated with it. Thomas Hawk has written repeatedly against Apple TV, and for the very same reasons I describe in this post. Steve Jobs recently said he’s not sure what to do with Apple TV. He’s treating it like an unwanted step child. It’s not listed in the Mac product lineup on Apple’s website. It sits off to the side in a section of its own, and you have to do a search for “Apple TV” in order to find it. Corrected 11/11/08: It’s listed in the iTunes and More line-up along with the iPods.

For one thing, Mr. Jobs, you can stop being so greedy in your approach to the device and let people use the USB port on the back. Or how about letting people stream Netflix videos with it, so they don’t have to buy a separate device? I’m a Mac user and have a Netflix account. Until Netflix release Roku and opened up its streaming program to Mac users, I was in the dark. You probably don’t want to do these things because it’ll cut into your video rentals and purchases, and you like that extra revenue stream, but the fact remains that sales of the device will always remain low if you insist on hamstringing it.

The WD TV Player, on the other hand, is made to suit most people. It has a USB port where you can connect most external hard drives. It will read NTFS, FAT32, and HFS file systems too. (I found that out from WD Support, because the info isn’t listed among the specs. They pointed me to KB article #2726.) There seems to be an issue with HFS+ file systems, but they’ll still work, only differently. I’ll have to look into that later.

Also not listed among the specs is an Optical Audio port, but when I look at the back of the device, it seems to me I can see one there.

To me, WD TV is the long-awaited answer to my media player needs. At around $99 (street price), this is one device that will make its way to my Christmas stocking pretty soon, because I’ve got a Drobo full of content I’d like to play my way, not to mention that I also have two WD Passport drives.

I may even get one for my parents, to replace their Apple TV. They’ve had to keep their Drobo connected to their iMac in the home office, with iTunes open, all this time, just so they could watch a movie or two from the Drobo. That’s not right. Once I get the WD TV, I can take their Drobo, put it in the living room, and hook it up right there, without worrying about WiFi, streaming, iTunes, and a whole bunch of nonsense. Apple dropped the ball with Apple TV, and WD picked it up and started running with it.

The WD TV supports the following file formats:

  • Music: MP3, WMA, OGG, WAV/PCM/LPCM, AAC, FLAC, Dolby Digital, AIF/AIFF, MKA
  • Photo: JPEG, GIF, TIF/TIFF, BMP, PNG
  • Video: MPEG1/2/4, WMV9, AVI (MPEG4, Xvid, AVC), H.264, MKV, MOV (MPEG4, H.264). It will play MPEG2/4, H.264, and WMV9 videos up to 1920x1080p 24fps, 1920x1080i 30fps, 1280x720p 60fps resolution. That’s awesome.
  • Playlist: PLS, M3U, WPL
  • Subtitle: SRT (UTF-8)

I plan to get one soon, and I’ll let you know in this post if it lives up to its specs and my expectations. If you’d like to get one too, Amazon lists them. See below.

You can buy the WD TV Player from:

Standard